Left:
BOB TAYLOR'S PIRAGUA
Contents:
Contact info:
- Jim Michalak
- 118 E Randall, Lebanon, IL 62254
- Send $1 for info on 20 boats.
Jim Michalak's Boat Designs
118 E Randall, Lebanon, IL 62254
A page of boat designs and essays.
(15JAN99) This issue will discuss materials and tools I've used for my own boats. Next issue (about 1Feb) I'll look at some lessons learned from my boat WeeVee.
|
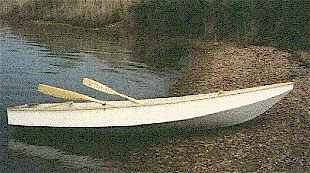
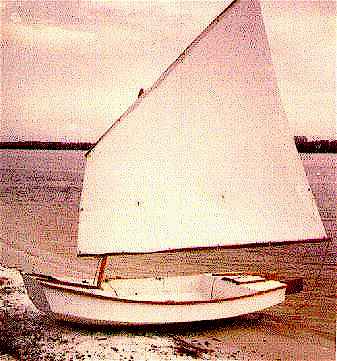
Left: BOB TAYLOR'S PIRAGUA
|
|
|
|
|
|
MATERIALS AND TOOLS...
BUT FIRST SOME COMMENTS ABOUT BUILDING OARS...
Some folks have thought I was all wet with my comment about needing a bandsaw to cut the 2-1/4" oar blanks and they have proven me so. Paul Kraniak, who built the prototype QT, wrote,
" Re your writings about oars: Speaking from my vast experience of building two, but using different methods, I don't understand your concern about 2-1/4 inches of thickness to cut.
"My first was built with a ripping and a crosscut handsaw, and sharp ones have a job of that size done pretty fast - maybe ten minutes total cutting time. I had to use a keyhole saw for the angles at the tops of the oar blade. Most of the shaping was done with rasp and plane, which took a good while.
" The second was roughed out with a circular power saw, using a saber saw to finish the cuts. Either of these tools can easily cut the necessary thickness, though the circular saw has to be the full-size one with the 7 1/4 inch blade, and the saber blade has to be an extra long one - easily available. This oar was shaped and finished with a belt sander - much faster. I don't like the saber saw much for anything over a half inch because it tends to make cuts that aren't perpendicular, at least for me.
" One other thing: I made my grips 1- 1/2 inches in "diameter" (they're octagons) to start with, and cut them down a little at a time with the belt sander until they felt good in my hands. This was at about 1- 1/4 inches. I think this makes rowing much nicer to my hands, to have a shape and size that feels best in them. "
And then I remembered about Bruce Hallman at Bruce Builds Roar who built oars for his Roar while waiting for the store to open. He used a saber saw and shows all in photos on his web site. And then Dave Carnell wrote a while back that he made his on his table saw. Dave also skipped carving the blade - he slotted the end of the shaft and used a plywood blade insert. I should try that.
NOW BACK TO MATERIALS AND TOOLS...
Here is what I suggest about hull materials: if you are a craftsman and are building a show boat, use the best materials. Otherwise use lumberyard materials. It has been demonstrated that a lumberyard boat will last at least 10 years with minimum care. The premium boat will cost two or three times as much as the lumberyard boat, and is likely to see less use. Then again, I might consider premium materials for a true workboat or a liveaboard boat where hauling out to repair will be a great inconvenience. The following essay represents my own way, which is by no means the only way.
The Lauan underlayment plywood only comes in 5 MM thickness - about 2/10 inch. Usually one face is totally solid and often very attractive. The center core is always solid. The other face varies from beautiful to terrible. The face plies are so thin that they will hardly stand sanding. The glue is supposed to be waterproof. But a lot of it isn't waterproof and since there seems to be no markings, you are taking your chances. The usual quick test is to boil a piece. Also check to see the panels are really 96" long. Often they are a tiny bit long. Lauan is quite inexpensive and is very easy to work with. It can build a beautiful lightweight boat. I've built several boats from 5mm lauan underlayment and they have held up. My lumberyard no longer sells it.
Exterior AC Fir plywood was once available like bread and butter around here. My lumberyard no longer carries it but you may still find some. It comes in a multitude of thicknesses. Quality seems to vary quite a bit. The A face is nearly always plugged or puttied in places, but that is usually a cosmetic problem. The C face always has some holes, seams or knots. The best thing to do when you get a sheet home is to fill the voids with body filler and sand smooth while you are still working with a big flat sheet. The inner core sometimes has bothersome voids. Fill them if you find them. Often they go undetected until you launch your boat. At the void site the face sheets will swell and bubble up. The same thing will happen if the face sheets don't adhere well to the core.
You can fix the bubbles even on a completed boat. Use a sharp chisel to open up the swell, cut it away and see what's inside. Don't stop chipping until the void or delamination is totally uncovered. Then you can fill the void to the surface with fiberglass cloth in epoxy or polyester resin, or just plain body filler. Grind it smooth and apply two layers of fiberglass over the repair, lapped about 1 inch over the good wood surface. Fair and paint. On brand new wood I used to make the repair with polyester resin. But lately I've been using more and more epoxy for repairs. Sometimes it takes years for the void to bubble and I've never noticed any genuine harm to come from leaving the bubble as it is.
My lumberyard currently has two types of "exterior plywood. One type is fairly expensive but is the best I've ever worked with. It's stamped "exterior" and made in a US mill. For 1/4", the center ply is a thick fir piece and the faces are a mystery light hard wood, very thin. There were no voids of any size in the core and the faces were almost flawless, with no patches on either side. There were some worm holes on the C face. The 3/8" sheets I bought had just one thin hard wood face and two thick plies of fir. Again, no seroius voids and only a few knot holes on the C face. Very nice to work with. Well worth the extra money. As with lauan you need to check the length of the panel.
The second type of exterior plywood at my yard is BC pine. Structurally it seems excellent, no serious flaws in any of the plies in the panels I bought this past year. It has some problems though. Not available in 1/4" here. Not sanded very evenly and it doesn't like to lie totally flat. The true thickness of the panel may not be exactly as stamped. Very inexpensive. I haven't built a boat of it.
For framing lumber I use regular soft pine. It is very cheap and easy to work, but not very rot resistant, I think. I use it for oars and spars also. Clear pine boards cost three times as much as common boards and I rarely buy them. Pine is about all that is available here. The yard man told me the best wood is in 2x10's which can be very long. Those boards are huge and you may have trouble handling them. But it would be worth looking into having one ripped to the sizes you need at the yard.
For glue I almost always use Weldwood. If you can't get it at your lumberyard, you can buy it very cheaply from Wick's Aircraft Supply, 1-800-221-9425. Mix it with cold water until it is about as thick as regular white glue. Your joints need to be fairly tight. My experience is that it won't really set hard and permanent until it has been kept at 70 degrees F for 12 hours or something similar. It will get tack free at colder temperatures and you'll think it has set - but it hasn't. On a hull that is both nailed and glued, I just go on building and try to heat up the project to kick off the glue every few days. (Weldwood powdered water mix glue is not claimed to be waterproof by the maker. I have a boat which was stored outside uncovered and certain areas became soaked. After about ten years of this the glue in those areas seemed to disappear without a trace. In the meantime the rest of my fleet seems unaffected.)
I've started to use more epoxy as I repair and modify my older boats. Dave Carnell, retired chemical engineer, has led the way to cheaper epoxy and so far hasn't been rubbed out by the Epoxy Mafia. Here's what Dave says. Epoxy resins are all the same except some are thinned. He buys the cheapest. But the hardeners vary a lot. Any will work with any resin (since all the resins are the same, right?). The proper mixing ratio is determined by the hardener's instructions. My latest epoxy purchase was from Raka Marine at 561-279-8929. I got 3/4 gallon kit for $40. That came as 1/2 gallon of resin and 1/4 gallon of hardener for a 2:1 mix and a total brew of 3/4 gallon. (The 2 to 1 ratio is easily done by eye. No pumps required. I mark a stick 1/2" from the end and again 3/4" from the same end, and clamp it with a clothespin inside an unwaxed paper mixing cup, with the end of the stick on the bottom of the cup. I fill to the 1/2" mark with resin and add hardener to the 3/4" mark.) Raka has several flavors of epoxy. Mine used "very fast" hardener which is not to be confused with "5 minute" type which is not considered to be waterproof. Using the "very fast" in 40 and 50 degree temperatures the epoxy set about overnight. The "slow" hardener takes a full day to set at 70 degrees. It might be the best choice when working in hot tempearatures. Setting rates are VERY sensitive to temperature.
Dave has led the way on epoxy fillers, too. That is very important since even epoxy used in a tight wood-to-wood joint needs to be thickened a bit to keep it from running out of the joint. Dave says "pulverized limestone" available at seed stores is the best filler. It must be very finely ground to work smoothly. Sometimes for large fillets I use ordinary sawdust which I "mine" from my bandsaw as a filler. The old rule on thickening epoxy seems to be mayonnaise stiffness for glued joints and peanut butter thickness for fillets and fillers. In all cases, a wipe of unthickened epoxy needs to be on the wood before the thickened stuff goes on. Epoxy used with fiberglass cloth should not be thickened, in fact that is the case for thinned epoxy.
A word or two about tube type house construction adhesives. I've tried Liquid Nails and would avoid it on a boat. It doesn't cure hard making it impossible to sand. It might make a sealant for a boat using conventional fasteners but I've never seen it written that it was really waterproof. Almost all of these things will say "not for use below the waterline" and in that respect might be like Weldwood. I wouldn't use it for a boat stored in the water (or one that fills with rainwater) but it will likely be Ok for a dry stored boat. In the same catagory is "PL Premium" but Premium cures hard and is nice to work with. I haven't built a boat with PL Premium yet but others have with excellent success.
For nails, bronze ring nails are by far the best because they're strong, come in all sizes, hold about like screws, and don't mind grinding and sanding. I buy them when I can. They are expensive but I suppose a little boat will use less than $10 worth. Galvanized nails from the lumberyard are fine too, except that you can't sand them or they will rust. But I've used lots of them. Galvanized roofing nails are very good for nailing thin plywood sheets. They can be purchased in different lengths.
While you're at the lumberyard, pick up a pound of 1" and 1-1/2" dry wall screws. Get a couple of driving bits for your drill, too. These screws are excellent as clamps. In most cases they require no pilot holes. You can hold two pieces of wood together by hand and "clamp" them very strongly by using a dry wall screw. Sometimes you can preassemble an entire hull this way, take it apart, apply glue, and reassemble it exactly the same as before because the screws always realign the pieces precisely. After the glue cures you can remove the screws and insert nails, non rusting screws, or simply putty the holes. The dry wall screws can be saved and reused.
I got a question once about what type of wire to use for wire "stitching" used in taped seam construction. I think almost any type of soft wire is suitable but I prefer .020" diameter stainless steel lock wire available from Wicks Aircraft Supply.
FINISHING MATERIALS
For putty I use ordinary two part auto body filler like "Bondo" for about everything. Read the instructions on the can and practice with small amounts first.
For fiberglass I prefer getting glass cloth and tape by mailorder (try Merton's Fiberglass Supply, 1-800-333-0314, or Wicks) although for small projects I sometimes buy the little packs of cloth and resin at the discount store. (By the way, fiberglass "tape" comes in rolls in widths from 1" to about 6". Its edges are treated to prevent unraveling and is thus much prefered for taping plywood seams together. But you could cut regular cloth into strips instead.) If you are using polyester resins for the fiberglass work buy "Finishing" resin as opposed to "Laminating" resin if given a choice. Read the instructions on the can and practice with small amounts first. Do your fiberglass and resin work all at one time. Always sand it lightly after it cures to remove wax and glaze. Yes, epoxy is better than polyester.
I use regular house paints, both latex and oil. Latex is very easy to use but some claim it won't hold up on a boat. I know it is fine on a boat stored under cover. Oils are messier to use but, once set, are slicker to clean and can usually be stripped very quickly to bare wood with a torch and knife. I clean the oilpaint brushes with gasoline. Either way, I use two coats of primer and only enough top paint to cover.
I prefer regular oil based spar varnish. It won't show dirt or damage like paint so I try to use it on pieces that get dirty or banged up. It touches up very easily. Two coats will protect but three coats are better. Sunlight eats it up and it needs renewing more often than paint.
ONE LAST SOURCE
In fact they used to call themselves "The Source". Right now they are the only place I know of to supply things like bronze oarlocks and rudder fittings. But they also sell all the nails, glass, glues, goos, etc. They are Jamestown Distributers at 1- 800-423-0030.
I have a Sears bandsaw with a 12" throat. I bought it new in 1972 and it has held up in spite of plastic housings and such. I've got it geared way down. I think the best blade for boaters is a 3/8" skip tooth which cuts fast and straight. In my type of boats, cutting curves is not the bandsaw's job so much as cuttingbevels. But almost any saw will cut the bevels and taped seam boats in particular don't have many bevels to cut.
I have a homemade table saw that is just a circular saw mounted on a 1" plywood plate, about 20" x 30". It is blocked off the floor about 12" - just enough to take the saw. The saw's trigger is clamped in the "on" position and the rig starts when I plug it in. Not too safe maybe. It can barely cut 1-1/2" thick, especially when canted over to cut a bevel. I use it mostly for ripping boards and it may outperform a real table saw on that account because it's easier to prop up long boards when the saw is on the floor. It has a great advantage as far as storage over a real table saw. I can stand it up against a wall so it requires no floor space. My "fence" is a 1" x 3" iron bar which I clamp to the plywood table. Takes a while to set up.
I also have a regular unmounted circular saw. I use it almost exclusively for cutting plywood. With a good combination blade .set to protrude about 1/4" through the plywood it will zing a clean cut, including making the curves often required, better than a saber saw. But a saber saw will do that job too. The very best blades are the Matsushita thin kerf carbide tipped blades sold by Nutmeg Marine at 910-686-4184.
I have an inexpensive saber saw with a fine tooth blade for cutting access holes, limber holes, etc. It can also be suitable for bevel cutting in lieu of the bandsaw, although it's tough to get a straight cut without using a guide. You can smooth up the cut with a belt sander.
I think the hand held belt sander, 3" wide belt, is fabulous. I built my first boats without one so I know. Use 60 grit belts for all your finish work, if not all work. I have an orbital sander left over from the old days but never use it.
One other sander I do find very useful is a 5" rubber disk set in a 3/8" drill. This is especially good for feathering out fiberglass work which will often "load up" and ruin a sanding belt. I buy 60 grit pads meant for automotive work. Use a light touch and practice with it because it can really cut. I've also used 20 grit disks, which appear to have small rocks as cutting agent, for really coarse cutting with great satisfaction.
My only drill is a standard 3/8" reversible job. I have a coffee can full of assorted drills. I don't hesitate to run out and buy the right sized drill bit for the job and usually buy two if it's a small bit. Actually only a few basic sizes are required. Keep two driver bits for sheetrock screws on hand.
That's it for power tools. But I would say you could get by with a circular saw, a saber saw and a drill. Boats were invented long before power tools but I guess the old builders had bigger muscles, more time, and sharper edges.
You often need a saw for cutting sticks to exact length. The bandsaw is good, the saber saw OK, a fine tooth hand saw works, but a hacksaw with a regular metal cutting blade is what I use the most. To tell you the truth, it is often the only handsaw I use on a boat.
I have only one plane - an ordinary Stanley hand plane about 12" long. I don't use it very much but marvel at what it can do when properly sharpened and set up.
A half round rasp will work miracles sometimes.
I keep a couple of ordinary claw hammers near. You will often need a backup block for driving nails into light structures. A lead or steel block, about 5 or 10 pounds, is ideal. A small sledge hammer works fine.
Don't forget the normal mess of screw drivers, scrapers, wrenches, putty knives, etc...
NEXT TIME...
I'll review lessons learned from a little boat I made called WeeVee.
Piragua
Someday I may get to put my full catalog on the net. For now I'll put one design in each issue.
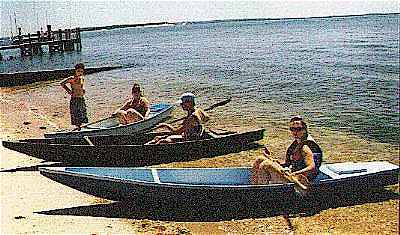
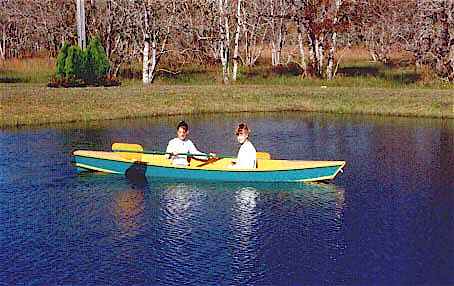
This article about Piragua is a rerun from last year's 15jan issue. This is one boat I'd like to keep available to view because it is a simple and very useful boat. There are two Piraguas in my area, both were father/son projects. Don't think of the boat as a toy. It's the sort of thing you build as a whim but you end up using it more than your store bought boat.
I got this mail the other day...
Dear Jim,
A good friend of mine convinced me that I needed to build a boat this past summer, so he could borrow it. I had entertained the idea for sometime (except for the borrowing part) but could not decide what type of boat to build. I own a twenty four-foot offshore rig and was looking for something I could play around with that was "low maintenance". I decide on the Piragua for several reasons but I made a few changes and I hope you don't mind. I am sending a few pictures to you of the finished product and I want you to understand how extremely pleased I am with this boat.
You'll notice that I incorporated a slight crown on the fore and aft decks to help shed water. I also installed deck lids in the fore and aft bulkheads for access to the dry storage at each end of the boat. I used a scarf joint on the five millimeter Lauan plywood to hide the joint which required me to scarf pieces together for the fore and aft decks.
The structure was fastened with stainless steel ring shanked nails and epoxy. The bottom has one layer of fiberglass cloth for protection. All wood surfaces have three coats of epoxy and five coats of paint. I use the bow eye and aft cleat to secure the boat inverted to the roof of my Ford Bronco. A real eye catcher!
This boat was my first to build but won't be my last. I had a great time building the Piragua and will be doing it again next summer. My hat's off to you! The plans were concise and easy to cipher. I'm amazed at how straight this boat tracks in the water. Nothing like a canoe.
Once again, thanks for supplying me with your Piragua plans. I hope I did them justice and didn't offend you with the changes I made.
Bob Taylor
Bob did the plans justice and didn't offend me with his changes.
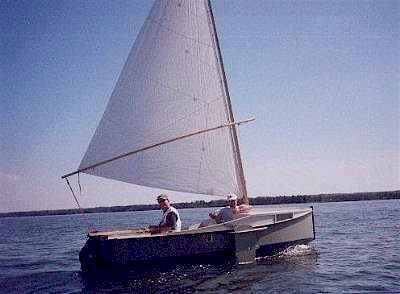
PIRAGUA, SWAMP BOAT, 14' X 33", 70 POUNDS EMPTY
I saw a genuine historic pirogue at a museum a long time ago. It looked like a big snack tray - not so much a hollowed out log as a hollowed out plank. Pirogues are great for poking around in swamps and ponds. They're a lot like canoes. Don't plan on standing up in one without practice and don't take one out in hard waves or wind. This one might float two men if they sit still.
The prototype Piragua was built by Don O'Hearn of Ferguson, Missouri, mostly for fishing.
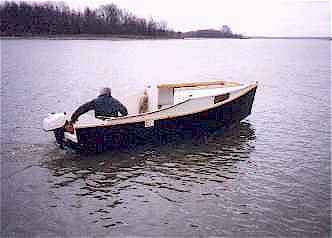
Piragua should make a good electric boat. I did some electric testing with my Piccup Squared and a borrowed motor and battery. I clamped the motor to the stern with the mount's locking pin disabled to allow it to kick up if it struck anything. I clamped a control arm to the motor tube and used a long light push/pull stick, actually an old came pole with screw together ferrules that I had found somewhere. The control stick ran almost the full length of the cockpit and I could steer from anywhere in the boat. The control head stayed with the motor (the motor was not modified in any way) and was set to full power. From the cockpit the power was controlled by simply connecting the alligator clip to the battery. Docking was effected by pulsing the motor. It worked great! Full speed was about 4 mph with that boat using a 24 pound thrust motor. I did learn that the battery is probably a more important purchase than the motor. A good full size trolling motor battery might supply full power for almost two hours giving 6 or 8 miles range. The operation is totally silent, especially at reduced power. There is nothing like it.
And there is nothing to building one of these. It might be the easiest project in the catalog, maybe twenty hours of labor. Use lumberyard and discount store stuff. Two sheets of 1/4" plywood with nail and glue construction. Plans are $15. No jigs. No lofting.
Prototype News
Some of you may know that in addition to the one buck catalog which now contains 20 "done" boats, I offer another catalog of 20 unbuilt prototypes. The buck catalog has on its last page a list and brief description of the boats currently in the Catalog of Prototypes. That catalog also contains some articles that I wrote for Messing About In Boats and Boatbuilder magazines. The Catalog of Prototypes costs $3. The both together amount to 50 pages for $4, an offer you may have seen in Woodenboat ads. (If you order a catalog from an internet page you might state that in your letter so I can get an idea of how effective this medium is.) Payment must be in US funds. The banks here won't accept anything else. (I've got a little stash of foreign currency that I can admire but not spend.) I'm way too small for credit cards.
Usually when a design from the Catalog of Prototypes starts getting built and is close to launch I pull it from the catalog and replace it with another prototype. So that boat often goes into limbo until the builder finishes and sends a test report and a photo.
Here are the prototypes abuilding that I know of:
IMB: Click here to visit Tim Webber's page and see some photos of the Texas IMB under construction. Then poke around Tim's web page a bit. I heard this week from the Texas IMB builder who said, "I want to let you know that IMB is alive and looking good. She is now right side up and sitting on her cradle. Soon this boat and carrier will be mounted on the small trailer I have ready......"
Fatcat2: There is an old timer (80 years +) in Minnesota who has completed the hull of a Fatcat2. Fatcat2 is a simple 15' x 6' catboat, gaff rigged and multichined. I think the sail rig will be done this coming winter. Not only has he finished the Fatcat2 hull but he has started a....
Twister. The Twister hull is pretty well cut and fitted, ready to tape. Walt lives north of Green Bay, working in an unheated shed. He tells me there will be no more building until things warm up again next year in late Spring. If you live up there and would like to contact Walt, let me know.
Jonsboat: A builder in Florida has started a stretched version of Jonsboat (16' stretched to 19'). This boat was featured in the 15 April issue.
Herb builds AF3 (archived copy)
Hullforms Download (archived copy)