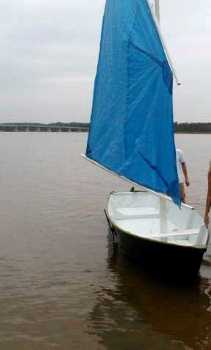
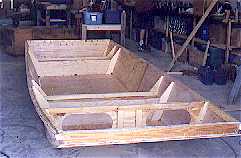
ANOTHER POLYSAIL from the 15 August issue. This is a Carnell $200 skiff by Pete Respess. The two shaping darts are very clear.
Contents:
Contact info:
Jim Michalak
118 E Randall,
Lebanon, IL 62254Send $1 for info on 20 boats.
Jim Michalak's Boat Designs
118 E Randall, Lebanon, IL 62254
A page of boat designs and essays.
(15Nov99) This issue shows how to model a boat hull using Hullforms 6S. Next issue, 1Dec99, will show how to use the Hullforms 6S model plus the cg data from the last issue to get a stability curve for the new design.
WEBSITE ALERT...
If you are interested in free analytical boat design software go to Hullforms Download (archived copy) and download some. I'm using the oldest version in this issue, Hullforms 6S, if you care to follow along.
Hullforms Model
FROM LAST ISSUE...
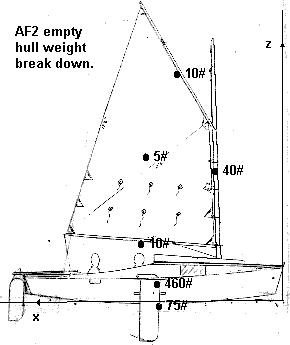
Here is a figure showing AF2 with my guess at the weights of the major components and a first shot at their locations. Last issue I found the first best guess weights and cg's for this boat for several different loading conditions. This issue will show how to make a computer model of the AF2 hull using the free Hullforms modeling program to enable us to get stability information using the different weights and cg"s next issue.
I'VE BEEN PUTTING THIS MODELING OFF A LONG TIME...
...because I'm not an expert at it. I've never really read the instructions which are in the zipfile that you download. I've decided to present what I know and how I do it because I've found it to be so useful. Hullforms 6s was written back before Windows became dominant. It runs in DOS and is very compact and effecient compared to more modern stuff. It has no whistles or bells but I've never noticed it trying to deceive or lie to me. It occurred to me that I'm breaking all sorts of laws by presenting this but I hope not. If so, explain it to me and I'll remove the essay.
Also I'll say that to use this program you really need to design the boat first. It's not the sort of thing where you drag lines around to get a pretty picture of a boat. What it is very good at is crunching the numbers for a design that you have already drawn.
TO START...
...download the program, get into DOS, unzip it, and start the program "Hullform". Then select "File". If you select the "Open" entry you should find a bunch of sample boats put there by Peter Rye. Poke around there a bit to see what the program can do.
Next select "New" to start a new design. Next you will get a screen that allows you to input the basic dimensions of the boat. Here is that screen for the AF2:
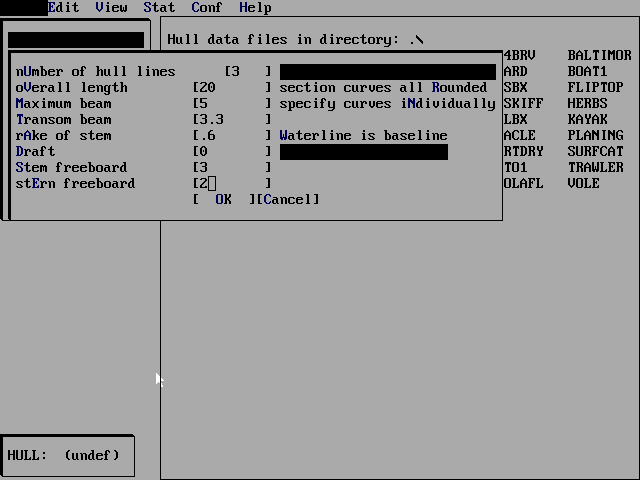
I've replaced the default values with the numbers for the AF2 here. To explain, the hull dimensions I'm using are all in "feet" although you will find you can reconfigure the program for metric. Also I'm using a convention where the z axis is positive when down. You can reconfigure that also if you wish.
Anyway, I've input the length at 20', the breadth at 5', the bow height at 3' and the stern height at 2' and stern width of 3.3'. The program also asks for the rake of the bow. I've input that as .6' and that is how much the stem rakes aft from the top to bottom. You must also input the number of hull lines you will be using. For AF2 I've selected 3, one for the keel, for the chine, and for the deck/coaming. (Since Af2 is a true flat bottomed boat I think the program would also work with 2 lines, just the chine and the deck/coaming.) For the rest of the input values I've kept the default values. I set the value for the waterline at 0.0 but it can be changed very easily later in the program.
One note about the black blotches that appear on the screen. The program on my screen blanks out the item you have selected. The items blanked out in the above screen refer to the cross section being a hard chined boat, as opposed to a rounded cornered boat. And that the keel line will be used as a reference line, not the waterline.
Next select "view" and then "general orthogonal" and you will get a view of things so far. Like this:
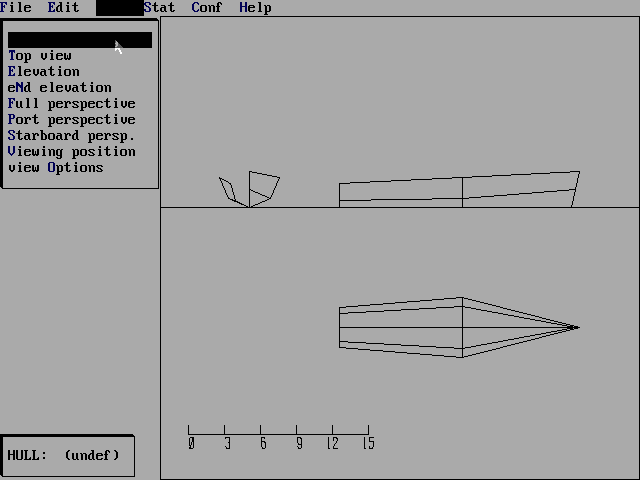
Not exactly what we had in mind! But from here on we will correct and massage it to shape with the Edit function. So select Edit.
To begin with we must correct the stem. The convention for the program is to put the rake forward of the zero station and I always design my boats with the rake behind the zero station. In other words my boat is really 20' long while the Hullforms convention puts the .6' rake ahead of the zero station for a total length of 20.6'. It's easy to fix. Select Edit and then Edit a Station, then select Station 0 and stay with "graphical edit". You will see a graphical view of the side view of the stem. There are three points there that correspond to the stem values of the three hull lines. Drag the 1 point aft .6' so it is on the zero station. Then drag the 3 point which represents the keel line to the design value of .6' aft of zero, and up to a z value of -.5" (remebering that "up" is a negative value in this system). Then drag the 2 point to be right on top of the the 3 value. The stem now represents the actual design.
Everytime you change something on the model check the View to make sure it did what you intended. If it did then save it back under File. The saved files are quite small, maybe 5k.
If you check the View now you will see not much has changed, only the stem moved aft making the boat a bit shorter. Next we have to input the dimensions of our AF2 one station at a time (which is why you need to design the boat first to the point of having a table of offsets). Select Edit, then New Section. It will ask you where to place the new section (in feet in this sample) at the same time showing you where the old sections are. For AF2 the next section will be at 2' so that value is entered. The program pauses a bit with a notice to select "Edit a section" to input values for the new section. Select Edit a Section. It will ask you which section to edit and you will tell it to select the new section (now called Section 1) and you need to tell it also to use a "text" edit instead of a "graphic" edit. That done it will show you this screen:
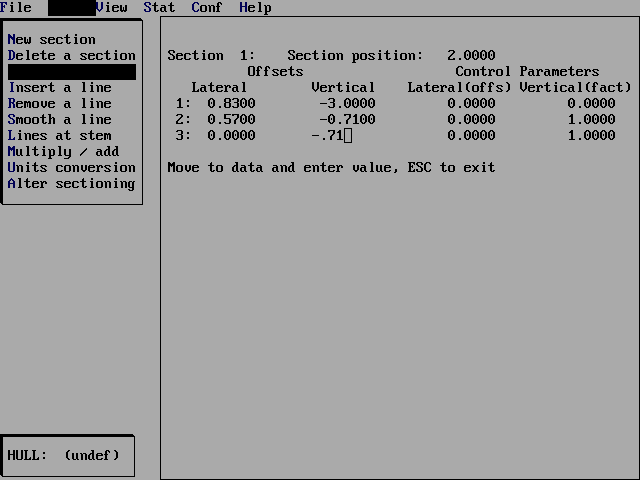
Here I've already input the offset dimensions for the AF2 station 2. You can check the location of the station in the upper right and you can click on that value and change it if you wish, moving the station fore and aft on the model. I've input the half breadths (lateral offsets), in feet, for the three lines. The half breadths for the keel will always be 0.0 in this case since it is essentially the boat centerline. The heights (vertical offsets) are shown in the next column and are also dimensioned in feet and in this convention are negative since up is negative. Since this is a flat bottomed boat the z value for the keel is always the same as for the chine. Now the model looks like this:
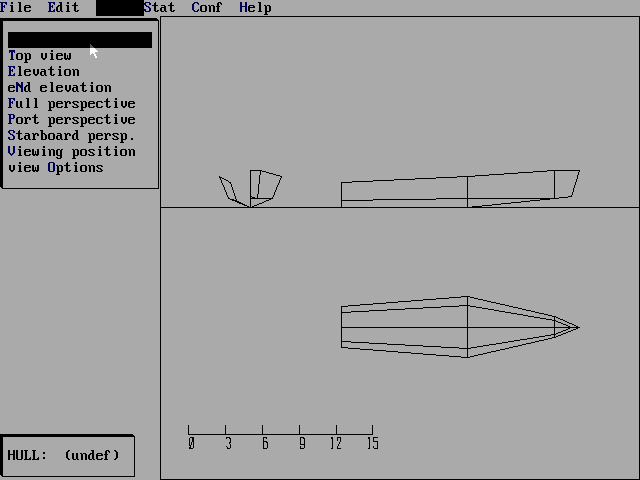
View it and save it and move to the next section. Eventually you will come to the main cross section which the program in its wisdom has placed at X=9.1. In reality it is at 10.0. To set it right, select Edit, then Edit a Section and choose that section. Correct it's X dimention to the desired value and adjust the lateral and vertical offsets as you treat it now as a normal section. Here is what the model looks like at this point:
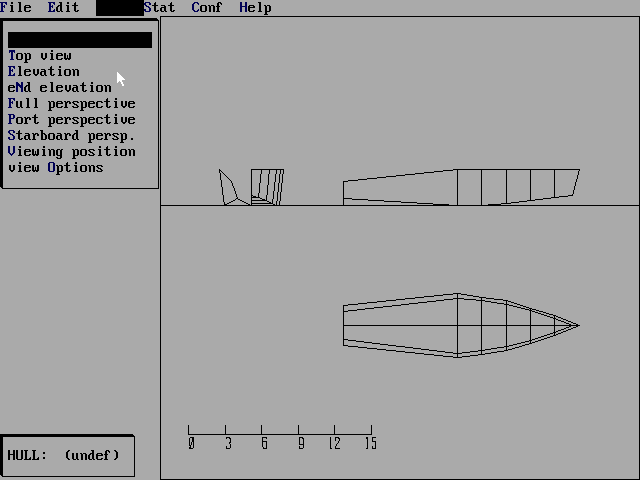
While you are at it you will have to correct the transom in the same way. I should say here that I know of no way to give a boat a raked transom in Hullforms.
Then continue with the rest of the sections until you are done. The model then looks like this:
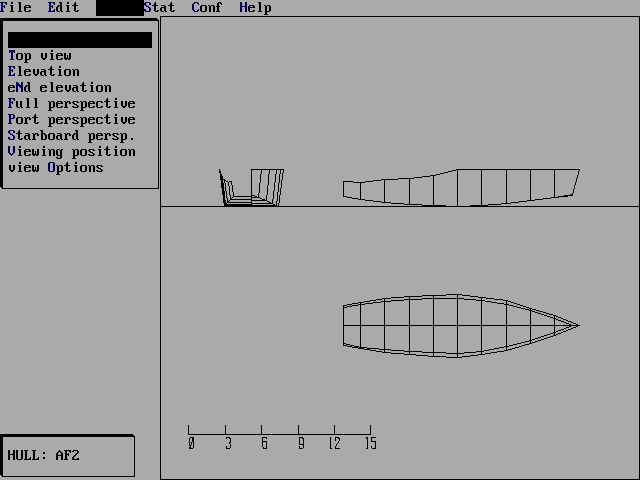
As you were working on the model you will have noticed that the program has connected all your sections with short straight line segments. This is a great advantage of this program in that you can place sections anywhere and produce abrupt changes in the lines, something the free "fairing" programs won't do. So with this program you can model the effects of abrupt changes in decklines.
And for the AF2 studies the ability to model abrupt changes allows us to model in the effects of a flooded cockpit, something we'll check out next issue. At some point AF2 will heel to a point where its cockpit will flood, and yet the sealed cabin and stern locker still provide buoyancy. When that happens we can adjust the AF2 model like this:
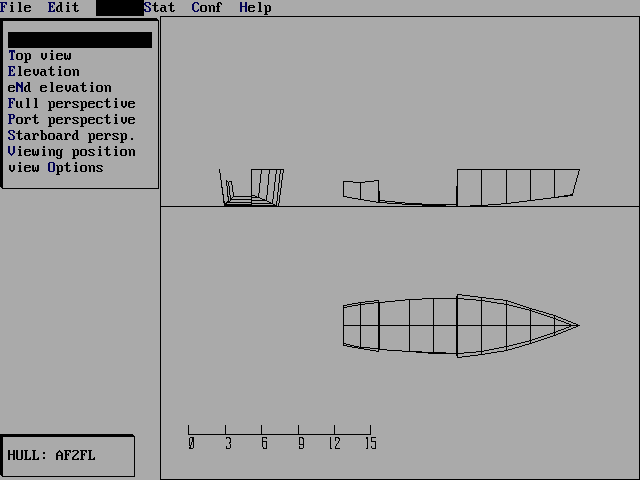
What I've done here is add new sections at the ends of the open cockpit. (Actually the new sections are spaced .1' from the original ones so the program won't gripe.) Then I've adjusted the "coaming" line down to just above the bottom. Now when the program figures its hydrostatics it will think the volumes of the cockpit are quite small - it's flooded! I've saved this version as a separate file.
NEXT TIME...
We'll use these models plus the cg and weights data from last issue to predict stability for AF2.
Fatcat2
< WIDTH="350" HEIGHT="253">
< WIDTH="350" HEIGHT="311">
FATCAT2, POWER/SAIL CUDDY CAMPER, 15' X 6', 450 POUNDS EMPTY
Fatcat2 is still really a prototype boat even though I can show photos of a completed boat. What happened is that the builder, who is in his mid 80's, was taking the prototype to the lake to test when it was damaged in a road accident. It's been repaired but the boat is near Green Bay and it will be next summer before any testing can be done. So I've put Fatcat2 back into the prototypes catalog and perhaps we can get another prototype built.
Fatcat2 is a cuddy cabin sailer patterened somewhat after a traditional catboat. She's the widest boat I've ever done, proportionally speaking, but lots of boat have been built to these proportions and my my Piccup Pram, which is almost similarly wide, certainly has no difficulties in rough going. The multichine bilges make a big difference and I wouldn't try a serious boat like this with a totally flat bottom. This boat has a short wide cockpit with benches that should be comfy for three adults. The cabin will be nice for a solo camp or a hide-out for two.
The mast is about the same length as the hull and steps in a tabernacle, both features should make for quick rigging. With a crutch or gallows to hold the struck rig you should be able to fold it all down without unhooking all those lines that a gaffer needs. I've seen it done on a Mudhen and it looks like Walter has rigged his Fatcat2 that way. If you look hard at the tabenacle in the photos you might make out that Walter also has rigged a winch to pull the mast up.
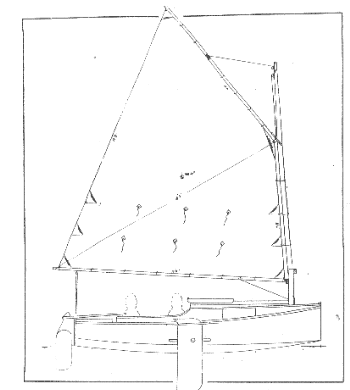
This boat is not ballasted. I did some paper studies of its stability which backed up my experiences in boat like this. They are usually most stable at about 20 degrees of heel, which might be the most heel you should sail at normally. Beyond that point the righting moment decreases until it reaches zero at about 50 degrees of heel and she'll go over. I'd expect her to lay high on her side because the rig is buoyant. Most likely you will have to parbuckle her upright with a rope if the leeboard is on the high side of the knocked down boat and out of your reach. I'd expect a rope or transom step will be needed to reboard the boat. The cockpit will take on a small amount of water but I'll bet she'll sail with it. A bucket is the only way to clear that sort of water, those pretty hand pumps being about useless. (Making Fatcat2 self righting in the usual way would mean making the belly twice as deep to float about 400 pounds of ballast, then add a self draining raised cockpit. A very different boat that some might prefer.)
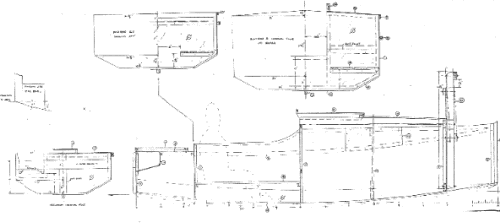
Fatcat2 is built with taped seams and no jigs or lofting required. The plywood bill looks like four sheets of 1/4" plywood, fours sheets of 1/2", and two sheets of 3/4" plywood for a thick bottom. Plans are $20 until one is tested.
Prototype News
Some of you may know that in addition to the one buck catalog which now contains 20 "done" boats, I offer another catalog of 20 unbuilt prototypes. The buck catalog has on its last page a list and brief description of the boats currently in the Catalog of Prototypes. That catalog also contains some articles that I wrote for Messing About In Boats and Boatbuilder magazines. The Catalog of Prototypes costs $3. The both together amount to 50 pages for $4, an offer you may have seen in Woodenboat ads. Payment must be in US funds. The banks here won't accept anything else. (I've got a little stash of foreign currency that I can admire but not spend.) I'm way too small for credit cards.
Here are the prototypes abuilding that I know of:
Jonsboat: I suspect a few of these have been built but I've never gotten a report. Here are photos of one being built by Chuck Leinweber of Duckworks Magazine I'm told this boat is now complete except for painting.
< WIDTH="246" HEIGHT="168">
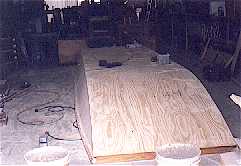
Mayfly12: A Mayfly12 is going together up in Minnesota. The decks are on and he's into the sailing bits. By the way, the sailing bits on almost any sailboat large or small consume about half of the effort in labor and materials. Just when you thought you were about finished!
AF4B: A builder in Virginia is building AF4Breve, a 15.5' version of the 18' AF4. I tried to talk him into building the 18' version but he had two very good reasons to go shorter - a short trailer on hand and insufficient building space for the larger boat. The AF4B is essentially a "scrunched" version of AF4 but comes from a whole new set of drawings. The prototype is in the final building stages where the sanding and filling and painting seem endless.
AF2: An AF2 has been started in Oklahoma that should be close to the plans. Bottom (double layer of plywood) is on and finished and the hull has been flipped upright by brute strength, no ropes or jacks used.
Herb builds AF3 (archived copy)
Hullforms Download (archived copy)