Garth Battista & Co. of Breakawaybooks.com in Toto.
Contents:
Contact info:
Jim Michalak
118 E Randall,
Lebanon, IL 62254Send $1 for info on 20 boats.
Jim Michalak's Boat Designs
118 E Randall, Lebanon, IL 62254
A page of boat designs and essays.
(15Jun00) This issue presents a method of jiffy reefing a balanced lug sail. Next issue, 1Jul00, will rerun the article about making a kickup rudder.
|
|
Left:
Garth Battista & Co. of Breakawaybooks.com in Toto. |
|
|
BALANCED LUG JIFFY REEF
BACKGROUND...
Balanced lugsails are pretty interesting. I suppose they are one step away from a square sail. They no doubt have a long history that predates any fancy hardware, and now that fancy hardware is expensive and hard to find in some areas a fellow can still make an effective lugsail with stuff from the lumberyard. The spars are very short for the area set and need no standing rigging, making the lug ideal for a cartop or trailer boat that needs to be rigged in a few minutes. Here are the basics of the balanced lug sail:
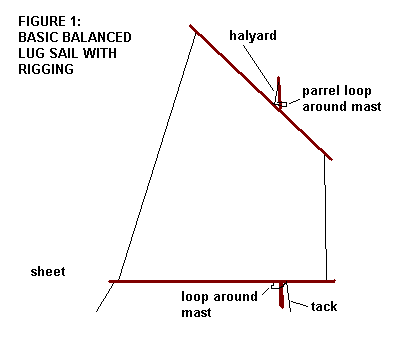
To review a bit, this sail is "balanced" a bit around the mast, the best place to fasten the halyard to the yard is about 40% aft of the luff. Further forward and the sail will twist a lot and lose the ability to point well into the wind. Properly set up these sails will tack through about 100 degrees, very good for such low tech. The yard needs to be fastened loosely to the mast at the halyard with a parrel loop of some sort to keep it located especially in rough water. There are lots of ways to do that and rigging a balanced lug was covered in detail in another issue of this site. Down at the boom is a tack line set about 15% aft of the luff, although this is not as critical as the halyard location. Again, the tack line needs a parrel loop of some sort to keep the boom from moving in rough water. The tack needs to be set VERY tight, thus putting great tension in the luff. Without that tension the sail will twist when sailed to windward with great loses. (In fact since the tack is so short and easy to get at I always make it at least a two to one tackle. A simple effective set up is a line running from the hull, over the boom, and back to the hull to a cam cleat. A quick yank at the cam cleat will retension the rig in an instant in a two to one effort.) Lastly there is the sheet, the location of which is usually not critical at all. When sailing the balanced lug, the sail is left standing from tack to tack. One tack will result with the sail draping over the mast but the effect is not noticable no matter how bad it looks. The sail is usually very gentle in a jibe.
There are two other types of lugsails that I know of. A dipping lug is as above but without a boom. In that case the tack is tied right to the hull and the location of the sheet is critical since it has to stretch out the foot of the sail. Usually the dipping lug needs several locations to anchor the sheet, each to deal with a different point of sail. When tacking a dipping lug the tack and sheet are disconnected and the entire sail shifted around the mast, not a good arrangement for sailing in close quarters but OK for making a long passage with enough crew to do the job. Viking ships of old would set their square sail as a dipping lug.
The other common lug type is the standing lug. It's exactly the same as the balanced lug except that the tack line is tied to the forward end of the boom and the boom pivots there at the mast as with a gaff sail. As a result the boom of a standing lug will lift when there is pressure on the sail. When close hauled that won't matter because the sheet will pull the boom down, but when running off the wind the boom can lift a lot, allowing the yard to twist forward and that is bad. That can be cured with a vang from boom to mast. The balanced lug needs no vang and is effectively self vanging, the lift of the boom being very small because of the location of the tack line.
JIFFY REEFING THE BALANCED LUG
The balanced lug is secured to the boat with just the halyard and tack, and their parrels, so when you disconnect them the sail rolls up in a nice package. But you can also fix jiffy reefing gear to the balanced lug that stays with the package. You run the reefing gear once and it is forever there ready for use.
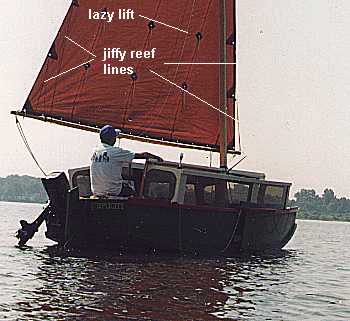
Here is a photo of Karl James' jewelbox with the jiffy reef lines (barely) visible. He has two reefs, both with jiffy reef lines permanently attached. Also shown in a "lazy lift" which is just a loose loop of line running from near the mast head, down around the boom though a pad to keep it located and back to the mast head. When Karl releases the halyard the sail will drop down, the boom lowers until the lazy lift becomes taut and then the sail will gather fairly neatly in the lazy lift.
Here is how the reef lines are run:
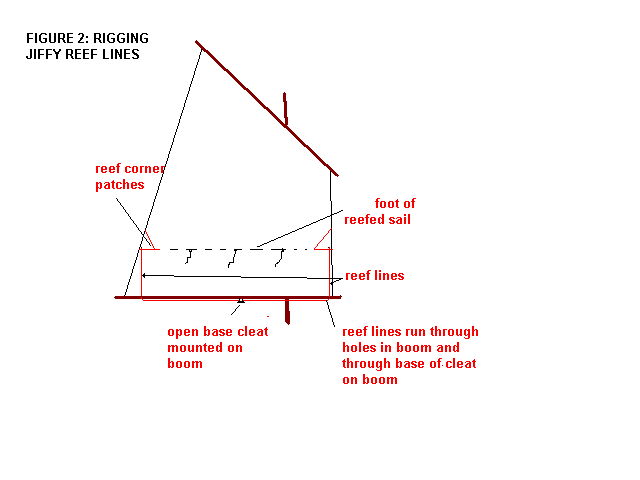
There is a reef line tied permanently to each corner patch of the new reef foot. Those lines run down through faired holes drilled in the boom end, then they run to an open based cleat near the center of the boom. In practice those two reef lines can really be just one continuous line running from one reef corner, through the boom, through the base of the cleat, throught the other hole and one to the other reef corner.
The location of the holes in the boom is fairly critical. They must be placed such that when the reef lines are pulled tight and cleated, the corners of the reefed sail are pulled down and slightly outward to stretch the foot of the sail just the right amount. Expect to experiment. Since lug sails usually taper a bit, the reef line holes tend to fall slightly inside the unreefed attachments.
The location of the cleat on the boom isn't too critical except that it should be in a place handy when reefing. Better towards the front of the boom than aft.
Here's how you reef the sail in action:
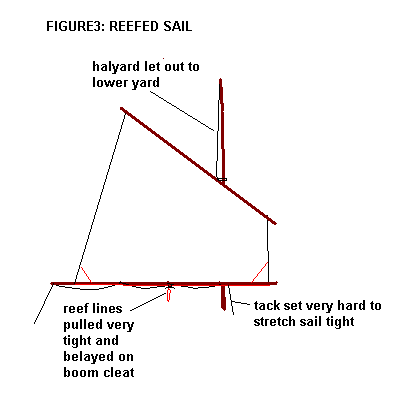
First you loosen the halyard to lower the sail. If you have a lazy lift it will gather there clear of the deck. If not, gather the lowered sail in the boat.
Next grab one of the jiffy reef lines and pull until the new reef corner is hard against the boom and cleat the line to keep it there. Then grab the other jiffy reef line and pull until that reef corner is hard against the boom and cleat that line.
Tie in the reef patches in the middle of the sail.
Hoist the sail with lots of tension in the halyard. You may want to reset the tack to put lots of tension in the luff of the sail but with this method the tack and sheet are not changed.
That's it!
Taking the reef out is even easier. Just untie the reef patches, uncleat the jiffy reef lines, and hoist back to full sail. Always make sure you have lots of tension in the luff by resetting the tack line.
NEXT TIME...
I'll show how to make a kick up rudder.
JONSBOAT
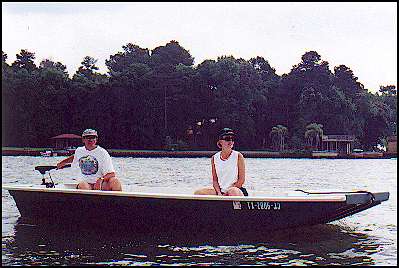
JONSBOAT, POWER SKIFF, 16' X 5', 200 POUNDS EMPTY
Jonsboat is just a jonboat. But where I live that says a lot because most of the boats around here are jonboats and for a good reason. These things will float on dew if the motor is up. This one shows 640 pounds displacement with only 3" of draft. That should float the hull and a small motor and two men. The shape of the hull encourages fast speeds in smooth water and I'd say this one will plane with 10 hp at that weight, although "planing" is often in the eye of the beholder. I'd use a 9.9 hp motor on one of these myself to allow use on the many beautiful small lakes we have here that are wisely limited to 10 hp. The prototype was built by Greg Rinaca of Coldspring, Texas and his boat is shown above when first launched with a trolling motor. But here is another one finished about the same time by Chuck Leinweber of Harper, Texas:
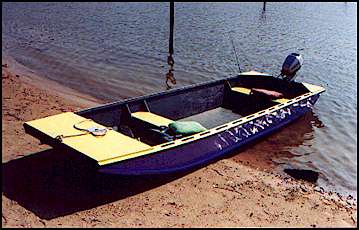
In the photo of Chuck's boat you can see the wide open center that I prefer in my own personal boats. To keep the wide open boat structurally stiff I boxed in the bow, used a wide wale, and braced the aft corners.
I usually study the shapes of commercial welded aluminum jonboats. It's surprising to see the little touches the builders have worked into such a simple idea. I guess they make these things by the thousands and it is worth while to study the details. Anyway, Jonsboat is a plywood copy of a livery boat I saw turned upside down for the winter. What struck me about that hull was that its bottom was constant width from stem to stern even though the sides had flare and curvature. When I got home I figured out they did it and copied it. I don't know if it gives a superior shape in any way but the bottom of this boat is planked with two constant width sheets of plywood.
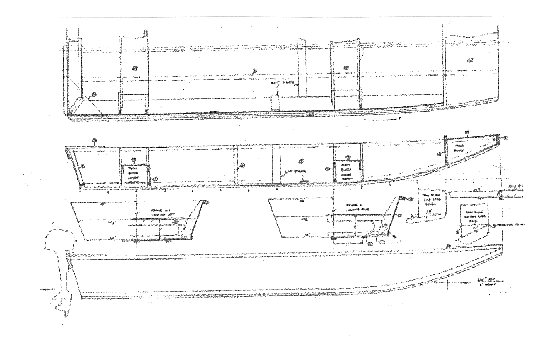
Greg Rinaca put a new 18 hp Nissan two cycle engine on his boat, Here is a photo of it:
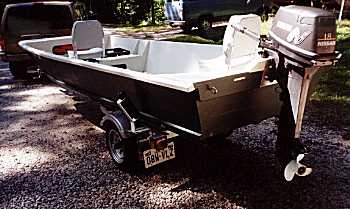
The installation presented a few interesting thoughts. First I've been telling everyone to stick with 10 hp although it's well known that I'm a big chicken about these things. Greg reported no problems and a top speed of 26 mph. I think the Coast Guard would limit a hull like this to about 25 hp, the main factors being the length, width, flat bottom, and steering location. Second, if you look closely at the transom of Greg's boat you will see that he has built up the transom in the motor mount area about 2". When I designed Jonsboat I really didn't know much about motors except that there were short and long shaft motors. I thought the short ones needed 15" of transom depth and didn't really know about the long shafts. Jonsboat has a natural depth of about 17" so I left the transom on the drawing at 17" and did some hand waving in the drawing notes about scooping out or building up the transom to match the requirements of your motor.
I think the upshot of it all is that short shaft motors need 15" from the top of the mount to the bottom of the hull and long shaft motors need 20". There was a lot of discussion about where the "cavitation" plate, which is the small flat plate right above the propellor, should fall with respect to the hull. I asked some expert mechanics at a local boat dealer and they all swore on a stack of tech manuals that a high powered boat will not steer safely if the cavitation plate is below the bottom of the hull, the correct location being about 1/2" to 1" above the bottom. But Greg had the Nissan manual and it said the correct position is about 1" BELOW the bottom. Kilburn Adams has a new Yamaha and its manual says the same thing. So I guess small motors are different from big ones in that respect.
But it seems to be not all that critical, at least for the small motors. Greg ran his Jonsboat with the 18 hp Nissan with the original 17" transom for a while and measured the top speed as 26 mph. Then he raised the transom over 2" and got the same top speed!
There is nothing to building Jonsboat. There five sheets of plywood and I'm suggesting 1/2" for the bottom and 1/4" for everything else. It's all stuck together with glue and nails using no lofting or jigs. I always suggest glassing the chines for abrasion resistance but I've never glassed more than that on my own boats and haven't regretted it. The cost, mess, and added labor of glassing the hull that is out of the water is enormous. My pocketbook and patience won't stand it. Glassing the chines and bottom is a bit different because it won't show and fussy finishing is not required.
Plans for Jonsboat are $25.
Prototype News
Some of you may know that in addition to the one buck catalog which now contains 20 "done" boats, I offer another catalog of 20 unbuilt prototypes. The buck catalog has on its last page a list and brief description of the boats currently in the Catalog of Prototypes. That catalog also contains some articles that I wrote for Messing About In Boats and Boatbuilder magazines. The Catalog of Prototypes costs $3. The both together amount to 50 pages for $4, an offer you may have seen in Woodenboat ads. Payment must be in US funds. The banks here won't accept anything else. (I've got a little stash of foreign currency that I can admire but not spend.) I'm way too small for credit cards.
Here are the prototypes abuilding that I know of:
Caprice: A brave and experienced builder in Texas it making the 25' Caprice water ballasted sailboat. A big project. Here is a first assembly photo.
< WIDTH="365" HEIGHT="277">
We also have the start of a Jon Jr, a 12' x 3' personal sized jonboat, down in Texas. Here is the latest photo with the bottom going on.
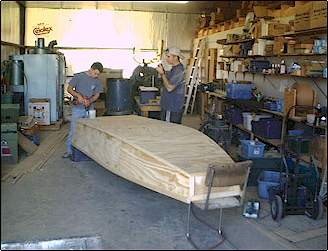
IMB: Also at the lake Conroe messabout Jerry Scott's prototype IMB got into the water. A full report when I receive one.
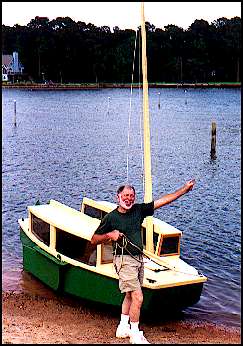
Mayfly12: A Mayfly12 is going together up in Minnesota. It is now complete except for painting. Here is a construction photo from last summer.
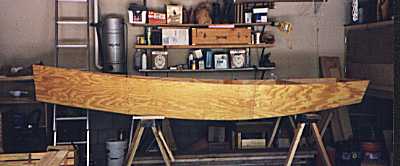
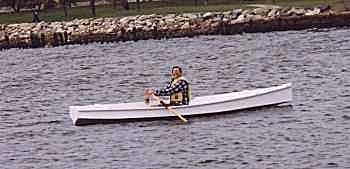
Robote: Robote is supposed to be a fast somewhat extreme rowing boat based on my old WeeVee design, thus it has a deep V bottom but is stretched out to 14' long with a very pointy bow. It was drawn as a custom job but if it works out I'll put it in the catalog. The boat is now complete and launched but waiting for final photos and test results. Here is a preliminary photo on its first row with builder Frank Kahr at the oars:
Herb builds AF3 (archived copy)
Hullforms Download (archived copy)
Plyboats Demo Download (archived copy)
Table of Contents