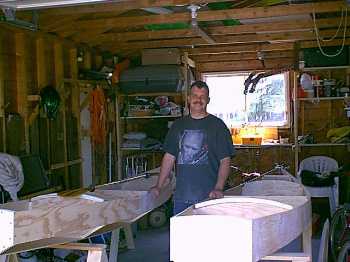
Rob Cole building Totos way up north.
Contents:
Contact info:
Jim Michalak
118 E Randall,
Lebanon, IL 62254Send $1 for info on 20 boats.
Jim Michalak's Boat Designs
118 E Randall, Lebanon, IL 62254
A page of boat designs and essays.
(1Jul00) This issue reruns the article about building a kick up rudder. Next issue, 15Jul00, I'm going to take a deep breath and start a primer on sailing for nonsailors.
Chris Flynn took photos of our recent Rend Lake Messabout and presented them in Duckworks Magazine. Click on over for a look at one of the best websites for our type of boating, all put together by Chuck Leinweber.

|
Left:
Rob Cole building Totos way up north. |
|
|
SMALL BOAT RUDDERS
BACKGROUND...
Here is an article I wrote a while back that appeared in the great paper magazine BOATBUILDER. I've included copies of it in my prototypes catalog since then. The article shows how I've made rudders for my own small boats.
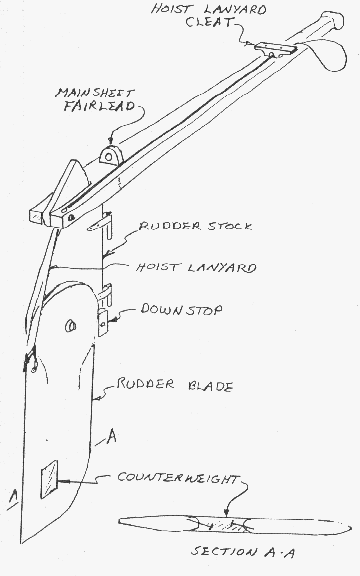
Where I sail only a kick-up rudder works well. It's not because once a year you might strike a ledge and break off a fixed rudder. It's because our waters are generally shallow and a fixed rudder would require endless fussing on every trip. With the weighted kick-up rudder shown here you just blast along without giving the kick-up blade a second thought.
I have also tried kick-up rudders that weren't weighted, but were held down by lanyards. Nearing a shore or shallow I had to play the thing like a puppet and quickly ran out of hands because the tiller, sheet, and board all needed handling at the same time. The weighted rudder blade is much better. In this article I'll show you how I build a kick-up rudder from the ground up from plywood. This sort of rudder can be suitable for boats up to about 22 feet length.
RUDDER BLADE...
The best way to make the blade is to laminate it from thinner plywood. I've seen warped blades made from a single piece of 1/2" plywood, but I've never had a problem with a blade built up from two layers of 1/4" plywood.
Cut out the plywood blanks and butter one up with glue. I prefer plastic resin glue. It comes as a dry powder and is mixed with water to the consistency of regular white wood glue. It's best to spread the glue with a notched trowel like you use to paste down floor tiles. Place the glued-up blanks together on a flat surface protected with plastic or paper, and tap a couple of light nails through them so they can't slide around on each other. Apply clamping pressure with weights like concrete blocks placed atop the blanks. Now stay away until the glue has set good and hard.
Now give the blade a final trimming and streamline the edges where required. (If your rudder, daggerboard, leeboard or centerboard vibrates in use, streamline the edges some more. That almost always cures the ailment.)
SINK WEIGHT...
I called this the "counterweight" in the drawing but "sink weight" is a better term.
The sink weight should be slightly heavier than the buoyancy of the immersed blade. Wood is about half as dense as water, and lead is about 11 times denser than water. It works out that the area of the lead weight should be about 1/16th the area of the immersed blade, or maybe 7 percent of the area to give a slight negative buoyancy. For example, a blade that is 10 inches by 15 inches immersed is 150 square inches. The lead weight could be 150 x .07 = 10.5 square inches, which would be a square 3.24 inches per side. Cut a hole in the blade for the lead to the proper size, preferably toward the tip and toward the trailing edge. Bevel the hole's edges so the lead will lock in place by forming flanges around the blade. Also place some rustproof nails or screws around the interior of the hole to further lock the lead in place. Clamp the blade to a flat metal plate and place it level on the floor.
To figure the weight of the lead required, multiply the area in inches by the thickness in inches and again by .4. In the example, if the example blade is 3/4" thick, the weight of the lead required is 10.5 x .7 x .4 = 3.15 pounds.
To melt the lead, I use a propane camp stove. I place it right next to the job so I woun't have to tote molten lead around the shop. For a crucible I use a coffee can with a 1/2" pour hole drilled about 3" above the bottom of the can, with a long metal handle bolted to the side of the can. The crucible goes on the stove with enough lead wheel weights inside sufficient for the pour.
Begin the pour as soon as the lead is molten. (The steel clamps on the wheel weights will float to the top and not pass through the pour hole.) Take your time and be very careful with the pour, but it must be done all at once. Overfill the hole in the rudder blade somewhat to allow for shrinkage on cooling. Shut off the stove and walk away from the job for a few hours. Lead stays very hot long after it has solidified.
If the weight gets loose in the blade due to shrinkage, you can tighten it by placing the weight over an anvil and hitting the lead with a hammer. That squeezes the center and expands the perimeter.
Now contemplate what it's like to pour a thousand pound keel!

RUDDER STOCK...
Laminate this exactly as you did the rudder blade. You need to add the downstop and it's amazing to me how sturdy this part needs to be. A block of hard rubber or phenolic plastic bolted in place might be best.
TILLER/HOIST LANYARD...
Don't make the tiller too short! Make it too long and shorten it later if needed. The tiller should fold neatly along the back edge of the rudder for storage.
Use light braided line, about 3/16" for the lanyard. Tie it to a small hole in the rudder's trailing edge. The hole needs to be located about where the raised rudder meets the aft end of the tiller. Then pass the lanyard through a hole in the back corner of the tiller, then forward to a small cleat on the top of the tiller. Pass the lanyard through a small hole in the base of the cleat and tie and loop for your fingers. To raise the rudder, yank on the lanyard and belay it around the little cleat. To lower the rudder, uncleat the lanyard and let the blade drop kerplunk against the stop.
SHEET FAIRLEAD...
This works very well on smaller sails that don't require multipart main sheets. Screw a fairlead solidly to the tiller's top face. Place the fairlead right above the rudder hinges so the sheet loads won't affect steering. Run the sail's sheet through the fairlead and forward along the tiller. You can secure the sheet merely by wrapping it a couple of times around the tiller's grip under your steering hand. Then you can steer and hold the sheet with the same hand. To release the sheet in a puff you need only slacken your grip without letting go of the tiller. You can also belay the sheet around the rudder lanyard cleat if you are feeling lucky.
HINGES...
I haven't figured out hinges yet. I think the best ones are welded up from stainless steel, but I'm working towards building boats totally from lumberyard stuff. Stevenson Projects used barrel bolt locks for hinges. Payson used eyebolts and rods. Dick Scobbie used door hinges with big cotter pins for pivots. Seeing those, I tried some door hinges on a dink rudder and was quite satisfied, especially since they came from the scrap bin. Most door hinges won't mount as simply as real boat fittings - check out the angles they swing through and do some head scratching.
One thing I'm sure of: Don't rely on gravity to keep your rudder on your transom. In a knockdown the rudder may unship and leave you with a very wet boat and no rudder. Also, with the sheet fairlead on the tiller as I've shown it, the sheet can produce a large upward force on the assembly in strong winds and lift the whole thing out of conventional fittings. Both of these things have happened to me. Now I secure conventional fittings against knockdowns and sheet loads by drilling as small hole in one pintle below the gudgeon and putting a cotter pin through the hole.
THE CARY HINGE...
I wrote the above a few years ago. But very recently I got letter from Ted Cary in Florida. He has a way of making effective rudder hinges from scrap seatbelts.
Here is his description:
"Thought you might be interested in my solution to the rudder pintle problem. My first experience trying to hit two gudgeons with the pintles in a big chop, while hanging over the transom, disqualified that system for me. I came up with a simple track and slide system, then epoxied up the slide and rudder stock around pieces of connecting webbing strap. The stap flexes when you steer. You can bend a seat belt a lot of times before it breaks, and nylon doesn't corrode in salt water. I found that you must align the strap longitudinally across the direction of the flex, and you must not allow the epoxy to harden on the strap where it has to flex. But the ends of the strap have to be well saturated to hold the slide and the rudderstock halves together. The most successful way I've used to avoid glue where I don't want it is to get the parts all glued up and assembled with clamps, keeping the glue off the flex line as much as possible. Then use a syringe or squirt bottle to saturate the flex line with vinegar, working it through the fibers, before the glue starts to set. The acetic acid neutralizes the amines in the epoxy hardener, so it won't polymerize. The clamped parts won't allow the vinegar to reach the glue on the strapping between them, so it goes off where you want it to."
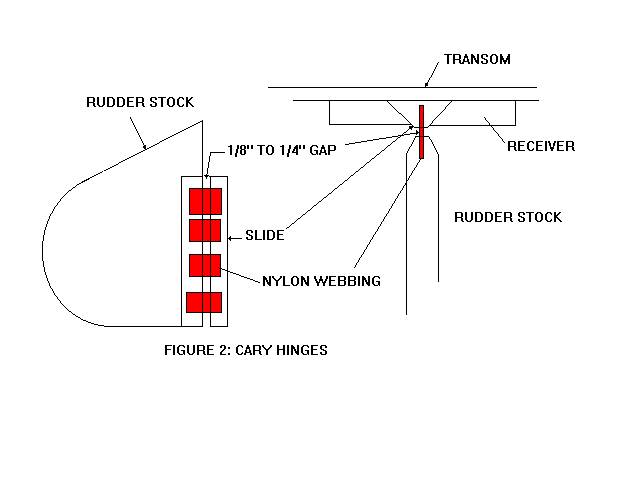
"Dropping the triangular section slide down the transom track installs the rudder in a fraction of a second.This hinge rig has been working great on several dinks for over 4 years now."
Well, I must try Ted's system sometime. I think model airplane guys have been using flexing plastic hinges for a long time. My only comment might be that I would also lock the slide it to prevent it from unshipping in a knockdown.
NEXT TIME...
I'll start a primer on sailing for nonsailors.
SKAT
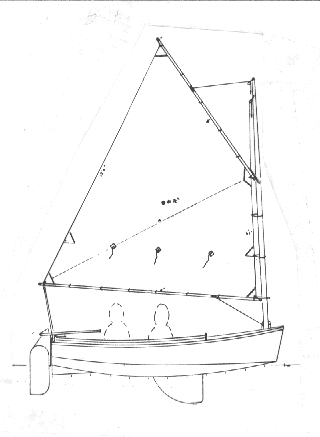
SKAT, CATBOAT, 12' X 5-1/2', 250 POUNDS EMPTY
Long time readers may recall this design as being in the prototypes section a while back. One was being built and nearly completed when the builder had to put it aside to work on some realities of life, something that happens to all of us from time to time. I decided to put Skat back into the catalog and maybe a second one will get started. Here is a photo of the first hull partly finished. When completed Skat will be decked from bow to centerboard with small side decks in the cockpit. The two forms you see in the cockpit area will be removed when the decks are in place.
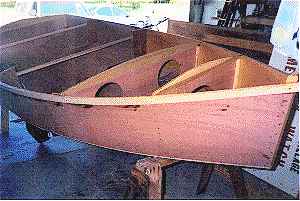
Skat is a small traditional looking catboat based on a similar boat in HOW TO BUILD SMALL BOATS by Edson Schock. My copy is undated but the style of the boats suggests to me that it was written in the 1950's. The books's hulls are plywood but none are done "instant" style. I admire Schock's designs for their simple good looks and wholesomeness. Skat is like the little catboat in that book but is a taped seam instant boat with a gaff rig and kickup rudder replacing the original's Marconi rig and barndoor rudder.
I think a shallow V bottom like this one can outperform a flattie. If sailed flat this hull will have no chines in the water while the flattie will have two. When heeled the V hull will have only one chine in the water while the flattie may have two. If the flattie is heeled so one chine is "flying" the flattie may match the V. This shape was once quite popular because it worked so well with flat panels, the Lightening, Y Flyer, and Wind Mill coming to mind.
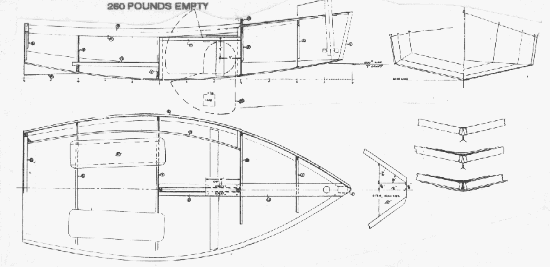
The 81 square foot gaff sail works with a 14 foot long mast which should make for better trailering than the original 21 foot mast. I kept the centerboard layout and I think this is just one of two boats I've drawn that had a centerboard. A leeboard won't work with this traditional shape. For a leeboard to work here the entire rig would have to be shifted aft at least a foot.
Construction of Skat calls for three sheets of 1/4" plywood and four sheets of 3/8" plywood. No jigs or lofting required.
Plans are three blueprints plus keyed instructions for $20 until one is built and tested.
Prototype News
Some of you may know that in addition to the one buck catalog which now contains 20 "done" boats, I offer another catalog of 20 unbuilt prototypes. The buck catalog has on its last page a list and brief description of the boats currently in the Catalog of Prototypes. That catalog also contains some articles that I wrote for Messing About In Boats and Boatbuilder magazines. The Catalog of Prototypes costs $3. The both together amount to 50 pages for $4, an offer you may have seen in Woodenboat ads. Payment must be in US funds. The banks here won't accept anything else. (I've got a little stash of foreign currency that I can admire but not spend.) I'm way too small for credit cards.
Here are the prototypes abuilding that I know of:
Caprice: A brave and experienced builder in Texas is making the 25' Caprice water ballasted sailboat. A big project. Now the bottom and bilges have been fitted and taping begins.
< WIDTH="306" HEIGHT="401">
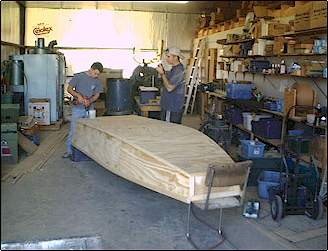
We also have the start of a Jon Jr, a 12' x 3' personal sized jonboat, down in Texas. Here is the latest photo with the bottom going on.
IMB: Also at the lake Conroe messabout Jerry Scott's prototype IMB got into the water. A full report when I receive one.
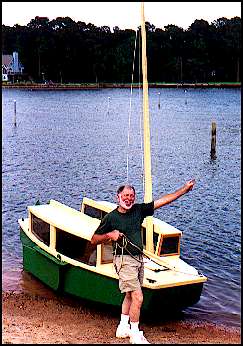
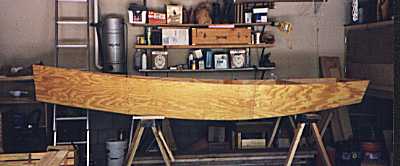
Mayfly12: A Mayfly12 is going together up in Minnesota. It is now complete except for painting. Here is a construction photo from last summer.
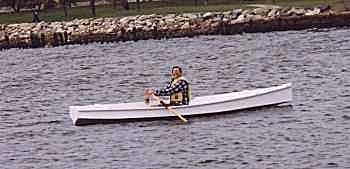
Robote: Robote is supposed to be a fast somewhat extreme rowing boat based on my old WeeVee design, thus it has a deep V bottom but is stretched out to 14' long with a very pointy bow. It was drawn as a custom job but if it works out I'll put it in the catalog. The boat is now complete and launched but waiting for final photos and test results. Here is a preliminary photo on its first row with builder Frank Kahr at the oars:
Herb builds AF3 (archived copy)
Hullforms Download (archived copy)
Plyboats Demo Download (archived copy)
Table of Contents