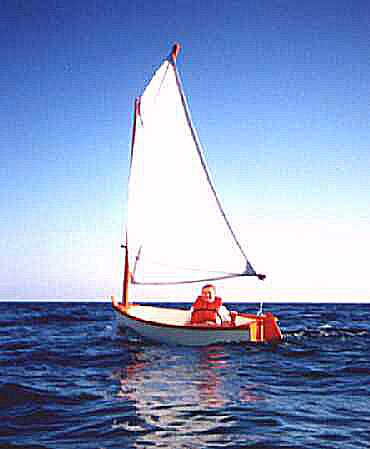
Sean Moffitt in Slam Dink.
Contents:
Contact info:
Jim Michalak
118 E Randall,
Lebanon, IL 62254Send $1 for info on 20 boats.
Jim Michalak's Boat Designs
118 E Randall, Lebanon, IL 62254
A page of boat designs and essays.
(1Sep00) This issue presents a couple of leeboard topics. Next issue, 15Sep00, will rerun an important issue about some capsize tests.
INDIANA MESSABOUT NOTICE: The 9th Annual Lake Monroe Messabout will take place on September 22,23 and 24. This messabout is on Lake Monroe, at the Paynetown State Recreation Area, all this about ten miles south of Bloomington, Indiana. No campsites will be reserved so congregate in the tent area, sites 1-10, 28-32. Pitch in dinner on Saturday night. For more info contact Bob Bringle at rbringle@iupui.edu.

|
Left:
Sean Moffitt in Slam Dink.
|
|
|
LEEBOARD ISSUES
THE VERY BASICS...I've covered sizing and placing of leeboards in previous issues that you can find down in the Way Back Issues link. But to recap, the things you might remember are that the immersed area of the board should be about 4% of the sail area, and that the leeboard must be mounted at the hull's widest beam in order to be in flow parallel to the boat's motion. The suggestion on area would apply to any board such as a centerboard or a daggerboard (but those boards need not be limited to mounting at the boat's widest beam). Lastly, the sail area has to be aligned with its sail area center right above the center of the board's area, more or less.
Here is an example of a leeboard on Slam Dink.
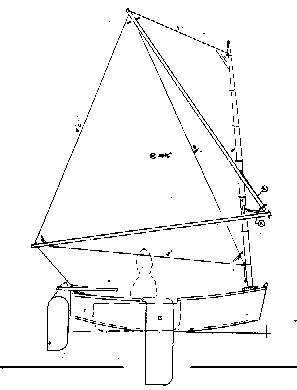
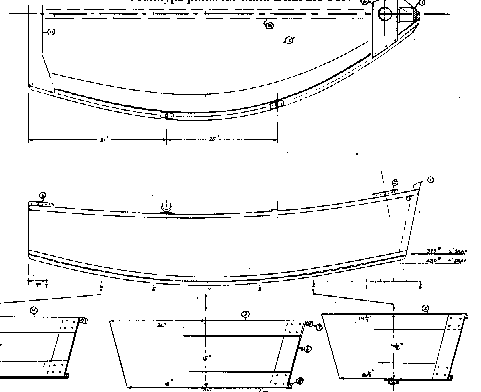
Notice that it pivots around a bolt which is placed to allow the board to retract fully above the bottom of the hull. You can't tell from the drawing but the pivot bolt runs through a lower hull guard and the top of the leeboard runs in a slot in an upper hull guard. The board is thus braced to take loads in both directions, unlike a tradional loose leeboard. As a result only one of these pivoting leeboards is needed on the boat, it works on both tacks, where the tradional loose leeboard only works on the lee tack so two are required. In truth these pivoting leeboards aren't really leeboards but are more like centerboards mounted outside the hull. While sailing you handle it just like a centerboard - just leave it down almost all the time except maybe while running and broad reaching. But I'm still going to call it a leeboard.
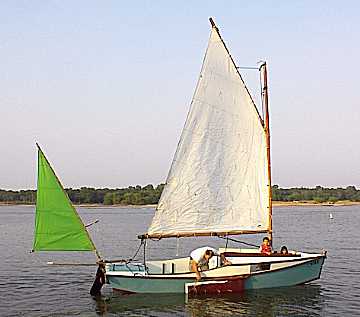
The pivoting leeboard has several advantages. They are easily built and altered. There are no holes required through the hull except for the pivot hole. Best of all the leeboard takes up no room on the boat's interior. On the Slam Dink that same board mounted as a centerboard would take up the whole interior. You could see the same situation below on Richard Spelling's AF2 (shown with an experimental mizzen sail).
HANDLING THE LEEBOARD...
I've found that no ballast is required for these boards, they are laminated from layers of plywood with the edges streamlined. If they are loosely pivoted they have a natural tendency to drop down a bit so that they might drop about 20 or 30 degrees until the buoyancy of the immersed segment balances the weight of the board. If you are trailering your boat it is often prudent to secure the board in the full up position so it doesn't catch on things while launching. That happened to me once while launching my Birdwatcher which has a conventional centerboard. I bashed away at it perplexed until the tiny voice of a six year old watching said, "Mister, that board thing on your boat is catching your trailer."
So in that AF2 photo Richard is releasing a line that secures the leeboard in the up position.
How to get the board down? Easy. There is an ear attached to the upper aft edge of the leeboard that sticks up through the upper guard and there is a lanyard attached to it. Grab the lanyard and pull back on it and the leeboard rotates down until it goes kerplunk against the aft end of the slot in the upper guard. Here is Richard hauling the board down.
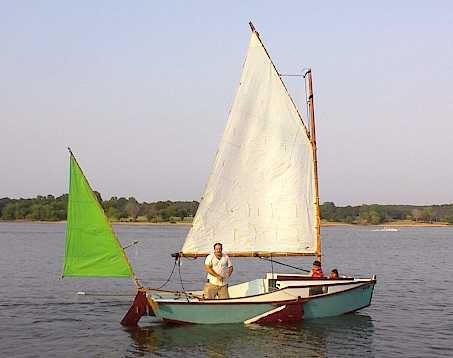
Once the board is down it prefers to stay down, especially if there is a bit of friction between board and guards applied by tightening the pivot bolt. There are two things that can make it pop up. First if it strikes something like a stump or the bottom. Second is drag on the board when there is no side load on the board such as when running downwind or sometimes when tacking through the eye of the wind.
Once that happens the board will pop up to its comfortable 20 or 30 degree position and stay there until you yank it back down. In the partially down postition the board will still provide skeg effect when running downwind. But some boats will steer better downwind if the board is pulled down again and you might experiment with that. In the situation where the board pops up while tacking through the eye of the wind, you must pull it back down again to sail on the new tack. As always, if the boat suddenly feels funny while tacking through the wind, always check the leeboard first and make sure it is down.
It is possible to cleat off the lanyard to make sure the board stays down but you must remember to release it before running into shallows. I don't do that myself. Instead I prefer to run the lanyard back around an oarlock and into the cockpit. The oarlock acts as a turning block. Here is a photo of Herb McLeod's AF3 and you can clearly see the leeboard, upper leeboard guide, pivot bolt, and the lanyard running aft to a cleat which is handy at the back edge of the cockpit.
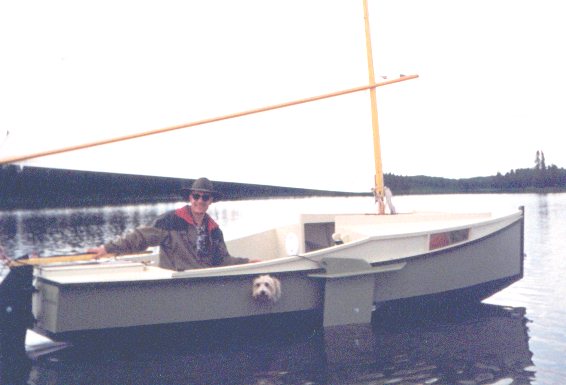
Again, usually on a boat like AF3 I would run the lanyard through the oarport and around the oarlock (Maggie the Dog would not appreciate that) and not cleat it off. But I do use a cleat on the forward end of the upper leeboard guard. I can secure the board in the up postition by leading the lanyard forward to that cleat. But in normal use the board is cleated up only while trailering.
Birdwatcher type boats have a problem with a leeboard like this in that there is no convenient access to the outside of the hull to handle that lanyard. My suggestion would be to run the lanyard through a small hole in the side of the hull which is kept radiused to act like a bearing. Pull the board down at any time that way without leaving the inside of the boat. No need to ever pull it up except to trailer.
No one has done that but some of those boats have lanyards running fore and aft to be captured by cleats on the fore and aft decks. So you can pull the board around like a puppet in any direction. Here is a photo of Karl James' Jewelbox chuckling along. You can see here the leeboard, the upper and lower guard, pivot bolt, and a loose lanyard running outside the hull to a cleat on the aft deck. (There is also a line running forward but it's not really visible.) You can see there is no tension required in that lanyard to keep the board in the down postion.
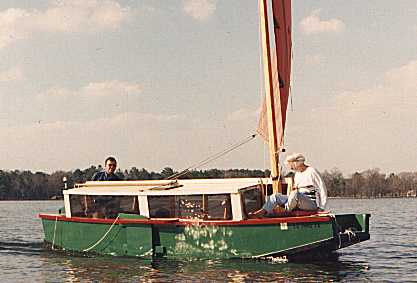
WHAT'S THAT VIBRATION???...
This one applies to any foil running through the water such as leeboards, daggerboards, centerboards and rudders. It is expecially true for deep narrow foils of the type preferred for low drag.
If the leading and aft edges of these boards aren't properly streamlined they will vibrate. That happened to me in the original Piccup Pram which had a really long narrow board. I wrote to Bolger about the problem and his answer was something like this:
"Streamline the edges more. If it still vibrates, streamline it some more."
So I streamlined the edges and the vibration went away. Bolger has seen everything.
We recently learned an intersesting spin on this. Richard Spelling was having problems with his leeboard vibrating and was getting tired of streamlining the edges. About the third time he wrote me about the problem, I had just received an issue of Small Craft Advisor and there it was - a discussion about foil vibration by the racing boat designer Stephen Baker.
Here is what Baker said:
"...A thin trailing edge, if faired into the shape properly, is a must. Do NOT round the trailing edge, rather cut it square and thin, and then bevel it about 30 degrees (doesn't matter which side) to stop it from vibrating at speed..."
A few days later Richard wrote me back, "Thinning and beveling worked pretty well. All leeboard vibration gone. Thanks guys."
NEXT TIME...
I'll rerun an important capsize issue.
Contents
SLAM DINK
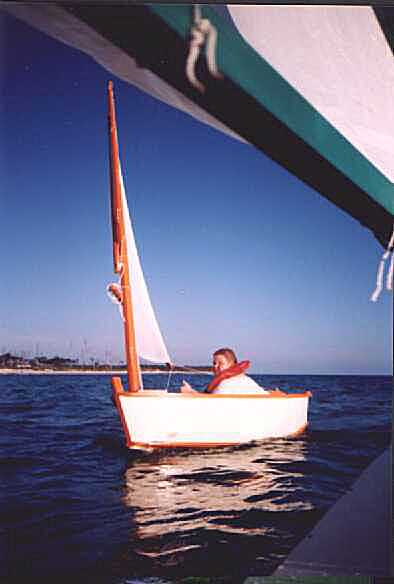
SLAM DINK, 7-1/2' X 45", 60 POUNDS EMPTY
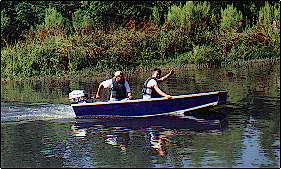
Slam Dink was presented earlier this year as a prototype design and was quickly built by the Moffitt gang in Stone Mountain, Georgia. Here Sean and Lauren contemplate boatbuilding on a picnic table:
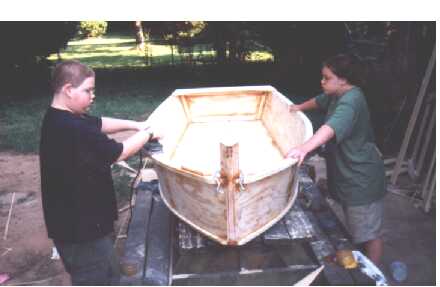
Slam is a pretty straight forward building job from two sheets of 1/4" plywood, which includes the sailing bits like the rudder and leeboard. No jigs needed. It's built by wrapping the sides around three temporary forms and going from there. The only hitch reported in building came when installing the chine logs. They bend in two planes and on a boat this short the bending is pretty sharp. Several chine log candidates broke before getting good ones on. That is a very common problem with short curvy boats, the common solutions are laminating the logs in thinner more plyable layers, steaming the logs to the bend, and bending slowly and carefully with good stock. This is a nail and glue boat with epoxied glass only on the outer chine corners to provide some armor. Yes, it could also be done with taped seams inside and out to eliminate the chine log.
This is the only boat I've ever drawn with a traditional spril sail. I used both a sprit yard and a sprit boom to keep good control of the sail and I was impressed with the photos of the boat sailing. The sail shown is made from a white polytarp sail kit available from PolySails. It has most of Poly Sails' technology in that it is taped together (temporarily, eventually you need to sew it together) and uses poly rope edging. But it uses my radial dart shaping technology that you can find in the back issues of this web site. At least in these light wind photos the sail looks to have none of the extreme twist that ruins the set of a lot of sprit sails. I think the key here is stiff spars, stiff sail edging, and the use of two sprits. If you omit the sprit boom you will need a different sheet location for each point of sail and probably will have no way to control it well on downwind.

These little dinks have problems with carrying a lot of weight, they are just too small to do so. Slam will have good flow lines up to a total weight of about 300 pounds. It will weigh close to 100 pounds empty and ready to sail so you aren't going to sail two adults in this little one, or any little one. It will float that much weight easily but the stem and stern will be immersed and it becomes a clumsy "through the water" boat instead of a fast "over the water" boat. Not that anything this short can really be fast. Also any boat this small and light will be dominated by the weight of the skipper and he will need to be somewhat nimble.
Plans for Slam Dink are $20.
Prototype News
Some of you may know that in addition to the one buck catalog which now contains 20 "done" boats, I offer another catalog of 20 unbuilt prototypes. The buck catalog has on its last page a list and brief description of the boats currently in the Catalog of Prototypes. That catalog also contains some articles that I wrote for Messing About In Boats and Boatbuilder magazines. The Catalog of Prototypes costs $3. The both together amount to 50 pages for $4, an offer you may have seen in Woodenboat ads. Payment must be in US funds. The banks here won't accept anything else. (I've got a little stash of foreign currency that I can admire but not spend.) I'm way too small for credit cards.
Here are the prototypes abuilding that I know of:
Caprice: A brave and experienced builder in Texas is making the 25' Caprice water ballasted sailboat. A big project.Here the hull has been glassed, painted and turned. The water ballast tanks are complete, one coating with glass/epoxy and the other just with epoxy for a scientific test. The builder's past experience with a boat this size is that if the sun doesn't hit the plywood you don't need the glass fabric to keep the ply from checking. But if it does, as with the decks, epoxy coating alone won't keep the ply from checking. Here is a recent composite photo showing how to work on the interior before putting on the roof:

Jon Jr has been completed by Joe Leinweber and Dan Ellis and tested to a certain degree. Click here to read about the test and the surprize ending! ("The waters are only safe until next time!")
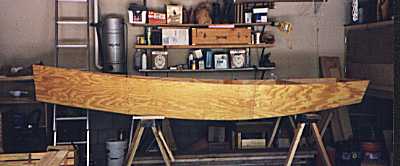
Mayfly12: A Mayfly12 is going together up in Minnesota. It is now completed and has been sailed. Waiting for final photos. Here is a construction photo from last summer.
AN INDEX OF PAST ISSUES
Herb builds AF3 (archived copy)
Hullforms Download (archived copy)
Plyboats Demo Download (archived copy)