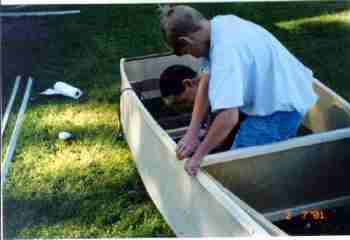
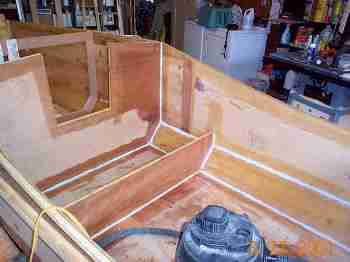
The Battista boys fit a chine log.
Contents:
Contact info:
Jim Michalak
118 E Randall,
Lebanon, IL 62254Send $1 for info on 20 boats.
Jim Michalak's Boat Designs
118 E Randall, Lebanon, IL 62254
A page of boat designs and essays.
(1oct01 ) This issue will present thoughts about scarfing lumber. Next issue, 15oct01, will talk about the weather.
AN ANNOUNCEMENT FROM GARTH BATTISTA...
"A CALL FOR PHOTOGRAPHS
Breakaway Books will be publishing BOATBUILDING FOR BEGINNERS (AND BEYOND), by Jim Michalak, in June of 2002. They would like pictures of people building and enjoying Michalak designs. Any good photos you have (prints, please) are welcome.
Send them to:
Garth Battista
Publisher
Breakaway Books
P.O. Box 24 / Biruk Road #AT7
Halcottsville, NY 12438I will sort through to see what photos work best in the layout or on the cover, and will give a free copy of the new book to everyone whose photo is used in the book. I promise to return each and every photo to its owner. If you send in photos, include your name and address, the boat design, and any interesting stories or details. Thanks!"

|
Left:
The Battista boys fit a chine log.
|
|
|
Scarfing Lumber
SCARFING LUMBER...
There will be times when you can't buy lumber as long as you will need. This will be especially true for masts, but it can also be true for elements like wales and chine logs. At my lumber yard many boards max out at 16' long, although some such as 2 x 10's can still be got in 20' lengths (if you can lift them). The standard solution to the length problem with lumber is to scarf it together.
Here is what a proper scarf joint looks like:
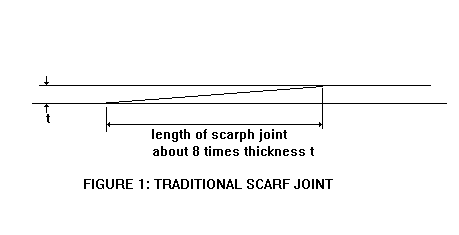
The reason scarf joints have always been used to joint lumber pieces lengthwise is that a butt joint, where one end of a board is glued directly to the next board with cuts at 90 degrees, never works even with modern glues. The joint is all end grain to end grain with no chance of getting a good glue line as you would with a scarf joint, or even with a butt block joint where the glue is loaded in shear instead of tension. By using a scarf with a 6:1 slant, the glued area is over six times the area of a straight butt joint.
I've shown how to piece plywood sheets together with butt plates instead of scarf joints, to make sheets longer than the standard 8' lengths. That usually won't work well with lumber elements. For example, if butt blocks were to joint the boards that make up your mast, the butt blocks would have to be on the outside of the mast to be effective. It could be done but would look clunky is nothing else. As for length, if you were joining 3/4" lumber with a 3/4" thick butt block, the block would need to be 12" long to get the 8:1 scarf ratio that might be considered to be the minimum.
SAWING THE SCARFS...
Actually scarf joints are easy except for cutting the scarf angle. There are fixtures made for circular saws that cut a scarf automatically like this:
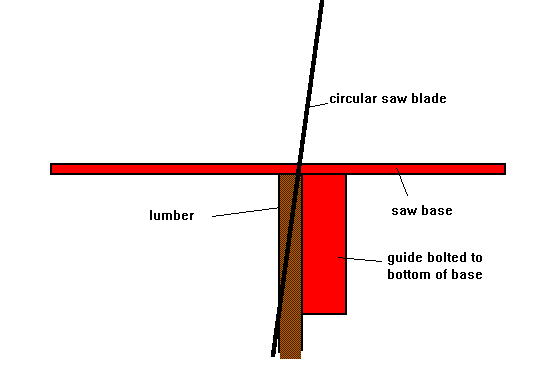
Pro builders use these to cut scarfs on plywood, but the plywood has to be thin. The usual circular saw protrudes about 3" maximum below the guide, so if you are scarfing at an 8:1 ratio, the thickest wood you can cut this way is 3/8". Still, for a pro scarfing plywood it is very useful. But useless for scarfing 3/4" lumber.
Let's say you need to join 3/4" x 1-1/2" lumber to make wales or chine logs for your boat. An 8:1 scarf in 3/4" thick lumber will be 6" long, like this:
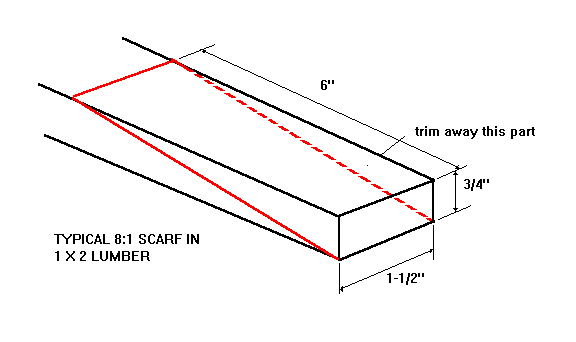
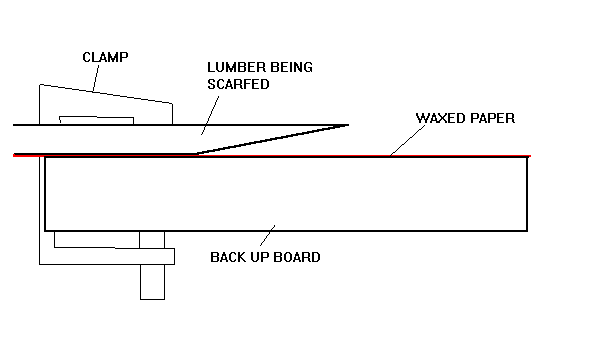
It's easy to draw the cut on the end of your sticks. You can try cutting it with a really good handsaw. It pays to practice. I've been able to cut the stick with a really good saber saw or circular saw but the guide has to be set exactly at 90 degrees and you can't waver in your cut. If you get a bad cut, you can try again on the same end. In fact if pays here to start with extra lengths of lumber so you can try several cuts on each board until you get the knack. You can also try working the cut to shape with a plane or rasp. If you have a power plane, you might try whacking the scarf to shape with only that. When you think you have two good ends cut, clamp one against a firm surface such as a length of 2x4, like this:
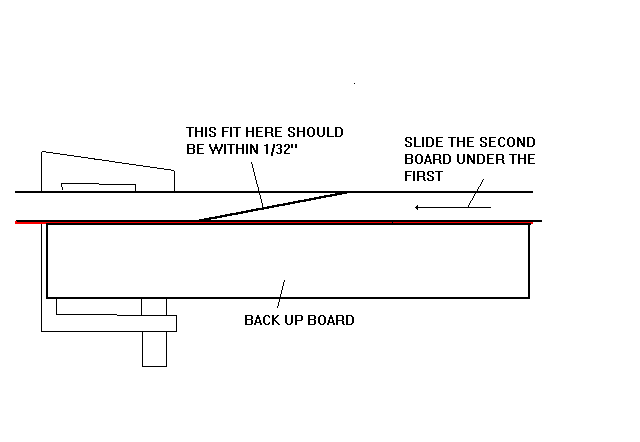
Slide the mating piece into position and check the fit. Remember that as you glue these up they must be straight. I think they should fit within about 1/32" to make a good glue joint with thickened epoxy. Like this:
ROUTING THE SCARFS...
When I built a Birdwatcher a while back I needed to join a lot of lumber since the boat was 24' long and the mast longer. I built a simple fixture for my router for cutting the scarfs. It looks like this:
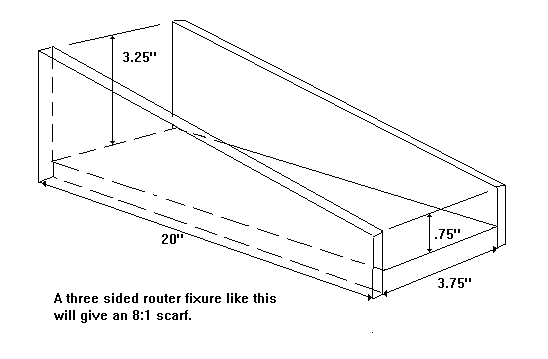
The base plate of the router needs to be removed (three screws) and replaced with a one wide enough to span the fixture opening in all positions. The fixture needed to be wide enough to scarf the 3" wide boards I was using for the mast.
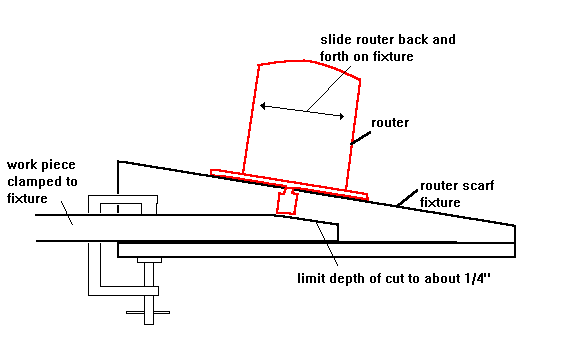
Here is how I make a scarf cut with this fixture. The board is clamped into the fixture such that the router will cut no more than about 1/4" deep. The router is turned on and worked around the fixture until it has cut all the available material. Like this:
Then the board is unclamped and slid forward into the fixture such that once more the router will slice off another 1/4" of material, only this time there will be a lot more wood to cut. And so forth until the the entire scarf is cut. Or is it? I've found it best to avoid a total feather edge at the end of the scarf cut - leaving about 1/32" uncut seems ot work best, like this:
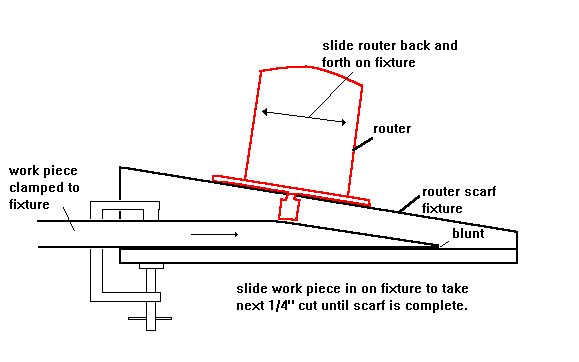
That's all there is to it. One of the nice things about this fixture is that it is pretty compact. So instead of moving those long boards to the fixture, it is usually a lot easier to move the fixture to the boards, a nice feature when you start working with really long boards.
GLUING THE SCARF...
Now it is time to glue the boards together. Best to glue them up on a piece of 2x4 such that they will be straight as you glue them. Cover the 2x4 with waxed paper so that the backup board doesn't become a permanent part of your boat! Clamp the first board on like this:

Trial fit the second board. Butter it well with epoxy thickened to about mayonaise consistancy. Push it into place but not so hard that all the glue squeezes out. Now clamp the second piece to the backup 2x4. If you are going to have problems with gluing the joint I think it will be with glue squeezing out too much and also with lifting of the first board at the feather end of its scarf. You can help that out by carefully drilling a pilot hole for a screw right through the scarf and carefully installing a temporary screw with a backing washer like this:
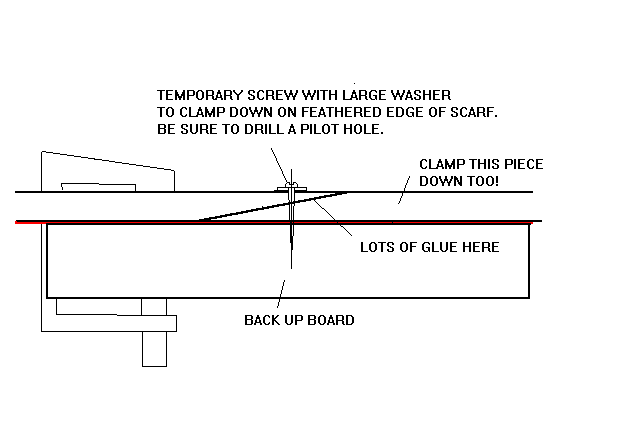
That temporary screw will help a lot for overall alignment while the glue sets. It's a fact that glue is very slippery until it sets up and tapered clamped joints like this can slowly slide apart without really good clamping.
DON'T PLAY WITH THE SCARFED LUMBER UNTIL THE GLUE HAS CURED REALLY HARD! It may take a few days, depending on your glue and your climate conditions. Almost no glues set well below about 70 degrees. When I did the Birdwatcher mast scarfs it was in the middle of a wicked winter. I cut the scarfs with the router fixture, glued and clamped them up, covered them with a blanket blasted a salamander kerosene heater under the blanket. It got well over 100 degrees under there and they cured very quickly. Those scarfs are still holding!
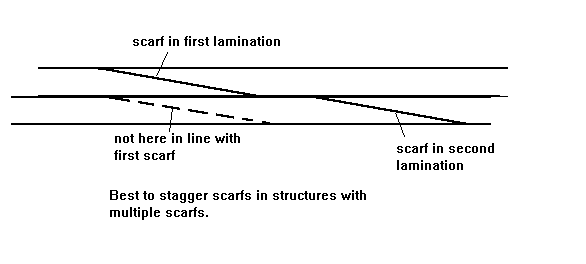
Once your glue is completely cured the joint should be as strong as the basic wood and you can go on building as if there were no joint there. But it doesn't hurt to be prudent. I try to locate the scarfs in wales and chine logs where the curvature will be the least. I try to locate the scarfs in masts towards the top, where the bending loads are the least. And on elements that have several boards with scarfs, such as wales with multiple laminations and boxed masts, I stagger the scarfs such that they are not all one atop the other.
NEXT TIME...
I'll present some thoughts about the weather.
Contents
VAMP
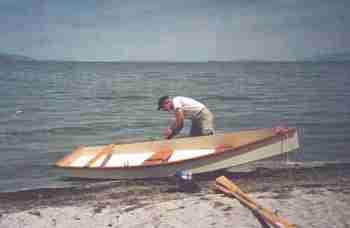
VAMP, LIGHT ROWBOAT, 12' X 3.5', 60 POUNDS EMPTY
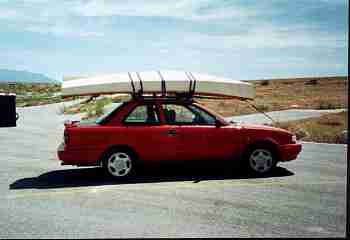
After the success Frank Kahr had with Robote I designed a smaller version with most of the same features. The idea was to get a fast and seaworthy boat that would cartop so easily that you would want to leave it on the car top more or less all the time, ready to go at a moment's notice. From cartopping smaller boats like Toto I had found that they hardly slow the car down or keep a compact car from getting 30+ miles per gallon on the highway. I thought the trick was to keep the boat small enough that complicated tie downs were not required. I also knew that Piccup, at about 90 pounds, is about the most a fellow would want to cartop. Lighter is better, of course, but once the weight gets below 70 pounds the boat becomes so easy to load that getting it super light is not mandatory. The prototype Vamp that you see here was built by Ken Prims of Layton, Utah. Here is his boat atop his compact car, a very nice package as I had hoped.
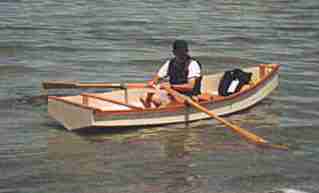
Why not stick to a canoe like Toto? It has the size, weight and shape (mild sheer and squared stern) that makes for easy cartopping. But a good rowing boat can be as fast, dryer, and take a passenger with more ease. The only problem I see with Vamp is that her V bottom can make beaching more challenging than a boat with a flat bottom plank.
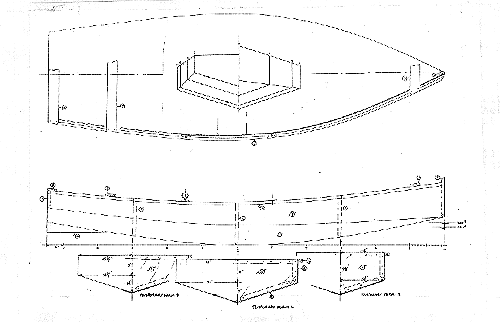
Construction is with taped seams from three sheets of 1/4" plywood, the same bill of materials as for the larger Robote. Robote will be a lot better if you are rowing with a passenger all the time. Vamp might be a handier impulse boat for a solo boater, although it can take two adults in a pinch.
Vamp plans are $20.
Prototype News
Some of you may know that in addition to the one buck catalog which now contains 20 "done" boats, I offer another catalog of 20 unbuilt prototypes. The buck catalog has on its last page a list and brief description of the boats currently in the Catalog of Prototypes. That catalog also contains some articles that I wrote for Messing About In Boats and Boatbuilder magazines. The Catalog of Prototypes costs $3. The both together amount to 50 pages for $4, an offer you may have seen in Woodenboat ads. Payment must be in US funds. The banks here won't accept anything else. (I've got a little stash of foreign currency that I can admire but not spend.) I'm way too small for credit cards.
Here are the prototypes abuilding that I know of:
Family Skiff: A Family Skiff has been started in Virginia.
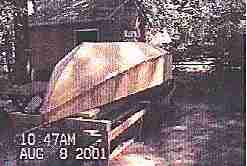
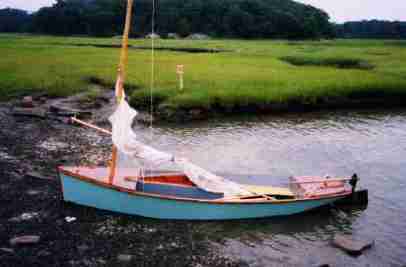
HC Skiff: One of these has been completed and sailed in Massachusetts. Here is one of the first photos - very pretty boat, I think. The builder has gotten many great comments from other boaters and it occurred to me that this boat was called the "Oystering Skiff, Cape Cod, taken off at Orleans (Massachusetts), Aug 7, 1933" in Howard Chapelle's great book American Small Sailing Craft, where I got the lines. So this is sort of a retro photo with classic boat in its classic Massachusetts setting.
Electron: An Electron has been started in California.
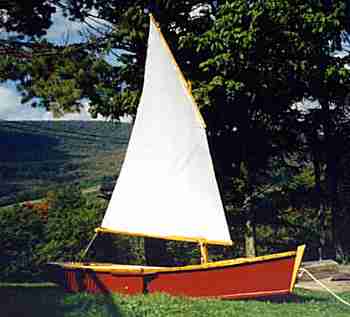
Mayfly: The prototype of the original 14' Mayfly is finished in New York state. Here it gets its lawn trials:
AN INDEX OF PAST ISSUES
Herb builds AF3 (archived copy)
Hullforms Download (archived copy)
Plyboats Demo Download (archived copy)