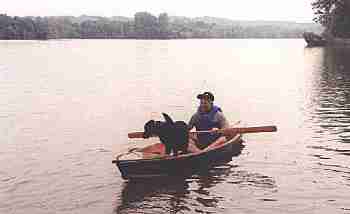
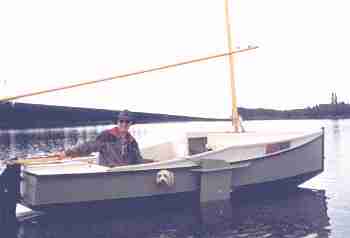
Nashville's Tagalong The Dog skippers her Piragua as Joe White provides the paddle.
Contents:
Contact info:
Jim Michalak
118 E Randall,
Lebanon, IL 62254Send $1 for info on 20 boats.
Jim Michalak's Boat Designs
118 E Randall, Lebanon, IL 62254
A page of boat designs and essays.
(1Sep01 ) This issue presents a couple of leeboard topics. Next issue, 15Sep01, will rerun an important issue about some capsize tests.
INDIANA MESSABOUT NOTICE: The 10th Annual Lake Monroe Messabout will take place on September 21,22 and 23. This messabout is on Lake Monroe, at the Paynetown State Recreation Area, all this about ten miles south of Bloomington, Indiana. No campsites will be reserved so congregate in the tent area, sites 1-10, 28-32. Pitch in dinner on Saturday night. For more info contact Bob Bringle at rbringle@iupui.edu.

|
Left:
Nashville's Tagalong The Dog skippers her Piragua as Joe White provides the paddle.
|
|
|
LEEBOARD ISSUES
THE VERY BASICS...I've covered sizing and placing of leeboards in previous issues that you can find down in the Way Back Issues link. But to recap, the things you might remember are that the immersed area of the board should be about 4% of the sail area, and that the leeboard must be mounted at the hull's widest beam in order to be in flow parallel to the boat's motion. The suggestion on area would apply to any board such as a centerboard or a daggerboard (but those boards need not be limited to mounting at the boat's widest beam). Lastly, the sail area has to be aligned with its sail area center right above the center of the board's area, more or less.
Here is an example of a leeboard on Slam Dink.
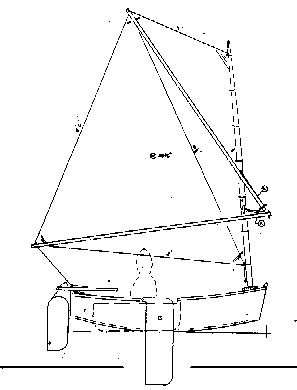
Notice that it pivots around a bolt which is placed to allow the board to retract fully above the bottom of the hull. You can't tell from the drawing but the pivot bolt runs through a lower hull guard and the top of the leeboard runs in a slot in an upper hull guard. The board is thus braced to take loads in both directions, unlike a tradional loose leeboard. As a result only one of these pivoting leeboards is needed on the boat, it works on both tacks, where the tradional loose leeboard only works on the lee tack so two are required. In truth these pivoting leeboards aren't really leeboards but are more like centerboards mounted outside the hull. While sailing you handle it just like a centerboard - just leave it down almost all the time except maybe while running and broad reaching. But I'm still going to call it a leeboard.
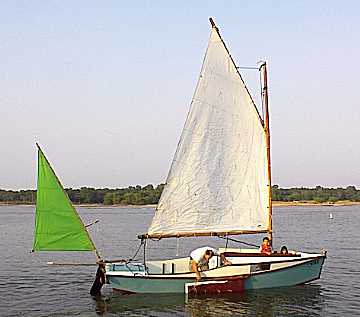
The pivoting leeboard has several advantages. They are easily built and altered. There are no holes required through the hull except for the pivot hole. Best of all the leeboard takes up no room on the boat's interior. On the Slam Dink that same board mounted as a centerboard would take up the whole interior. You could see the same situation below on Richard Spelling's AF2 (shown with an experimental mizzen sail).
HANDLING THE LEEBOARD...
I've found that no ballast is required for these boards, they are laminated from layers of plywood with the edges streamlined. If they are loosely pivoted they have a natural tendency to drop down a bit so that they might drop about 20 or 30 degrees until the buoyancy of the immersed segment balances the weight of the board. If you are trailering your boat it is often prudent to secure the board in the full up position so it doesn't catch on things while launching. That happened to me once while launching my Birdwatcher which has a conventional centerboard. I bashed away at it perplexed until the tiny voice of a six year old watching said, "Mister, that board thing on your boat is catching your trailer."
So in that AF2 photo Richard is releasing a line that secures the leeboard in the up position.
How to get the board down? Easy. There is an ear attached to the upper aft edge of the leeboard that sticks up through the upper guard and there is a lanyard attached to it. Grab the lanyard and pull back on it and the leeboard rotates down until it goes kerplunk against the aft end of the slot in the upper guard. Here is Richard hauling the board down.
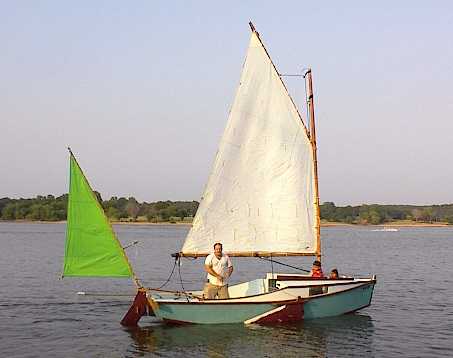
Once the board is down it prefers to stay down, especially if there is a bit of friction between board and guards applied by tightening the pivot bolt. There are two things that can make it pop up. First if it strikes something like a stump or the bottom. Second is drag on the board when there is no side load on the board such as when running downwind or sometimes when tacking through the eye of the wind.
Once that happens the board will pop up to its comfortable 20 or 30 degree position and stay there until you yank it back down. In the partially down postition the board will still provide skeg effect when running downwind. But some boats will steer better downwind if the board is pulled down again and you might experiment with that. In the situation where the board pops up while tacking through the eye of the wind, you must pull it back down again to sail on the new tack. As always, if the boat suddenly feels funny while tacking through the wind, always check the leeboard first and make sure it is down.
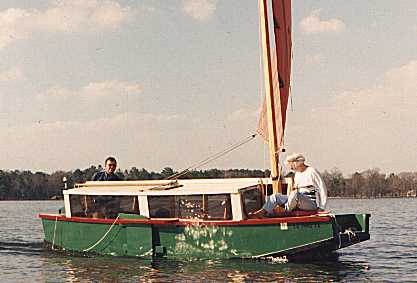
It is possible to cleat off the lanyard to make sure the board stays down but you must remember to release it before running into shallows. I don't do that myself. Instead I prefer to run the lanyard back around an oarlock and into the cockpit. The oarlock acts as a turning block. Here is a photo of Herb McLeod's AF3 and you can clearly see the leeboard, upper leeboard guide, pivot bolt, and the lanyard running aft to a cleat which is handy at the back edge of the cockpit.
Again, usually on a boat like AF3 I would run the lanyard through the oarport and around the oarlock (Maggie the Dog would not appreciate that) and not cleat it off. But I do use a cleat on the forward end of the upper leeboard guard. I can secure the board in the up postition by leading the lanyard forward to that cleat. But in normal use the board is cleated up only while trailering.
Birdwatcher type boats have a problem with a leeboard like this in that there is no convenient access to the outside of the hull to handle that lanyard. My suggestion would be to run the lanyard through a small hole in the side of the hull which is kept radiused to act like a bearing. Pull the board down at any time that way without leaving the inside of the boat. No need to ever pull it up except to trailer.
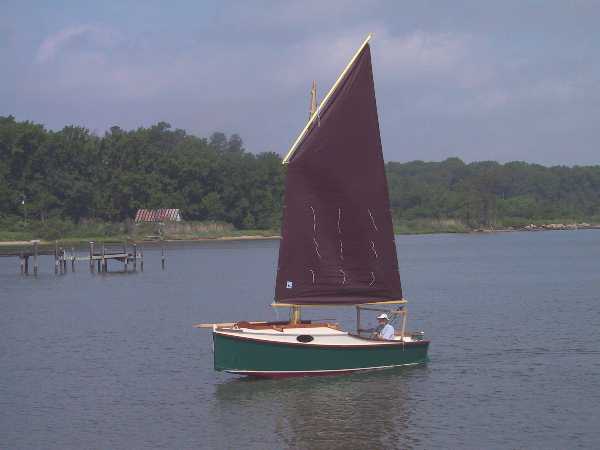
No one has done that but some of those boats have lanyards running fore and aft to be captured by cleats on the fore and aft decks. So you can pull the board around like a puppet in any direction. Here is a photo of Karl James' Jewelbox chuckling along. You can see here the leeboard, the upper and lower guard, pivot bolt, and a loose lanyard running outside the hull to a cleat on the aft deck. (There is also a line running forward but it's not really visible.) You can see there is no tension required in that lanyard to keep the board in the down postion.
WHAT'S THAT VIBRATION???...
This one applies to any foil running through the water such as leeboards, daggerboards, centerboards and rudders. It is expecially true for deep narrow foils of the type preferred for low drag.
If the leading and aft edges of these boards aren't properly streamlined they will vibrate. That happened to me in the original Piccup Pram which had a really long narrow board. I wrote to Bolger about the problem and his answer was something like this:
"Streamline the edges more. If it still vibrates, streamline it some more."
So I streamlined the edges and the vibration went away. Bolger has seen everything.
We recently learned an intersesting spin on this. Richard Spelling was having problems with his leeboard vibrating and was getting tired of streamlining the edges. About the third time he wrote me about the problem, I had just received an issue of Small Craft Advisor and there it was - a discussion about foil vibration by the racing boat designer Stephen Baker.
Here is what Baker said:
"...A thin trailing edge, if faired into the shape properly, is a must. Do NOT round the trailing edge, rather cut it square and thin, and then bevel it about 30 degrees (doesn't matter which side) to stop it from vibrating at speed..."
A few days later Richard wrote me back, "Thinning and beveling worked pretty well. All leeboard vibration gone. Thanks guys."
NEXT TIME...
I'll rerun an important capsize issue.
Contents
NORMSBOAT
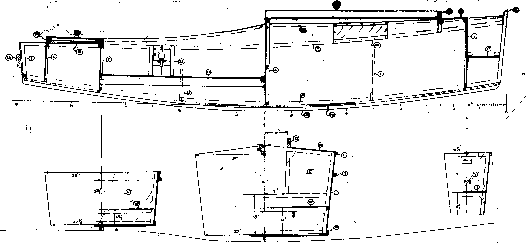
NORMSBOAT, 18' X 5-1/2", 600 POUNDS EMPTY
Normsboat was designed for Norm Wolf of Washington D.C. to join a group of trailer traveling shallow water sailors. He wanted the ability to motor and self rescue in a knockdown. Simplicity of rigging was also of importance. The prototype was built mostly by Richard Cullison of Cullison Smallcraft with some items done by Norm. Richard has presented a fine photo essay of the construction at his web site.
A real motor mount is the first reality that you face with almost any boat that is supposed to be on a schedule. Normsboat has a very short motor well in the stern that is full width. Small fuel cans can go there too, as can the extra anchors, boots, etc. Actually Norm hasn't used the motoring ability of his boat (yet) and uses a 12' long yuloh oar instead which you can see lashed to the deck of his boat - it looks like a bow sprit but it isn't. I show oarports on the drawings, another way of getting around without a motor in calm conditions. That, by the way, is the achilles heel of the idea of using oars instead of a motor on a sailing boat. The oars will work in calm conditions but they can't save your butt in really bad going like a good motor might.
Just forward of the well is a buoyancy/storage chamber. Very important in a knockdown, a chamber like this is supposed to hold the stern up when the cockpit floods, keeping the boat level and preventing flooding in the cabin. Forward of that is a 6' long cockpit with bench seating giving Normsboat the capacity to sail several adults. Forward of that is a 7-1/2' cuddy cabin right out of AF4. It has a slot top which allows you to walk right to the bow of the boat. In bad weather you cover the slot with a tarp. There is room to sleep two but they have to be great chums, the idea is for it to be a solo cabin. And finally there is a small well in the bow for a messy anchor.
Norm did a practice capsize in calm conditions. It worked but I think most of us hoped the cabin slot would have more freeboard when the boat was on its side. I thought the AF3 capsize test went a lot better in that respect. I'm not sure why there is so much difference between the two. Anyway, I'm hoping for an AF2 practice capsize before making any decisions about it. Normsboat righted very easily when Norm grabbed the bottom and very little water inside the cockpit and none anywhere else. But I would be worried about a wave washing into the cabin slot in rough water and would make an effort to fit watertight hatches over the slot in rough going. I hope to write more about this in a later issue (if I figure it out).
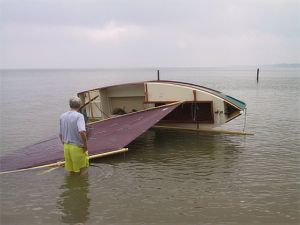
The sail rig is right out of AF2 except here it is rigged as a balanced lug sail to make the rigging quicker. It also allows a lighter mast. On the downside, the mast must be stepped in the cabin but it won't be a bother to a solo cruiser. The boat could be rerigged as a gaffer as with AF2. Pivoting leeboard and rudder make sailing in shallows very easy.
Norm used to have a Dovekie. Phil Bolger, who designed Dovekie, would point out that the idea behind Dovekie was that it be non motorized and he would be disappointed that no one wants to row and everyone adds a motor. But almost every feature of Normsboat is something I learned from Bolger ..... the highly rockered sharpie hull, the double planked bottom (strength and weight where it is needed), the draining wells bow and stern, the emergency buoyancy system, the slot top cuddy, the lug sail with off center mounting, and the single pivoting leeboard.
Fourteen sheets of 3/8" plywood with simple nail and glue construction. No jigs, no lofting.
Plans for Normsboat are $40.
Prototype News
Some of you may know that in addition to the one buck catalog which now contains 20 "done" boats, I offer another catalog of 20 unbuilt prototypes. The buck catalog has on its last page a list and brief description of the boats currently in the Catalog of Prototypes. That catalog also contains some articles that I wrote for Messing About In Boats and Boatbuilder magazines. The Catalog of Prototypes costs $3. The both together amount to 50 pages for $4, an offer you may have seen in Woodenboat ads. Payment must be in US funds. The banks here won't accept anything else. (I've got a little stash of foreign currency that I can admire but not spend.) I'm way too small for credit cards.
Here are the prototypes abuilding that I know of:
Family Skiff: A Family Skiff has been started in Virginia.
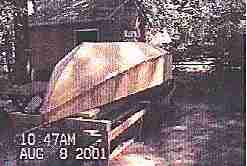
HC Skiff: One of these has been completed and sailed in Massachusetts. Waiting for photos.
Electron: An Electron has been started in California.
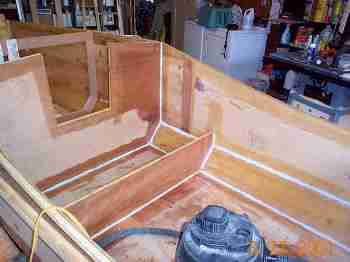
Mayfly: A prototype of the original 14' Mayfly is going together in New York state.
AN INDEX OF PAST ISSUES
Herb builds AF3 (archived copy)
Hullforms Download (archived copy)
Plyboats Demo Download (archived copy)