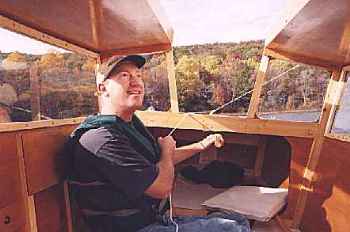
Erwin Roux sails his new Jewelbox Junior in Pennsylvania.
Contents:
Contact info:
Jim Michalak
118 E Randall,
Lebanon, IL 62254Send $1 for info on 20 boats.
Jim Michalak's Boat Designs
118 E Randall, Lebanon, IL 62254
A page of boat designs and essays.
(15feb02) This issue will will continue the series about assembling an "instant" boat. I think the subject will be completed in the next issue.
ON LINE CATALOG OF MY PLANS...
... can now be found at Duckworks Magazine. You order with a shopping cart set up and pay with credit cards or by Paypal. Then Duckworks sends me an email about the order and then I send the plans right from me to you. The prices there are $6 more than ordering directly from me by mail in order to pay Duckworks and credit charges. The on line catalog has more plans offered, about 65, than what I can put in my paper catalog and the descriptions can be more complete and can have color photos.

|
Left:
Erwin Roux sails his new Jewelbox Junior in Pennsylvania.
|
|
|
Making A Hull 3
THE BOTTOM...
With the hull inverted on saw horses, go over the bottom edges with sanding blocks, or rasps, or belt sanders, or what ever is required, to make the bottom fair and ready to accept the bottom planks.
Here is another warning about checking your alignment. As you start to box the hull in it will get really rigid. If you install the bottom correctly so that the hull is straight, you will have a good straight hull with its shape locked in. If your boat is crooked after you put on the bottom it will be crooked forever. Check that those centerlines are all in a row.
Only the smallest of boats can be planked over the bottom with a single sheet of plywood. All the rest require joining plywood panels together. Unlike joining the side planks, the bottom planks will not be precut to shape and joined with butt plates before assembly to the hull.
The bottom of a flat iron skiff is put on oversized and trimmed to shape after assembly, like a pie crust. Here is how I do it.
Where you start with the first panel is not too critical. Usually the plans will show you where to start. Let's say you have a 15' boat and the plans show to start planking the bottom with a 4' long piece at the stern. I would hoist the piece into position and clamp it in place long enough to track the hull shape on it. Then remove it and cut to shape well outside of the traced line. Put it back in place with temporary screws or clamps.
Now to prepare that piece with a butt plate that will join it to the next piece. The plans will suggest the size of the butt plate. Let's say it is a piece of lumber 3/4" x 3-1/2". This piece will be centered on the joint of the two bottom panels, 1-3/4" on each side of the joint. So draw a line down the center of the of the piece, trial fit it into position, and mark where it would need to be cut to fit at that joint, inside the bottom, between the sides.
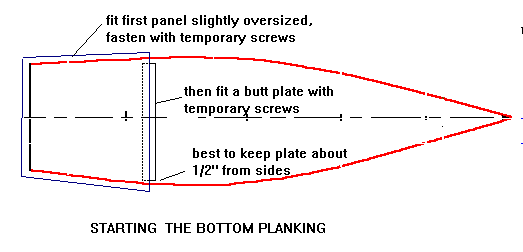
I prefer to cut the butt plates on the bottom about 1/2" short of the sides to provide a limber channel to prevent the trapping water at the butt plates (which may later cause rot) and to provide a place for an epoxy fillet later which will help seal the plywood edges of the sides (and makes the boat easier to clean). But there is no doubt that the bottom is slightly weaken at those points and I wouldn't argue with anyone who ran the butt plates right out to the sides. Take care in gluing and fastening the butt plates, especially near the ends of the plate.
With the butt plate cut to length, butter up the surface that will mate with the bottom panel you just installed, clamp it into position and secure it with screws or nails. What you have now is a bit of a shelf at the end of that bottom panel to accept the next panel.
When you do a bottom like this you don't have to wait for the glue to cure on one panel before going to the next. In fact I would suggest you do the entire bottom in one session if you can.
So right on to the next panel. Hoist it onto the bottom, trace it, cut slightly oversized and screw it temporarily into position. Glue and nail it down at the butt plate. (In some cases you might have to remove the bottom panels to permanently install the butt plates because the curvature of the bottom is too great to install it in place without a "kink" resulting at the butt plate.) Install the butt plate that will take the next section. It is a bit like laying bricks. On a 15' boat the bottom could have as few as two panels or as many as four.
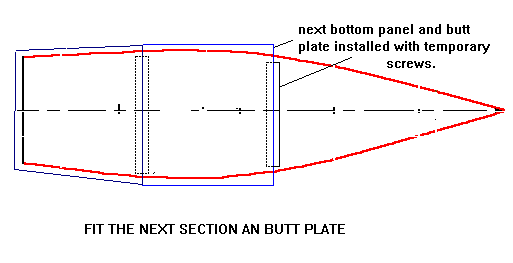
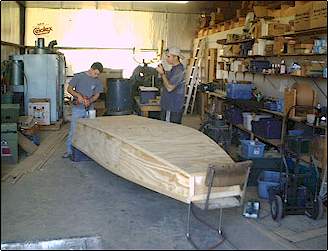
In real life it might look like this:
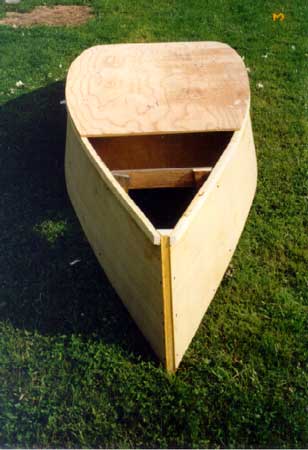
Finally undo the temporary bottom screws, shift the bottom so you can butter up the chines with glue, replace the bottom and reinstall the temporary screws. Nail about every 6" and replace the temporary screws with nails.
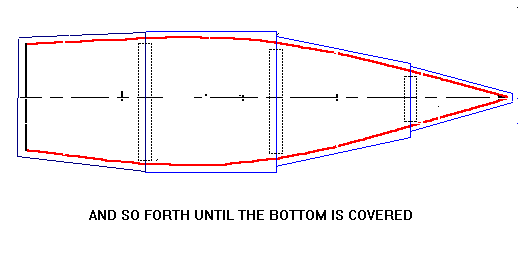
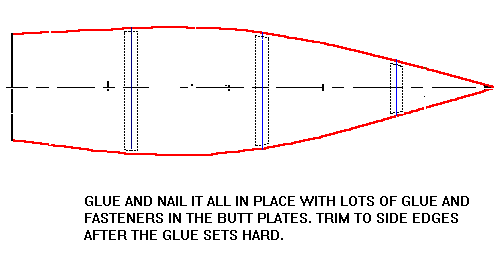
At this point it is probably too late to change any hull alignment problems. It will be too rigid. Prop it up and clean up all the glue drips you can find so you don't have to sand them off later. Walk away from the project and let the glue cure hard.
FINISHING THE BOTTOM...
TO GLASS OR NOT TO GLASS...
If you expect to get hard use out of your boat you should think about fiberglassing the entire bottom. If not you can save money and work and weight by just glassing the chine edges and the butt joints.
Carefully trim the out edges of the bottom panes flush to the chine logs and give the chine corners a good radius, at least 1/4" radius. A belt sander is a great tool for that job.
Go over the bottom with epoxy putty and fill any flaws and gaps. Allow it to cure hard and then sand smooth. Draw a centerline on the bottom. Mask the sides of the boat so that epoxy dripping down on the sides will not leave you with lumpy sides.
It must be stressed that you have to do the epoxy work all at once. If you allow one section or layer to cure before applying the next, you must sand everything and even then you may not get the adhesion that you will if the whole job sets up at once. So be well prepared. (I'm reminded of the early days of foam/epoxy homebuilt airplanes. The designers bragged you could build the wing in a day. The people who prefered the older techniques pointed out you MUST build the wing in one day.)
If you are glassing the entire bottom use something like 6 ounce fiberglass cloth. Trial fit the glass panels you will use, wrapping them around the chine corners about an inch. Mix up some slow setting epoxy, the thinner the better. Lift up a piece of you bottom glass and paint a heavy coat of epoxy on the bottom wood, getting it really heavy on the chine corners where the edge grain will soak up the epoxy. Lay that section of glass over the wet epoxy and paste it down. Soak the cloth with more epoxy until the cloth texture is full, rubbing the epoxy in with a paint brush or a squeegee. Be very careful of the chine edges. Make sure there is plenty of epoxy there and that the glass sticks tightly to the corners with no sign of epoxy starvation there. Glass which has been wetted through looks clear. Glass which is not completely wetted through will have a white appearance.
Once the bottom glass is on and before it cures, paste on another layer of 3" wide fiberglass tape (it comes in rolls and is not adhesive tape) over the chine corners. It is a nice touch to offset the edge of the second layer about 1/4" to make for a more gradual transition from wood to glass. Paint it down very well with unthickened epoxy. The corner will now look like this:
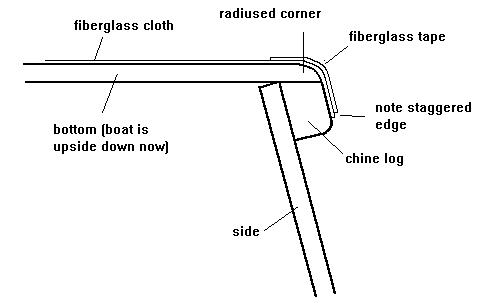
If you are not glassing the entire bottom, you must armor at least the chine edges with two layers of fiberglass tape set in epoxy and seal the bottom butt joints with a layer of fiberglass tape set in epoxy.
Walk away from the job again until the epoxy has totally cured. Then I advise that you give the entire bottom a light sanding, filling flaws with thickened epoxy.
If your boat has a bottom skid/stiffener, now is the time to put it on. These parts aren't easy to install. Getting the joint between the bottom and the skid watertight is pretty important to avoid rot. Draw the location of the skid on the bottom and drill screw holes in the bottom about every 6". Apply a lot of thick glue or epoxy to the area of the joint and press the skid into position. Most likely you will have to hold it down temporarily with a few screws driven from the outside. Then crawl inside the project and install the screws from the inside through those holes you predrilled. Not much fun but you should be able to get a good straight installation with good glue squeeze out all along the skid. Remove the temporary screws that you drove from the outside in.
Right now you can finish the bottom of your boat with paint and with luck never have to turn the boat upside down again. Fill and sand to your satisfaction but remember that pro boat builders spend half of their labor sanding and painting. Once satisfied, apply paint. Usually I suggest two layers of latex primer followed by two coats of color. Paint is always a big arguing point with boats. A good brand of latex house paint should do you well. If you have coated the bottom with epoxy you won't really need the primer if you are using latex. If you are using oil paints, be sure to check to see if the paint is compatable with epoxy because some will not cure on top of epoxy. They say there is no way of checking besides to paint a section and see what happens because paint companies change their formulas all the time. Others say to allow paint to cure for a week or two before trying to move the boat. I was never so patient.
With the bottom totally done you can put your boat on a trailer now if you wish. Wheel it around as needed. Block it up steady when you work on the project.
Usually you can remove the temporary forms at this point.
With the boat upright and forms removed, you should add a fillet of thickened epoxy around all the interior joints like this:
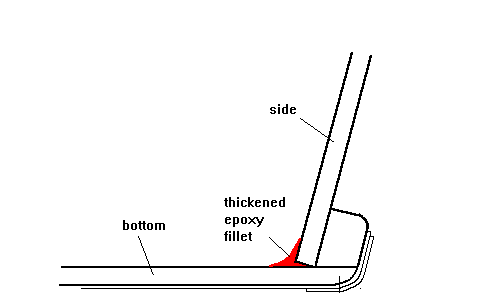
I think these fillets are the most useful thing a fellow can do to improve the lifespan of his boat. They keep water from getting into the nooks and crannys and prevent water from seeping up the endgrain of the wood. They also make the boat a lot easier to clean. Epoxy is the stuff to use here. In my experience materials like auto body filler and RTV aren't suitable.
DECKS...
Trial fit your decks, mark the plywood to shape and cut it out.
Before you install the decks consider whether to first paint the interior of the hull.
Hatches in decks can be installed now. Cut the hatch opening in the deck plywood and frame the opening with lumber coamings. I try to interlock the ends of the coamings like this:
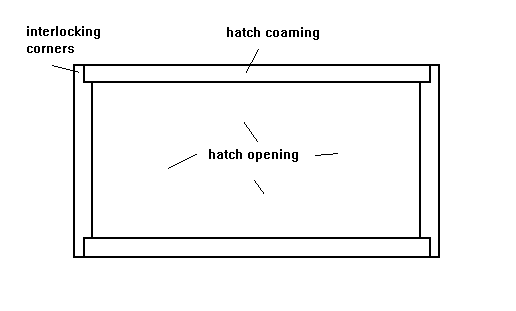
There will be some decks that may need to be removed in the future. In those cases you probably should secure them to the hull with screws and a sealing caulk. Latex caulk is usually what I use since RTV sealants can be so adhesive that they will prevent removal of the deck - you will have to cut it away.
Most decks can be installed with nails and glue.
There is one trick to installing decks in cuddy cabins that I want to show. On many designs the deck "clamp", which is the piece of lumber that connects the deck to the hull, curves around the front of the boat and ends abruptly at a bulkhead, where the sides and wales continue in a smooth curve to the stern. If you were to install the clamp in the usual way and end it aburpty at the bulkhead as shown on the plans, you would find that it doesn't want to take the same curve as the sides! What has worked very well to correct the situation is to extend the clamps past well past the bulkhead into thin air, and then spring those ends inward with a cross stick. Like this:
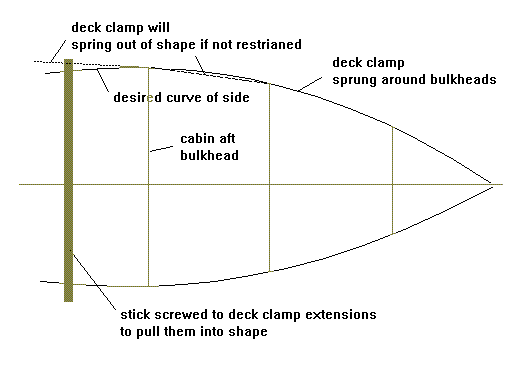
Keep the clamp extensions and stick in place until the cabin decks are shaped and nailed in place. That will hold the clamps in shape and you can then trim them to final length.
NEXT TIME...
...We continue building a hull.
Contents
SPORTDORY
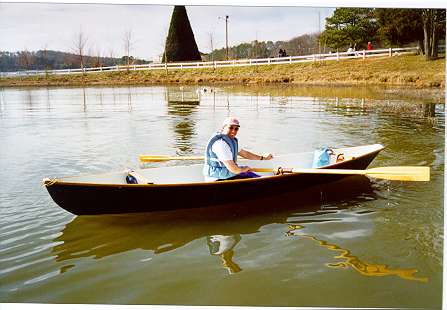
LIGHT ROWBOAT, 15' X 4', 70 POUNDS EMPTY
SPORTDORY
Sportdory is an attempt to improve upon the Bolger/Payson dory I built about 15 years ago. This boat is slightly smaller than my old dory. In particular the bow is lower in hopes of cutting windage. the stern is mostly similar. The center cross section is about identical. This boat has slightly more rocker than the original Bolger dory.
The hull is quite simple and light, taped seam from three sheets of 1/4" plywood, totally open with no frames. The wales are doubled 3/4" x 1-1/2" pieces to avoid the wale flexing my first boat had. I've added an aft brace to stiffen it up and give the passenger a back rest.
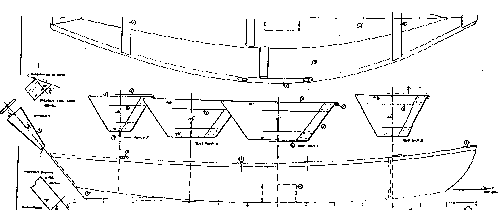
Mine once covered 16 statue miles in four hours. In rough water you will feel the waves are about to come on board but they won't. But if you try to stand up in one it will throw you out with no prayer of reentry.
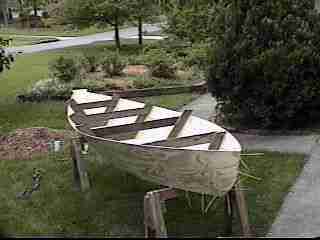
The prototype was built by John Bell of Kennesaw, Georgia. Here is a photo of John's Sportdory under construction. You can see the sides and bottom, precut to shapes shown on the plans, wrapped around temporary forms and "stitched" together with nylon wire ties in this case. I'm quite certain that with this design one must leave the forms in place until all the structural elements like the wales and cross bracing have been permanently installed. If they are removed before then, the assembly will change shape and you won't get the same boat. In particular I think the nose will droop to no one's benefit.
One might wonder about a comparison of Sportdory, Roar2 and QT. They are all about the same size and weight, a size and weight I've found ideal for the normal guy. They are small enough to be manhandled solo yet large enough to float two adults if needed. They are all light and well shaped for solo cartopping. Roar2 is probably the most involved to build and the best all around of the three. Sportdory is simpler and lighter, at least as fast and as seaworthy, but most likely will feel a little more tippy and less secure. You shouldn't really try standing up in either of these two. QT will be the least able of the three as far as speed and seaworthiness but may be the easiest and cheapest of the three and is stable enough to stand up in. So take your pick.

Sportdory plans are $20.
Prototype News
Some of you may know that in addition to the one buck catalog which now contains 20 "done" boats, I offer another catalog of 20 unbuilt prototypes. The buck catalog has on its last page a list and brief description of the boats currently in the Catalog of Prototypes. That catalog also contains some articles that I wrote for Messing About In Boats and Boatbuilder magazines. The Catalog of Prototypes costs $3. The both together amount to 50 pages for $4, an offer you may have seen in Woodenboat ads. Payment must be in US funds. The banks here won't accept anything else. (I've got a little stash of foreign currency that I can admire but not spend.) I'm way too small for credit cards.
Here are the prototypes abuilding that I know of:
Electron: The California Electron is coming along. Right now a four cycle 2 hp outboard has been purchased so the original electric idea may wait a while.
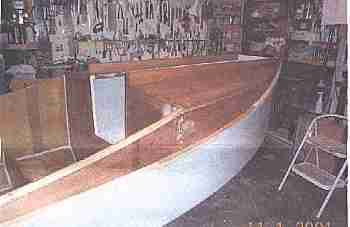
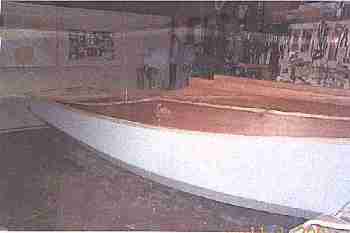
Mayfly: The prototype of the original 14' Mayfly is finished in New York state. Here it is on its first sail (Long Island Sound).
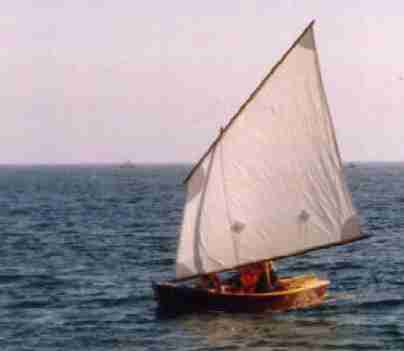
A Jewelbox Jr has been completed (with a lug rig) in Idaho. Waiting for good photo and some more testing but so far so good says the builder. Another has been completed in Pennsylvania and I have a report and photos to present, maybe next issue.
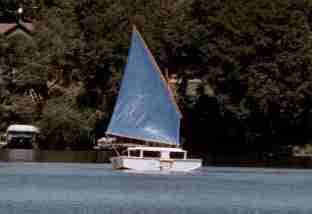
A Campjon is being built in exotic Queensland, Australia, and now another in New York.
AN INDEX OF PAST ISSUES
Herb builds AF3 (archived copy)
Hullforms Download (archived copy)
Plyboats Demo Download (archived copy)
Brokeboats (archived copy)