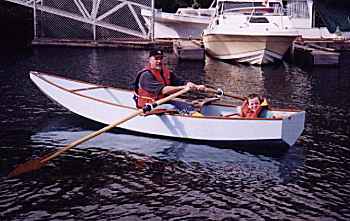
Brian Walker pulling oars on his Roar2 with son Murphy in British Columbia. Check out his website to see his project with sliding seat adaptation
Contents:
Contact info:
Jim Michalak
118 E Randall,
Lebanon, IL 62254Send $1 for info on 20 boats.
Jim Michalak's Boat Designs
118 E Randall, Lebanon, IL 62254
A page of boat designs and essays.
(15may02) This issue will present a builder's essay about building the HC Skiff. The 1jun02 issue will rerun the ever important Sail Area Math essay .
ON LINE CATALOG OF MY PLANS...
... can now be found at Duckworks Magazine. You order with a shopping cart set up and pay with credit cards or by Paypal. Then Duckworks sends me an email about the order and then I send the plans right from me to you. The prices there are $6 more than ordering directly from me by mail in order to pay Duckworks and credit charges. The on line catalog has more plans offered, about 65, than what I can put in my paper catalog and the descriptions can be more complete and can have color photos.
Note: The Duckworks manager is back from vacation and the Paypal system is working again.
THE 13th ANNUAL MIDWEST HOMEBUILT BOAT MESSABOUT will take place on June 8 and 9 at the Gun Creek Recreation Area at Rend Lake in Southern Illinois. Take exit 77W off I-57, head towards the golf course and you will see the signs. Lots of people arrive on Friday and leave early on Sunday. The camping fee is now $10 which includes the ramp fee at this Corps of Engineers facility. There is no schedule of events. We have a pitch in dinner on Saturday evening.

|
Left:
Brian Walker pulling oars on his Roar2 with son Murphy in British Columbia. Check out his website to see his project with sliding seat adaptation
|
|
|
Building HC Skiff
BUILDING THE HC 18, by Dan Roach
"The HC 18 was derived by Jim from illustration #36 of Howard Chapelle's American Small Sailing Craft, and it's an 18 foot Cape Cod Oystering Skiff.
I selected the boat after more than a year of reading boatbuilding books (apparently not the right ones though, more on that later) and corresponding with builders and designers. My criteria were as follows, it had to be big enough to hold me and a couple of kids, have a classic look, robust enough to be trailerable and deal with beachings on the rocky shoreline that's common here in NE, stable, easy to build (first time for me) and inexpensive. After a lot of reading, I initially ordered plans for a Stevenson Weekender - which I read and then sold on eBay - it's a pretty boat, and seemed reasonable but it somehow didn't resonate with me. I then ordered a set of Selway-Fisher plans for a Highlander 18. The plans were quite intimidating and pretty complex, but it was the closest thing in print to what I had in my minds eye.
After running the calculations on the cost of materials and estimates of building time, I sold those plans on eBay and started to build a Bolger Gypsy from Payson's Instant Boat book. The Gypsy was smaller than I'd like, but it was pretty to look at and seemed easy to build. At that point, I was frankly getting plan fatigue and I just wanted to start to cut wood! I'd actually cut out the transom for the Gypsy when I found the prototype catalog from Jim, and the rest is history. I was attracted by the fact the plans were taken directly from the old lines table, and that felt more pure. I wanted a boat that was unique and throughout the search process I was drawn more and more to working boats. After I ordered the plans from Jim I read Howard Chapelle, and it was an epiphany. If I'd started with Chapelle in hand I could have saved a year, as his discussions of work boats, pleasure boats and hull designs were all my questions and searching answered in one place
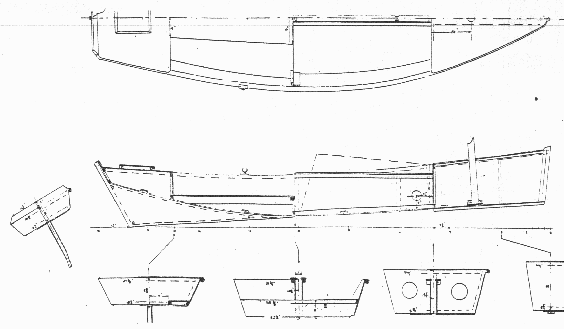
So, the 3 pages of plans arrived from Jim and I began the process. My tools were very modest - a cordless B&D circular saw, cordless drill, an old circular saw, and assorted hand tools such as planes, hand saw, and others. No table saw, no band saw, no routers, no planers, nothing fancy like that. I'd loved to have them though, but they weren't in the budget and I didn't anticipate needing them, nor did I in the long run. Without going into details of all of the construction steps (which I'd be glad to in person), the 3 pages of plans were simple stitch and glue construction. In my opinion, the first and most important step is to build a model of the boat, out of heavy duty poster board. Get a glue gun, and in an evening you'll have done yourself a great service in understanding how the process will work.
After that, my next step was to assemble the frames out of 1/4" exterior luan (used for the whole boat - boil a corner for a couple hours though to be sure it's really waterproof) and spruce/pine depending on whatever was around my garage. Then, the plywood sides and bottom were scarfed together using epoxy and tape. Also, when someone tells you the scarfs are stronger than the wood believe them. I broke 2 sides during my own "experiments" all the while thinking, "Gee, I can't believe how flexible this wood is". The a loud snap as the wood broke, and lots of cursing. The second time. The first time I didn't curse since it was an experiment. Second time was it was a verification of the first experiment and but it really amazed me how far it would bend before breaking and I had to see if it was an anomaly. It wasn't but I cursed anyway.
The boat was initially assembled right side up. The sides were connected to the stem, frames and transom, affixed into place, and the boat was inverted in order to attach the bottom. Get help for this step. I was reluctant to ask for assistance, but believe me, you'll need help!. The bottom shape was pretty close to correct, I'd left it oversize to adjust for any errors I'd made. Adjust and shifting the bottom was tough, since the wood was essentially a 6 foot wide 20 foot long piece of 1/2" plywood. It has quite an arc in it as the hull shape is graceful. Have some weights around to help you convince it into shape. I got in on, trimmed it, and used plastic cable ties to stich it in place and then epoxied it on. Then I turned the boat right side up and epoxied in all the frames.
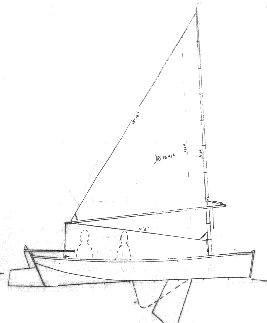
Then, turned the boat over and cut out the centerboard slot, installed the skeg, and then put on 2 layers of cloth and epoxy on the sides and bottom and primed and painted it. Then turned the boat right side up and built the seats, installed the centerboard case, and the decks. I reinforced the mast step more substantially than the plans called for, as I was being conservative. Same is true for the centerboard case. I then built the centerboard (which I weighted down with about 20 lbs of lead, built the rudder, made the mast, sprit boom, a pair of 8 ft oars, tiller (from an old piece of teak from a couch that was being thrown away). I installed a lot of styrofoam for flotation in the front and rear compartments of the boat. The cleats were made by me out of oak and maple. They were surprisingly easy to make, they're very strong, and add a great deal to the appearance boat.
A note to builders though - I used a lot of epoxy - several gallons of it! When I build my next boat, I'd consider one of the giant containers instead of multiple gallon containers. Don't waste your time with any wood glue - elmers, titebond, whatever the brand it doesn't matter it's all junk and unable to stand any substantial stress. Use thickened epoxy. It's expensive, takes forever to dry, but it's worth the extra effort.
For sails, a friend gave me an old genoa from a Typhoon that's very close to the dimensions of the mainsail called for in the plans. The cut and draft of the sail is wrong though, so the performance suffers somewhat heading windward. Next year I'll have a real sail. But the price was right.
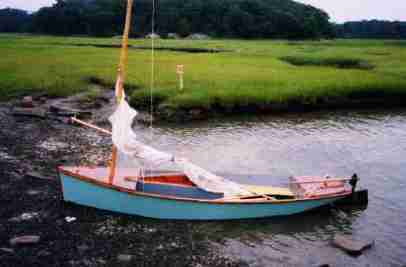
In total, including epoxy and fiberglass the materials for the boat were around $1200. The rigging is very simple, as I tried to put myself in the shoes of an oysterman circa 1900. The boat fits nicely on a $500 trailer (I had to buy it new, all the used ones were junk) that's meant for a 16 ft boat. We tow it behind a minivan without issues. It's been up and down the sea coast of Maine, NH and Mass, with up to 5 people and a dog. It's a pretty dry boat, only once came close to putting the rail over. The mast bends to dump out excess wind, and you get a lot of warning from the boat if there will be trouble. When I sail it alone, I try to bring some sand bags as ballast at it handles much better with more weight without appreciable loss of speed. Coming about is a gentle process since if you push the tiller too fast the boat simply stops and then begins to blow backwards. Then it's like backing up a trailer to get the nose of the boat windward again. Stepping the mast and rigging the boat takes between 10 and 30 minutes, depending on how many people talk to you in the parking lot. Invariably, someone will also approach you on the water as well to ask about the boat. The shape of the hull and the shape of the sprit rig really stand out amid the rest of the fleet. I didn't select the boat for those reasons, nor do I seek out the attention, but I will admit to feeling pride when complimented and it's a nice byproduct. My hat's off to Jim for transcribing the plans into a great boat!
Dan Roach Tel: 781.290.5060"
Plans for HC Skiff are $30.
NEXT TIME...
I'll rerun the Sail Area Math essay.
Contents
Mayfly14

MAYFLY14, ROW/SAIL SKIFF, 14' X 4', 150 POUNDS EMPTY
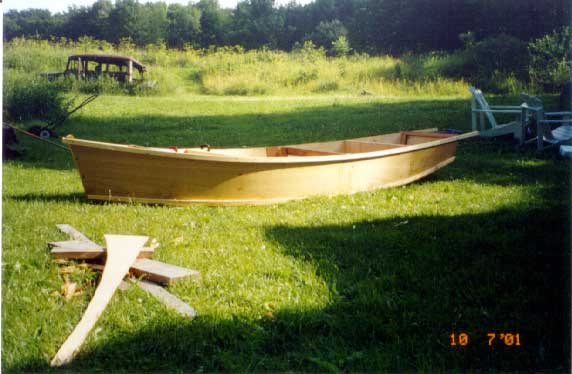
Mayfly14 is a straight forward flat bottomed plywood skiff for sailing and rowing. She's easy to build because her planks have no twists. That means that the chine log and wale bevels are constant for all practical purposes and can be presawn before assembly. The construction is of the simplest nail and glue variety with no building jigs or lofting required - an "instant" boat. The prototype was built by Garth Battista and kids in Halcottsville, NY.
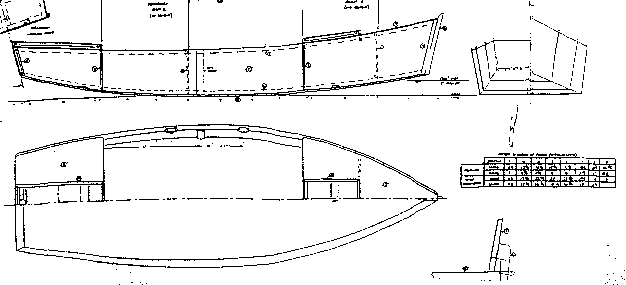
I think this boat is about the right size for a lot of folks, although I might argue that it is too heavy to cartop with comfort and once you decide to trailer a boat you might as well go to a sixteen footer. Mayfly14 will take two adults easily and yet still be a wonderful solo boat.
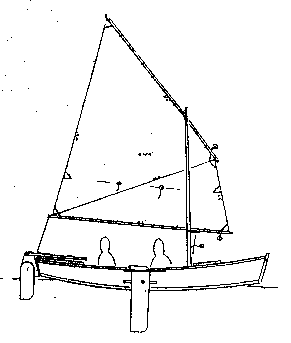
The sail rig is a balanced lug which is easy to build and stow. I recommend that my customers sew their own sails either from common polytarp (as Garth did in the boat shown above) or real Dacron sailcloth. The plans show instructions for sewing in real sailcloth. You need a sewing machine that sews zigzag stitches and cheap home machines are usually good at that. I don't claim to be the world's best sailmaker but it is not majic. I can do it and so can you. The clothes you are wearing are ten times more complex than a small sail. There are a few rules to follow and I give an essay on that with each set of sailboat plans. In fact I suggest you sew your sails before you build your hull. Both sail and hull require about the same work space. Sew the sail first, roll it up, stuff it in a closet, and now your workspace is ready for your hull. Getting the sail done can get you over a big mental hurdle.
Mayfly14 needs three sheets of 1/4" plywood and two sheets of 1/2" plywood.
Mayfly14 plans are $30.
Prototype News
Some of you may know that in addition to the one buck catalog which now contains 20 "done" boats, I offer another catalog of 20 unbuilt prototypes. The buck catalog has on its last page a list and brief description of the boats currently in the Catalog of Prototypes. That catalog also contains some articles that I wrote for Messing About In Boats and Boatbuilder magazines. The Catalog of Prototypes costs $3. The both together amount to 50 pages for $4, an offer you may have seen in Woodenboat ads. Payment must be in US funds. The banks here won't accept anything else. (I've got a little stash of foreign currency that I can admire but not spend.) I'm way too small for credit cards.
Here are the prototypes abuilding that I know of:
Electron: The California Electron is coming along. Right now a four cycle 2 hp outboard has been purchased so the original electric idea may wait a while.
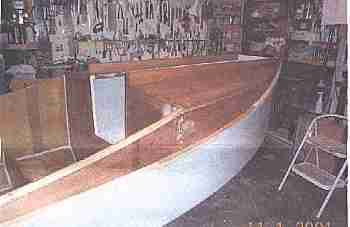
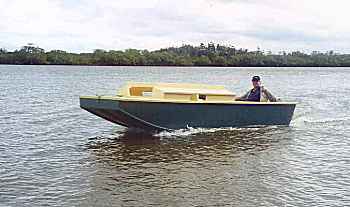
The Queensland Campjon is done! Shown here with a 2.5hp motor.
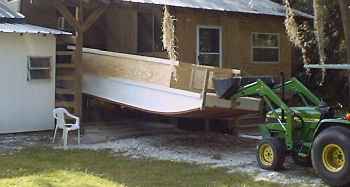
A barn in rural Florida giving birth to the first Shanteuse, this one stretched from 16' to 24'. The builder said it was easy to turn the hull but it looks like his name is John Deere.
AN INDEX OF PAST ISSUES
Hullforms Download (archived copy)
Plyboats Demo Download (archived copy)
Brokeboats (archived copy)
Brian builds Roar2 (archived copy)