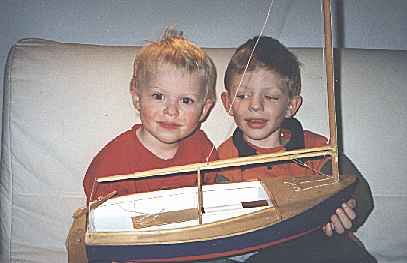
The Moser boys (Germany) admire dad's Skat model.
Contents:
Contact info:
Jim Michalak
118 E Randall,
Lebanon, IL 62254Send $1 for info on 20 boats.
Jim Michalak's Boat Designs
118 E Randall, Lebanon, IL 62254
A page of boat designs and essays.
(1feb02) This issue will will continue the series about assembling an "instant" boat. I think the subject will absorb the next two issues.
ON LINE CATALOG OF MY PLANS...
... can now be found at Duckworks Magazine. You order with a shopping cart set up and pay with credit cards or by Paypal. Then Duckworks sends me an email about the order and then I send the plans right from me to you. The prices there are $6 more than ordering directly from me by mail in order to pay Duckworks and credit charges. The on line catalog has more plans offered, about 65, than what I can put in my paper catalog and the descriptions can be more complete and can have color photos.

|
Left:
The Moser boys (Germany) admire dad's Skat model.
|
|
|
Making A Hull 2
ASSEMBLING THE HULL....
If you haven't already done so you must now finish the side panels by joining the pieces with butt plates of some sort. There is a separate essay on the subject in the back issues. In my opinion all the joining methods shown work well.
Two things to watch out for as you finish the side panels. Make sure that the butt joints are true and that the two sides are indeed mirror images of each other. You can double check by laying the finished sides over each other. Their edges should match exactly (but in real life I suppose a tolerance of 1/8" would be OK). The other item is to make sure you indeed have a left side and a right side. That is to say that butt plates will be on opposite sides of the panels. Sound silly to think it could happen otherwise? It happens all the time that someone builds two lefties or two righties by mistake.
BEGIN THE HULL ASSEMBLY...
Now the fun begins! Let's take stock of what we have. We have the stem piece, the bulkheads and temporary forms, all with centerlines marked boldly around their centers, and we have the side panels with the bulkhead and form locations marked boldly.
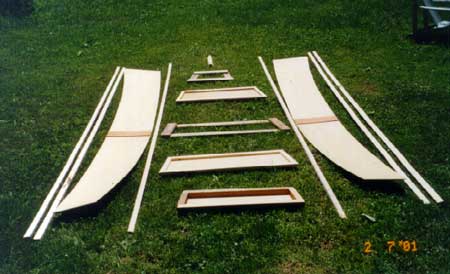
Decide now whether to build right side up or upside down. It is not a decision you can't change and you will find yourself flipping things over at times for better working position. But there are advantages and disadvantages each way.
I usually start a hull right side up. If you build right side up, you will get to see the true shape of the hull as it is assembled. If you have made a mistake, for example made a bulkhead or form wrong, the mistake will be obvious at once. On the other hand, most hulls have some flare to the sides with the ends sweeping upward if the boat is right side up. The side panels will need a little help taking that shape.
If you build upside down those side panels will almost fall into position with proper flare and sweep as gravity pulls them down. On the other hand it can be a lot harder to see the shape you are looking for in the boat if it is upside down. Errors in flare and sweep won't be obvious until the hull is turned upright.
FIRST...
I'm going to describe how I assemble a flat bottomed hull.
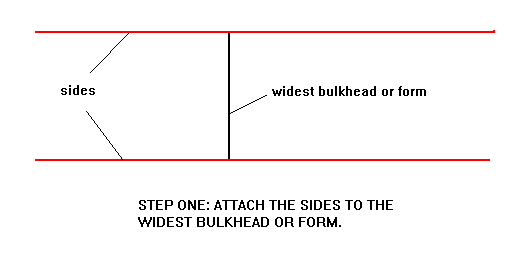
Grab the centermost bulkhead or form, the widest one, and one of the sides. Position the bulkhead or form on its line on the side panel and clamp it into position. (The drawing will show whether the locating line on the side refers to the front face of the form or the aft face.) Then screw the sides to that form or bulkhead with sheet rock screws, one about 2" up from the bottom, and the other about 2" down from the top. You should always predrill a lead hole for the screws. Then you can remove the clamps.
Grab the other side and repeat so that now you have two sides joined by the widest form or bulkhead. Place the assembly on two sawhorses.
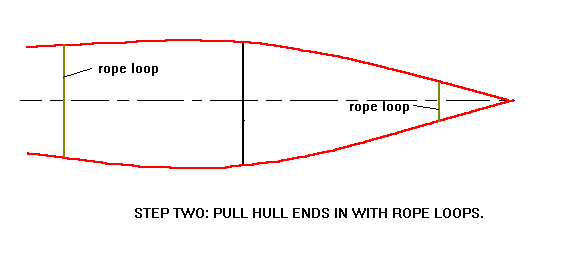
Take two loops or rope and use them to pull the hull ends inward to approximately their final widths. If the boat has flared sides and you are building right side up you will find that the ends will want to sweep upward as you pull the ends in. That is as it should be.
Next take the forms or bulkheads that are adjacent to the widest one and install them with screws as with the first one. Then work towards the hull ends one bulkhead or form at a time until they are all in.
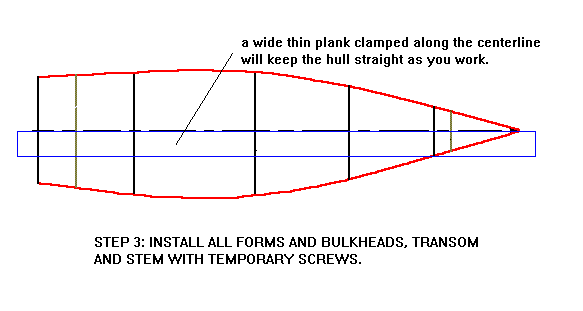
Then install the transoms or stem piece with temporary screws. Often the bevels on these end pieces are such that you won't be able to clamp them in place very well. In that case I like to predrill lead holes in the plywood for the screws, push the parts into position by hand and quickly screw them together in the proper alignment.
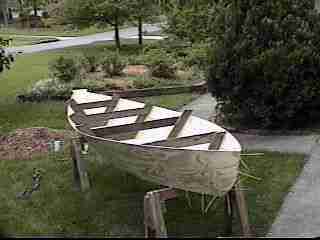
You might do all of the above on a small to medium sized boat in an hour. Your boat shape will be obvious already! Take a step back and admire it for a while. Then spend some more time eyeballing it to make sure it is right. Since you have centerlines drawn on all of the cross pieces, align them all first by eye and then with a straight edge. A piece of lumber like a straight 1x4 can be used to keep those lines all in a row, either clamp or screw the lumber to the cross pieces to retain the alignment (and stiffen the assembly). After you have the alignment lumber in place, eyeball the tops (or bottoms) of the bulkheads and forms to make sure the assembly is not twisted. In fact, as you work on the boat right up to completion always check the overall hull alignment.
Right here is a good time to take a break. Stay away for a day and when you return eyeball it all over again. If you like what you see, it is time to start gluing and nailing it together.
The temporary forms will need no more fasteners than the two screws on each side.
The bulkheads, transoms and stem pieces will need to be permanently glued and nailed into position. Here is the easy way to do it. Remove the two screws that hold one edge of a bulkhead to the side panel. It will come loose enough for you to butter some glue either on the bulkhead's edge or onto the mating area of the side. Once glue has been applied, slide it back into position and reinstall the screws. One of the beauties of using dry wall screws in this sort of assembly is that it will quickly go back together exactly as before, the screws wanting to fall right into the old holes. When those screws have been tightened, drill lead holes for nails at about a 6" spacing and drive the nails in. As you drive the nails on a structure that is still flimsy you will find it well to "buck up" the backside of the area with another hammer as a riveter would do. When the nails are in, remove the two temporary screws and drive nails into the holes. Don't drive nails into the areas about 2" from the edges where the chine logs and wales will eventually go - we will want those areas clear of fasteners for now so we might install fasteners for the chine logs and wales. On the other hand, if you find that for example the stem piece doesn't want to lie tight to the sides in those areas, you will have to install screws there that will be removed after the glue cures.
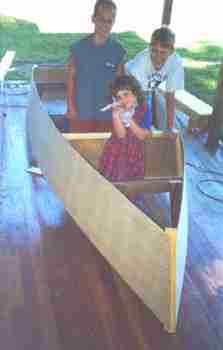
When you are done with one edge of a bulkhead, continue with the other edge, and then through the other permanent cross pieces one edge at a time.
After you are done with the nail and glue session, check hull alignment. Walk away from the project without touching it until the glue has set good and hard. Don't move anything while the glue is in the green stage.
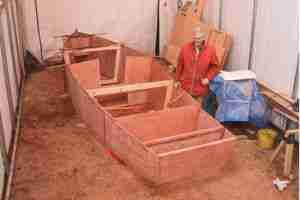
THE WALES...
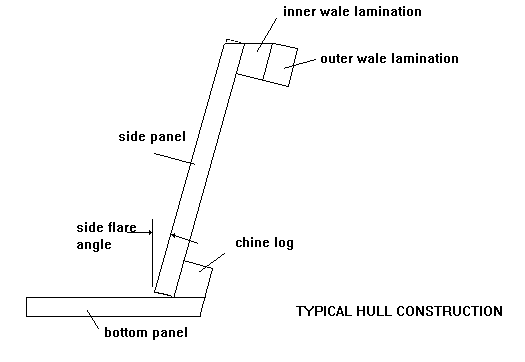
After glue has cured, I like to install the wales (also known as rails or gunwales or gunnles). These are usually 3/4" x 1-1/2" sticks that run full length of the boat. Sometimes they are doubled to be 1-1/2" square, or more. If you install them at this stage they will go a long way towards stiffening the assembly making it easier to work with and maintain alignment.
If your boat is really long there is a chance that you will need to "scarf" two or more shorter pieces of wood to get the full length piece. There is a separate essay on doing that. The scarfing must be done before assembly on the boat, and don't even try working with the scarfed piece until the scarf glues have set well. Once the scarf is complete the stick should be as strong as a single piece of lumber and you will work with it as a single piece.
Most of my drawings have a full sized detail of the wale cross section. On a boat with flared sides, assembly of things like decks or cross beams almost always will require that the wale be beveled on its top edge to allow a flat to mate with the deck. It is quite easy to prebevel the inner wale before assembly. Let's say the side is flared 10 degrees. If you set your table saw to cut at a 10 degree angle and then rip a long board to proper size, you will have it. In fact if your board is wide enough you will already have another 10 degree edge cut on it for the wale on the other side of the boat.
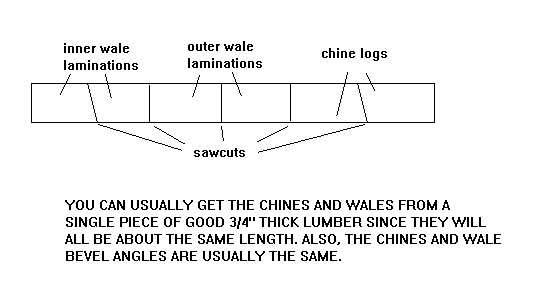
(In fact, while you are at it you might as well rip all the wale and chine pieces as shown above. They will all be about the same length so they can come out of the same board, if you can find a good one wide enough. So as shown above, you could set your saw blade at the flare angle and fence or guide at the proper width for the inner wales and make one rip pass on one side to get the first inner wale piece. Then reset the blade to zero degrees and leave the fence as is to make the second inner wale piece. Then another rip cut with no saw changes will give you an outer wale lamination and then another for the last wale lamination. Lastly, the cuts to give the chine logs will be like those for the inner wale laminations.)
So once the inner wale has been ripped to proper width and bevel, it is time to install it. Leave it long for now, to be trimmed to length after the assembly. I suggest you "dry fit" the wale into position first, as you did with the bulkheads. Clamp it into position and secure with screws into the bulkheads, transoms and stem and anywhere else needed to keep it in place. Actually at this point you can trim it to length.
Check hull alignment. Then dry fit he wale on the other side, and check alignment again. If you are building right side up you may want to invert the hull for the gluing operation.
Then loosen the wale screws over the bow half of the wale on one side allowing it to spring outward from the side panel. Butter the mating surfaces well with glue, and reinstall the screws. Repeat with the stern half of the wale. Drill lead holes for nails at about a 6" spacing along the length of that wale and install the nails (from the inside out). Remove the dry wall screws and replace with nails (from the outside in). Make sure the ends of the wale, at the stem and stern, are really well fastened. Wipe up glue mess. If the hull is inverted now you should not have any glue running down the sides of the hull ,although it may be running on the floor instead.
Repeat with the other side wale.
Check alignment and let the glue cure.
If the design calls for multiple laminations to the wale, the other laminations are easy. Usually they don't need a beveled edge. Just butter them up with glue, clamp in postion, and secure with a permanent screw about every 12" driven into the inner lamination. I don't use nails for the second lamination with the idea that if it ever needs replacement I could remove the screws and cut away the bad areas with no worry of hitting a fastener with the saw.
THE CHINE LOGS...
On my boats the chine logs are on the outside of the hull, "external chine logs". They join the side panels to the bottom. On traditional boats the chine log is on the inside of the hull. Phil Bolger was the first designer I know of who pushed the advantages of the external logs. With external logs the bulkheads need not be notched as they would to accept an internal log. The lengths of the external logs can be left long and allowed to run past the stem and stern to be trimmed after assembly, where with internal logs the length is critical since it must fit exactly between stem and stern. Lastly, external logs allow very easy solid fastened joints to stem, stern and at all the bulkheads.
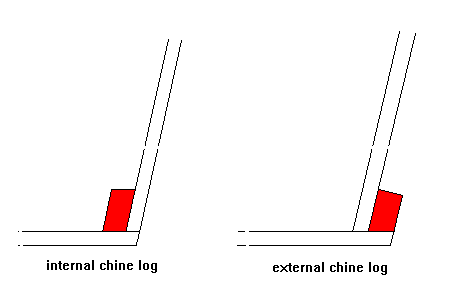
"But", you ask, " don't the external chine logs slow the boat?" Bolger didn't think so. In fact he thought that on a flat iron skiff the external chine acted as a dam to slow the flow of water around the chine, reducing the eddy at the chine and making the boat faster! I don't know about that. I've had boats with both internal and external chines and they go the same as far as I can tell.
Well, make and install the chine logs just as you did the wale. Usually the chine log will have a bevel which is constant, or close to it, along its length and you can prebevel them on your saw.
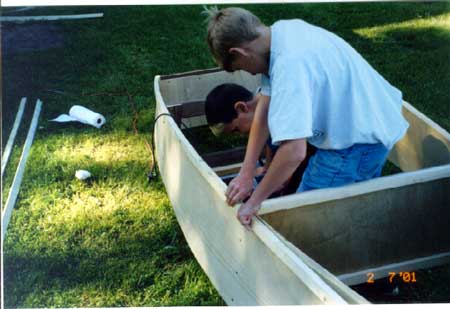
There is one difference perhaps between installing the wales and installing the chine logs. Sometimes the chine logs curve more than do the wales, especially with the rocker of the bottom. You will have to leave the chine logs long, perhaps by several feet, to allow you to get leverage on the end of the sticks and bend them into position. You might start the chine log installation at one end of the boat, gluing and nailing it there with two fasteners about 6" apart. Then slowly pull the other end into position and install with glue and another nail. Then so forth going one nail at a time. The force involved can be large and can distort the hull assembly. Watch out for that. Often it will help to install the two chine logs at the same time working from side to side as each nail goes in.
TAKE STOCK AGAIN...
At this stage your hull structure is about half done. (But you have a long way to go. Sanding and painting and finishing account for about half of the work in a boat hull. And if you are building a sailing boat, the sail rig is often about half the work of the project.) You will find the hull structure is getting rigid. Double ended boat, with pointy ends at each end and a stem and stern post at each end, will be very rigid at this point.
It's time to put on the bottom.
NEXT TIME...
...We continue building a hull.
Contents
Mayfly16
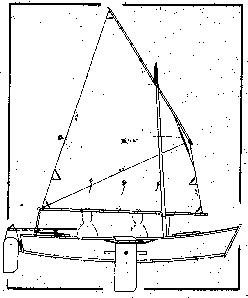
MAYFLY16, SAILBOAT, 15.5' X 5.5', 350 POUNDS EMPTY
Mayfly16 is large enough to swallow up three men or maybe a family with two kids. She has two benches that are 7' long and there should be plenty of room for all. I would say that her fully loaded maximum weight might be 900 pounds and her empty weight about 350 pounds, leaving 550 pounds for the captain and crew and gear.
At the same time the Mayfly16 can easily be handled solo, athough with just the weight of her skipper she will not be as stable as when heavily loaded. The boat also has two large chambers for buoyancy/storage and I can see her used as a solo beach cruiser because the floor space is large enough for a sleep spot. I've made here deep with lots of freeboard.
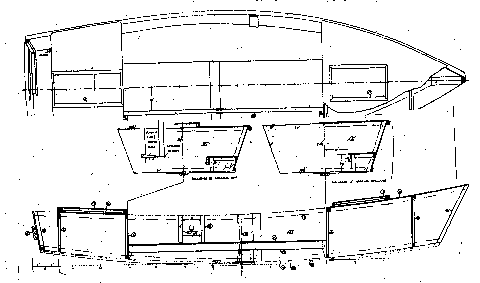
The balanced lug rig sets on short spars and sails very well reefed, in fact can be set up with jiffy reefing. The spars are all easily made and stowed, the mast being but 14' long setting 91 square feet of sail. In addition there are oar ports for those with lots of time and little money and a motor well for those with lots of money and no time. Two horsepower is all that a boat like this can absorb without going crazy. The motor well is actually an open self draining well that uses the full width and depth of the stern. It will come in handy for storing wet muddy things you don't want inside the boat, like boots and anchors. I've suggested in the plans that the rudder can be offset to one side a bit to give more room for the motor. Both Petesboat and Frolic2 have used an offset rudder with no harm other than perhaps needing a curved tiller to make it more comfortable. In the case of Petesboat, a 60 hp motor was on centerline and the rudder way over yonder to one side with a linkage to a centerline tiller. Pete said the large offset had no effect on steering.
Mayfly16 uses conventional nail and glue construction needing six sheets of 1/4" plywood and two sheets of 1/2" ply.
Prototype plans for Mayfly16 are $25.
Prototype News
Some of you may know that in addition to the one buck catalog which now contains 20 "done" boats, I offer another catalog of 20 unbuilt prototypes. The buck catalog has on its last page a list and brief description of the boats currently in the Catalog of Prototypes. That catalog also contains some articles that I wrote for Messing About In Boats and Boatbuilder magazines. The Catalog of Prototypes costs $3. The both together amount to 50 pages for $4, an offer you may have seen in Woodenboat ads. Payment must be in US funds. The banks here won't accept anything else. (I've got a little stash of foreign currency that I can admire but not spend.) I'm way too small for credit cards.
Here are the prototypes abuilding that I know of:
Electron: The California Electron is coming along. Right now a four cycle 2 hp outboard has been purchased so the original electric idea may wait a while.
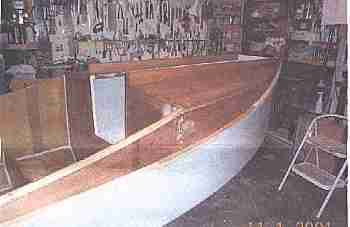
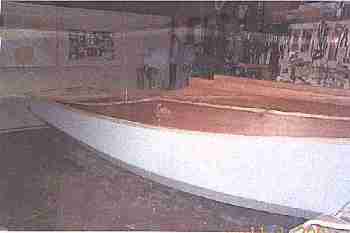
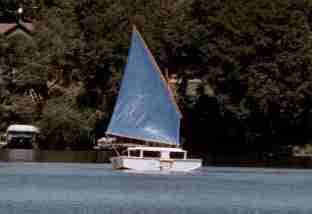
Mayfly: The prototype of the original 14' Mayfly is finished in New York state. Here it is on its first sail (Long Island Sound).

A Jewelbox Jr has been completed (with a lug rig) in Idaho. Waiting for good photo and some more testing but so far so good says the builder.
AN INDEX OF PAST ISSUES
Herb builds AF3 (archived copy)
Hullforms Download (archived copy)
Plyboats Demo Download (archived copy)
Brokeboats (archived copy)