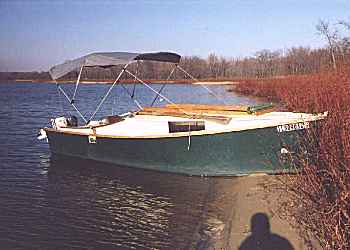
My AF4.
Contents:
Contact info:
Jim Michalak
118 E Randall,
Lebanon, IL 62254Send $1 for info on 20 boats.
Jim Michalak's Boat Designs
118 E Randall, Lebanon, IL 62254
A page of boat designs and essays.
(1jan02) This issue will present thoughts about outfitting my AF4. Next issue will begin a series about assembling an "instant" boat.
ON LINE CATALOG OF MY PLANS...
... can now be found at Duckworks Magazine. You order with a shopping cart set up and pay with credit cards or by Paypal. Then Duckworks sends me an email about the order and then I send the plans right from me to you. The prices there are $6 more than ordering directly from me by mail in order to pay Duckworks and credit charges. The on line catalog has more plans offered, about 65, than what I can put in my paper catalog and the descriptions can be more complete and can have color photos.

|
Left:
My AF4.
|
|
|
Outfitting My AF4
My AF4 has passed through its fourth season. I has had no structural changes in that time and I don't plan any. The only structural change I would contemplate would be to beef up the bottom skid/stiffeners with the idea of reducing flexing of the bottom in rough water but I doubt if I will do that this year. It is time to repaint it as you will see in these photos, an easy job since I'll just be recoating with the same paint.
But I have made some outfitting changes this year which have added to my enjoyment of the boat quite a bit. They were simple cheap additions as you will see.
BIMINI...
Even when you don't live in Florida or Texas a bimini covering the cockpit is a valuable addition. In the summer here I usually can't stay out more than about three hours in the sun without relief. With the bimini I can easily stay out all day, forever I suppose. Here is a photo of the boat with my bimini up:

On a boat this size you can buy a bimini pretty cheaply, say $200 from a place like Overtons.com complete with bows and a boot. They aren't yacht quality but they are light and will last for many years.
Mine started as a set of junker bows from a pontoon boat, way too large for the AF4. I cut the bows down in length and in width. To reduce the width I cut a section out of the center of each bow and spliced them back together with 10" sections of PVC pipe. The PVC pipe was slightly undersized so I slit the PVC sections, spread each splice piece out a bit with a screwdriver and inserted the aluminum bimini bows. Then I removed the screwdriver which let the PVC snap back over the bow with a terrific grip. No mechanical fasteners or glue needed.
With the bows cut down to size and mocked up in position I sewed a cover of polytarp because I had it already and was interested in seeing how that would hold up. I did have to buy $5 or $10 of bits and pieces for the project. So far it has held up well, no repairs needed yet. I also sewed up a boot with zipper to secure the folds of the folded bimini.
My bimini folds down over the motor for trailering, a bit of a problem sometimes because I can't work on the motors without propping it up and can't operate the boat with the bimini down. Originally I had the folded bimini rigged with back braces so I had a sort of "radar arch" when it was folded back and I could then work on the motors and use the boat with the bimini folded. But it all had to come down to get the rig in the shed and after a few months I got rid of the back braces and replaced them with ropes.
SLOT COVER...
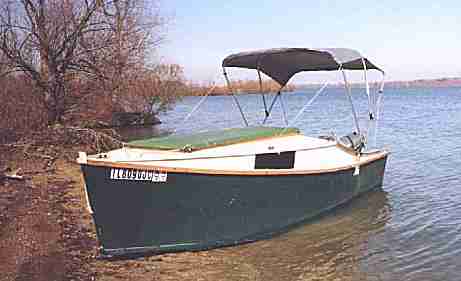
This has been on the boat since the beginning. In the previous photo you can see it rolled up at the front of the opened slot, held in place by a bungee cord so that it stays in place at all speeds including going down the highway. There are PVC pipe sections sewn into the ends to keep it spread apart there.
The idea behind the fabric cover is that you can roll it up in an instant and exit the boat from the front of the slot without getting your feet wet!
This cover is made of polytarp (four years old now) sewn together with care taken that there were no sewn seams on the flat top that might leak into the cabin. The cover is held to the boat with "lift a dot" type fasteners about every 20". There are three support bows made of PVC pipe on the top, these being taped in place with duct tape to avoid any sewing holes in the top. The whole thing rolls up as you see with the bows inside. Very quick.
The cover extends past the aft end of the slot, on downward to cover the door way which is about 24" wide and 30" deep on this boat. That flap is held down with a bungee that you can secure from the inside or outside. So you can shut yourself in pretty easily. Not secure against thieves.
Here is a photo of the boat with the cover in place. With the right combination of lift a dots and bungee cord you can unfasten the front of the cover to exit without disturbing the rest of the cover.
LIGHTS...
I added some interior lights this year. Hard to believe but when I first started boat camping twenty years ago I had no lights at all! Not even a flashlight. Eventually I tried candle lanterns and flashlights of different sorts before I settled on a regular kerosene lantern (burns "lamp oil", not kerosene). I still carry one. Not a bright light but cheap, totally reliable, and you can tell at a glance how much longer it will run, unlike any flashlight. I still bring one with me to use as an anchor light. I think it will run almost 24 hours on a full fill.
But my eyes aren't like they were twenty years ago and I thought something bright to read by would be nice. Passing through the Dollar General store I noticed a "tap light", as seen on TV, which is a battery powered dome light where you tap the dome to turn it on and off. I bought two at $2 each.
They each needed four AA cells and I wasn't into that. Made in China with old fashioned technology, assembled with screws and solder, they were easy to take apart and modify. I wired two together in series placing them on the sleeping side of the boat. I went to Wal-Mart and got a $15 lawn tractor battery and a plastic boat battery box. Secured the battery in the forward part of the cabin. That gets it out of the best living space of the cabin and puts the weight forward and AF4 really likes the weight forward.
Great light now! No difficulty finding the switch either.
With two lights in series to get them to take the twelve volt system I had the deal where one must be left with its switch on and the other one turns both lights on and off at once. Of course when a bulb goes bad I have a bit of searching to do. And the first bulbs were terrible, they all burned out in a short time. I've been told that even when used with four AA batteries the same thing happens. Replacement bulbs have solved that and the system has been bright and reliable. I measured the current draw at about 1/2 amp for the two lamps so the small lawn tractor battery, which I would think to have about 20 amp hours capacity, would last for many evenings. There is no charging system other than to put my little trickle charger on the battery every few campouts.
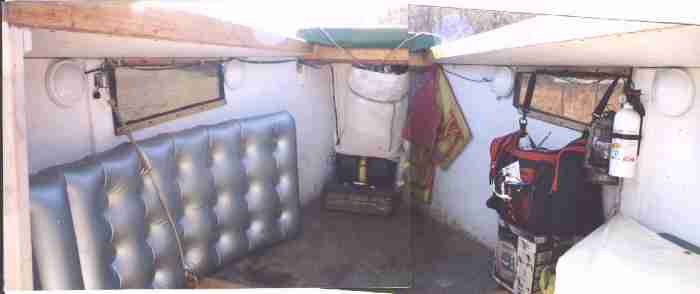
The things worked so well that I went back to the store and bought two more lights (with another stop at the hardware store for more good bulbs) and wired up the other side. Now when I turn them all on the cabin is lit brighter than almost any room in a house. Very glad I got these lights on board. Here is a photo of the interior of the boat and you can see the light domes by the windows and the battery way up front. (The photo is a composite of two wide angle photos and the boat really isn't as wide as it appears here.)
INTERIOR JUNK...
You can see the air mattress off to one side held up in storage with a bungee. In the bow you see the battery box behind my toolbox and underneath a net bag that holds a blanket and a sleeping bag. On the starboard side there is a life jacket hanging, a small duffle bag with a change of clothes, and then a fire extinguisher.
You see the idea of keeping the floor wide open when the mattress is not in use. So I can run forward and out in the open slot top.
Behind the fire extinguisher you can see the beginnings of the kitchen, in this case it is covered with a canvas that straps to the side and floor and keeps everything in place even while trailering. A view of the kitchen from the front looks like this:
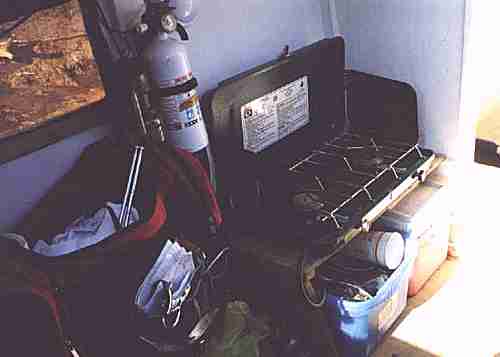
Here the canvas has been removed and the top of the stove opened. The stove is a standard two burner "Century" propane camp stove. The propane bottle is only connected when I'm cooking. I keep the propane bottle in the cockpit, out of the cabin, when I'm sleeping. The stove is on a light plywood shelf. Under the shelf is a cooler and a plastic bin that slides out and contains all the cooking stuff and usually has enough room for a few stew cans, a coffee jar, etc. It has all worked out very well and after decades of using a backpackers stove, having two burners is a real luxery.
COCKPIT...
I'm getting famous for not having much in the cockpit. Here is a photo:
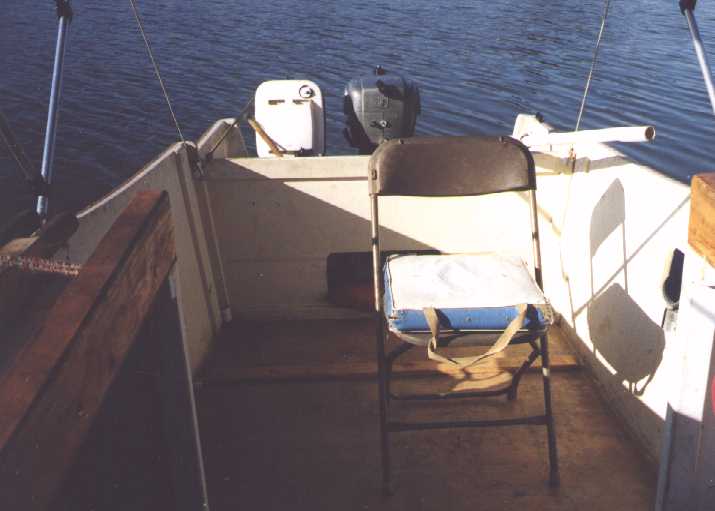
Nothing there besides a chair - a "found" folding chair with an old boat cushion on top. The old Sears 5 and Wards 12 are seen abaft. The motors have a 4' long tiller extension that allows me to steer the boat from the position shown. You can see that extension on the port side of the chair. The chair can be folded up and then I have a dancefloor.
ALMOST FORGOT..
Towards the end of the season when the days were getting really short and the nights really long I put a cigarette lighter type socket into my electrical system. I stole my wife's CD player and found I could fill the hours with music with no worry of having to buy an armload of AA batteries.
Then at Wal-Mart I saw a 12 volt 5" TV, black and white, with built in AMFM radio, for $20. Decadence! I was concerned about reception in the rural areas that I boat in but on trials found it got the old main stations plus more remote stations I can't get at home (we don't have cable TV).
Well, the last campout was in November after the time changed and it was pitch black by 5PM. The guru was there with his AF4 thinking I was really over the edge with the TV. I set it up on the cabin roof so we both could watch as we sat in our rafted boats bundled up against the cold. By 8 he was telling me where Drew Cary was and by 9 was excited at the thought of watching "To Have And Have Not", a Hemmingway story that starred Bogey and Bacall and a lot of boats. Alas, they showed "The Big Sleep" instead and the guru was disgusted again with my TV.
WEIGHING IN...
I noticed that my 20 year old trailer was starting to shed pieces so I hoisted the boat off of it and rebuilt it. The basic frame seems fine but I've replaced the tires and bunks. In the meantime I put the trailer on the scales. Weighs 200 pounds now. I put the AF4 back on the trailer and weighed it again. Weighs 625 pounds with the gear shown above, minus all engines and fuel and tool box. So the boat with its "cruising" gear weighs 425 pounds. When I first completed the AF4 in 1998 it weighed 300 pounds totally stripped. I haven't changed anything on the basic hull since then so I guess the gear shown above weighs 125 pounds.
A real operating weight would add 20 pounds for my tool box, 80 pounds for the Ward's12 (or the Johnson10), 40 pounds for a small backup motor like the Sears5, maybe 35 pounds for a lot of fuel. and 170 pounds for me. A total of 775 pounds. That is about 200 pounds heavier than I operated back in 1998 and explains why the little motors are pushing it at 6 mph now instead of 7 mph back then.
I hope to stop the weight gains right now. With luck I might leave the backup motor behind, although the guru thinks that is foolish. No more added "cruising gear". If nothing else, I noticed my little trailer is rated to carry 600 pounds and I'm already there.
NEXT TIME...
I'll start a series about assembling an "instant" boat.
Contents
HC Skiff
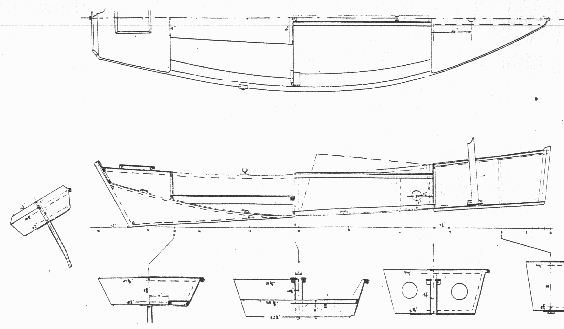
HC SKIFF, SHARPIE SAILBOAT, 18' X 5.5', 450 POUNDS EMPTY
HC Skiff is a rework of a "typical sharpie skiff" that appears on page 101 of Howard Chapelle's great book AMERICAN SMALL SAILING CRAFT. I can almost say that if you own only one book about small sailing boats that this is the one to have. The lines of my version are straight out of Howard's offset table. By today's standards it is a long narrow hull, 18' long and about 4' wide on the bottom. The stem rides about an inch above the water, then the bottom goes straight to the deepest point of the hull at about half the length of the hull. Then the bottom sweeps way up above the waterline for a very high and small transom. There were working hulls. Heavy loads could be carried without immersing the stern transom which is always harmful to a boat with no motor. You put everything in the stern and the stern still stays clear of the water. I think a hull shaped like this is little improved upon by any modern flattie skiff thinking. Chapelle said the shape was common all along the East Coast from 1860 to 1900. The prototype shown here was built by Dan Roach of Danvers, Massachusetts, very close to where Chapelle found the original boat he surveyed. Dan wrote quite a bit to me saying it was fast and handy and easily carried his family including the dog. (I'd quote what he said but I lost his email in a computer accident. So will somebody tell me why they put the "empty file" button right next to the "send message" button??)
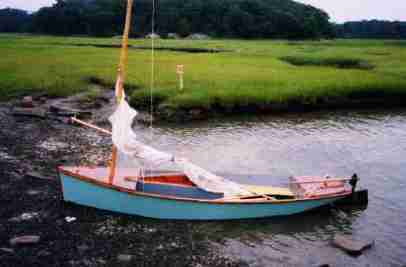
I used modern plywood construction on HC Skiff. The old boats were nailed together from 1" boards. Then they were left outside in the water until they died. They must have been very heavy both in their construction and in their soakage, not to mention the clams and oysters. My version uses five sheets of 1/2" plywood and five sheets of 1/4" plywood and will weigh a fraction of the original. It's all done with prefab parts and no jigs or lofting.
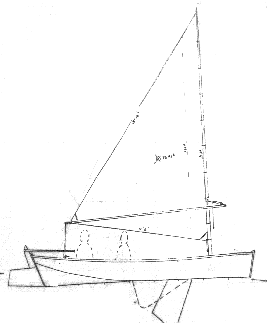
I had to tinker with the sail rig which was of the same style shown here but at least 50% larger. On the heavy old boats that might have been OK but I'm sure it would be way too much for the lighter plywood boat. I kept the large centerboard. I added hull air boxes bow and stern for a chance at self rescue after swamping. Also added some benches where the original boat was wide open from stem to stern with three simple thwarts.
Plans for HC Skiff are $30.
Prototype News
Some of you may know that in addition to the one buck catalog which now contains 20 "done" boats, I offer another catalog of 20 unbuilt prototypes. The buck catalog has on its last page a list and brief description of the boats currently in the Catalog of Prototypes. That catalog also contains some articles that I wrote for Messing About In Boats and Boatbuilder magazines. The Catalog of Prototypes costs $3. The both together amount to 50 pages for $4, an offer you may have seen in Woodenboat ads. Payment must be in US funds. The banks here won't accept anything else. (I've got a little stash of foreign currency that I can admire but not spend.) I'm way too small for credit cards.
Here are the prototypes abuilding that I know of:
Electron: The California Electron is coming along. Right now a four cycle 2 hp outboard has been purchased so the original electric idea may wait a while.
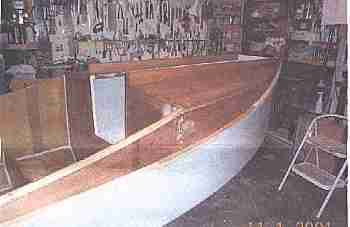
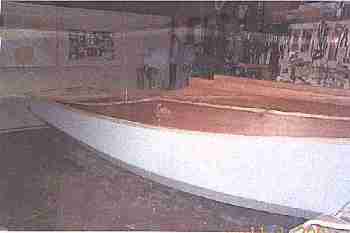
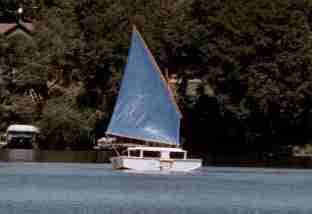
Mayfly: The prototype of the original 14' Mayfly is finished in New York state. Here it is on its first sail (Long Island Sound).

A Jewelbox Jr has been completed (with a lug rig) in Idaho. Waiting for good photo and some more testing but so far so good says the builder.
AN INDEX OF PAST ISSUES
Herb builds AF3 (archived copy)
Hullforms Download (archived copy)
Plyboats Demo Download (archived copy)
Brokeboats (archived copy)