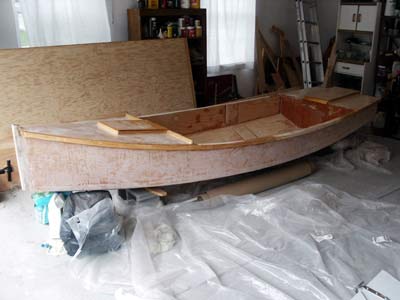
Shapely Mixer going together in Jack Clayton's living room.
Contents:
Contact info:
Jim Michalak
118 E Randall,
Lebanon, IL 62254Send $1 for info on 20 boats.
Jim Michalak's Boat Designs
118 E Randall, Lebanon, IL 62254
A page of boat designs and essays.
(15Sep03) This issue will present a rot repair not approved by Woodenboat. The 10ct issue will rerun the capsize recovery essay.
The 12th ANNUAL INDIANA MESSABOUT will take place at Lake Monroe (just south of Bloomington) on September 19 thru the 21st. All at the Paynetown Recreation Area. For more info contact Bob Bringle at rbringle@iupui.edu.
THE BOOK IS OUT!
BOATBUILDING FOR BEGINNERS (AND BEYOND)
is out now, written by me and edited by Garth Battista of Breakaway Books. You might find it at your bookstore. If not check it out at the....ON LINE CATALOG OF MY PLANS...
...which can now be found at Duckworks Magazine. You order with a shopping cart set up and pay with credit cards or by Paypal. Then Duckworks sends me an email about the order and then I send the plans right from me to you.

|
Left:
Shapely Mixer going together in Jack Clayton's living room.
|
|
|
Rot Repair?
MY AF4 BOTTOM HAS ALWAYS LEAKED...Right from the day it was new. The plywood used was rather strange, supposed to be 3/8" be really was something like two layers of knotty 1/8" and a dress layer of 1/6" perfect wood on one surface. It mikes out at .32" so is well undersized. Anyway, with the knots there were spots were the water would leak right through the middle of the ply to the inside until the leaky areas would swell shut after 15 minutes or so. So there was usually a puddle inside somewhere.
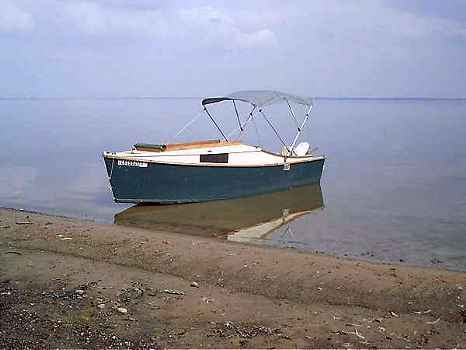
Next around here we have a problem with mud. They say the topsoil in some areas near the Mississippi River is over 100 feet thick. So when they make a lake around here it is usually based on such soil and everytime I go boating I bring a share of it into the boat on my shoes. There is almost no getting around it here. You can get muddy or you can quit boating.
And so it came to pass that after 5 years of use of my AF4 with no special cares or repairs or even new paint that I went boat camping one weekend and the leaks didn't stop after 15 minutes, or after an hour or after two days. There was instead a steady seep of maybe a pint an hour when still and a lot more when underway.
When I pulled the boat out on its trailer after that campout I took a good long look at the bottom for water seepage dripping outward now. There it was! Right behind the aft bulkhead. It looked like a knot going bad and I scratched at it with my knife and the blade went clear through all the way to the handle!
When I got it home I removed the motor well deck, then lifted out the two flotation blocks. These blocks were shimmed about 1/4" above the bottom but that wasn't enough. Five years of muddy water flowing in and out through the bulkhead limbers had filled that 1/4" with mud and the bottom had there rotted through from the inside.
I let it dry for a week and then scraped and chipped away at it until the punky wood was gone. Let it dry some more. Here is what I had left:
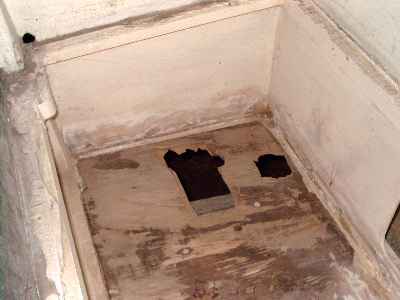
Note the big holes. The starboard side of the boat was quite similar. So there were fairly large areas where the wood remaining was maybe 1/8" thick and then there were the holes. What to do?
It wouldn't be a bad idea to completely replace the bottom. Or replace the bottom from the butt plate near that aft bulkhead on aft. But it was the end of July and I didn't want to get into a major repair. I wanted quick and dirty. Here is what I did.
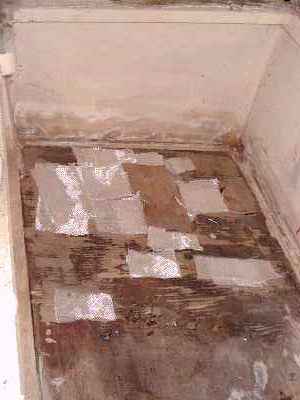
First I backed the holes from the outside with plywood surfaced with slippery plastic sheet. It was pretty easily done since the trailer bunks ran right under the larger holes and I was able to pinch the backup plywood between hull bottom and trailer bunk. Then to secure the outer edge of the backup ply I simply clamped it to the external chine log. I decided to fill the large holes with pieces of plywood and fill the eroded areas with pieces of fiberglass dry fitted for now like this:
HERE I MUST DIGRESS...
The basic plan was fill the rotted areas with pieces of plywood and fiberglass, all melded together with thickened epoxy and then all capped with another layer of plywood which would be glassed taped seam style to the sides. But there was a problem.
I had almost a gallon of epoxy on hand but it had set up, crystalized, in the jar! I had purchased it from Wicks Aircraft Supply about 20 miles from here about a year ago and it had set to apple sauce consistancy almost immediately even during the hot summer. It set rock hard over the winter. I went to Wicks to complain and raise hell about it. The man looked at it and said that was common, almost normal. He said it would return to liquid if heated. Had I tried heating it? Yes I had to no effect. He asked did I get it REALLY HOT! No, I hadn't. He said he would not replace it. That epoxy drums sometimes came right from the factory that way. Once heated to liquid again it would be like new, he said. I went away mad!
When I got home I got out my camp stove and a big old pot that my wife had condemn after I had boiled some homebrew in it. Filled pot about half full, placed the hardened epoxy jar inside with a piece of wood between jar bottom and pot to prevent melting of plastic jar. Set to boil. Ever so slowly it changed from like hard candy to apple sauce and then to pure honey, just as the Wicks man said it would. It took an hour on the boil. That was two months ago and it is still like pure honey. Here is a photo of the job, you can see it is turning liquid around the edges with an iceberg of solid resin in the center:

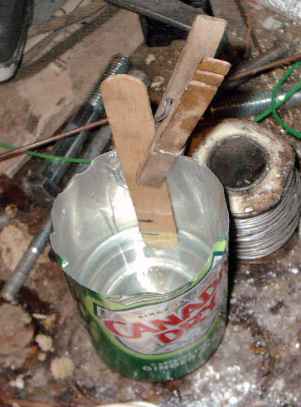
While I'm at it I want to mention how I mix epoxy. I stopped using pumps a long time ago finding they would shoot air at the worst time. Now I take a straight sided can like a soda can with the top cut off. Then I mark a mixing stick with two marks in the mixing ratio for the epoxy hardener. This hardener was 50% by volume to the resin. So I mark my stick at say 1" from the stick's end and another mark at .5" beyond that, or 1.5" from the end. Then the stick is placed into the can with end touching bottom and held there with a spring clothes pin. I fill to the 1" mark with resin, then add hardener to the 1.5" mark so the hardener volume is 50% of the resin. You can mix more or less but the ratio of the marks on the stick must be the same. Then mix. Here is what it looks like with the resin already poured in and waiting for the hardener to be added to the next mark, and take note that this job cannot be done on a clean bench:
Since I intended to thicken the epoxy a lot I stopped at Walmart and got a large jar of baby powder for $2. Baby powder is talc which is I think powdered soapstone and is a very good thickener for epoxy. Added ingredient is "fragrance". It about doubles the volume of the epoxy when mixed to mayonaise thickness.
BACK TO WORK...
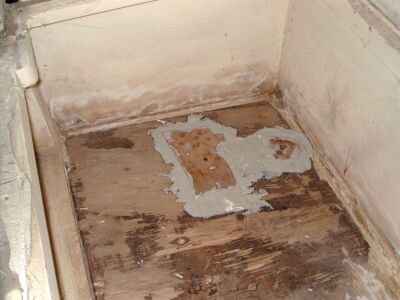
So the repair begain like this with some plywood chunks to fill the big holes and some epoxy paste (remember there is a plastic covered backup under all of this so the epoxy can't run out) like this:
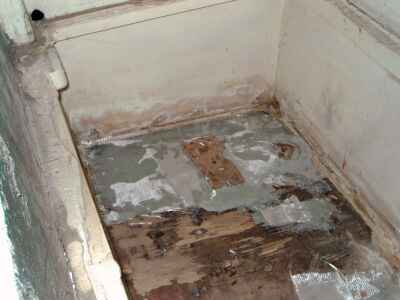
Then I started adding in the glass pieces pasting them down with more thickened epoxy like this:
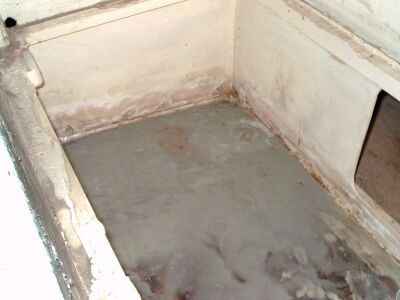
I kept pouring on the thick epoxy mix (I mix about 6 ounces at a time and thickened after mixing resin with hardener. You can't do this with fast setting epoxy since the whole operation took over an hour and the idea is to pour it all at once so it sets as one big blob.) I filled it, hopefully overfilled it a little bit, right to the top surface of the original plywood, like this:
Then I capped it with a plate of 3/8" plywood (cut to shape before doing any of the epoxy work and set aside). There were two plywood plates that would fill in the entire aft bottom bay. There was enough good wood left in the bottom and especially in the bottom skids that I could run screws through the repair plywood to clamp. Like this:
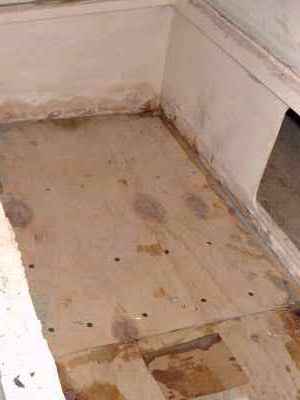
Next I filleted around the repair doubler and secured the perimeter with two layers of fiberglass tape, sort of a taped seam repair. Like this:
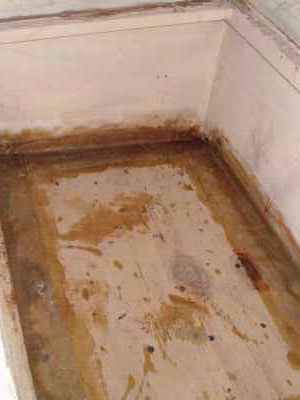
Both sides of the stern were repaired this way at the same time. When the epoxy had cured I gave it a brief sanding with a coarse disk mounted in a drill to remove any glass spikes, and I painted it.
I had decided to avoid trapping water in the stern as before. I added two large access holes to the aft bulkhead to provide a lot of ventilation and allow me to see and clean all the way to the stern's nooks and crannies.
Now, what to do about that flotation foam? I cut some foam blocks to fit tightly under the aft deck, wedge shaped, such that they don't contact the boat's bottom at all. Like this:

I've only shown one section but more were cut and placed so that they extended all the way across the back under the deck. I also wrapped them in plastic so they wouldn't fill the boat with orange crumbs.
Reinstalled the motor well deck. The boat was ready to go again in maybe 6 hours of work spread over several days.
BACK TO THE LAKE...
Well, the AF4 bottom still leaks a bit but not from the stern that was repaired. This winter I may go over the checks and knots in the bottom with the quart or so of epoxy I have left. Yes, someday I may replace that thin bottom totally.
NEXT TIME...
...I'll rerun the capsize recovery issue.
Polepunt
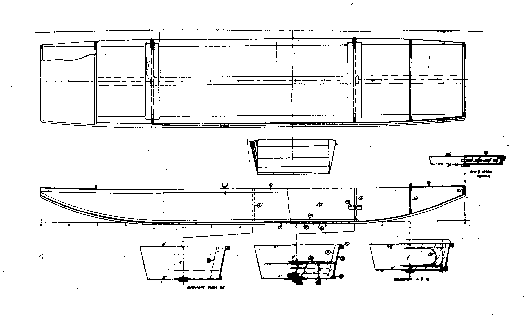
POLEPUNT, PUNT, 15' X 3', 110 POUNDS EMPTY
Do you have a swamp in your back yard? Turn that into a positive thing with a tradional punt that you push through the shallow water with a pole. I think this sort of boat has a long history and the similar shape in Chapelle's great book AMERICAN SMALL SAILING CRAFT goes back to at least the 1700's. Those weren't built of plywood, of course, and would be a lot heavier than this one. Actually Chapelle shows the shape of the old one as more elaborate than this one but I'm pretty sure this one is in no way harmed in function by the simplicity of its shape.
In particular I drew in a feature that I saw on a commercial aluminum jonboat. That is a constant width bottom. I used that feature on my Jonsboat design and it works very well. It might make the boat easier to build although something like Polepunt is easy to do in almost any case. I kept the bottom dead flat in the center 7' with no frames there so that you might walk the center as you push the pole. The boat is narrow at 30" inside on the bottom and I'm hoping that will make it stable enough to stand in. But such a light boat will be dominated by your weight and you will need to be careful how you stand. I've also shown rowlock sockets on the drawing and this might suit as a rowing boat using a removable seat. And this might be very suitable for floating streams with paddles, a substitute for an aluminum canoe. I see no good way to use a motor on a boat like this. The ends (which are identical) are swept way upward for good lines at slow speed and won't support any weight fore and aft. The only chance for a motor would be with an electric with remote steering so yo can keep your weight forward for proper trim. I've written words like that for almost all my arm powered boats and I still get regular photos of those boats with motor plates mounted on the stern. But I never get photos of those boats under power most likely because the owner tried it just once and never again after it tried to stand on its stern when the motor was fired up. So if you want power, and there is nothing wrong with that, build Jonsboat instead.
Nail and glue construction from four sheets of 1/4" plywood.
Prototype plans for Polepunt are $15 until one is built and tested.
Prototype News
Some of you may know that in addition to the one buck catalog which now contains 20 "done" boats, I offer another catalog of 20 unbuilt prototypes. The buck catalog has on its last page a list and brief description of the boats currently in the Catalog of Prototypes. That catalog also contains some articles that I wrote for Messing About In Boats and Boatbuilder magazines. The Catalog of Prototypes costs $3. The both together amount to 50 pages for $4, an offer you may have seen in Woodenboat ads. Payment must be in US funds. The banks here won't accept anything else. (I've got a little stash of foreign currency that I can admire but not spend.) I'm way too small for credit cards.
Here are the prototypes abuilding that I know of:
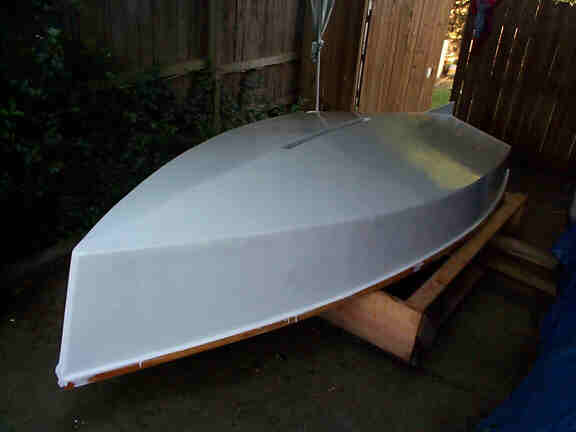
The Alabama Skat is in the paint stage:
The Texas Ladybug is starting to look pretty roomy:
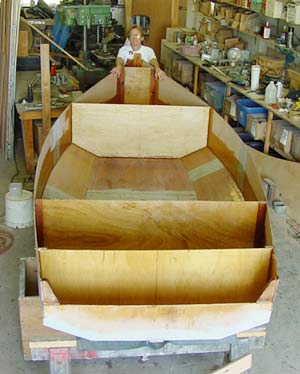
The Colorado Trilars looks ready to go:
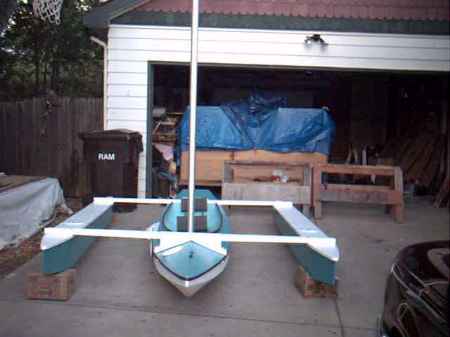
Also there is a Batto (long narrow rowing boat patterned after the Pete Culler Otter) completed by a very experienced oarsman in Brooklyn, NY (doesn't look like Brooklyn but he says it is).
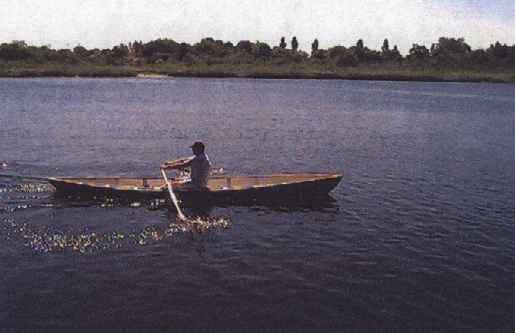
AN INDEX OF PAST ISSUES
Hullforms Download (archived copy)
Plyboats Demo Download (archived copy)
Brokeboats (archived copy)
Brian builds Roar2 (archived copy)
Herb builds AF3 (archived copy)
Herb builds RB42 (archived copy)