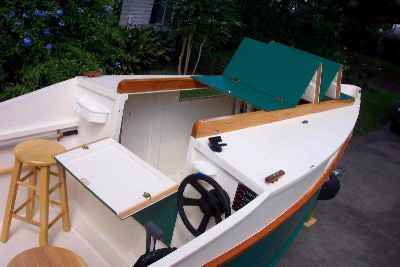
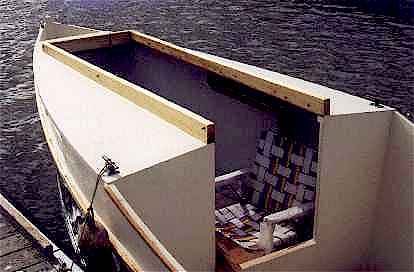
Bayard Cook's delux AF4 has an accordian cockpit slot cover.
Contents:
Contact info:
Jim Michalak
118 E Randall,
Lebanon, IL 62254Send $1 for info on 20 boats.
Jim Michalak's Boat Designs
118 E Randall, Lebanon, IL 62254
A page of boat designs and essays.
(15Dec04) This issue will finish the guest scarf essay although I should mention that this topic has raised enough mail to add a scarf3 essay in the near future. The 1Jan05 issue will rerun the IMB capsize test.
THE BOOK IS OUT!
BOATBUILDING FOR BEGINNERS (AND BEYOND)
is out now, written by me and edited by Garth Battista of Breakaway Books. You might find it at your bookstore. If not check it out at the....ON LINE CATALOG OF MY PLANS...
...which can now be found at Duckworks Magazine. You order with a shopping cart set up and pay with credit cards or by Paypal. Then Duckworks sends me an email about the order and then I send the plans right from me to you.

|
Left:
Bayard Cook's delux AF4 has an accordian cockpit slot cover.
|
|
|
Scarf Joints 2
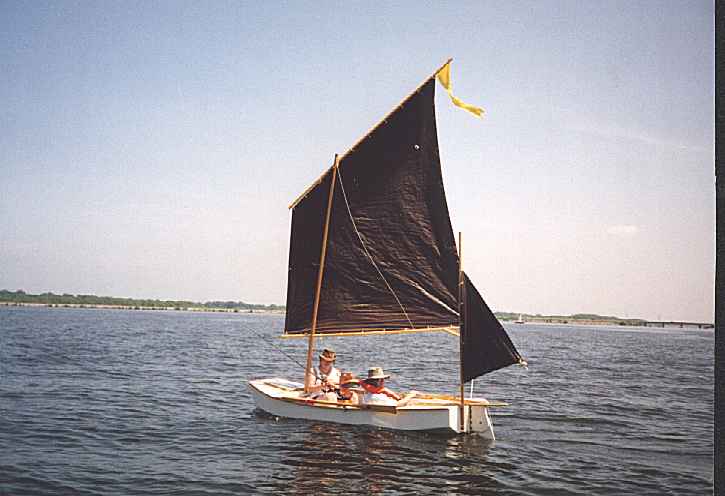
Remember Rob Rhode-Szudy? If you met him at the 2002 Rend Lake Messabout you would not have forgotten him. Here he takes his family for a sail in his 11' Piccup Pram:
In the last issue Rob showed us how he makes the cuts for his scarf joints. Next he tells us how he glues them together:
CLAMPING
I don't clamp scarphs. I screw them together, or nail them (through scraps of plywood so I can pull the nails!). I try to plan the holes so they don't come out anywhere important. But if they do, I dip a toothpick in glue and fill the hole. No big deal. Much easier than messing with tons of clamps. I HAVE that many clamps, but I find it so slow that I start to have to worry about glue pot life. Nailing gives me more time to spread glue the way I want it.
Nails also preclude parts slipping around while being clamped. I had a heck of a time keeping everything lined up on the first set of oars I made. Jim's oar design is light and wonderful to use, but the parts have to be lined up when you glue them. I realized (after doing it the stupid way) that I should have put a couple finish nails in for registration, THEN clamped. Then I decided there was no reason not to use a LOT of thin nails driven through plywood scraps, skipping the clamps altogether. So I tried the nail-clamping method on these scarphs and it worked very well. I recommend it.
SHARPENING CHISELS
OK, to use this method you really must be able to get the chisel reasonably sharp - at least for the later steps. Here are my recommendations.
1. Don't waste your money on any fancy sharpening stones. Sandpaper works fine and is cheap.
2. If you going to spend some money, use it on a Veritas Honing Guide. Any kind of honing guide would work. For about $50 it gives you FAR more than any stone. If you don't have a honing guide and need to do this scarph right away, make a wedge of wood to guide you. Don't try to press on it like you would a real guide, as you'll just sand the wood down and clog the paper. I cut the wedge a little narrow, and try to hold it just above the sandpaper, sort of just barely touching it. It takes coordination, you have to go painfully slow, and it's nowhere near as accurate as the honing guide. But it's far better than freehand. Get a honing guide. It's cheaper than a planer. Or even a plane! And your plane will work better too. (Well, your block plane will anyhow - see above regarding cap irons and my inability to make them work.)
3. If you don't have a bench grinder for the initial grinding to shape of that old, beat-up chisel you found under the workbench, use your belt sander! You will want to set up some kind of jig to hold the blade at about the right angle, and you will want a can of water handy to keep the blade nice and cool. Be aware, of course, of the hazards of electricity and water in close proximity. This trick would work especially well if you have a variable speed motor in the sander and can set it on slow. No such luck for me. I have to take tiny little nibbles at the chisel and still burn the steel on the end and have to hand sand it off.
4. DON'T use your honing guide on the belt sander! I tried this, of course. It beats the hell out of the roller.
MATERIALS
Pane of glass, preferably 1/4" thick or better
Sandpaper: approximately 100, 180, 240, 360, 600, 1000, 1500 & 2000 (finer stuff found at auto body supply shops)
Honing guide (homemade wedge guide if not available)
Chisel (obviously)
Crocus cloth for the final honing step, if you want a really perfect edge. (I didn't bother.)
A magnifier is helpful
Here's my procedure:
1. After almost destroying the honing guide on the belt sander, freehand a reasonable starting bevel into the blade. I recommend you skip to the freehand part.
2. Starting with the coarsest grit, grind the bevel until you have a good "burr" (looks like a wire) forming on the opposite side of the edge. Spend most of your time on the coarse grit and make sure you get a good wedge shape. That "wire" of folded up metal that starts to bunch up on the back side is your indicator. Don't have it yet? Keep grinding. This could take a while. Do it while watching TV or "watching the kids".
3. Grind off the burr with a few flat strokes on the flat side of the blade. Be sure you have the blade flat against the abrasive. If you lift the handle at all, you'll wreck all the work you just did!
4. Go to the next finer grit and repeat.
A powerful magnifier (like 10x or 20x) is very helpful in seeing whether you have formed a burr on the finer grits. Otherwise, you can usually FEEL the burr easier than you can see it. On the back of the blade, and starting from the handle side, slide your fingernail off the edge of the blade. You can feel that little burr drag against your fingernail. (NOTE: this is how cabinet scrapers work, cutting with a burr. Keep this idea in mind if you want any brightwork with a much finer finish than sandpaper can deliver. Needless to say, I don't.)
For more on this method of sharpening, search online for the "scary sharp" method. They go into far more detail. See also http://www.razoredgesystems.com.
OTHER METHODS
My dad felt the most accurate method would be making a jig for a router. Fine, but not everyone has a router, and I felt that making the jig would be a project in its own right. He already had a router and a jig that would have worked, wouldn't you know! It STILL seemed too much effort to set up and get right. On top of that, I would have to deal with the scary, screaming demon machine for hours on end.
And of course, it didn't NEED to be that accurate! The adhesive used governs how closely the joint needs to mate. If I had been using resorcinol or hide glue, the router and jig would have been reasonable. With Weldwood, it would have been overkill. With thickened epoxy or PL400 it's likely that even the accuracy I attained with the chisel is overkill. More on glue below.
He also pointed out that I could have struck the scarph line on each side of each piece and cut that line maybe 1" deep with a circular saw. Then, lowering the blade to full depth I could have finished the cut. This would have put the scarph very close to complete - close enough to finish with a handsaw and sandpaper. IF you're working with wood that is square to begin with, and IF your circular saw technique produces square cuts! This would have worked, I think, on the new 2x that I bought, but I very much doubt that I could have gotten square cuts on scrap tongue-in-groove 1x. It would have required jigging. I hate jigging.
GLUE
Since we're on the topic of scarphing, we should address glue. Many of us in the Midwest have noticed that DAP's Weldwood plastic resin glue is getting awfully hard to find. In Madison, WI I had to order it online. This would be fine, but the shipping charges make the price a bit high, and when you run short, you're out of luck.
Well, I ran short. I had read on Dave Beede's site (famous for his PVC cleats), simplicityboats.com, of various experiments using PL Premium in place of epoxy. This even included stitch & tape construction! I did a little reading on PL400 and have been using it on the schooner since I ran out of Weldwood. The experiments on Beede's site are testing the limits of the material, but gluing wood to wood, fastened with nails or screws is EXACTLY what PL400 is designed for. PL Premium is probably overkill for this.
Benefits include:
Locally available anywhere there is a construction trade of any kind - even on weekends! WaterPROOF (Weldwood is only water resistant)
Fast to use - no mixing
No need for containers, mixing sticks or spreaders
Bridges up to 3/8" gap
Thixotrophic - doesn't dribble down the sides when you glue the bottom on
Possibly cheaper than Weldwood when purchased in 28oz contractor size tubes
Low temperature curing - 10 degrees F!
That last benefit is important for many of us. Weldwood requires 70 degree temperatures to fully cure. Most of us want to be BOATING when it's 70 degrees! We need a winter adhesive, since that's when we build stuff. PL400 can be applied at 10 degrees. That is serious winter building capability. I was going to get more Weldwood for my spars, but I think I'm switching to PL400.
There are some other options out there now as well. Titebond III is also waterproof, and will cure at 47 degrees F. But it is nowhere near as strong as Weldwood and it only gives you about 10 minutes from when you start spreading the glue to when your clamping should be done. As easy to use as any carpenter's glue, it's pretty expensive. Titebond II is cheaper and water resistant, like Weldwood, but only allows 5 minutes assembly time after glue is spread. Again, it's nowhere near as strong as Weldwood. Weldwood gives you a 4 hour pot life at 70 degrees, which is its greatest strength. I was hopeful about these new glues, since they are locally available, but it seems they don't measure up well to Weldwood.
NOTE: If you ask for Weldwood in Midwestern hardware stores, they will direct you to a large assortment of contact cements with the Weldwood brand name. These are not what you want. You want Weldwood Plastic Resin Glue. Don't be surprised if they have never heard of it and think you're off your rocker. Even the really good old-line hardware store here in Madison, WI dropped this adhesive 2 years ago, and only the real old-timers can even remember it!
Of course, Epoxy works rather well for any of these applications. But I find it messy, expensive, and a huge pain in the butt to sand. PL400 is certainly messy, but I can cut away the mess with a sharp chisel.
GLUE CLEANUP
That last point does bring up some differences in glue clean-up. Weldwood Plastic Resin really shines here because it cures brittle-hard. You can sand it off with #40 abrasive with ease. Epoxy is similar, but the heat of sanding softens it, causing more clogging of the abrasive. All polyurethane adhesives come up short in abrasive clean-up. They soften almost instantly and clog the adhesive. I wound up sanding a little to heat it, then cleaning the softened glue with a chisel. Not graceful. It encourages one to be neat in gluing. The best solution seems to be using chisel-like shapes of scrap wood to cut the squeeze-out flush right after you clamp it. Be sure to check back later, though! A viscous adhesive like this can often put out a little more squeeze-out after you think it's done! Another approach might be to warm it with a heat gun and cut it away with a chisel, but I have not tried this yet.
Well, this should be enough to get you started scarphing, at least to get you over any initial reluctance. As always, feel free to contact me with any questions at robrohdeszudy at netzero dot net.
NEXT TIME...
We capsize an IMB to see what happens..
AF4
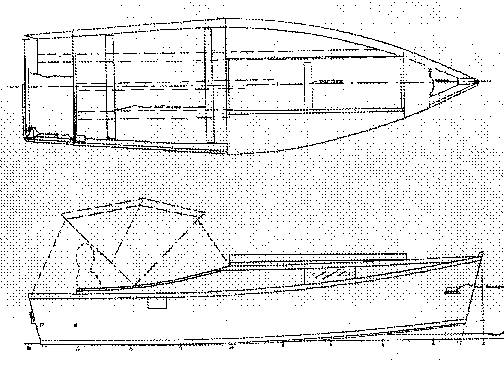
AF4, CUDDY POWER SKIFF, 18' X 5', 350 POUNDS EMPTY
AF4 is a simple low powered cuddy cruiser intended for protected waters. Kilburn Adams of St. Louis brought a boat similar in spirit to AF4 to our Midwest Messabouts and it was easy to see what a good idea this is. Kiburn's boat was a modified Sturdee Amesbury power dory with a small cuddy added and a new 4 stroke Yamaha 10. He thought the empty boat weighed about 600 pounds ready to go. It planed quite well with two men on board at about 13 knots. He made a 60 mile trip on the Mississippi (above the Alton dam where the current is small) burning about 4 gallons of fuel. It's quiet and cheap to operate. It's a good idea now that smaller 4 stroke motors are more common.
Here is an AF4 by Barry Targan. I think he is using a new 8 hp 4 cycle.
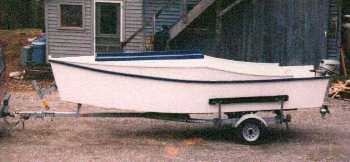
AF4 is supposed to do about the same job. Its simple hull shape won't handle rough going like the dory, but it's very easy to build and roomier. This boat has an open bow well for anchors and junk. The cabin is 8' long and 3' deep and 4' wide for minimal camping. It should be comfy for one and snug for two. it has a slot top to allow stand up boating in good weather. You cover it with a snap on fabric piece in the rain and cold. The cockpit is a full 6' long and 4' wide and totally open. You could lounge there too with a folding chaise. Aft of the cockpit is a draining motor well which will take the standard 6 gallon fuel tank and then some.
For power I used to say 10 horsepower maximum but now I would say 15 or 20. My boat has gained gear and weight over the past years and is more comfortable with the extra power. This past year I picked up a early 60's Johnson 20 at an antique outboard meet where no one is interested in such things because they are so common. The owner had $80 marked on the tag and I took a long look at it. Guru Max said to look over the lower unit really hard before buying anything and sure enough there was a crack in the casting below the prop, a sure sign that the unit leaked water and froze hard during the winter. So I told the owner I wasn't interested and that I didn't need another motor anyway. I asked him if it ran. "Sputters and leaks fuel out of the carb," says he. "Make me an offer," says he, "I don't want to take it home again." "I don't want to take it home either," says I. "$30," says he. I paid him and took it home. A mighty rap on the carb float bowl with the handle of a big screwdriver fixed the leak no doubt caused by a sticking float. A new spark plug fixed the sputtering and she was quickly purring in the test tank. I patched the crack in the lower unit casting with epoxy but she still leaked like crazy if the water level was above the prop so I'm convinced the seals are shot in the top of the casting. I swapped the drive unit from the Buccaneer 12 that I got two years ago (never did get that one to run on two cylinders) and was off to the lake. Put about ten hours on it and it ran perfectly the whole time. Slightly faster than the 15, burns more fuel and is noisier. At the end of the season I decided the 15 was a better all around motor in my case where I am almost always solo so I reinstalled the 15. A light AF4 planes with an old Sears 7-1/2 horse (single cylinder, air cooled, for $50 at a yard sale) as you can see here:
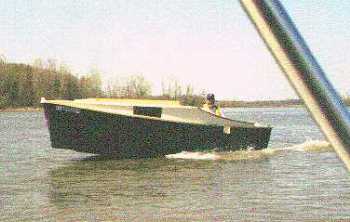
Here is John Bell & co. in his AF4. I think John is using a 20 hp four stroke having tested the boat first with 25 hp and found it too much.
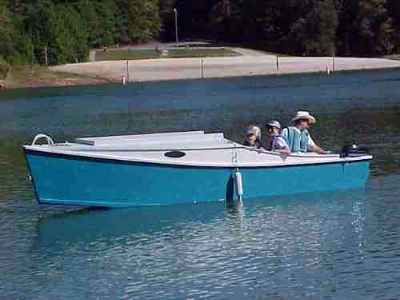
Here is one by Rhett Davis at the last Rend Lake meet.
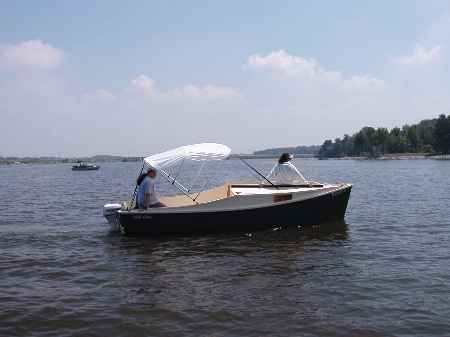
And here is another by the motor guru Max W at sunrise during our last campout.
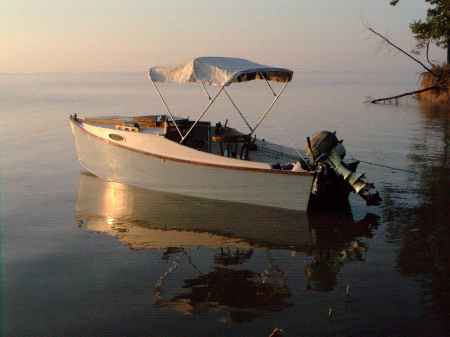
Bayard Cook built this delux AF4 in Florida:
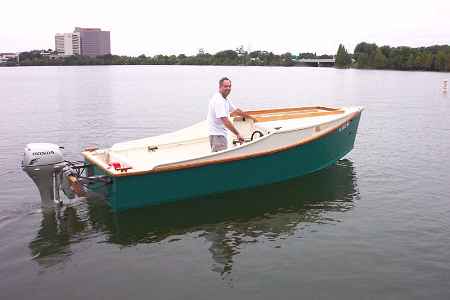
AF4 uses the simplest nail and glue construction. It takes five sheets of 1/4" plywood and four sheets of 1/2" plywood.
There is also a shorter 15' version called AF4Breve, the prototype shown here built by Bruce Given.
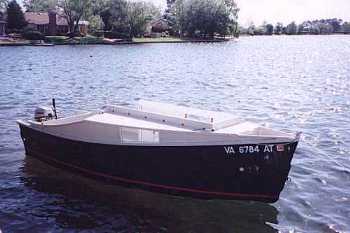
Plans for either AF4 or AF4Breve are $30.
Prototype News
Some of you may know that in addition to the one buck catalog which now contains 20 "done" boats, I offer another catalog of 20 unbuilt prototypes. The buck catalog has on its last page a list and brief description of the boats currently in the Catalog of Prototypes. That catalog also contains some articles that I wrote for Messing About In Boats and Boatbuilder magazines. The Catalog of Prototypes costs $3. The both together amount to 50 pages for $4, an offer you may have seen in Woodenboat ads. Payment must be in US funds. The banks here won't accept anything else. (I've got a little stash of foreign currency that I can admire but not spend.) I'm way too small for credit cards.
The AF4G is done and launched. Writeup after testing:
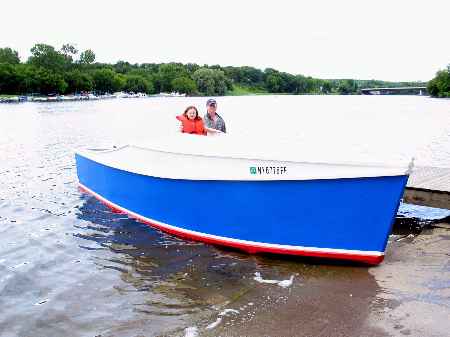
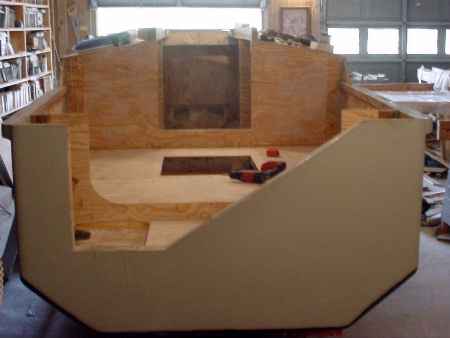
Garth has the big Cormorant project to the point where he can run power to it and set it up with a mattress and TV set and Mr Coffee and make it a hangout for the New York winter!
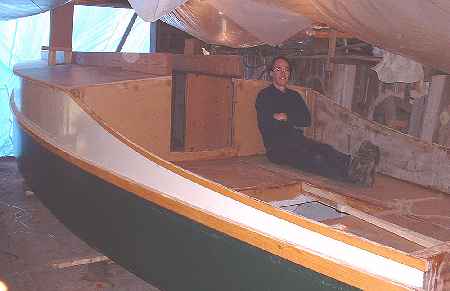
The out West Picara has its roof and some major sail rig bits done, but the Utah winter is closing in:
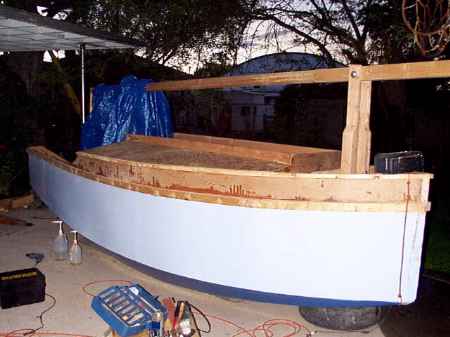
The down South Picara is getting its innards done.
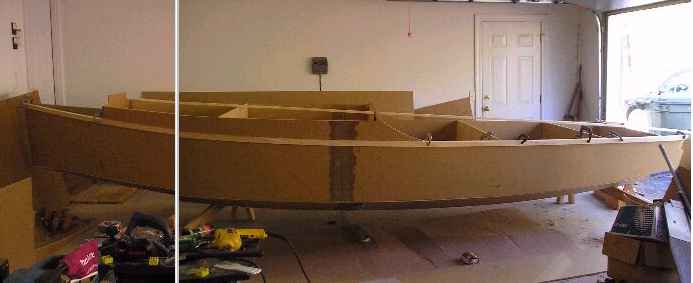
This long and lean project is a 19' version of Toon2. I don't have the drawings done yet. The builder is working from preliminary drawings and is about to pass me up. MDO plywood looks like cardboard now but it isn't.
AN INDEX OF PAST ISSUES
Hullforms Download (archived copy)
Plyboats Demo Download (archived copy)
Brokeboats (archived copy)
Brian builds Roar2 (archived copy)
Herb builds AF3 (archived copy)
Herb builds RB42 (archived copy)