Scarf Joints 1
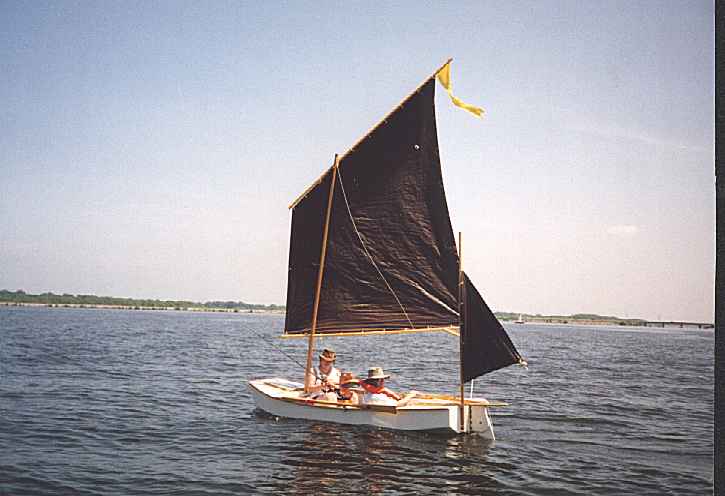
Remember Rob Rhode-Szudy? If you met him at the 2002 Rend Lake
Messabout you would not have forgotten him. Here he takes his family
for a sail in his 11' Piccup Pram:
Rob is building again and sent this article for all of us to read:
SCARPH JOINTS THE EASY(ISH) WAY
So, you want to build that bigger boat, but then you see the part of
the plans where you need a 25 foot 2x2 for each gunwale. Egad! Scarph
joints!
Yes, friend, you're gonna have to delve into the magical netherworld of
"real" woodworking inhabited only by trolls, gnomes and writers for
WoodenBoat.
Well, the woodbutchers just crashed their party. Let me show you how.
The "bigger boat" I mention above is a Bolger Light Schooner, and it
does indeed require 25' 2x2s for the sheer clamps, as well as several
other long pieces of 1x stock. Just to make it harder, I had a whole
bunch of really nice, old, straight, clear white pine that used to be
the porch floor of the house where I grew up. Of course, the pieces
were only 7 feet long! I made several poor attempts at scarphing before
I found something I could do reliably.
BANDSAW SCARPH
This was my first attempt. I cut a wedge "template" and masking-taped
it to the side of the stock where I wanted to cut the scarph. Then I
set up the bandsaw's rip fence and put the template side against the
rip fence. Sloooooooooow going on a bandsaw. Snapped a blade. My dust
mask did little to save my sinuses from the tons of ultra-fine sawdust
I made. Smoke too! It doesn't matter how thin it is sideways. It's the
top-to-bottom dimension that the saw hates. This, by the way, is a REAL
bandsaw. A big, old, cast iron Delta. It might have been short work
with the right blade, but the accuracy was the real problem. A thin
blade like that wanders in a tall cut, and my chines will thus have
gaps with lots of Weldwood and little wood.
In fact it is worse than that. There are some gaps with no wood OR
Weldwood! I should have used epoxy or PL400 on those poor fitting
scarphs. I had to nail them just to hold them together when bending the
sides around the bulkheads, and they formed weak spots in the curve
that needed to be pulled in with a Spanish windlass. That was a big
pain in the butt and waste of time. Being too late to make new chines,
I will have to add a strip of plywood to the inside of the chine after
the bottom is on, well nailed and glued, to strengthen this mess.
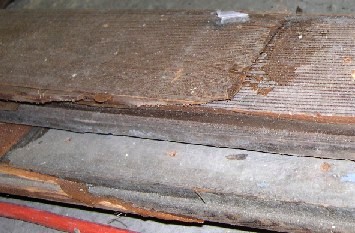
Here's a photo of what they looked like before ripping them into
chines. You'd think I'd have noticed, eh?
I did the deck carlings the same way and snapped one while dry fitting
it. Of course, it was only then that I realized the carlings can be
butt joined with a plywood gusset inside the center compartment. This
is how I'm doing it now. Sometimes it takes a while for that dim bulb
upstairs to warm up. I comfort myself that Bolger didn't think to show
that method in the plans either.
On to happier attempts!
TABLE SAW SCARPH
Same deal as the bandsaw scarph, but less wander and MUCH more smoke!
The blade was new too! I also had to remove the guard to run 3" high
stock through this saw (it's the cheapest of the Craftsman line), and
frankly that scares me. I like my fingers right where they are, thanks!
OK, so that wasn't a MUCH happier attempt, but I'm much happier that I
didn't waste a lot of time on it.
OLD SCHOOL
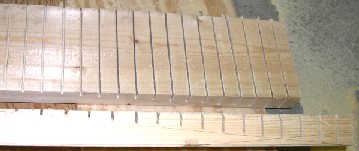
Well, sometimes the old school way is actually faster. I decided I
needed a truly reliable guide for depth. I nailed the stock to a piece
of plywood - all of the joints lined up. I made sure the ends were in
line with each other and square. Then I drew lines across the boards 1"
from the end, and 2", and 3"…on up to 18". (That's 18" in the 2x and 9"
in the 1x.)
Then I pulled out that wedge template I had made and drew the same
marks on it, and lined it up so it was right where I wanted the scarph.
I could have struck a line from it onto the side of the stock, but I
had something better in mind. (You'll see in the photos that I did
strike the line anyhow, just as a double check that I wasn't getting
too far off.)
I UNPLUGGED the circular saw, then retracted blade all the way. Then I
set it on the stock with blade alongside the stock, placed it so the
lowest tooth lined up with the 17" mark. (That is, the line
perpendicular to the stock, 17" from the end.) Then I lowered the blade
until it just touched the wedge. Remember that the wedge is lined up
right where the scarph should go, so it provides a depth gauge for the
saw to cross-cut a guide kerf. That, in fact, is the next step. I
locked the blade, pulled the wedge out of the way and cut a kerf on the
17" line. I repeated the same process for all the lines, all the way
down the wedge.
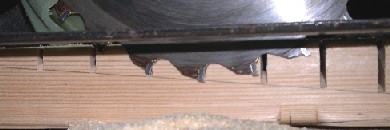
The bottoms of the resulting kerf outlined the top of my scarph! The
only remaining job was to remove the waste. This is not nearly as hard
as it seems. Almost pleasant, in fact. Makes you feel like a REAAAAAL
wooden boat guy, too.
CHISEL WORK
Yeah, you have to use a real woodworking tool. Scared me too. It
doesn't need to be an expensive one. Mine was a garden variety hardware
store 3/4" chisel. Look for a long blade and a long handle, though. The
stubby ones won't give you enough working space. Of course "real"
woodworking chisels work fine for this, but there's no need to spend
$40 for merely roughing out a scarph.
The first step is to split out the bulk of the waste from the end.
Don't try to go right down to the line. On each "step", first take off
like the top 1/4", then cut in maybe 1/8" intervals down to about 1/8"
above the kerf. The sharper your chisel is, the closer you can cut to
the line without having the grain take control of the cut.
Speaking of which, cheap folks like us don't get wood with vertical
grain. No problem. Keep the blade 90 degrees to the grain, whatever it
is. I found that in this "splitting" direction, the grain is boss. It
wants to split more than cut. Actually it cut fine for the first few
whacks, but then started to get dull and acted more like splitting. So
you'd best plan for splitting. If you do that, it will always work. If
you plan for cutting, it'll ruin your day when it splits. Remember, in
this first pass, just get it sort of close. Maybe 1/8" from the line -
1/16" at the absolute closest. It should still look like steps, and you
should still see the kerfs.
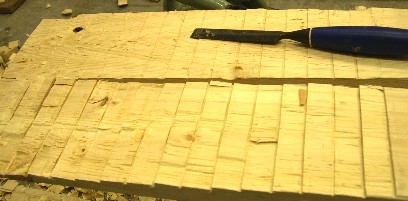
Now some of you will wonder why I didn't chop out the waste from the
side so I could see the depth. Well, I did the first one that way and
found that it dulled my lousy sharpening job on my lousy chisel almost
immediately. "Splitting" it out made the chisel last longer, or at
least made the edge not really matter.
Now smooth these "steps" down a bit more in the opposite direction.
Sharpen the chisel first! More on how to do this a bit later. Hold the
chisel almost flat to the stock. It's OK if you chisel a bit too flat,
but you don't want to dig in too deep. Be especially careful if the
grain is trying to "help" the blade dive in - that would be a very good
time to cut across the plank instead. When you're done with this step
you should still see most of the kerfs, but they will be very shallow.
Now some of you will ask why I didn't use a jack plane for this. Good
question. If I were better at making the damned thing work, I would
have loved to do just that. But, alas, it sits in pieces on the bench,
mocking my ignorance. I've read the articles on how to make them work,
but for some reason I still get chips under the cap iron no matter what
I do. Maybe because I still haven't made time to do half what those
articles recommend! I couldn't find my decent block plane either! Those
of you who own planes that work or electric hand planers might want to
go that way. I kind of liked doing it with a chisel, though. Like I
said, it made me feel like a real woodbutc…er…worker. (NOTE: Soon after
making the scarphs, of course, I found my decent block plane. Sigh…)
The next step is smoothing. Those of you with planes and planers just
keep on doing what you were doing before. The rest of us will get out
our belt sanders! Be REAAAAALY careful with this. It does not take long
at all to sand a hollow! Do that and you'll have a pocket with no wood
contact! Bad! Keep the sander moving at all times. I screwed a couple
up pretty badly by letting the sander dig a hole. See the photo of my
hastily cut chip of wood to fill a hollow I noticed after the glue was
on!

It worked out better than I had hoped, but that's a pretty big glue
line for Weldwood.
Also, don't feel that the kerfs need to be GONE. You're done using the
kerfs as a guide. Now you're just smoothing the surface a little so
there's more contact area.
Some of these scarphs were downright beautiful! By my standards anyhow.
Below is an example - one of my sheer clamps after installation. Almost
too bad I'm going to paint it. Almost.

NEXT TIME...
Rob fastens and glues the scarphs.
Contents
Dorado
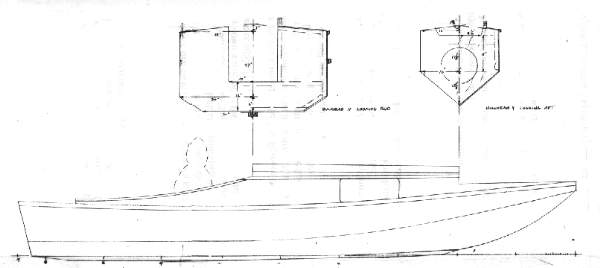
DORADO, POWER CUDDY SKIFF, 18' X 5.5', 650 POUNDS EMPTY
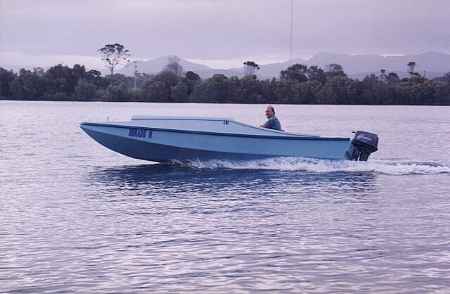
Dorado is a Southern Hemisphere constellation and also this boat
designed for Ashley Cook in New South Wales. The idea behind it was
for a rough water power boat with a sleepable cuddy cabin. We started
with my Frolic2 sailboat (which itself evolved from the Toto canoe)
and straightened out the stern lines to adapt it for planing power.
After mocking it up Ashley said he and family needed another 3" of
headroom so Dorado B was born and built. The plans show it both ways.
I should add that even though Dorado started out as a modified
sailing hull, it probably would be a terrible sailer just as Frolic2
would be a terrible power boat on plane. The two worlds just don't
mix and the idea of "just hoisting a simple sail" on Dorado is bound
to be a sure loser both because it will sail poorly and because you
will lose the simplicity of a straight power boat. Not that the idea
isn't worth more study. It would take a special person to do all the
tweaking involved with making the two-way boat work well.
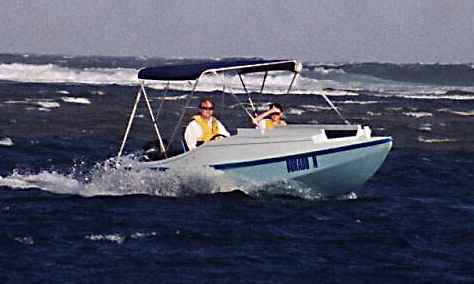
The shape works! Ashley has been running DoradoB into the rough
stuff. In the above photo he is off the east coast of Australia with
nothing but ocean between him and New Zealand. He says the big
curling wave to his side is a permanent fixture and fatal to boaters
trying it. This sort of water is the real advantage of a bottom shape
more complex that simple flat bottom, of course. A flat bottomed boat
like AF4 would get beaten up badly and be clumsey in such waters.
Also the more complex bottom handles better all around, especially in
tight turns, than the flattie and that is why the Coast Guard will
give a horse power allowable rating quite a bit higher to such a boat
when compared to the flattie. The flattie has the advantage of a lot
more floor space, less draft, simpler construction, and faster speed
in smooth water - so flatties live on. (Ashley sent me a video of
Dorado doing sharp full throttle turns, something I would never do in
AF4.)
He is using a new 30 hp two stroke motor. The Coast Guard would say
that is the max for this hull. With the 30 Ashley reports cruising at
about 20 mph with two adults on board. As an aside I should mention
that in boats like this one needs to pay attention to the prop specs
to prevent the motor from going over redline at full throttle. If the
usual prop is for a heavier and slower boat then I would expect the
motor to rev too high at full throttle in a lighter faster boat. The
idea is to select a prop with a pitch that will put the tach on the
red line at full throttle.
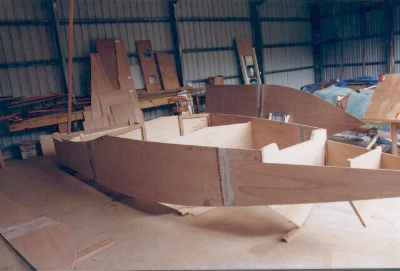
The hull is made with taped seams needing two sheets of 1/2" plywood
and eight sheets of 3/8" plywood, a total of about 400 pounds of
wood. I would expect the stripped hull to weigh about 500 pounds with
framing and fiberglass. I would add at least 150 pounds to that for a
motor and its gear which is why I estimate the empty weight to be
about 650 pounds. Add two adults and fuel and now you are around 1100
pounds total. The old rule for motors on planing powerboats is a
horse for each 50 pounds so if you havea 25 horse motor you will be
able to cruise this boat at 2/3 throttle. I would say 15 hp is the
minimum you might use and expect to plane, even then you must stay
very light and run near full throttle.
Plans for Dorado are $40 when ordered directly from me. You can also
get them through www.duckworksmagazine.com.
Contents
Prototype News
Some of you may know that in addition to the one buck catalog
which now contains 20 "done" boats, I offer another catalog of 20
unbuilt prototypes. The buck catalog has on its last page a list
and brief description of the boats currently in the Catalog of
Prototypes. That catalog also contains some articles that I wrote
for Messing About In Boats and Boatbuilder magazines. The Catalog
of Prototypes costs $3. The both together amount to 50 pages for
$4, an offer you may have seen in Woodenboat ads. Payment must be
in US funds. The banks here won't accept anything else. (I've got
a little stash of foreign currency that I can admire but not
spend.) I'm way too small for credit cards.
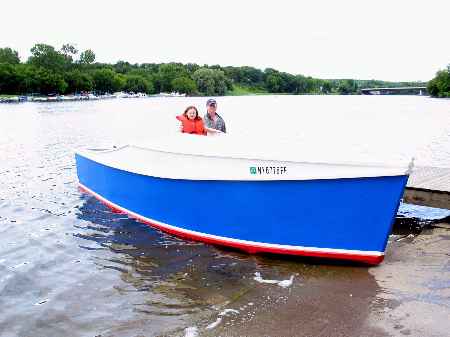
The AF4G is done and launched. Writeup after testing:
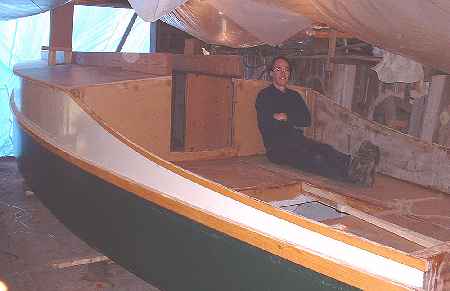
Garth has the big Cormorant project to the point where he can run
power to it and set it up with a mattress and TV set and Mr
Coffee and make it a hangout for the New York winter!
The out West Picara has its roof and some major sail rig bits
done, but the Utah winter is closing in:
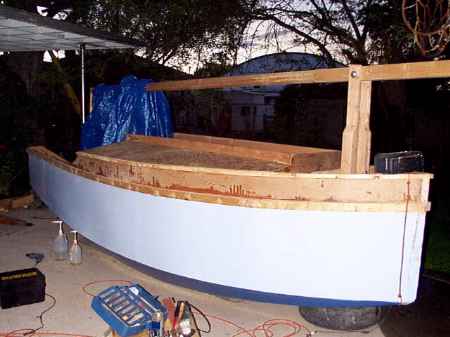
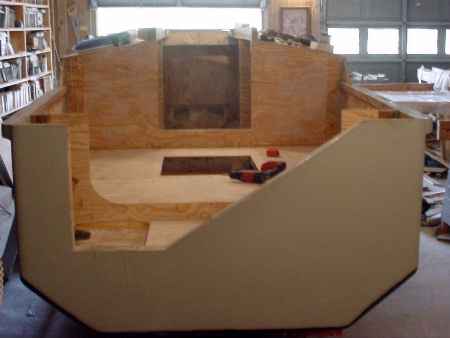
The down South Picara is getting its innards done.
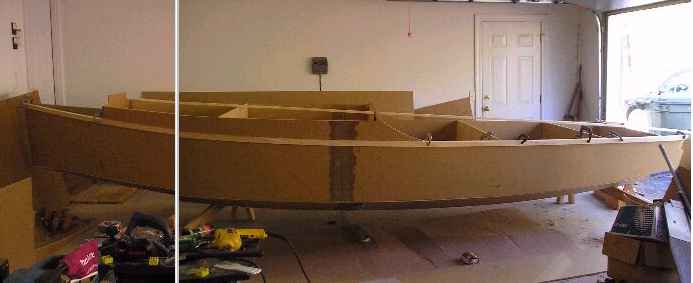
This long and lean project is a 19' version of Toon2. I don't
have the drawings done yet. The builder is working from
preliminary drawings and is about to pass me up. MDO plywood
looks like cardboard now but it isn't.
Contents
AN INDEX OF PAST ISSUES
BACK ISSUES LISTED
BY DATE
SOME LINKS
Mother of All Boat
Links
Cheap
Pages
Duckworks
Magazine
The Boatbuilding
Community
Kilburn's Power
Skiff
Bruce Builds
Roar
Dave
Carnell
Rich builds
AF2
JB Builds
AF4
JB Builds
Sportdory
Hullforms Download (archived copy)
Plyboats Demo Download (archived copy)
Brokeboats (archived copy)
Brian builds Roar2 (archived copy)
Herb builds AF3 (archived copy)
Herb builds RB42 (archived copy)
Barry Builds
Toto
Table of
Contents
