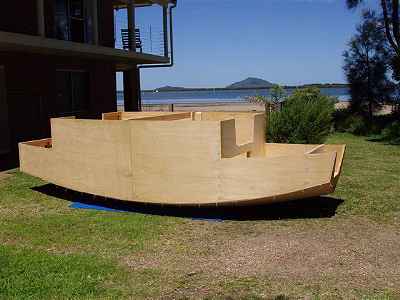
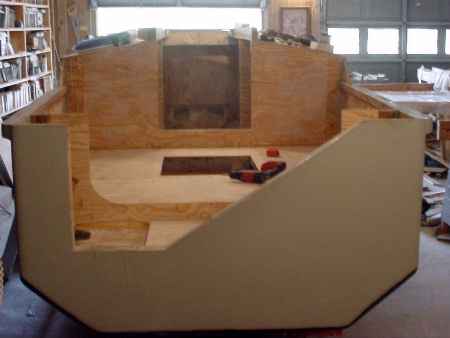
Greg Flemming's Down Under Scram project, now right side up.
Contents:
Contact info:
Jim Michalak
118 E Randall,
Lebanon, IL 62254Send $1 for info on 20 boats.
Jim Michalak's Boat Designs
118 E Randall, Lebanon, IL 62254
A page of boat designs and essays.
(15feb05) This issue will continue the series about drawing boats. The 1March issue will rerun the "calculating displacement" essay.
THE BOOK IS OUT!
BOATBUILDING FOR BEGINNERS (AND BEYOND)
is out now, written by me and edited by Garth Battista of Breakaway Books. You might find it at your bookstore. If not check it out at the....ON LINE CATALOG OF MY PLANS...
...which can now be found at Duckworks Magazine. You order with a shopping cart set up and pay with credit cards or by Paypal. Then Duckworks sends me an email about the order and then I send the plans right from me to you.

|
Left:
Greg Flemming's Down Under Scram project, now right side up.
|
|
|
Drawing Boats 3
QUICK REVIEW....
In the last "drawing boats" issue I talked about the importance of the end view of the design. This issue will start the layout of the lines of the Bobsboat design.
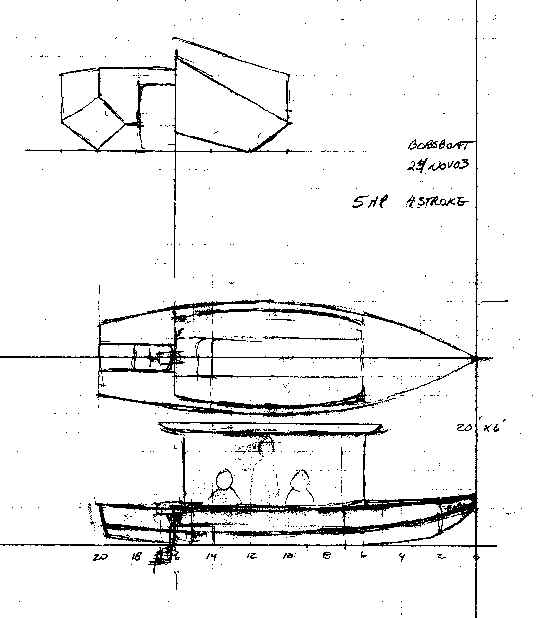
THE END VIEW...
I'm going to start by putting hard dimensions on the drawing of the end view. A lot of this is arbitrary but based on experiences with past similar boats. The size of the boat is based on what it's mission is: lets' say take four adults in relative comfort at slow power speeds, say with a new 5hp four stroke motor that will be quiet and fuel efficient. Four adults will total maybe 700 pounds and that motor another 100. The hull of something like this will weigh maybe 400 pounds so the total I would like to float with good lines (ie the ends and chines of the boat, all the sharp corners, will be out of the water) will be about 1200 pounds. The next web page issue will show how to check this.
Another goal will be that the planks will not be twisted. This will mean that section lines of a plank in the end view will be parallel. But I'm going to break this rule in the bow of the bilge panels and allow some twist. I'll explain why later.
And finally as discussed the last time I'm going to show all the lines in the end view as straight lines. Like this (this drawing and others will not be to scale but the dimensions shown were figured on the paper drawing):
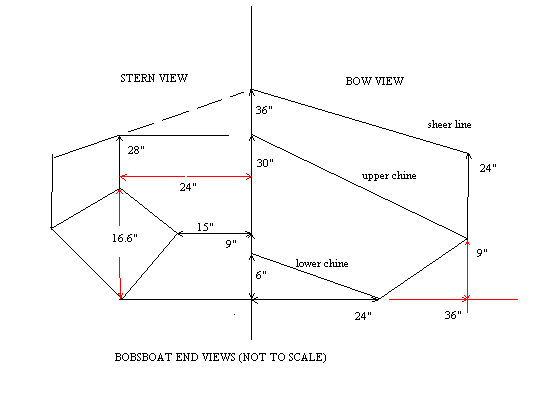
Just some general notes about the layout. The top width and depth is to give comfort and spread out room for the adults with some wide bench seating. The bottom width is at 4' to fit on a sheet of plywood, it could be narrower but I see no need for that and the wider the less tippy. The transom width is at 4' to fit on plywood also, it could be narrower but this boat is supposed to have its motor mounted in a wide slot so width might be important here. The stern is swept up higher than I expect will ever be needed to keep the transom from "dragging" through the water at this boat's slower cruising speeds. Same with the height of the bilge panels. But in the bow bottom I swept it up less with the idea that it will push through the water a bit and stay quiet. Bows like this work quite well if they are not swept up at all, by my experience. And by my experience a boat shaped like this can take quite an overload and still go well, unlike a plumb bow boat.
The sweep of the "sheer" on the bow and stern are also quite arbitrary in a boat like this. It is mostly for looks and I suppose the boat would go just as well if the sheer were dead straight but most folks would think that ugly. You could also sweep it too much and make it ugly, I think. This is one area where only a model can tell you how it's gonna look, although some of the new boat modling software will take a good stab at a pictorial representation.
NEXT, THE TOP VIEW...
You might be tempted now to draw the side view but I can assure you that your work will be a lot less if you go straight to drawing a top view. In this hull with plumb sides the sheer line and the top bilge line will appear as one and the same.
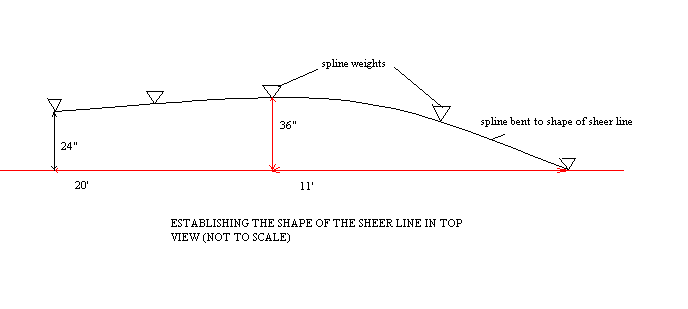
Here is how I would do that: First determine where the widest point of the boat will be. Hint: If you put the widest beam at 55% of the length you will end up with a normal looking boat. That is where I am going to put it on this 20' long hull - at 11' from the bow. (I'm reminded here of Phil Bolger's argument that the bow of your boat should be a little faster than the stern - otherwise the stern will on occasion try to pass the bow and that ain't good.)
So now I have three points of the top view of the sheer determined, the bow tip, the widest point and the stern flat. On the drawing board I lay out those three points and spring a batten through them using just three spline weights, like those shown in black. After those points were established I found I had to add other weights as shown because the natural curve of the batten wanted to spring outward beyond my 55% point and I used two more weights to spring it back into position. Like this:
That done I take dimensions of the sheer's width say every two feet to sort of "digitize" the curve of the line. Like this:
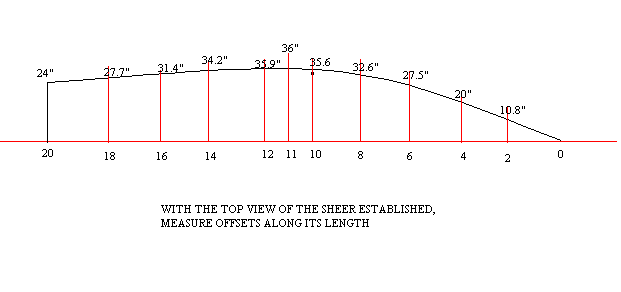
GUESS WHAT???
The shape of the hull aft of the widest beam is now totally esablished. We need only figure it out. The shape of the hull forward of the widest beam is about 70% established because we are allowing some twist in the bilge panels. If we were not allowing the bilge panels to twist then the hull shape there would now be totally established. That would be true of plumb bow multichine hulls I've done like Ladybug. But for a hull like this where the upper chine sweeps way up at the bow, to not allow twisted bilge planks would doom the boat to having an extreme rake to the lower bow which would shorten the waterline, and reduce capacity. In the case of Bobsboat the point of the V of the bow bottom would be about 5' aft of the bow at the sheer line if the bilge planks were not twisted to extend that point to 2' aft of the bow sheer.
Let's go back to the stern and find all the points needed to draw the side view. First use the top view to take note of the width of the hull at various stations. Then draw those stations in on the aft end view, like this:
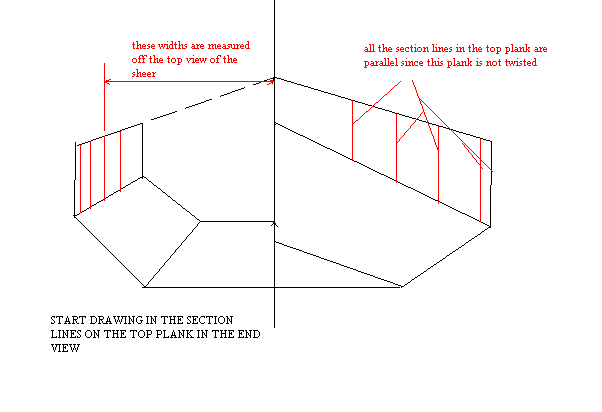
Now at each station you can measure up from the base line and determine the height of the sheer and upper bilge panel in the side view. You can spot them onto the beginning of a side view in that area.
But since there is no twist in the panels in the stern we can also draw the lines that represent the bilge panel in the end view, like this:
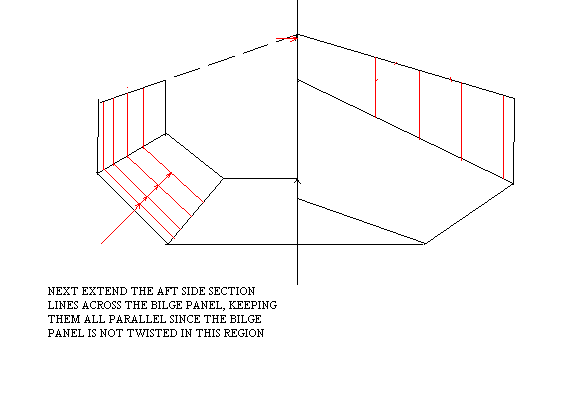
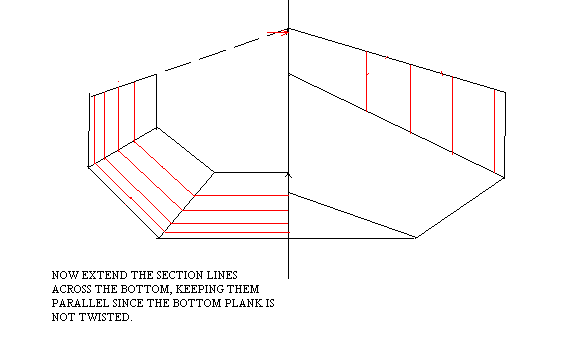
Connect those bilge lines across at the bottom panel and you will get the width of the bottom panel at each section.
THAT BOW...
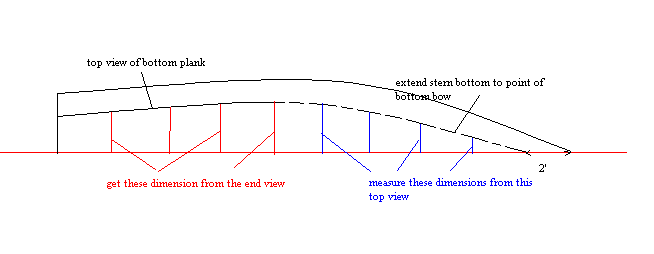
At this point you can go to the top view again and draw in the bottom plank, at least in the stern. In the region of the bow I will extend the bottom plank smoothly to a point 2' from the bow as shown in the original Bobsboat sketch. Like this:
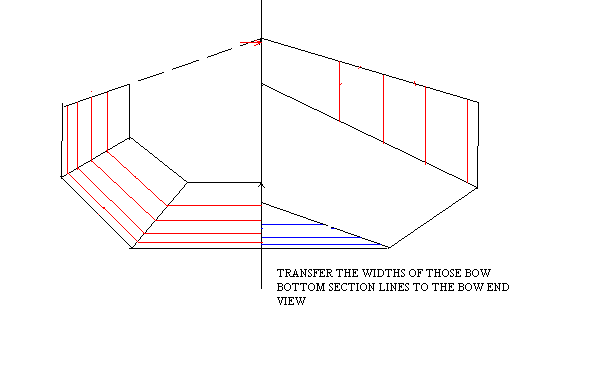
Now we also can measure the widths of the stations along the bottom plank in the bow region and transfer those to the bow end view, like this:
Then we can fill in the remaining section lines in the region of the twisted bow bilge planks, like this:
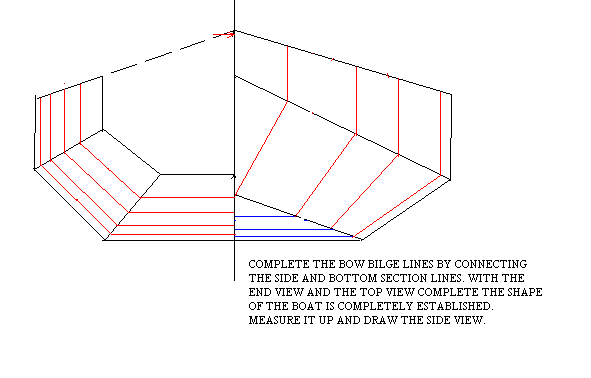
All the thinking is done. With the top view complete and the end view complete, the side view dimensions are all there. Just drawing it remains. The "lines" of this boat are done.
There are other ways of doing this but I have found the above to be the most efficient both in labor and in getting a good looking boat. It's quick once you get the hang of it. I suppose it might take an hour to get the lines completely done like this. If you decide to change something remember that changing something in one view usually results in changes in the other views.
At this point the best plan of action is usually to scope it out with a good program like Hullforms. In fact one of the very first things to do is to get a handle on the displacement of your new design, so next time I'll show how that is done with a rerun of an old essay on the subject. If it proves OK we'll move on to the details.
NEXT TIME...
..calculating displacement.
TOON2
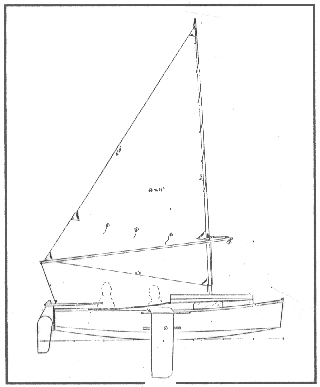
TOON2, CUDDY SAILBOAT, 15' X 5.5', 300 POUNDS EMPTY
Toon2 is in almost every way a multichine version of the AF3. I think these multichine hulls are more like round bilge hulls in that I keep the upper chine above any normal waterline so only the very easy lower chine flows through the water. Other boats shaped this way such and Piccup Pram and Woobo have proven to be very fast and well behaved. Yet they still have a flat center bottom plank that allows you to beach the boat upright.
So one might think that a multichine like this is in every way better than a real flat bottomed boat, but that is not totally true. For one thing multichines have a few more pieces to make and must be assembled with taped seams. Taped seams are light and probably more rot resistant than chine log construction but they can be a bit harder to understand at first glance. And someone building a boat with his children might have second thoughts about the kids messing around with large pots of epoxy. Also the bottom plank of a multichine hull is a lot narrower than that of the equal flattie so floor space is reduced, a real factor if you hope to sleep two on the cabin floor, which you can't do with Toon2.
Toon2 has about the same layout as AF3 but it is about 12" wider and I gave it some bench seats. I'm thinking this will be an excellent solo boat for a short cruise with someone used to tent camping, and yet be a good day sailer for two or three adults, or maybe two adults and two kids. This size boat has always been popular and always will be because it has that sort of capacity and yet can be manhandled by a solo skipper in almost any condition.
The sail rig is the same 96 square foot sharpie sprit that I used on Pencilbox and AF3. It started as the main on my old Bolger Jinni from 20 years ago. Very easy to make and use and efficient if you can live with a 21' mast on a 15' boat.
Toon2 uses taped seam construction with no lofting or ladder building jig required. She needs seven sheets of 1/4" plywood and two sheets of 1/2" plywood.
Prototype plans for Toon2 are $20.
Prototype News
Some of you may know that in addition to the one buck catalog which now contains 20 "done" boats, I offer another catalog of 20 unbuilt prototypes. The buck catalog has on its last page a list and brief description of the boats currently in the Catalog of Prototypes. That catalog also contains some articles that I wrote for Messing About In Boats and Boatbuilder magazines. The Catalog of Prototypes costs $3. The both together amount to 50 pages for $4, an offer you may have seen in Woodenboat ads. Payment must be in US funds. The banks here won't accept anything else. (I've got a little stash of foreign currency that I can admire but not spend.) I'm way too small for credit cards.
The AF4G is done and launched. Writeup after testing:
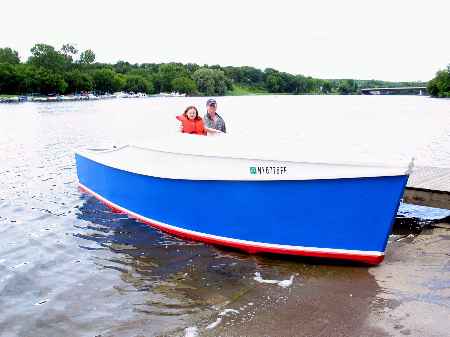
Garth has the big Cormorant project to the point where he can run power to it and set it up with a mattress and TV set and Mr Coffee and make it a hangout for the New York winter!
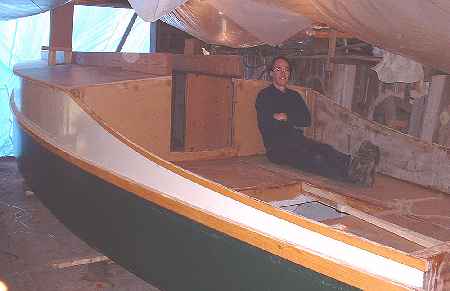
The out West Picara has its roof and some major sail rig bits done, but the Utah winter is closing in:
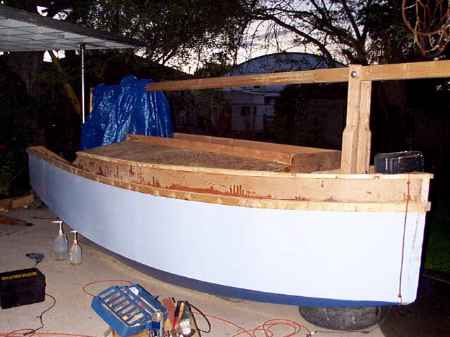
The down South Picara is getting its innards done.
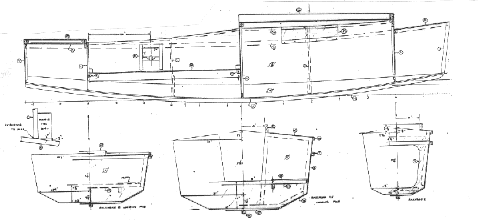
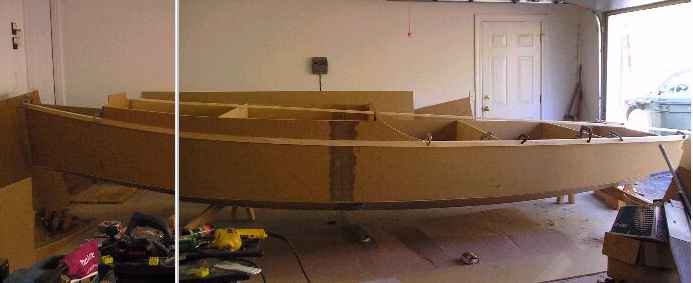
This long and lean project is a 19' version of Toon2. I don't have the drawings done yet. The builder is working from preliminary drawings and is about to pass me up. MDO plywood looks like cardboard now but it isn't.
AN INDEX OF PAST ISSUES
Hullforms Download (archived copy)
Plyboats Demo Download (archived copy)
Brokeboats (archived copy)
Brian builds Roar2 (archived copy)
Herb builds AF3 (archived copy)
Herb builds RB42 (archived copy)