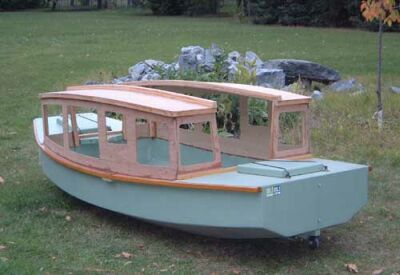
Derek Waters is converting his Piccup into a Piccup-Watcher.
Contents:
Contact info:
Jim Michalak
118 E Randall,
Lebanon, IL 62254Send $1 for info on 20 boats.
Jim Michalak's Boat Designs
118 E Randall, Lebanon, IL 62254
A page of boat designs and essays.
(15oct05) This issue will put a sail rig on Bobsboat. The 1 November issue will rerun the knockdown recovery essay.
THE BOOK IS OUT!
BOATBUILDING FOR BEGINNERS (AND BEYOND)
is out now, written by me and edited by Garth Battista of Breakaway Books. You might find it at your bookstore. If not check it out at the....ON LINE CATALOG OF MY PLANS...
...which can now be found at Duckworks Magazine. You order with a shopping cart set up and pay with credit cards or by Paypal. Then Duckworks sends me an email about the order and then I send the plans right from me to you.

|
Left:
Derek Waters is converting his Piccup into a Piccup-Watcher.
|
|
|
Designing Boats 10
A SAIL RIG FOR BOBSBOATMany of you know I hardly ever advise a sailrig be put on a powerboat. If you do that you usually get a very poor sail boat and a really cluttered powerboat, a lose-lose situation. But Bobsboat is different, I think, because it was intended from the first to be low speed. It has the lines, with a swept up narrow stern with all it its transom out of the water, that provides low drag at low speeds. (These same lines will make it go crazy if you add power to try to make it plane.) But, you say, Bobsboat has that big well cut out to accept the motor. True and I really don't know how that will affect sailing. I figure it this way: if you want it as a sailboat you can built it easily without the well. If you build it as a powerboat, my added sailrig will not really be in the way and easy enough to leave at home if you don't like it. Anyway, folks will ask for a sail rig and I will give them my best guess and in this case it might be worth the work.
Actually, adding the sail rig will be as easy as one, two, three...
One...

Start with a side view of Bobsboat. Draw a vertical line through the station with the widest beam. In order for Bobsboat to handle well the leeboard's area MUST be centered on this line. And the center of the sail's area MUST be centered on the line or slightly aft of the line, it can't be ahead of the line.
TWO...
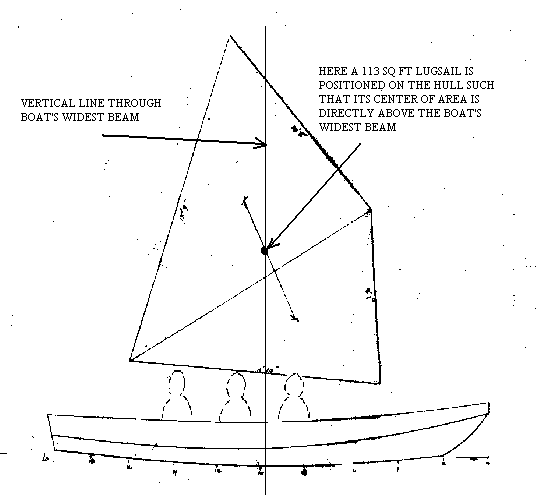
Make a drawing of the sail you intend to use drawn to the same scale as the above side view. Find the center of that sail's area per the "Sail Area Math" essay that I repeat every year. You might ask, "How much sail area do I need?" and there is in the way back issue archives an essay about that subject too. It is not a quick thing to analyze since it requires figuring the stability and weight of the boat, etc. At this stage for Bobsboat I will choose the same sail as is on the Bolger Windsprint, 114 square foot lug sail. Several sailmakers have made this pattern for sale and I can say from experience that it is about as large a sail as you want to handle by yourself solo in a light boat.
Place that sail drawing over the Bobsboat drawing with its center of sail area just aft of that vertical line through Bobsboat's middle, as shown above. You can tilt it one way or another to make it look jaunty. Be sure to keep it high enough to provide some head room and a clear view for the crew - leave that talk about how a deck sweeping sail is more efficient to the racers.
Now add the leeboard. Make the leeboard about twice as deep as it is wide and make its underwater area 4% of the sail area. The leeboard also should be narrow enough to tuck up neatly under the upper guard with its leading edge above the bottom of the boat, ie it won't be hitting the ground when retracted with the boat beached. Draw it such that its center of area is right on that vertical line, like this;
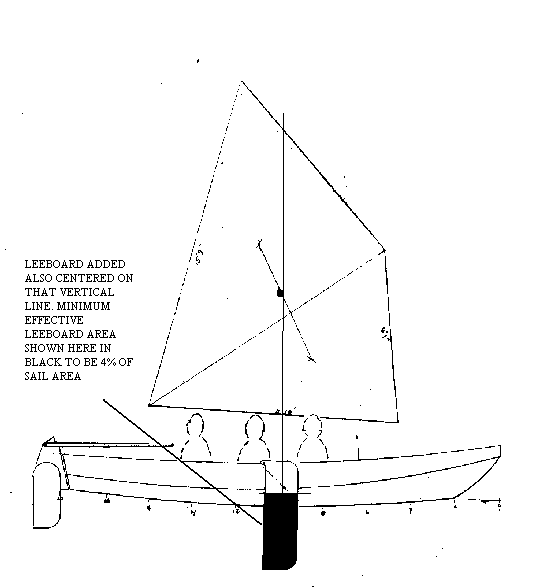
(If you are using a daggerboard or centerboard instead of a leeboard, those need not be placed at the widest point of the hull, but even then the sail's area needs to center directly above the daggerboard/centerboard.)
THREE...
Now add the mast. A mast on a boat like this MUST attach to a bulkhead and MUST cross the sail's yard near 40% aft on the sail's head. like this:
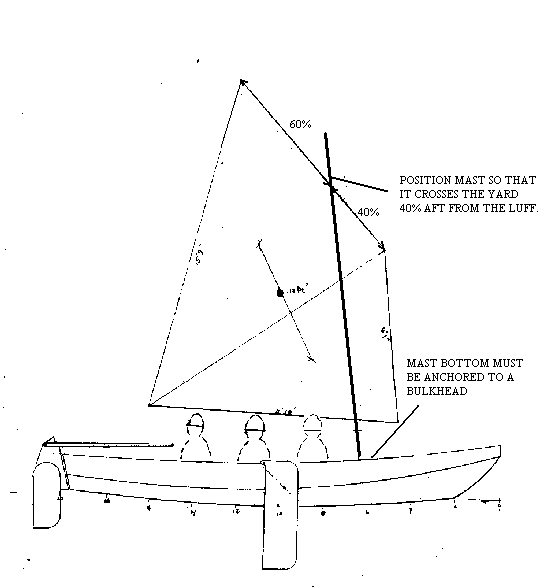
With the mast located you can draw the mast step and partner on the hull.
At this point the overall geometry of the sail rig is locked in. You could make the sail larger or smaller, with the leeboard adjusted if you wish to maintain the 4% area relationship with the sail, but the orientations along that vertical line cannot change.
How long the mast? It needs to be at least a foot longer than you would first think. Don't draw it too short and if you are building a mast always make it (and the tiller) longer than the designer shows. Sails and ropes stretch and the extra length will allow for that. Same with the yard and boom - make them too long.
How big in diameter the spars? First of all I'll say that for lug sails now I always show spars with square cross sections. They are a lot easier to make and with a lug sail the square section is of no hinderence to the sail. And square is a lot stiffer than round of equal size. So it is a win-win situation. Square also allows simple box construction if you like. That does not save as much weight as you might think but on really large spars will simplify fabrication. The mast cross section is usually determined by stiffness requirements or perhaps I should say desires because on a lug sail the mast can be quite limber and still work well. But folks don't want to see their masts bending away off to leeward in a blow. So here I would use a 3" square cross section where the mast meets the partner and taper it to 1-1/2" square at the tip. Should be able to make that up from 3/4" boards quickly and hollow to save a bit of weight. As for the yard, a 1-1/2" square solid stick will work although it will bend also in a blow and you might want instead 2-1/4" square (or round for looks). Bobsboat can be a little tricky to fit out this way. It won't by itself be too demanding of spar strength but if the skipper is a popular guy and always goes out with that ten foot cockpit full of people the weight on board can get quite high and stressful to the spars. Luckily on a lug rig, the spars are very easy to change and experiment with.
THREE AND A HALF...
Although the important basics are done, there are some other details to attend to.
One thing is the rudder. I don't have a majic formula about this, I just draw something that looks like a rudder. There will be some problem with the Bobsboat rudder as far a clearance with the motor but that is always the case with any sailboat with a motor. I always make a deep narrow rudder and they have always worked well. The only rudder that I ever had trouble with was when I tried a shallow wide rudder on my WeeVee dinghy, with endplate. On a brisk downwind run it would not hold the boat on course and the boat would turn around into the wind. I replaced it with my usual deep swing rudder and all was well again. So I leave those shallow wide endplated rudders to Phil Bolger and they always work well for him.
One last detail to figure out is the pivot point for the leeboard. This has been the source of cursing for many builders who find their leeboards don't pivot up and down like they would wish. Here is how I figure it:
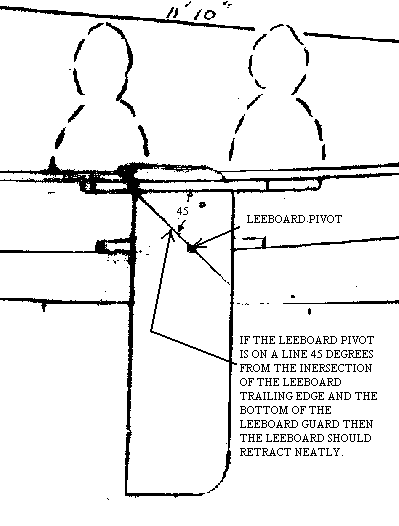
Draw a line at 45 degrees reaching down and forward from the point where the leeboard's trailing edge and the lower edge of the upper leeboard guard intersect. I think the leeboard pivot can be anywhere on that line and the leeboard should retract nicely under the guard. For strength reasons it is best if the pivot is close to the middle of the board, ideally say between a third and a half of the way from the board's leading edge. You need to take the strength of the leeboard seriously because a failure can be something of a catastrophe and will usually happen at the worst possible time - same with the mast.
Now, why do builders, myself included, have problems with getting the pivot located correctly? Here is my theory: for the leeboard (or centerboard) to retract correctly all the factors of hull shape, leeboard guard postitions, etc. need to be right on. The leeboard is the last piece of the puzzle to get made and will have to accommodate all the errors that have accumulated in the hull building. So by that time things may have gotten off blueprint enough that the leeboard won't fold properly even though the pivot hole has been well located. Fear not! My given pivot location should be taken as a first guess. Draw its location boldly on the leeboard, hold the board temporarily in position on its guards and see if it will fold properly. Adjust as required. And if you have already drilled the hole and don't like the folding results, drill another hole that will work well! Leave the bad hole there so people will have something to talk about.
NEXT TIME...
...We'll capsize a sailboat.
Imresboat
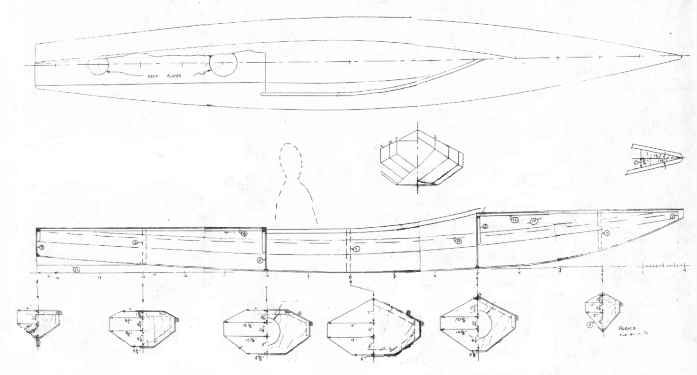
IMRESBOAT, DOUBLE PADDLE CANOE, 15.5' X 26", 50 POUNDS EMPTY
Imresboat is a slimmed up version of Larsboat which was designed for Lars Hasselgren to replace a Folboat that had finally met its end. Lars wanted capacity for two, plus decking, as with his old Folboat. But Imre wanted something more slender and lower in the same length. The result is 26" wide instead of 30" wide. And the result of that is that Imresboat is a single seater because the capacity has been reduced with the width. Imre wanted it even narrower but I hoped to stay within the tippyness bounds of most folks. Not sure yet how narrow something like this can get before the normal guy can't sit upright in it. I do know that you apparently can get used to about anything in that respect as experienced kayakers do.
The deck opening is smaller to sit just one man but I think it is longer than the usual kayak because us older folks have trouble fitting our legs through the hole in a performance kayak. Something like putting on a pair of pants without standing up.
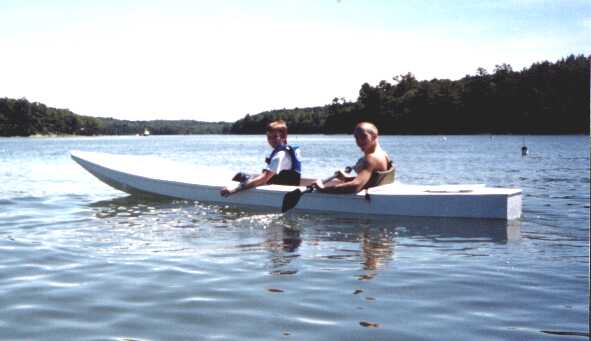
(Here is a photo of Paul Moffitt's Larsboat with two aboard.)
Another change I made with Imresboat is to go to thinner plywood to save weight. In this case I suggest 1/8" ply for everything except the bottom which is still 1/4". Not sure where the 1/8" plywood comes from but it used to be what they skinned doors with. Be sure to boil a sample and hope it is waterproof. Anyway, Chuck Leinweber brought a Toto to our messabout with 1/8" ply sides and 1/4" bottom and it struck me as being fine for stiffness and strength. Like Toto and Larsboat, Imresboat is taped seam construction. I'm guessing at the 50 pound weight but for example Larsboats built of 1/4" plywood have weighed between 60 and 80 pounds depending on who built them.
Taped seam construction from four sheets of 1/8" plywood and one sheet of 1/4" plywood.
Imresboat plans are $20 until one is built and tested.
Prototype News
Some of you may know that in addition to the one buck catalog which now contains 20 "done" boats, I offer another catalog of 20 unbuilt prototypes. The buck catalog has on its last page a list and brief description of the boats currently in the Catalog of Prototypes. That catalog also contains some articles that I wrote for Messing About In Boats and Boatbuilder magazines. The Catalog of Prototypes costs $3. The both together amount to 50 pages for $4, an offer you may have seen in Woodenboat ads. Payment must be in US funds. The banks here won't accept anything else. (I've got a little stash of foreign currency that I can admire but not spend.) I'm way too small for credit cards.
The out West Picara is I am told done to the point of using it as a powerboat:
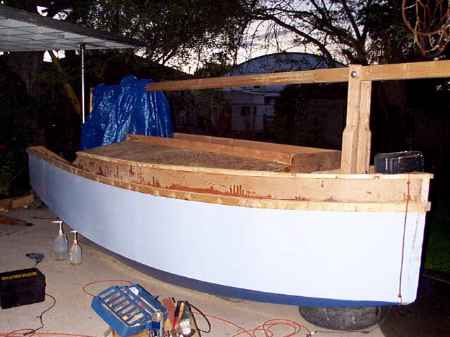
The down South Picara is more or less complete now. Should have an updated photo soon.
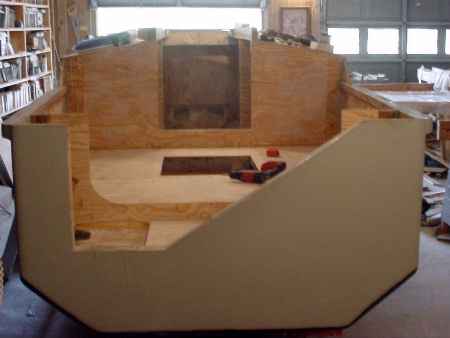
This long and lean project is a 19' version of Toon2, awaiting its sailrig. Long and narrow and with multichines, this should be the fastest boat I've ever drawn if the skipper can hold it down.
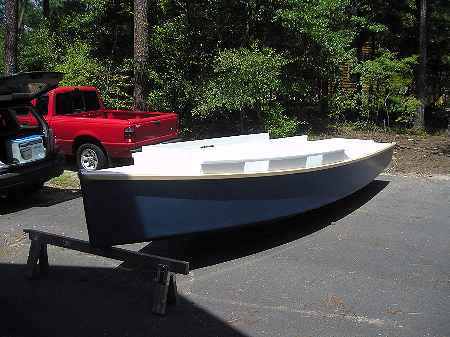
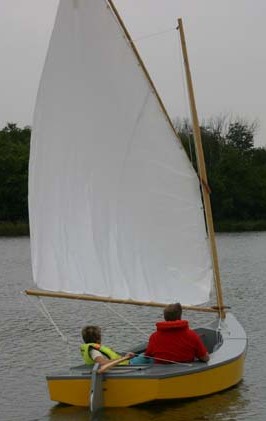
A Vector builder is keeping a website of the project at http://www.geocities.com/michsand@sbcglobal.net/ and here is a photo of his boat on its first sail, just before the storm hit. I also have photos of a Vector completed by Pete Mohylsky in Florida. Hopefully a report soon:
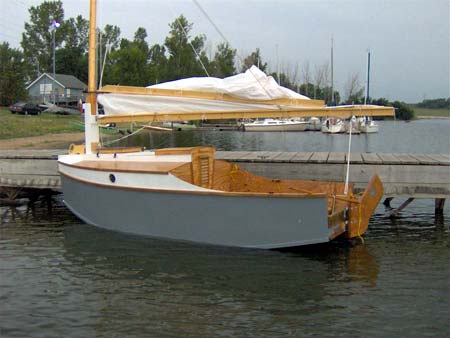
Here is a Musicbox2 I heard about through the grapevine.
AN INDEX OF PAST ISSUES
Hullforms Download (archived copy)
Plyboats Demo Download (archived copy)
Brokeboats (archived copy)
Brian builds Roar2 (archived copy)
Herb builds AF3 (archived copy)
Herb builds RB42 (archived copy)