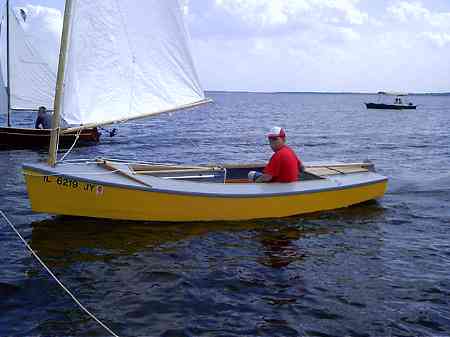
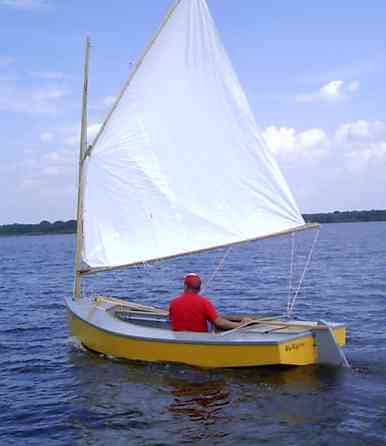
Mike Sandell sails his new Vector at the Rend Lake Messabout.
Contents:
Contact info:
Jim Michalak
118 E Randall,
Lebanon, IL 62254Send $1 for info on 20 boats.
Jim Michalak's Boat Designs
118 E Randall, Lebanon, IL 62254
A page of boat designs and essays.
(15jun06) This issue will rerun the rowboat setup essay. The 1 July issue will present the Rend Lake 2006 Messabout.
THE BOOK IS OUT!
BOATBUILDING FOR BEGINNERS (AND BEYOND)
is out now, written by me and edited by Garth Battista of Breakaway Books. You might find it at your bookstore. If not check it out at the....ON LINE CATALOG OF MY PLANS...
...which can now be found at Duckworks Magazine. You order with a shopping cart set up and pay with credit cards or by Paypal. Then Duckworks sends me an email about the order and then I send the plans right from me to you.

|
Left:
Mike Sandell sails his new Vector at the Rend Lake Messabout.
|
|
|
ROWBOAT SETUP
I've been showing photos of Max Wawzyniak's Oracle prototype for the past few month. The project was done a while back but we were frozen in until about the first week of March. Then it all burst out then and we had a day in the 70'sF and it was time to launch. That particular day the wind was gusting to 30 and no testing was going to get done but it was a good day to take photos and also to set the boat up in the way I like to see it done.
We went to Washington County lake here in Illinois which is about a mile long and with many arms, steep hills around and a shallow launch ramp in a protected area. A very nice rowing lake.
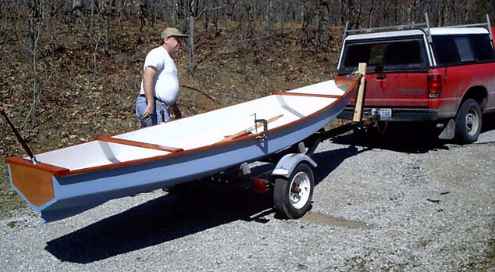
The first thing I must say to those who are finishing a new rowing boat is to not install the rowlocks in the shop! I usually show a rowlock location on the drawing but that is just my best guess at the time I drew the boat. If you have a little patience you can get it just right the first time by following this essay.
Max unloaded his new Oracle and showed me his gear. He had made a low rowing seat, 3-1/2" high, and had some nice 8' oars. The seat looks low but you will usually have a cushion on top and this is a low sided boat. This seat turned out to be just right for Oracle.

Next the boat was placed in the water tied loosely to the dock. Max climbed in and we looked for the seating position that would provided a level boat.
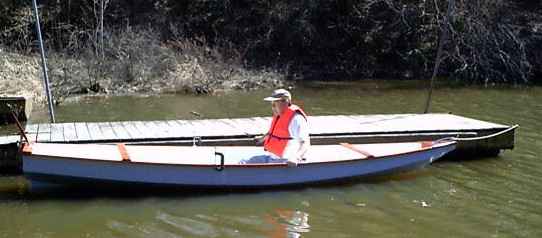
Here he is too far forward and you can see that the bow is down and the stern is up. I might add that it really takes two people to get this just right - one to be the skipper, and another to watch for the correct trim since seeing the trim from inside the boat can be difficult.
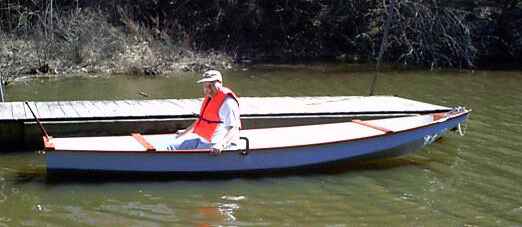
Here he is too far aft. The bow is up and the stern is down:
Here he is with his weight located properly for a level boat. At this time he marked the seat location on the bottom of the boat so he could easily repeat the location in the future.

Sitting in the properly trimmed boat Max holds the oars comfortably and notes where they cross the wale.
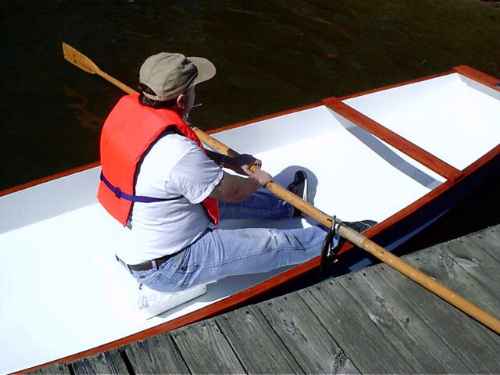
At those points he places a large C clamp in position to simulate the rowlocks.

Now for a test row using those C clamps as thole pins. If the clamps are large enough you might pass the oar through the opening or you might tie the oars to the clamps. In this case Max was just careful to keep the oars against the clamps.
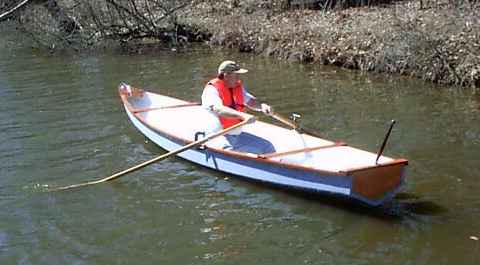
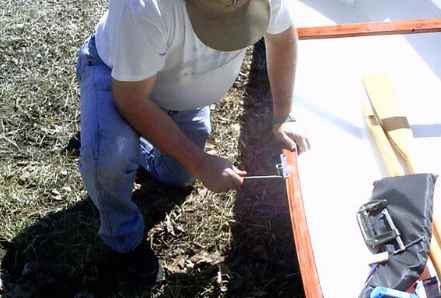
At this point you can shift things around. Once you find the best place for the oarlocks, note the position and install the lock sockets. In this case Max used common sockets mounted outside the wale. He screwed them into position for now, to replace the screws with small bolts in the future. (Screws have a bad habit of working loose at the worst time.) Sockets mounted outside the wale instead of inside? They function a lot better outside with no chafing on the wale but if you are using the boat as a tender then inside the wale might be better because there will be no metal to gouge the mothership.
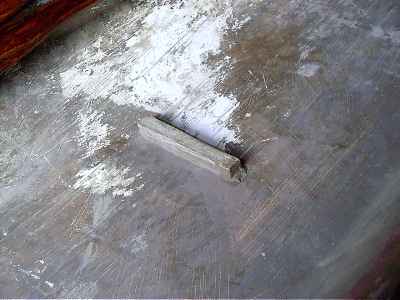
Not quite done yet. A good rowing setup will also have cleats inside the hull against which you can brace your feet. It's not a big deal in calm conditions but for rowing hard, and in some conditions all rowing will be hard, the cleats will make a huge difference in the amount of force you can deliver to the oar.
Max didn't install his on his test day but the cleats can be about 3/4" square and 6" long and mounted in a comfortable position. Many rowing boats will have several cleats spaced maybe 3" apart to allow for different sizes of oarsmen. Here is a photo of the cleat in my old Roar2. It was meant to be a temporary fit and was plopped in place with a blob of Bondo. Still temporary after 12 years!
Perhaps just as good as a cleat is the arrangement that Rob Rohde-Szudy made for his Piccup Pram with a rope loop to the seat that captures a bracing bar that rests on the floor of the boat:
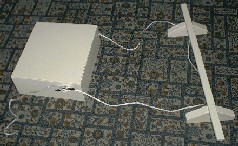
NEXT TIME: We'll look at the 2006 Rend Lake Messabout.
Vector
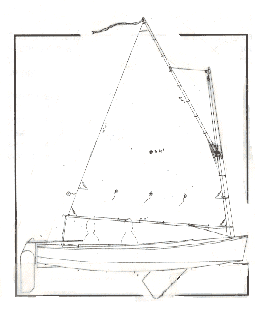
VECTOR, SAILBOAT, 15' X 5.5', 350 POUNDS EMPTY
Every now and then I draw up a sailboat with a centerboard. A boat with a centerboard can have a prettier rig sometimes because the rig does not have to be centered over the hull's widest beam, as it does with a leeboard boat. But the sail area still has to be right above the centerboard for the boat to balance well. In Vector's case, the widest hull beam is 10' aft and the centerboard is between 4' and 8' aft. And that is the downside of the centerboard - it takes up some the prime space inside the hull.
Some designs will skimp on the centerboard size in order to take up less prime space but the result of that will always be more leeway when sailing to windward. In round numbers the area of the board that moves through the water needs to be about 4% of the sail area to efficiently counteract the full side force of the sail. Essentially the centerboard "flies" through the water in the same way that an airplane's wing flies through the air. True, water is about 900 as dense as air but things conspire to keep the centerboard from getting 900 times as much force from a given area. First the centerboard cannot develop a really high lift coefficient since it must be symmetric in cross section in order to operate on both tacks, unlike a soft sail which can be shaped with camber to reach a Cl of 1.5 in a good sail and maybe 2.0 in a great sail. Worse yet is the fact that the centerboard will flow through water at a fraction of the wind speed, and if your boat is beating to windward at 3 knots in a 15 knot wind, the 4% rule works out almost exactly. That is the worst case - beating to windward especially in rough water. If your boat were to hit a big wave and slow down below 3 knots, or if the centerboard were undersized to start with, the board will "stall" and develop no more lift no matter how much angle of attack (leeway to a sailor) you demand of it. The only solution would be to "fall off" the wind, pick up more speed, and try again just as an airplane pilot needs to recover airspeed after a stall.
Vector was inspired by the 12' Skat. It will be a much better family boat than Skat because of its greater capacity. Two adults and two kids would do it. There is a huge water tight storage volume behind the cockpit. The transom is quite wide and will take a small motor on a bracket mount, or you might try building in a motor notch to one side.
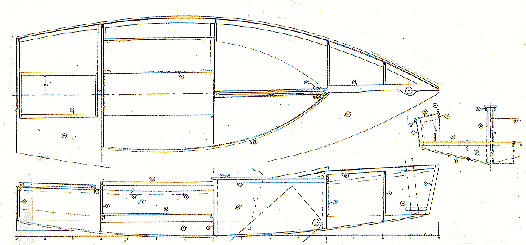
She's V bottomed as you see. Should be fast and handy, better than a flat bottomed boat although she will be a bit tippier and draw a bit more water than the flat bottomed boat.
There are two prototype Vectors that I know of. The first was by Peter Mohylsky down on the Gulf Coast (hope it is still there).
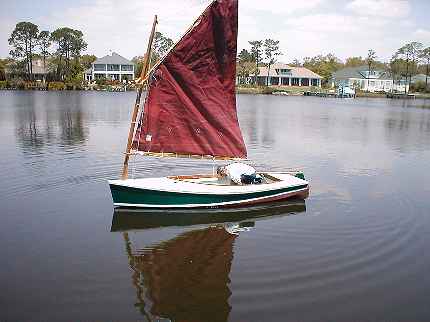
I never heard much of that boat but the second by Mike Sandell showed up at the 2006 Rend Lake Messabout much to my surprise (I had to ask what it was) and I got to talk to Mike and see it sailing for two days. Mike has a website at http://www.geocities.com/michsand@sbcglobal.net/ (archived copy) where the building is well covered. He was still quite new to the boat but especially on the second day, after he had tweaked the lines on his polytarp sail, he had no trouble sailing and sometimes leading the fleet.

I asked Mike to write a bit about the experience and he responded:
"My Vector was built over a period of five months in 2005, beginning in March of that year. The wood used was AC grade plywood purchased from the Menards home improvement store, with framing purchased both at Menards and Home Depot. The large pieces were cut to shape using a table saw with the blade set to a shallow cut. Small pieces were cut with a sabre saw.
"The glue used in the project was Titebond III, produced by Franklin International. which is an ANSI/HPVA Type I waterproof glue. Clamping of parts on the project was accomplished using a combination of deck screws and PVC clamps.
"Parts were cut in my basement workshop, and assembly was done in the garage. Taping of the seams was accomplished using marine epoxy and fiberglass tape purchased from Chuck Lienweber at Duckworks Boatbuilders. Two layers of tape were applied to both the inside and outside of all seams. Filling was done using both epoxy filled with wood flour, and also polyester auto body filler, depending upon the application.
"The boat was finished using an oil-based alkyd primer and oil-based industrial enamel, also purchased at Menards. Brightwork was various types of moulding pieces, held in place with stainless steel wood screws and stained with a Minwax water-based light oak stain. Final finishing of the brightwork was done using Johnson's Paste Wax.
"Fittings were all purchased from Duckworks. Running rigging is all braided nylon line from the home improvement stores, except for the mainsheet, which is twisted polypropylene, which is easier on the hands than nylon cord. The sail was made using a kit from Polysail International, and was completed in a single day, as advertised. The working lines for the sail are both led to cam cleats on the rear top end of the centerboard box. The mainsheet goes through a traveller mounted on the rear deck, and from there through turning blocks on the underside of the boom and finally to a block on the back of the centerboard box. The rig includes a boom vang, and the boom sets on the mast about fifteen inches above the deck when the sail is properly set.
"My boat includes four minor departures from the plans. The first is centerboard box. The plans call for cutting the bottom of the box to fit the curve of the hull bottom, setting the box on top of the hull, and then glassing it in place. I didn't see any way that I would successfully cut the box to precisely match that curve, so instead I cut the bottom slot wide enough to fit the centerboard box through it. I then glassed it in place from the inside, carved and sanded the protruding end of the centerboard box to match the outside curve of the hull, and then glassed the outside edges to finish the installation.
"The second change was in the seats. I'm a fairly big guy, and found that changing sides during a tack or jibe was difficult due in part to the limited foot space between the seats. The original seats were fourteen inches wide, and I replaced these with twelve-inch wide seats. The extra four inches made a huge difference for me.
"The third change was in the jaws for the boom. On a windy day last summer (before I had installed the boom vang) I broke the jaws while running downwind. Rather than build a new, long set of jaws, I cut off the broken set short, and then just used a longer cord to wrap around the boom. The cord is waxed to help ease movement, and does not carry any parrell beads. This has worked fine for me since then.
"Lastly, I did not construct my gaff and boom from laminated lumber as specified in the plans. Both are banister rail pieces purchased at Home Depot. The piece used for the gaff felt stiff and heavy, and was used as-is. The piece for the boom felt less robust to me, and got another piece of wood laminated to the flat surface on the bottom. I think I cut that one a bit too low, however, and it still worried me a bit. I plan on making a new boom this winter, which will have a deeper piece glued to the bottom of the railing to produce a "keyhole" shaped boom, similar to the T-booms seen on other small wooden boats.

"My Vector was named "Valkyrie", in homage to my Swedish ancestry on my father's side. Because of the gaff rig, it takes a bit more tweaking of the sail to get things just right than on simpler rigs. But once set, she really screams. "Valkyrie" accelerates very quickly on reach, and will point nearly as high as a sloop rig. But if the sail is not set properly, she'll flutter and stall in a heartbeat. Really keeps me on my toes! The only additional change I feel the boat needs is a longer tiller for single-handed sailing. Other than that, she is a joy to sail, and was worth every last minute put into her creation.
Taped seam construction. She needs four sheets of 1/2" plywood and six sheets of 1/4" plywood.
Plans for Vector are $40.
Prototype News
Some of you may know that in addition to the one buck catalog which now contains 20 "done" boats, I offer another catalog of 20 unbuilt prototypes. The buck catalog has on its last page a list and brief description of the boats currently in the Catalog of Prototypes. That catalog also contains some articles that I wrote for Messing About In Boats and Boatbuilder magazines. The Catalog of Prototypes costs $3. The both together amount to 50 pages for $4, an offer you may have seen in Woodenboat ads. Payment must be in US funds. The banks here won't accept anything else. (I've got a little stash of foreign currency that I can admire but not spend.) I'm way too small for credit cards.
The out West Picara is I am told done to the point of using it as a powerboat:
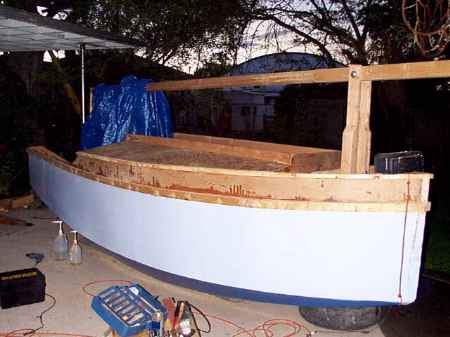
The down South Picara is more or less complete now. Should have an updated photo soon.
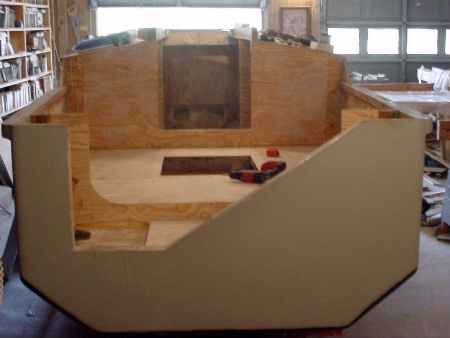
This long and lean project is a 19' version of Toon2. Shown here on its first sail in very light winds. We will wait a bit longer to get a sailing report in stronger winds.
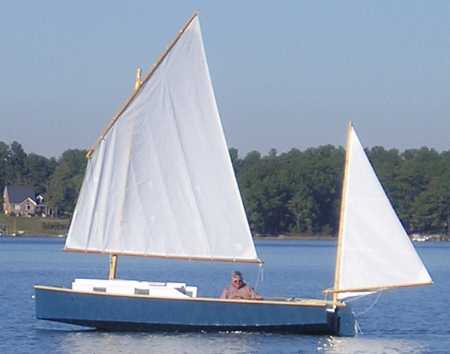
Here is a Musicbox2 I heard about through the grapevine.
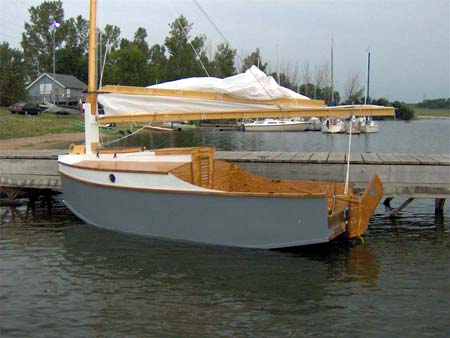
We have a Philsboat going together in California:
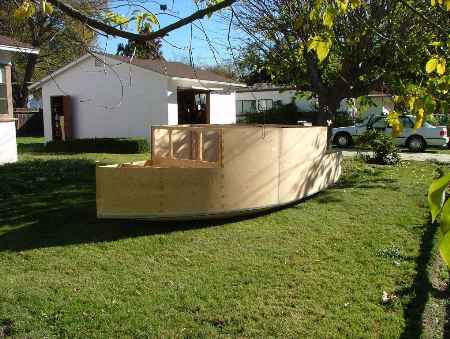
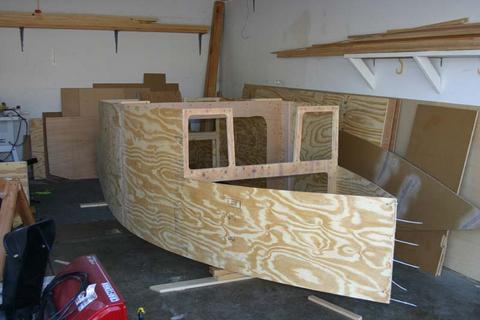
And here is another Philsboat in northern Illinois:
AN INDEX OF PAST ISSUES
Hullforms Download (archived copy)
Plyboats Demo Download (archived copy)
Brokeboats (archived copy)
Brian builds Roar2 (archived copy)
Herb builds AF3 (archived copy)
Herb builds RB42 (archived copy)