
Wojtech Baginski, again, rowed his Robote 60km on the delta of the Vistula river in Poland.
Contents:
Contact info:
Jim Michalak
118 E Randall,
Lebanon, IL 62254Send $1 for info on 20 boats.
Jim Michalak's Boat Designs
118 E Randall, Lebanon, IL 62254
A page of boat designs and essays.
(15sep07) will take a look at "relaminating" my Toto. The 1 October issue will take a look at hull wind drag.
THE BOOK IS OUT!
BOATBUILDING FOR BEGINNERS (AND BEYOND)
is out now, written by me and edited by Garth Battista of Breakaway Books. You might find it at your bookstore. If not check it out at the....ON LINE CATALOG OF MY PLANS...
...which can now be found at Duckworks Magazine. You order with a shopping cart set up and pay with credit cards or by Paypal. Then Duckworks sends me an email about the order and then I send the plans right from me to you.

|
Left:
Wojtech Baginski, again, rowed his Robote 60km on the delta of the Vistula river in Poland.
|
|
|
Relaminating Toto
HISTORY...My Toto was designed in 1992 and I built my prototype at the same time, sort of one hand in the shop and another at the drawing board same time. I built it with "lauan underlayment" which was common at the time and was blessed by some and cursed by others. It was nice stuff to work with since it had no knots, just occasional worm holes. Three ply with the outer plies about 1mm thick and the center about 3mm thick for a total of 5mm. The problem with it was its glue. The lumberyard said it was waterproof but many boat builders said no, it wasn't waterproof. But I forged ahead with it. I recall I used assorted other materials, for example I made the taped seam fillets with polyester Bondo filler but taped the seams with real epoxy. (I don't advise that since you have to sand the fillets before applying the tapes, much better and much quicker to use epoxy fillets and apply epoxied tapes directly over before the fillet sets, thus you have it all cure at once with no sanding at all required!)
THEN...
...about ten years later I could see the cheap plywood was starting to delaminate in places. The rear deck and the edges near the wales were first but that was little concern to me since there was no leaking there. About three years ago the bow started to seep serious water right through the plywood. It would leak for five minutes or so and then seal itself, a nice trait of wood. So I carried on without repair. Two years ago it was time to get serious about fixing that leak, especially since it was clear a large spot, say 10" in diameter, had delaminated on all plies. If I hit a stump there it might go clean through easily.
FIRST REPAIR...
...in that area was sort of a textbook thing, I think. I removed the outer delammed ply with a knife exposing the core ply, then epoxied in two thin layers of fiberglass to bring the surface about equal to the original wood, and then added a third layer that went out to capture the surrounding wood to capture it all. Then I went boating again with no leak!
AND THEN...
...last year I was beginning to get leaks right through the plywood near the seating area. They would stop after a few minutes. Toto is a wet experience anyway, at least when I am at the paddle, and a quarter inch of water sloshing on the bottom is routine. I lived with it.
BUT THEN...
...this year it was clear it was time to fix the boat or retire it. Upon launch it would leak right through the plywood so that I might have an inch of water sloshing at the seat within five minutes. After ten minutes the leak would seal, then I could dump the water and be OK for the rest of the day. But more areas of soft skin showed that both the outer and inner plies had delaminated from the core in some fairly large areas, plus more smaller long narrow delams in other places. I considered scrapping the boat and building something new, but Toto was what I wanted and I would just build another new one. A hard look at the hull gave me the guess that perhaps 10% of it had problems. Was I going to throw away the other good 90%? Not without at least a small fight.
A QUICK FIX...
... I actually tried this in one major leak area. I gave the outer surface a good coat of roofing tar. Don't laugh. That is how boats were treated in the old days and maybe still are in some places. I knew that tar and water don't mix from fixing my roof. Wood under 50 year old tar paper can look lumber yard new if the paper stuck to it. Anyway, it worked for a short time, a couple of trips to the lake. But eventually the outer ply blisters would crack again at the tar and leak again. So it didn't work in this case at least.
NEXT...
... I went to the really troublesome spot near the seat at the bilge and tried to glue the delaminated inner ply back in position (the outer plies there already had the tar treatment). I opened up some of the blisters with a knife, spread them apart as I squirted in Titebond, pressed it flat again as best I could, put waxed paper over it and pressed it all down with some bricks for weights and let set for a day or two. Well, first thing I learned is that Titebond needs air to set up because when I peeled the waxed paper back I still had wet glue. So I let it set up without the bricks, not too well pressed down. Still leaked but perhaps some of the structural integrety was back.
FINALLY...
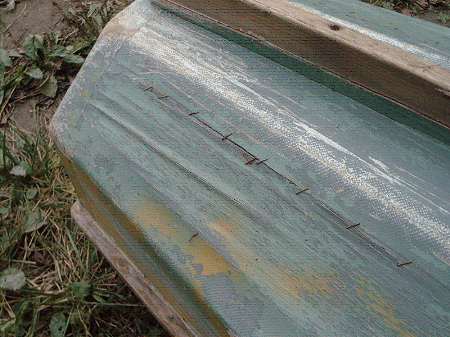
...While wielding my shop stapler around I decided to try one more thing. I opened up the top edge of a delam blister with my knife...
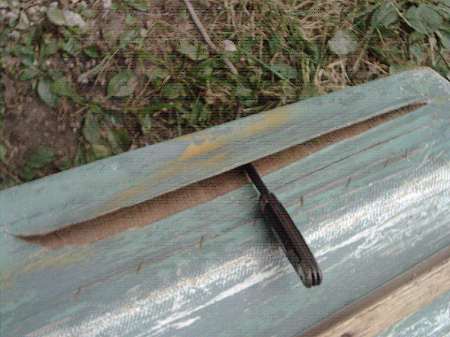
...squirted in glue and gave it time to drip down into the blister
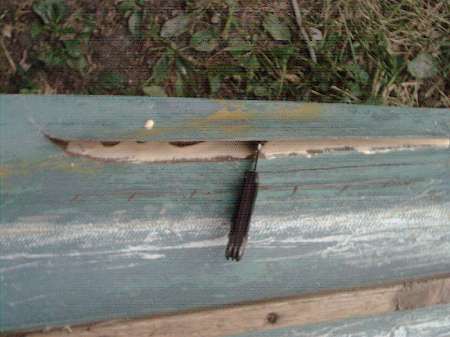
...I used a lot of glue since it was cheap and easy to use. Then starting at the blister bottom I put in a line of stapels to rivet the outer ply to the thick center ply, and worked my way up to the top of the blister squeezing out huge amounts of glue (easy to clean up with water if you are quick about it).
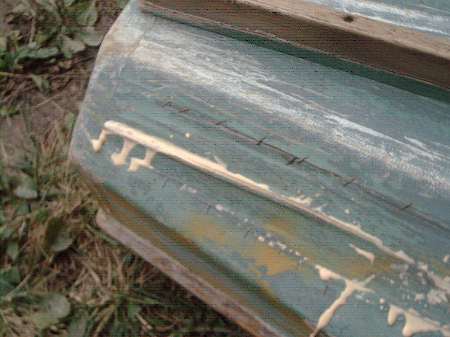
For now at least I have left the staples in giving it a nice Frankenstein appearance. The first few small tests seemed promising so I retried that big area in the seat bilge region. Lots of glue and staples but they are cheap. It is all quickly done. A day or two for the glue to set and off to the lake. Success! With that one area repaired my leak was a fraction of before. Then with each trip home I would attack a new blister, inside the hull and out.
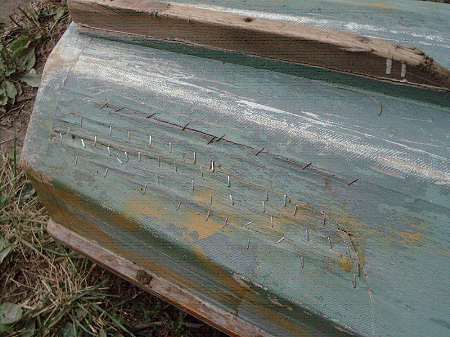
SO, AT THIS POINT...
...As I am writing, the last trip out gave only about 1/8" of water in the bottom and much of that might have come in with my wading shoes. No need to stop after five minutes to dump the water out and hope the leak has sealed itself. I just kept going and after two hours in the water still had that original shallow puddle. I still have areas to fix. The water is getting too cold now for Totoing so it might be a winter project.
A FUTURE FIX...
...might be to fix the exterior blisters, sand and fill smooth and glass the outside. As it is now only my outside bottom has been glassed (and it has not blistered there). But you know me. It is very unlikely that I will spend that money before I see if the cheap quick fix has worked or not. So far I have about $5 in the entire repair. Will that glue I used be any better than the original? We shall find out.
SO WHAT'S THE VERDICT...
... on that lauan underlayment plywood. Well one guy says it delaminated so it is junk. The other guy says it lasted ten years before giving any trouble, right? Another thought I have always had is that the glue might really be waterproof but they put it on too thin in areas. I say that because problems tend to appear in "bands" as if their glue roller was dry in spots.
But I wouldn't use it again and here is why. Before building Toto I built all my other boats out of lumberyard AC exterior fir plywood. I still have three of those boats, Birdwatcher, Roar2 and Piccup. None have any delams whatsover. I don't think AC fir is available anymore but a real exterior plywood is worth looking at.
Stay tuned! Maybe I can sink it next year.
NEXT TIME...
...We'll look at getting blown about by the wind.
Mayfly14
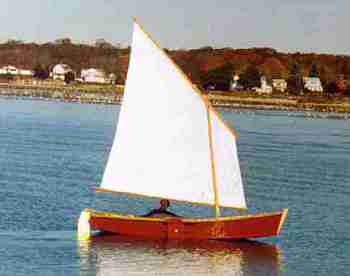
MAYFLY14, ROW/SAIL SKIFF, 14' X 4', 150 POUNDS EMPTY
Mayfly14 is a straight forward flat bottomed plywood skiff for sailing and rowing. She's easy to build because her planks have no twists. That means that the chine log and wale bevels are constant for all practical purposes and can be presawn before assembly. The construction is of the simplest nail and glue variety with no building jigs or lofting required - an "instant" boat. The prototype was built by Garth Battista and kids in Halcottsville, NY.

I think this boat is about the right size for a lot of folks, although I might argue that it is too heavy to cartop with comfort and once you decide to trailer a boat you might as well go to a sixteen footer. Mayfly14 will take two adults easily and yet still be a wonderful solo boat.
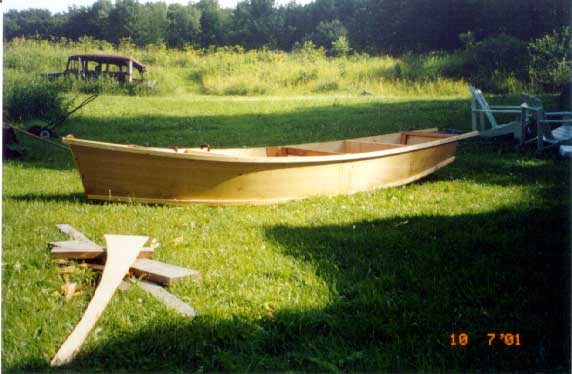
The sail rig is a balanced lug which is easy to build and stow. I recommend that my customers sew their own sails either from common polytarp (as Garth did in the boat shown above) or real Dacron sailcloth. The plans show instructions for sewing in real sailcloth. You need a sewing machine that sews zigzag stitches and cheap home machines are usually good at that. I don't claim to be the world's best sailmaker but it is not majic. I can do it and so can you. The clothes you are wearing are ten times more complex than a small sail. There are a few rules to follow and I give an essay on that with each set of sailboat plans. In fact I suggest you sew your sails before you build your hull. Both sail and hull require about the same work space. Sew the sail first, roll it up, stuff it in a closet, and now your workspace is ready for your hull. Getting the sail done can get you over a big mental hurdle.
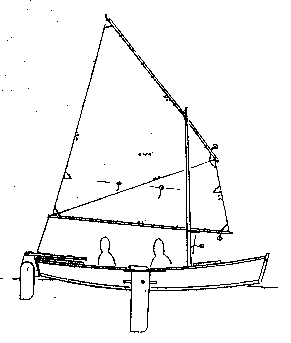
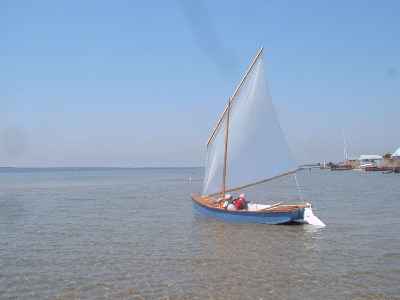
Garth's friend Ari made this Mayfly14 shown in shallow water at Long Island Sound:
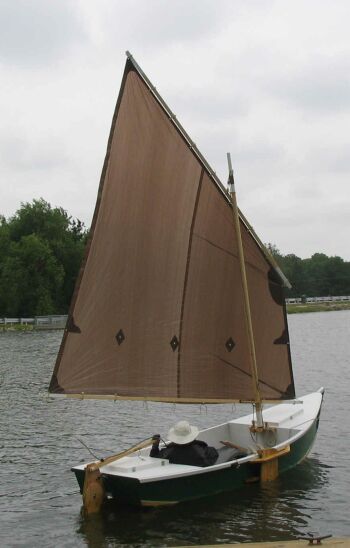
Here is another by Don and Tom Burton in Illinois:
I think there are more but I lost the photos in a hard drive crash last winter.
Mayfly14 needs three sheets of 1/4" plywood and two sheets of 1/2" plywood.
Mayfly14 plans are $30. But, the Mayfly14 plans are shown complete in reduced size in my book available from Duckworksmagazine.com along with Garth's blow-by-blow assembly photos plus a huge amount of other stuff.
Prototype News
Some of you may know that in addition to the one buck catalog which now contains 20 "done" boats, I offer another catalog of 20 unbuilt prototypes. The buck catalog has on its last page a list and brief description of the boats currently in the Catalog of Prototypes. That catalog also contains some articles that I wrote for Messing About In Boats and Boatbuilder magazines. The Catalog of Prototypes costs $3. The both together amount to 50 pages for $4, an offer you may have seen in Woodenboat ads. Payment must be in US funds. The banks here won't accept anything else. (I've got a little stash of foreign currency that I can admire but not spend.) I'm way too small for credit cards.
I think David Hahn's Out West Picara is the winner of the Picara race. Shown here on its first sail except there was no wind. Hopefully more later. (Not sure if a polytarp sail is suitable for a boat this heavy.
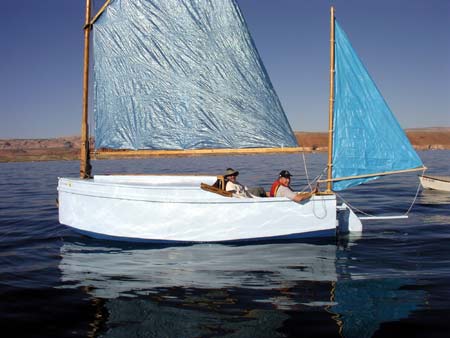
Here is a Musicbox2 I heard about through the grapevine.
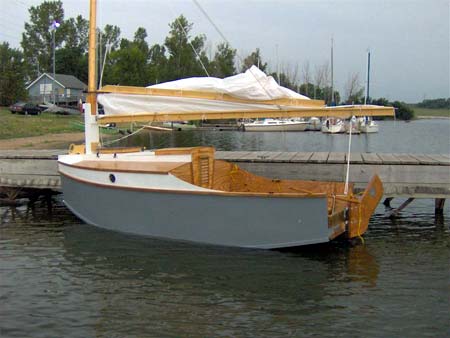
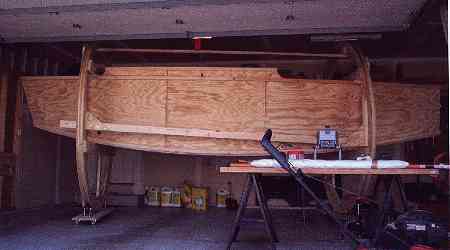
HOLY COW! A Jukebox2 takes shape in Minnesota. Unheated shop means no work during the winter. Check out that building rig! (Wait a minute! I just got a CD of photos of a Jukebox2 finished in the Sydney, Australia area by Ted Arkey!)
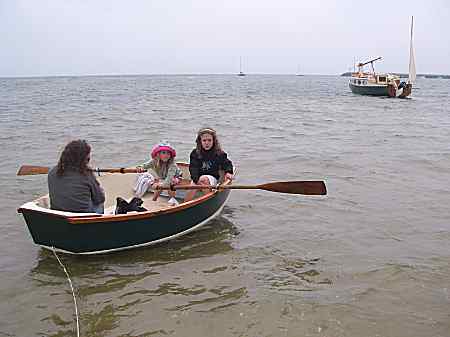
And the Vole in New York is Garth Batista's of www.breakawaybooks.com, printer of my book and Max's book and many other fine sports books. Boat is done, shown here off Cape Cod with mothership Cormorant in background, Garth's girls are one year older. Beautiful job!
AN INDEX OF PAST ISSUES
Hullforms Download (archived copy)
Plyboats Demo Download (archived copy)
Brokeboats (archived copy)
Brian builds Roar2 (archived copy)
Herb builds AF3 (archived copy)
Herb builds RB42 (archived copy)