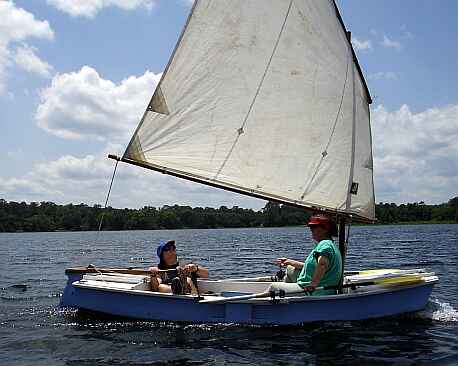
Gary and Helen Blankenship go for a Piccup Pram cruise in northern Florida.
Contents:
Contact info:
Jim Michalak
118 E Randall,
Lebanon, IL 62254Send $1 for info on 20 boats.
Jim Michalak's Boat Designs
118 E Randall, Lebanon, IL 62254
A page of boat designs and essays.
(15jul08)This issue will complete the AF4 rebottoming essays. The 1 August issue will repeat the Sail Area Math essay.
THE BOOK IS OUT!
BOATBUILDING FOR BEGINNERS (AND BEYOND)
is out now, written by me and edited by Garth Battista of Breakaway Books. You might find it at your bookstore. If not check it out at the....ON LINE CATALOG OF MY PLANS...
...which can now be found at Duckworks Magazine. You order with a shopping cart set up and pay with credit cards or by Paypal. Then Duckworks sends me an email about the order and then I send the plans right from me to you.
THE 17 ANNUAL INDIANA MESSABOUT...
... will take place at Lake Monroe near Bloomington, Indiana on xx September. John McDaniel writes: "Go to http://pwp.att.net/p/pwp-mwmess for more information. Susan and I plan to put BANTY in the water on Friday and sleep aboard a couple of nights. Come join us..... well, bring you own boat or tent... BANTY only sleeps two. The Saturday pitch-in dinner is always good and the campfire chat is even better. This year we'll have a representative from Gougeon Brothers, Inc., manufacturer of WEST SYSTEMŽ products present on Saturday to discuss epoxy and epoxy products. Sunday afternoon we're hosting anyone interested at the McDaniel-Shanklin Donkey Farm & Boat Emporium (Columbus, IN). You can check progress (or lack thereof) on our 48' sailboat and enjoy a burger or hotdog."

|
Left:
Gary and Helen Blankenship go for a Piccup Pram cruise in northern Florida.
|
|
|
AF4 Bottom 3
BEFORE I GET TO THE NEW BOTTOM...
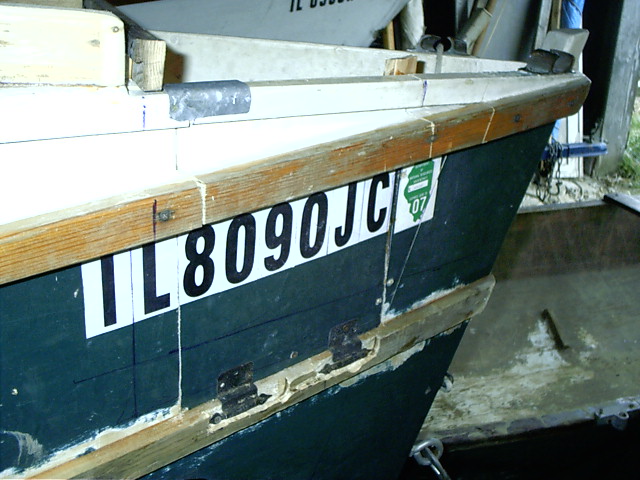
...I want to report on the new boarding door arrangement. As you may recall I chopped away at the fore deck and bulkhead and then made a swing down door in the bow to allow easier boarding from the beach. Here is the door during construction:
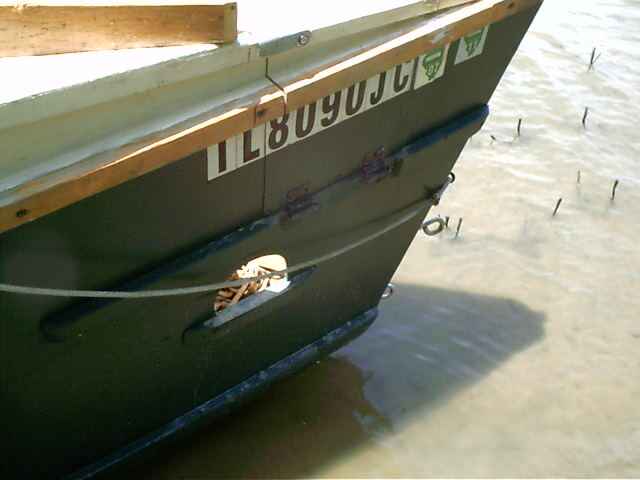
And here it is after cleaning up (but I kept the rustic hinges). With all the flooding we've had this year I couldn't really find a beach so here she is pulled up onto a flooded agricultural field:
Unlatch it, swing it down and leave it. Pull out the drop board from the bulkhead to give an easy step to the shelf in the front of the cabin:
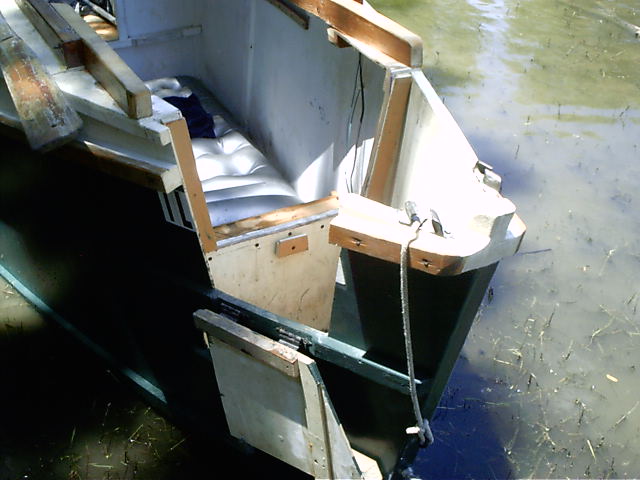
I can get there is one step now. Before it was about 40" hoist to the foredeck, then swing legs around for a 40" drop into the cabin with maybe a little parallel bar action on the way with the deck beams.
I suspect the door and dropboard are overkill, at least for calmer waters. I've left the door down by mistake a few times already. It is well above the usual waterline, especially when the bow lifts under power. There is an added benefit that I had not guess at in that it is easier to see over the bow now with the dropboard removed. A few inches seems to make a big difference here.
So it was a big success! I'm not going to include the mod in the drawings - it is the sort of detail that I don't like to see on drawings myself. Options that can weigh down a first time builder in particular. Better yet a set of drawings for a simple project that will leave him saying, "I can do that!" Then ten years later he can add a door, like I did.
OK, NOW ON TO THAT NEW BOTTOM...
...I hope for the last time. Remember the basic plan was to cut away the old bottom on the inside, a few inches in from the sides and then nail and glue the new bottom over the resulting "ledge", like this"
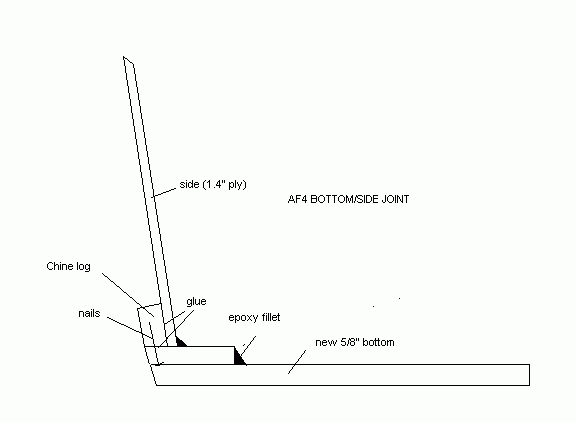
We've covered that in previous issues. The old bottom came off quickly and the new went on quickly, the only problem being fussing with new styles of plywood and glue.
For butt plates I went to using 1x6 boards, up from the 1x4 of the first bottom since those were troublesome. I cut them short of the sides as I usually do, like this:
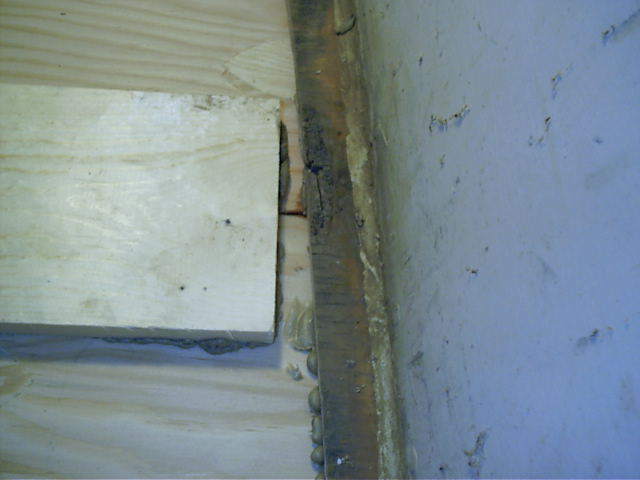
The old idea was to keep the butt plates short of the sides to form a limber channel where water could flow freely. But those old butts started to separate from the bottom right at the ends near the gap. My theory was that the sudden change in stiffness at the end of the butt plate caused a stress concentration, etc. etc. and if you sound educated you can explain away anything. So this time I tried something different. First I tapered the ends of the butt plates to ease that sudden change in stiffness, like this:
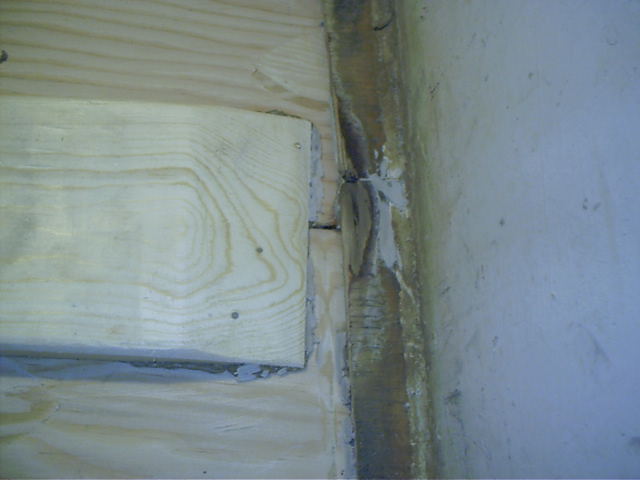
At that point I had the grand idea to taper it to nothing and put epoxied glass from the tapered plate over to the side to complete a structural joint. Then I found I couldn't really taper it to zero. Then I filled the gap with epoxy putty (my favorite thickener is baby powder) like this:
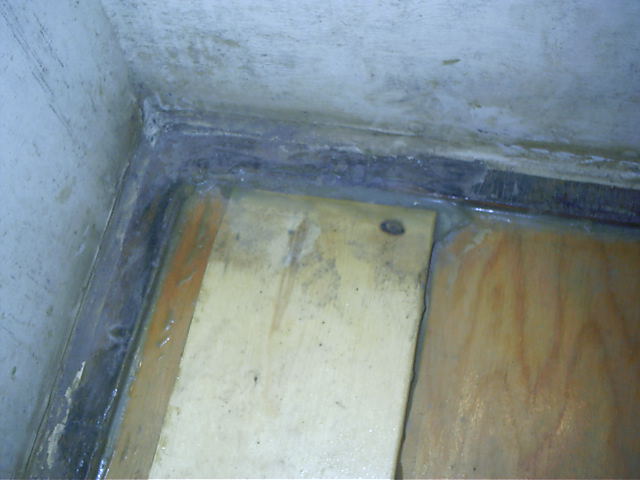
And then with the Rend Lake messabout coming fast I stopped work, left off the glass and went boating. You will note also that I put a fillet completely around the inner joint of the new bottom. I did that with the old bottom too and had no problems with rot at all at the bottom/side joints. The fillet prevents water from wicking into the joint methinks and also keeps dirt out of the joint. Thus no rot.
Then off to the lake. First time in the water with the new bottom was at Rend Lake messabout. NO LEAKS! Although we watched it closely and kept it at first in thin water just in case. Paul Breeding got this photo of me setting off:
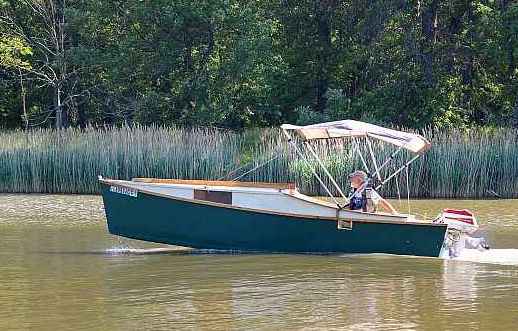
STILL NO LEAKS! Outside this quiet cove were whitecapped waves going maybe 2' high. I went out into it for a short time and pounded around a bit. No significant bottom flexing. I chickened out at the time being concerned about my motors which had not been run in two years, the backup motor would not start at all, and went back into the cove. In subsequent trips I have seen no leaks at all and no significant flexing. Nothing has broken. Another success? It took at least a year to see the problems with the old bottom so the jury is still out. This is one case where I did change the drawings, in fact I did that a long time ago, increasing the bottom thickness to 1/2". I'm still showing on the drawing the original stiffener layout of three 1x4 boards instead of a single 2x4. We will see how that works out too but the the single 2x4 is easier to install and probably stiffer than the sum of the three 1x4's. And I think the single stiffener joint is less likely to cause problems than the triple stiffeners since those joints tend to become rot traps.
SO IS SHE GOOD FOR TEN MORE YEARS???
... I don't see why not. Better than new right now.
Wooboto
WOOBOTO, SAILBOAT, 15' X 4.5', 200 POUNDS EMPTY
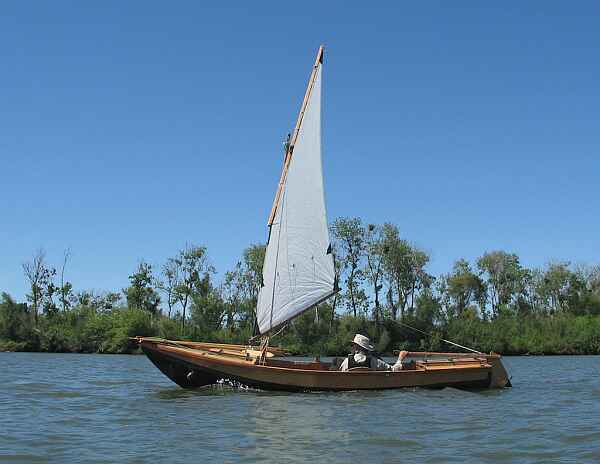
Steve Chambers out in California had built a Roar2 very quickly, in two or three weeks as I recall, and had gone off rowing with it and liked it a lot. He started looking for a design to learn sailing. He was thinking of my old Woobo design but got to really like the Roar2 bow which evolved from Toto. Could the two ideas be combined, a Woobo with a Toto bow. Would it be called Wooboto. Why not? And thus it came to be.
I knew that Steve worked quickly. He started straight off and I saw no need to release Wooboto in a prototype stage since it would be a "done" design in no time. Steve did a great job of it.
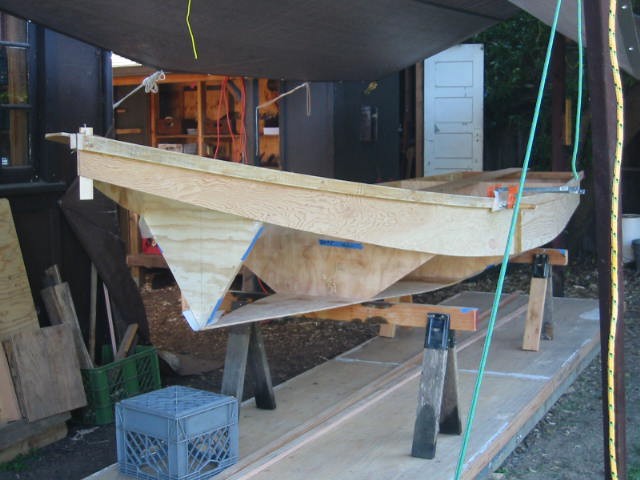
I wanted to show this photo to illustrate the one problem he had with assembly. He assembled it as I called for in the drawing with the sides attached to the forms and bulkheads and the wales added as shown. But the problem was that the sides, especially in the bow, are flimsy at this stage and the stiff wales pushed the sides down an inch or so as the wales themselves were bent upward. He noticed the problem at this stage and adjusted the forward form so that the bottom did not bend downward too, then he had to adjust the bilge panels a bit to fit. So from now on with designs of this shape I am going to change the assembly method so that the wales are not added until the bilges are installed to stiffen those narrow sides. Steve quickly pressed on to this stage:
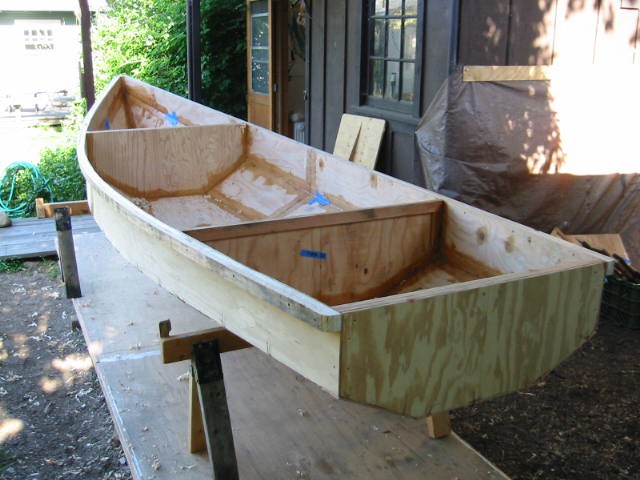
You see that Wooboto has a simple spare structure. No interior seats and no motor well. And then on to this:
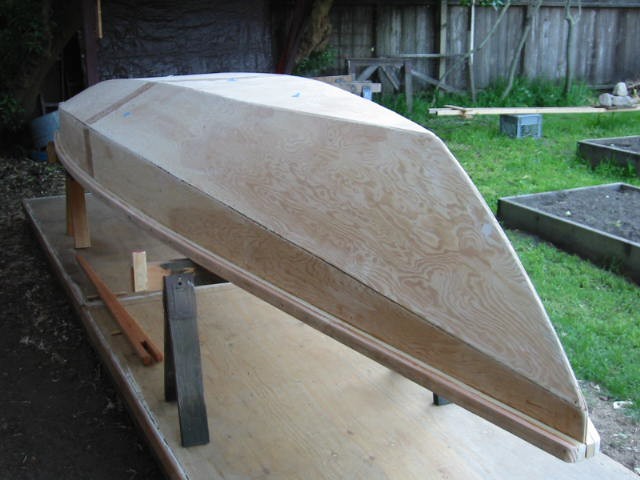
A quick clean job. By this time he had already made a polytarp sail from the Mayfly drawings shown in my book, a 75 sq ft job. But he launched it first as a rowing boat without its decks:
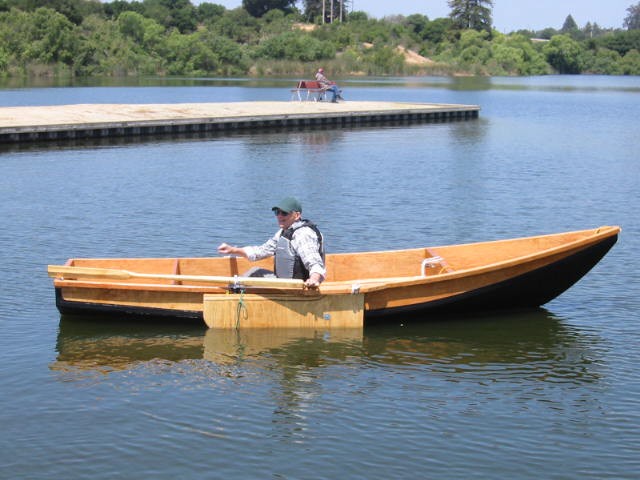
He made those oars too. He practiced sailing for a few weeks:
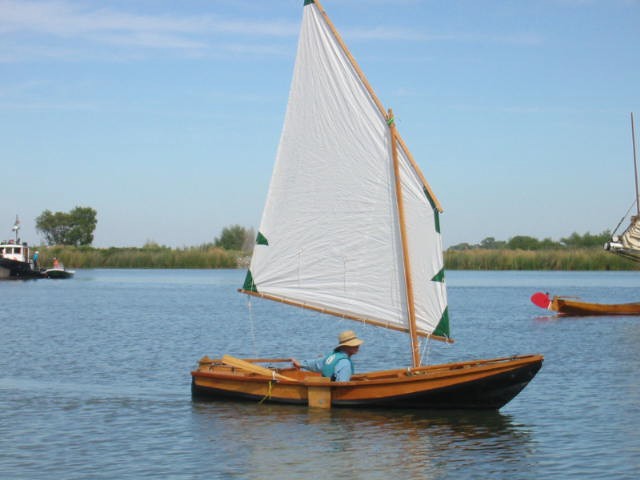
And then off on a cruise of several days with a club of pretty boats in the Sacramento Delta area as I recall:

A wonderful story!
Plans for Wooboto are $40.
Prototype News
Some of you may know that in addition to the one buck catalog which now contains 20 "done" boats, I offer another catalog of 20 unbuilt prototypes. The buck catalog has on its last page a list and brief description of the boats currently in the Catalog of Prototypes. That catalog also contains some articles that I wrote for Messing About In Boats and Boatbuilder magazines. The Catalog of Prototypes costs $3. The both together amount to 50 pages for $4, an offer you may have seen in Woodenboat ads. Payment must be in US funds. The banks here won't accept anything else. (I've got a little stash of foreign currency that I can admire but not spend.) I'm way too small for credit cards.
I think David Hahn's Out West Picara is the winner of the Picara race. Shown here on its first sail except there was no wind. Hopefully more later. (Not sure if a polytarp sail is suitable for a boat this heavy.
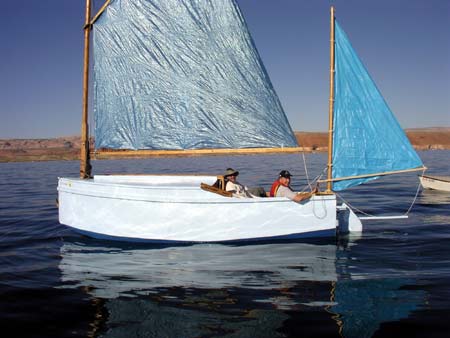
Here is a Musicbox2 I heard about through the grapevine.
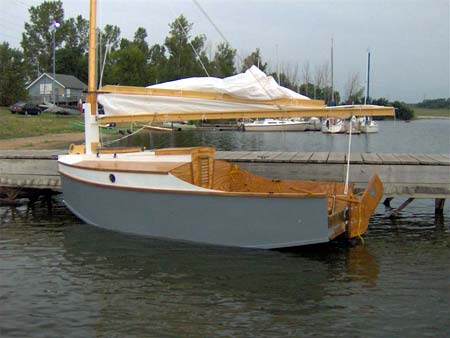
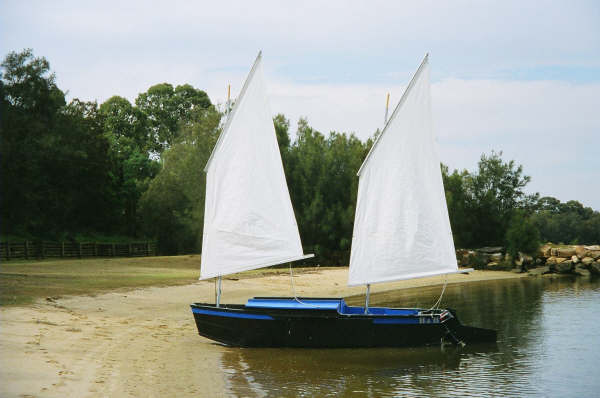
This is Ted Arkey's Jukebox2 down in Sydney. Shown with the "ketchooner" rig, featuring his own polytarp sails, that is shown on the plans. Should have a sailing report soon.
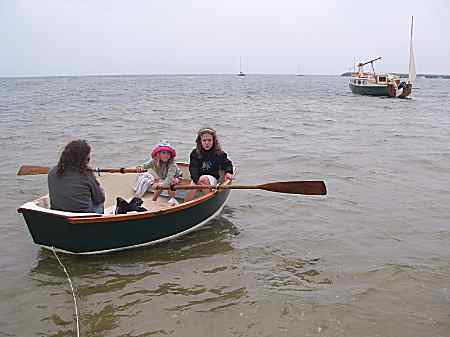
And the Vole in New York is Garth Batista's of www.breakawaybooks.com, printer of my book and Max's book and many other fine sports books. Boat is done, shown here off Cape Cod with mothership Cormorant in background, Garth's girls are one year older. Beautiful job! I think Garth is using a small lug rig for sail, not the sharpie sprit sail shown on the plans, so I will continue to carry the design as a prototype boat.
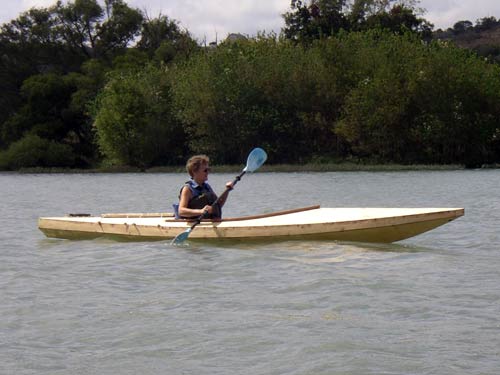
And the Leinweber's make another prototype! This one by Sandra, an Imresboat shown here on its first outing. They are taking it on a "cruise" so more about it later.
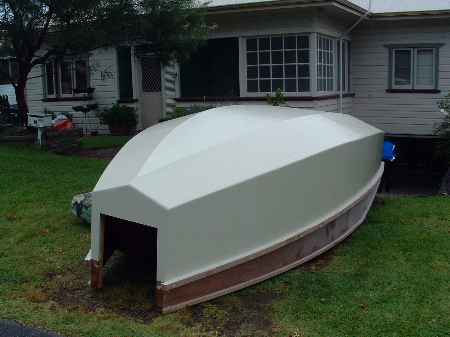
And a new Down Under Blobster, now upside down....
And up in Maine friends gather to turn the Caroline hull:
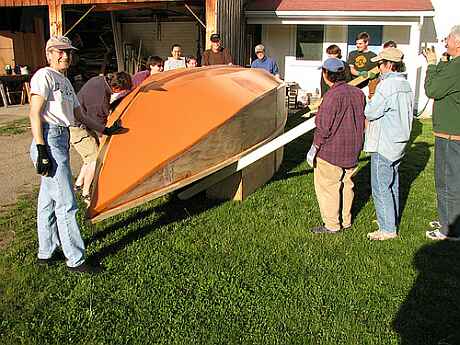
I gotta tell you that on the Caroline bilge panels I made an error in layout and they are about 1" too narrow in places on the prototype plans. I have them corrected but it always pays, even with a proven design, to cut those oversized and check for fit before final cutting.
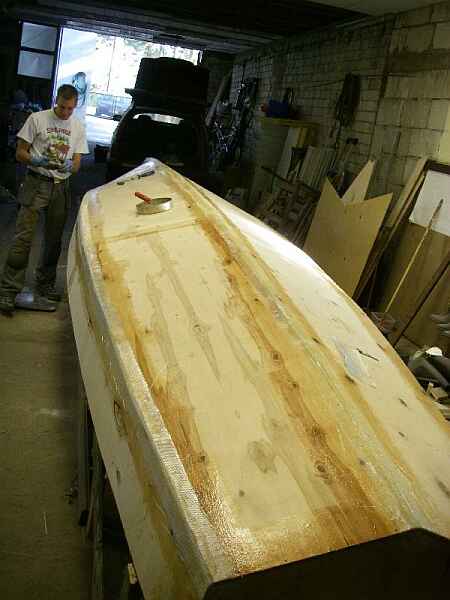
And in far off Estonia a Raider takes shape:
AN INDEX OF PAST ISSUES
Hullforms Download (archived copy)
Plyboats Demo Download (archived copy)
Brokeboats (archived copy)
Brian builds Roar2 (archived copy)
Herb builds AF3 (archived copy)
Herb builds RB42 (archived copy)