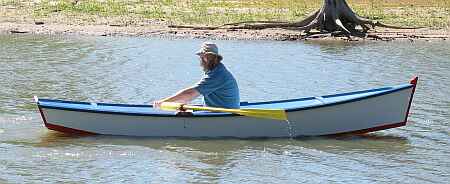
Ronnie Ash goes for a row in his really pretty QT Rowing Skiff.
Contents:
Contact info:
Jim Michalak
118 E Randall,
Lebanon, IL 62254Send $1 for info on 20 boats.
Jim Michalak's Boat Designs
118 E Randall, Lebanon, IL 62254
A page of boat designs and essays.
(1Aug08)This issue will repeat the all important Sail Area Math essay. The 15 August issue will take a frest look at materials.
THE BOOK IS OUT!
BOATBUILDING FOR BEGINNERS (AND BEYOND)
is out now, written by me and edited by Garth Battista of Breakaway Books. You might find it at your bookstore. If not check it out at the....ON LINE CATALOG OF MY PLANS...
...which can now be found at Duckworks Magazine. You order with a shopping cart set up and pay with credit cards or by Paypal. Then Duckworks sends me an email about the order and then I send the plans right from me to you.
THE 17 ANNUAL INDIANA MESSABOUT...
... will take place at Lake Monroe near Bloomington, Indiana in late September. John McDaniel writes: "Go to http://pwp.att.net/p/pwp-mwmess for more information. Susan and I plan to put BANTY in the water on Friday and sleep aboard a couple of nights. Come join us..... well, bring you own boat or tent... BANTY only sleeps two. The Saturday pitch-in dinner is always good and the campfire chat is even better. This year we'll have a representative from Gougeon Brothers, Inc., manufacturer of WEST SYSTEMŽ products present on Saturday to discuss epoxy and epoxy products. Sunday afternoon we're hosting anyone interested at the McDaniel-Shanklin Donkey Farm & Boat Emporium (Columbus, IN). You can check progress (or lack thereof) on our 48' sailboat and enjoy a burger or hotdog."

|
Left:
Ronnie Ash goes for a row in his really pretty QT Rowing Skiff.
|
|
|
Sail Area Math
BACKGROUND...I have to rerun this essay every year. This subject is the most common area where tinkerers of designs get in trouble. It always has been and always will be. Anytime you modify the sail rig you need to keep this math in mind.
If you look at the picture below of the sail rig of Mayfly12 you will see on the sail some (fuzzy) writing (that didn't scan well) that says "55 square feet" to the left of a small circle that represents the center of that area (honest).
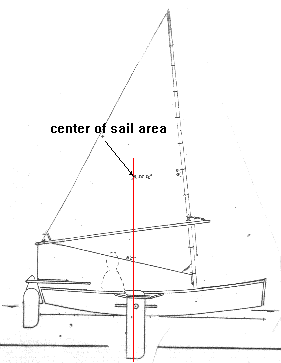
The center of that area is often called a "centroid" and you will see it is placed more or less directly above the center of the leeboard's area. That is very important.
As you might imagine a shallow flat hull like this with a deep narrow leeboard wants to pivot around that leeboard. If the forces of the sail, which in a very general way can be centered at the sail's centroid, push sideways forward of the leeboard, the boat will tend to fall off away from the wind. You should be able to hold the boat on course with the rudder but in that case the rudder will have "lee helm" where you have to use the rudder to push the stern of the boat downwind. The load on the rudder will add to the load of the leeboard. Sort of a "two wrongs make a right" situation and generally very bad for performance and safety in that if you release the tiller as you fall overboard the boat will bear off down wind without you.
If the centroid is aft of the leeboard you will have "weather helm", a much better situation. The rudder must be deflected to push the stern towards the wind and the force on it is subtracted from the load on the leeboard. Not only that, but when you release the tiller as you fall overboard the boat should head up into the wind and stall and wait for you if you are lucky. It's a good deal but if you overdo it you can end up with too much load on the rudder.
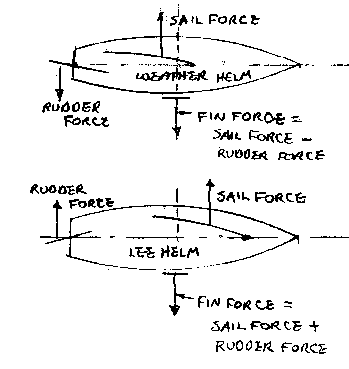
This balance problem is actually one of the few things about sail rigs that is not arbitrary. The type of rig and its area are pretty arbitrary depending on how fast you want to go, how much you weigh, etc. But balance is quite important and is one of the areas where backyard boaters get into trouble, sometimes changing the boat or rig with no thought of balance. So before you go doing that you should do a little homework. This essay will tell you how to figure sail area and find the centroid.
One last item: the balance situation shown for Mayfly12 is what I have found to be best for this type of boats. Boats with large fin keels don't balance that way - usually the sail centroid is well forward of the keel centroid. That distance is called the "lead". That type of boat is not within my personal experience and I'm not going to get into that. But you still would have to figure the area and centroid.
THREE SIDED SAILS...
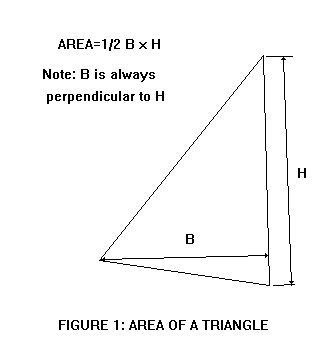
This one is really easy. The area is just the base time the height divided by 2. Any side can be the base and the height is aways at a right angle to the base.
So when you lay out the sail you draw it up on thin paper to the same scale as your hull drawing with the leeboard (or daggerboard or centerboard) lowered. Draw a line through the center of the board straight up. Now we're going to locate the scale sail on the boat such that it's centroid falls very close to that line.
Here's how you find the centroid of a triangular sail.
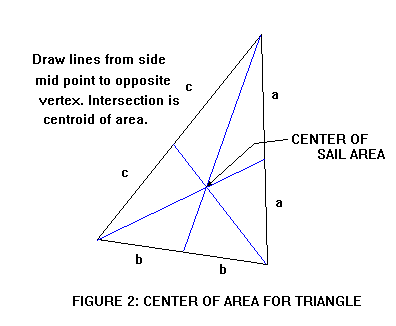
Find the midpoint of each side and and draw a line from that midpoint to the vertex opposite it. The three lines will intersect at the centroid. Actually you only need to find the intersection of two lines but the third line is a good check.
That's it! Now you can take you scale sail drawing and slide it around your hull drawing until the centroid is on that line drawn up from the hull's board. Move it up and down and tilt it until you like the way it looks. But don't cheat much forward or aft of that line.
FOUR SIDED SAILS...
To find the area of a four sided sail you just divide it into two triangles, find the area of each triangle as above, and add the two together.
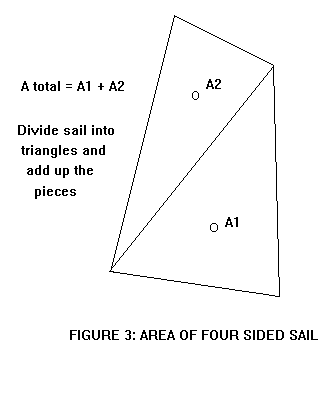
Now to find the centroid of the four sider. Start by finding the centroids of the two triangles that make up the four sided sail as shown above. Now draw a line from one triangle centroid to the other. The centroid of the four sider is on that line somewhere.
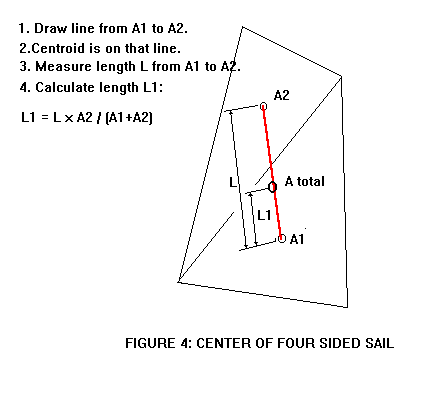
To find exactly where the centroid is on that line, measure the length of that connecting line. You need not use the same scale as is used on the drawing. I prefer to use a millimeter scale for this measurement. Then get out the calculator and work the formula shown in the Figure 4. Let's say for example the length of the connecting line on the scale drawing measures 120 mm (that is measurement L). Let's say the example sail has a lower triangle area of 50 square feet (that is A1). The upper triangle is 35 square feet (that is A2). So the total sail area is 50 + 35 = 85 square feet. The length L1, which will exactly locate the sail's total centroid, is L1 = 120 x 35/85 = 49.4 mm. So you take that millimeter scale and measure up from A1 centroid on the connecting line 49.4 mm and make a tick mark on the connecting line. That is the centroid of the total sail.
Another way to find the centroid, especially of a really odd shaped sail, is to take the scale drawing of the sail and cut it out. Then balance the cutout on a knife edge and mark the balance line, rotate the cutout on the knife edge about 90 degrees and rebalance and mark the new balance line. The centroid lies at the intersection of the two line.
Another way is to dangle the cutout on a pin stuck through a corner and into a wall marked with a vertical line that passes through the pin point. Mark the line that passes through that pivot corner and a vertical. Then rotate the cutout to hang it from another corner, and mark a second line through the second pivot corner and a vertical. The centroid lies at the intersection of those two lines. Back at the missle factory the designers had a favorite place, complete with pivot pin socket hole and vertical line, to hang these cutouts and that place was known as the "weighing wall". Meanwhile the super computer cranked away next door but its answers weren't to be trusted unless they agreed with the cutout hanging at the weighing wall.
RIGS WITH MANY SAILS...
Figure 5 shows the rig for Viola22. It has a main gaff sail of 177 square feet, and a mizzen sail of 45square feet. Where is the centroid of the assembly?
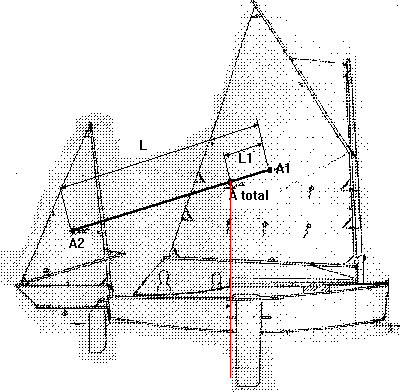
It's done exactly as with Figure 4. Draw a line connecting the areas of the two sails. Measure the length of the connecting line. Then run through the same equation as in Figure 4. Nothing to it.
One thing I might point out about the Viola22 rig is that the total centroid falls near the aft edge of the leeboard. By my experience the mizzen is not as efficient as its area suggests so it needs to be a bit oversized by normal rules, fudging the total centroid aft. I think in general the aft sails operate in the scrambled flow of the forward sail, causing loss of force back there.
NEXT TIME...
...We'll take another look at that Shanteuse shaping thing.
Polepunt
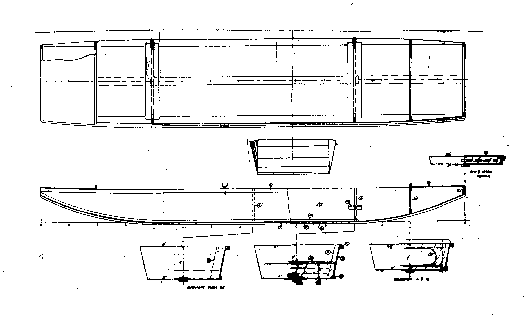
POLEPUNT, PUNT, 15' X 3', 110 POUNDS EMPTY
Do you have a swamp in your back yard? Turn that into a positive thing with a tradional punt that you push through the shallow water with a pole. I think this sort of boat has a long history and the similar shape in Chapelle's great book AMERICAN SMALL SAILING CRAFT goes back to at least the 1700's. Those weren't built of plywood, of course, and would be a lot heavier than this one. Actually Chapelle shows the shape of the old one as more elaborate than this one but I'm pretty sure this one is in no way harmed in function by the simplicity of its shape.
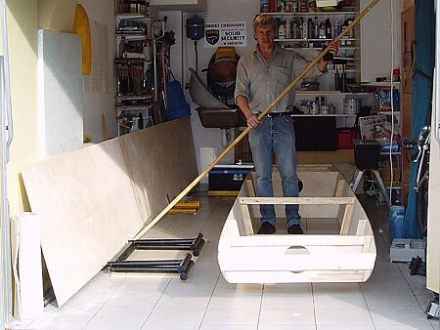
In particular I drew in a feature that I saw on a commercial aluminum jonboat. That is a constant width bottom. I used that feature on my Jonsboat design and it works very well. It might make the boat easier to build although something like Polepunt is easy to do in almost any case. I kept the bottom dead flat in the center 7' with no frames there so that you might walk the center as you push the pole. The boat is narrow at 30" inside on the bottom and I'm hoping that will make it stable enough to stand in. But such a light boat will be dominated by your weight and you will need to be careful how you stand. I've also shown rowlock sockets on the drawing and this might suit as a rowing boat using a removable seat. And this might be very suitable for floating streams with paddles, a substitute for an aluminum canoe. I see no good way to use a motor on a boat like this. The ends (which are identical) are swept way upward for good lines at slow speed and won't support any weight fore and aft. The only chance for a motor would be with an electric with remote steering so yo can keep your weight forward for proper trim. I've written words like that for almost all my arm powered boats and I still get regular photos of those boats with motor plates mounted on the stern. But I never get photos of those boats under power most likely because the owner tried it just once and never again after it tried to stand on its stern when the motor was fired up. So if you want power, and there is nothing wrong with that, build Jonsboat instead.
Anyway, our old buddy in Poland, Wojtek Baginski, built the prototype to perfection. In one of Phil Bolger's books he says the real trick of designing a successful boat is to get your design into the hands of the right user, and so it is with Wojtek. Here is his account of the maiden voyage:
"Here is a brief description of polepunt nautical characteristics. The first is that polepunt is incredibly stable. During our cruise the crew (Wojtek Baginski is in the stern in most of these photos and his boating buddy Wojtek Holnicki in the bow) was often forced to gather on the stern first, and next on the bow (after boat's center has passed over the bar) to jump over a tree or a branch laying in the water, not stopping the punt. We were using the internal stiffener as a walkway and it helped much to keep the balance.
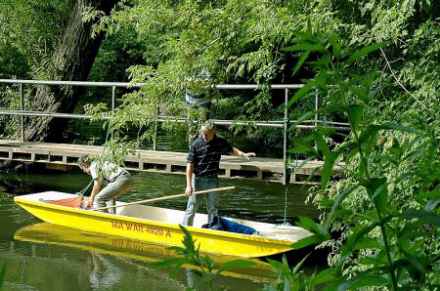
The second notice is that polepunt responds to oar action very well. After more of less a strong push of a pair of paddles she smoothly went a long distance on calm water. Looks like rowing will be successful as well, when an oarsman will take a seat at the center of the boat, and will pull the boat with the pair of 7 foot oars (we have chosen a pair of heavy ones for the Vistula , because of possible wind and waves acting on her open area against the boat). As for using a pole, it's really amazing and effective power, but needs a bit of experience. Worth learning!

Another notice is that the boat is surprisely strong, I think because of relatively low ratio of free plywood surface to chine logs, stiffeners, gunwales and frames. She got a few strong hits and scrapes from wooden, concrete and stone objects, but generally everything is OK, external chine logs gave good protection to the sides in extremal conditions. I laminated the bottom with a fiberglass twice, inside and outside, by the way.

So, the boat is really useful in various conditions (we checked her out during 20 km long raft in various water areas including wild state creek, regulated state creek, small man made lagoon and big river). I think with her low cost and quick building process she is a very good proposition not only for beginners but for advanced adventurers as well (hey don't look at me! :).
Thanks Jim."

Thank YOU, Wojtek!
I want to point out here is that a stream like this clearly isn't meant for modern boats and if you have a boat like Polepunt you can navigate it and pretty much have it all to yourself. This can be really high quality boating.
Nothing to builiding Polepunt, of course. Nail and glue construction from four sheets of 1/4" plywood.
Plans for Polepunt are $20 when ordered directly from me.
Prototype News
Some of you may know that in addition to the one buck catalog which now contains 20 "done" boats, I offer another catalog of 20 unbuilt prototypes. The buck catalog has on its last page a list and brief description of the boats currently in the Catalog of Prototypes. That catalog also contains some articles that I wrote for Messing About In Boats and Boatbuilder magazines. The Catalog of Prototypes costs $3. The both together amount to 50 pages for $4, an offer you may have seen in Woodenboat ads. Payment must be in US funds. The banks here won't accept anything else. (I've got a little stash of foreign currency that I can admire but not spend.) I'm way too small for credit cards.
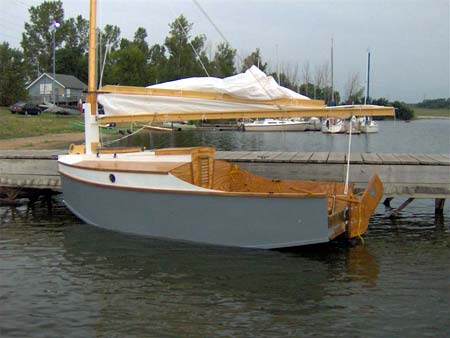
I think David Hahn's Out West Picara is the winner of the Picara race. Shown here on its first sail except there was no wind. Hopefully more later. (Not sure if a polytarp sail is suitable for a boat this heavy.
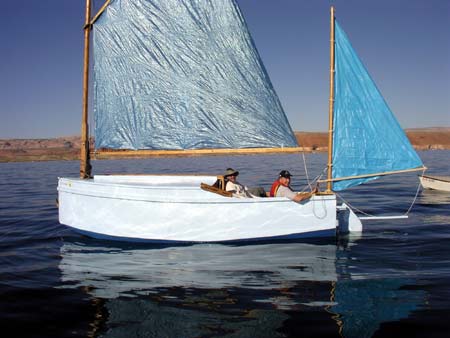
Here is a Musicbox2 I heard about through the grapevine.
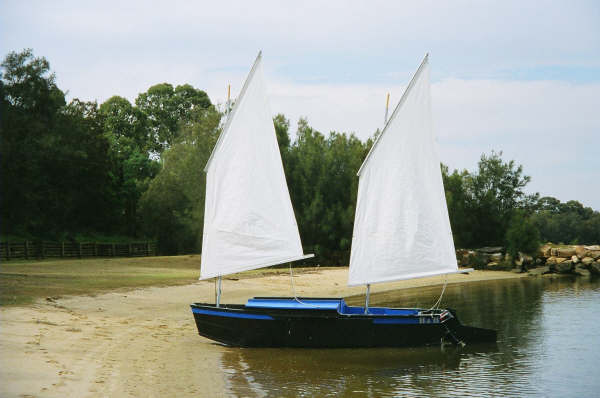
This is Ted Arkey's Jukebox2 down in Sydney. Shown with the "ketchooner" rig, featuring his own polytarp sails, that is shown on the plans. Should have a sailing report soon.
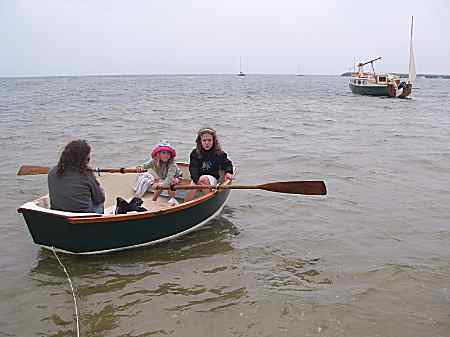
And the Vole in New York is Garth Batista's of www.breakawaybooks.com, printer of my book and Max's book and many other fine sports books. Boat is done, shown here off Cape Cod with mothership Cormorant in background, Garth's girls are one year older. Beautiful job! I think Garth is using a small lug rig for sail, not the sharpie sprit sail shown on the plans, so I will continue to carry the design as a prototype boat.
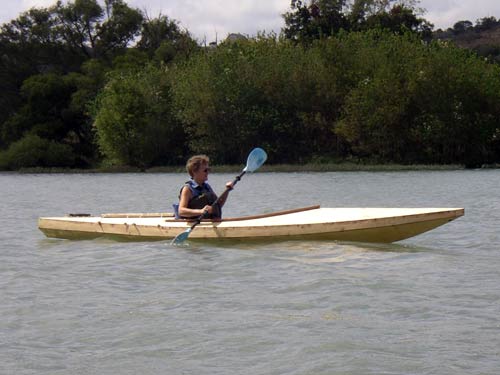
And the Leinweber's make another prototype! This one by Sandra, an Imresboat shown here on its first outing. They are taking it on a "cruise" so more about it later.
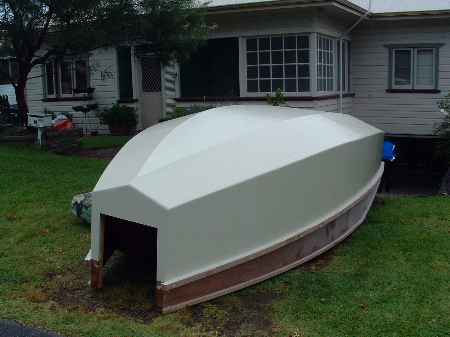
And a new Down Under Blobster, now upside down....
And the Caroline boats for the first time (without wind):
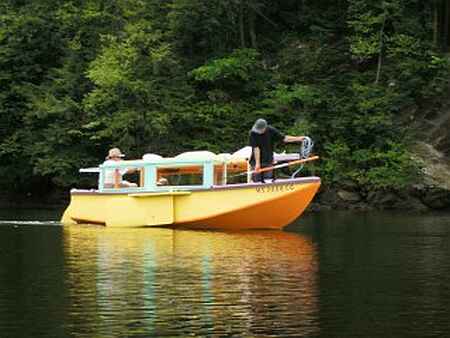
I gotta tell you that on the Caroline bilge panels I made an error in layout and they are about 1" too narrow in places on the prototype plans. I have them corrected but it always pays, even with a proven design, to cut those oversized and check for fit before final cutting.
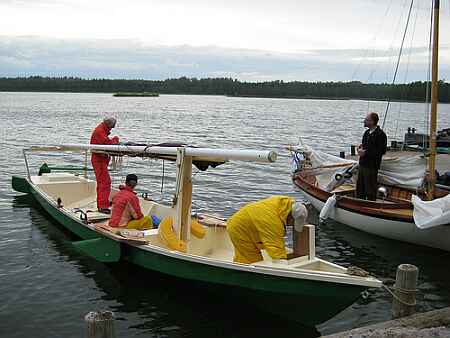
And the Raider of Norm Wolfe did indeed make it to the Finnish Raid. I'll bet the paint was still wet.
AN INDEX OF PAST ISSUES
Hullforms Download (archived copy)
Plyboats Demo Download (archived copy)
Brokeboats (archived copy)
Brian builds Roar2 (archived copy)
Herb builds AF3 (archived copy)
Herb builds RB42 (archived copy)