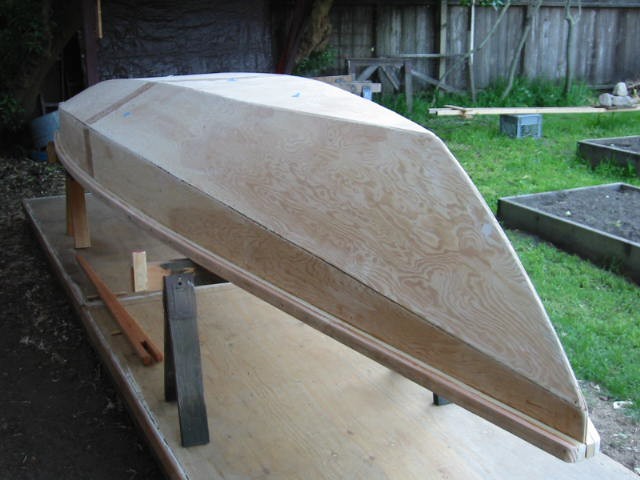
A graphite bottom painted on a new hush hush project called Wooboto.
Contents:
Contact info:
Jim Michalak
118 E Randall,
Lebanon, IL 62254Send $1 for info on 20 boats.
Jim Michalak's Boat Designs
118 E Randall, Lebanon, IL 62254
A VERY MOST IMPORTANT ANNOUNCEMENT!!!
My faithful internet server for 11 years, APCI, is closing its doors! They say the homepage and email will operate until about the end of June so we have a bit of time to make a transfer. This has kept me distracted, more than usual, for a week now but I have decided to relocate at http://home.earthlink.net/~je3mchlk/data
for now. Try clicking on it and see where it goes. If you bookmark the new location things should continue OK. Hope it all works out.
Well, fairwell to APCI. They are local, they always answered the phone and strived to answer my stupid questions. It was just the company I needed and I will miss them. In 11 years I think the only interuptions were three, a massive storage failure about 8 years back that knocked them off for a week, a huge storm that knocked power out to the whole area for half a week (they got back on the air with a huge generator in a couple of days), and then there was the time an errant pickup truck knocked down the telephone pole outside their building taking with it all their phone lines. They eventually had to hang it up "due to irreconciliable contract disputes with the phone company" and we all can sympathize with that. So we have a few weeks to get it sorted out.
My new email until further notice will be jimmichalak@earthlink.net I have changed that in the contact section of the table of contents. Hope it all works OK.
A page of boat designs and essays.
(1may08)This issue will start replacing the bottom of my AF4. The 15 May issue will rerun the rowing gear article.
MESSABOUT NOTICE:
THE REND LAKE MESSABOUT WILL TAKE PLACE ON JUNE 6 and 7 AT THE GUN CREEK RECREATION AREA AT REND LAKE IN SOUTHERN ILLINOIS. MORE DETAILS WILL FOLLOW BUT IT MIGHT BE PRUDENT TO MAKE CAMPING RESERVATIONS IF YOU INTEND TO ATTEND.THE BOOK IS OUT!
BOATBUILDING FOR BEGINNERS (AND BEYOND)
is out now, written by me and edited by Garth Battista of Breakaway Books. You might find it at your bookstore. If not check it out at the....ON LINE CATALOG OF MY PLANS...
...which can now be found at Duckworks Magazine. You order with a shopping cart set up and pay with credit cards or by Paypal. Then Duckworks sends me an email about the order and then I send the plans right from me to you.

|
Left:
A graphite bottom painted on a new hush hush project called Wooboto.
|
|
|
New AF4 Bottom 1
BACKGROUND...
Well, last spring, 2007, I decided to get my AF4 ready to launch. I noticed the butt plate in the cockpit bottom was getting pretty soft and rotten. I had already "repaired" it once a year earlier by scraping out the crud and pouring epoxy into the hole. I threw a bucket of water into the cockpit to see what would happen. It leaked out but sometimes with wood the leaks will seal after a bit. But I kept throwing in water and it kept leaking out. I decided to sideline the boat until repairs could be made and used the old Birdwatcher that summer.
NOW...
...the bottom of my AF4 was a bother from the day it was launched. I used 3/8" plywood except I didn't know that plywood now is in general 1/32" undersized. And this was only three ply. And one face had no flaws but was quite thin. And the other face was pretty bad, full of knots, checks and cracks. The inner core was thick without voids but where the inner laminations were joined there was a seam. When launched I would see eventually a wet line running from stem to stern where the water leaked through the flaws in the outer thick face, then through that seam in the inner ply, and then through the very thin inner face. The leaks would seal shortly.
But the bottom was always too flexible for me and I was used to flexing bottoms. I changed the bottom thickness in the drawing from 3/8" to 1/2".
SO...
...I decided that this time there would be no patching. I would replace the bottom with something thicker. Max Wawrzyniak's AF4 had a 5/8" bottom with a single 2x4 skid/stifferner down the bottom and it seemed rock solid to me. (Max built his boat after trying mine so he knew what to change.) Now I intended to copy Max.
FIRST, DEMOLITION...
I thought about this a lot. How to remove the old bottom. It was constructed like this:
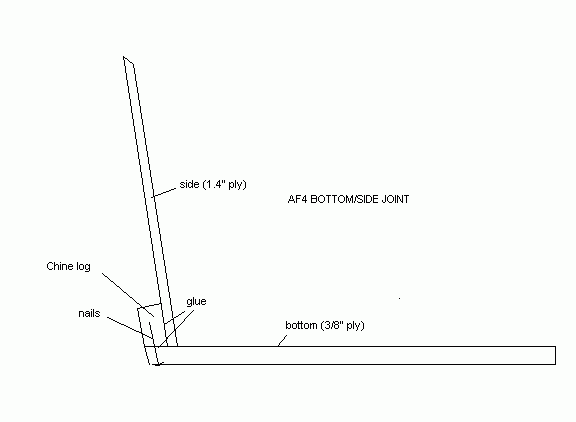
The bottom/chine joints all seemed totally intact. The first thought was to remove the old bottom where it joined the chines but that would involve destroying all the nails, etc. that I used to join it all together. Then I said to myself, "Why destroy that joint! What if I cut the bottom inboard, like this:"
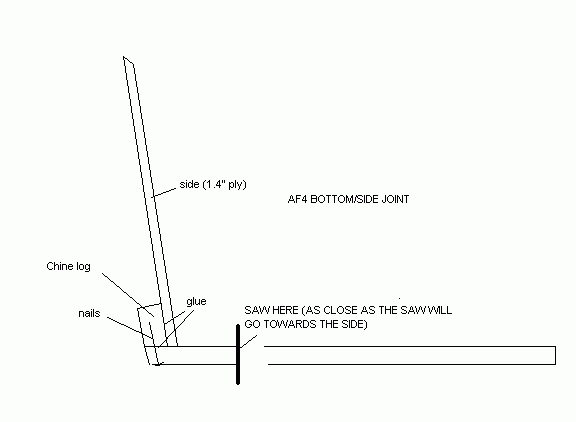
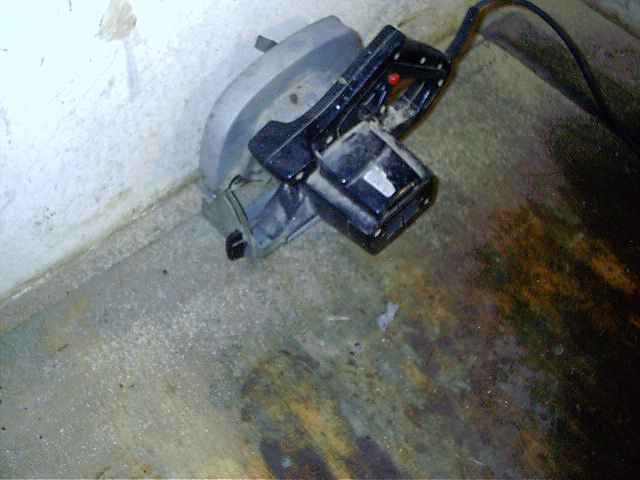
A bad photo of the operation might look like this:
Then I could grind the old paint and fiberglass off the remaining bottom and have a nice flat and wide surface to attach the new bottom, like this:
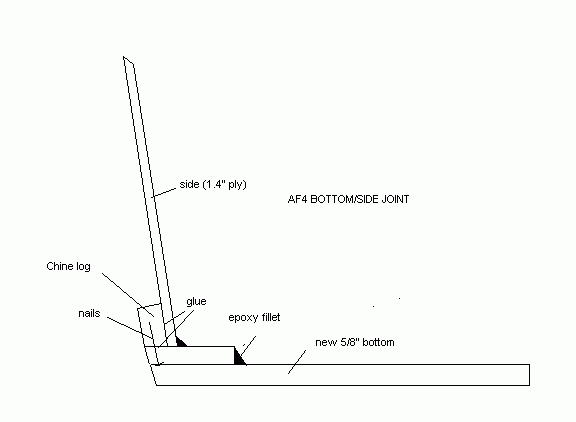
That was the plan. Now to real life demolition.
The initial sawing was quite easy to do. Done from the inside with the boat on the trailer. First I took my circular saw,with those great thin carbide tipped blades that Dave Carnell used to sell. It cared not if it hit a nail which was bound to happen. I set it as close to the side of the boat as possible and let her rip. This went very quickly but the circular saw would not get into the corners. In a few minutes the bottom was released from most of the sides and bulkheads but was still tabbed to the corners. Then I took my little saber saw and did the corners (careful to not let my body fall through as the bottom gave way at each corner). I would say in an hour I had the major sections removed. I left the little forward tip of the bow intact since the saws would not fit down in that little well. I saw no real need to remove that part.
AUTOPSY....
I made a point now to look over the sawn out bottom panels. In spite of all the trouble that plywood gave me it was all totally intact. No delams of any sort. All the rotting was in the pine boards used to butt the panels together just behind the cabin. Perhaps that piece was rotten from the start but the interesting thing was that the rot was centered on the seam and also where the bottom skids passed under the butt plate. Go figure.
FLIPPING IT OVER...
Had to flip it over myself but with almost all the bottom removed it wasn't too heavy. It was awkward though because the shed was full of Birdwatcher too so the flip had to be confined to the AF4 trailer. I tipped it on its side and slid it as far to one side of the trailer as possible. Then tied a rope from deck to the roof rafter in hopes of holding it up sideways and then lowering it down gently under control. No such luck. As I fiddled with the rope tension it all went CRASH and, there, I had flipped it by myself without killing anyone. Actually I saw no damage.
THERE WERE STILL REMAINS...
...of the skids in the areas near the bulkheads and sides where the bottom has not been cut away. A hammer and chisel got them to go. The glue still held OK but I think it is very hard to get a really good glue joint on these skids when you are working by yourself. And there was some rot on the ply outer surface where the skids had been removed, indicating that water had seeped between skid and bottom. But it was not deep.
I STOPPED AT THE NAPA STORE...
...with the hope of finding a grinding gizmo of sorts that would buzz away the paint and bottom corner armor of glass and epoxy. I was pleased to find they had a very rough disk, maybe open 40 grit, that would fit the 5" rubber backup disk I have used for years with a drill. It buzzed through it all down to bare plywood, filling the shed with a dust of paint, glass and epoxy. I found one area about a foot long where the epoxy used to glue down the corner glass armor had not set completely. It clogged my disk but luckily that was on the final stretch. I suppose I had about two hours in sanding. I suppose I had maybe six hours in the whole operation at this time.
WHEN WE GET BACK TO THIS REPORT...
...I hope to show the new bottom going on. Should be straight forward but I decided the repair glue with be epoxy and not Titebond as first planned. I will have to level fill those small rotted areas and also have a skim of glass and epoxy on the corners in areas. Not sure if Titebond will bond to those areas to will go with epoxy and nails (of course).
Robbsboat
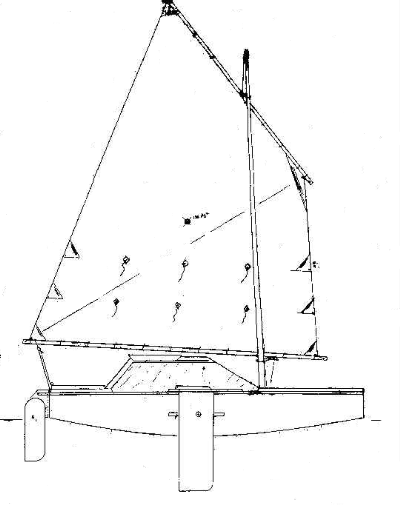
ROBBSBOAT, SAILBOAT, 15' X 4', 550 POUNDS EMPTY
Robb really probably wanted a Matt Leydon cruiser like Paradox but was put off by the complexity and small size. It has been a while since I saw Paradox plans but I think the "complexity" of the design is mostly in the details that made such a small boat livable. And maybe the only way to make a small boat like this work well in the Paradox fashion is to install all those details. However, my feeling is that almost no one is going cruising the way that Matt does and can get by without many of those details. My feeling is that Matt was able to make those trips in his little boats by very careful and patient planning and lots of experience. And if anyone were to ask me if this new boat is safe for ocean travel my answer would be a very quick and loud NO. In the right hands, like Matt's, it might be but it is the old case of "If you have to ask, the answer is NO." because the question demostrates you don't have enough experience to start with (like me).
But for a couple of days cruising on Kentucky lake, etc. by a small nimble person, it might work well, and that is what most of you will do if you are lucky. So the idea of Robbsboat is a small cruiser, totally enclosed, you sail it from the inside, you sleep in it, and it is supposed to take care of you and be self righting. Robb wanted it really sturdy so we have all 1/2" plywood with a bottom of double 1/2" plywood. Conventional construction including the only time I have ever used internal chine logs at Robb's insistance. That heavy plywood makes for a heavy boat - say 550 pounds stripped. The boat is supposed to be OK up to 1500 pounds total so a lot of gear can be stuffed inside. Some will think this is a two person cruiser, but they won't think that again after trying it on for size. If you tell someone they won't cruise with wife/girlfriend more than once I suppose 100% of them will disagree but you would be right for about 90% of them, so the boat will be a success 90% of the time. Much better than a really big boat that ends up being the wrong boat 90% of the time.
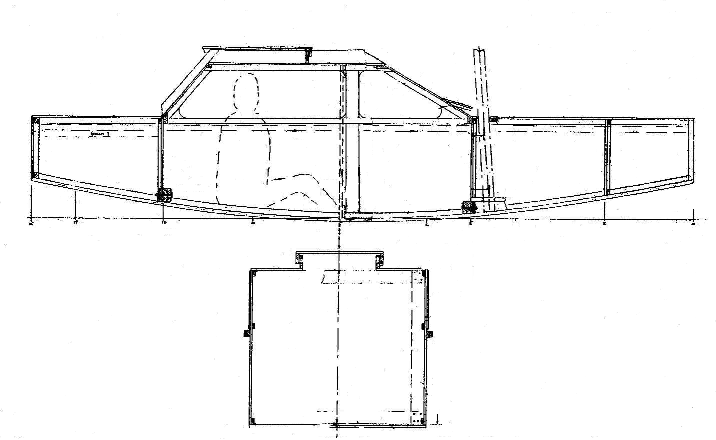
The sail rig shown is probably too large but then again it depends on the person and his cruising area. It is quite easy to reef or switch to a smaller sail since it is easy to get a balanced lug tuned up.
Eleven sheets of 1/2" plywood with conventional construction.
Plans for Robbsboat are $30 until one is built and tested.
Prototype News
Some of you may know that in addition to the one buck catalog which now contains 20 "done" boats, I offer another catalog of 20 unbuilt prototypes. The buck catalog has on its last page a list and brief description of the boats currently in the Catalog of Prototypes. That catalog also contains some articles that I wrote for Messing About In Boats and Boatbuilder magazines. The Catalog of Prototypes costs $3. The both together amount to 50 pages for $4, an offer you may have seen in Woodenboat ads. Payment must be in US funds. The banks here won't accept anything else. (I've got a little stash of foreign currency that I can admire but not spend.) I'm way too small for credit cards.
I think David Hahn's Out West Picara is the winner of the Picara race. Shown here on its first sail except there was no wind. Hopefully more later. (Not sure if a polytarp sail is suitable for a boat this heavy.
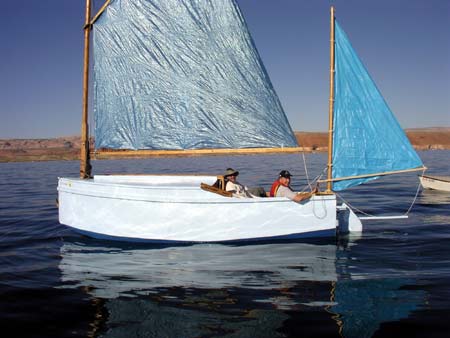
Here is a Musicbox2 I heard about through the grapevine.
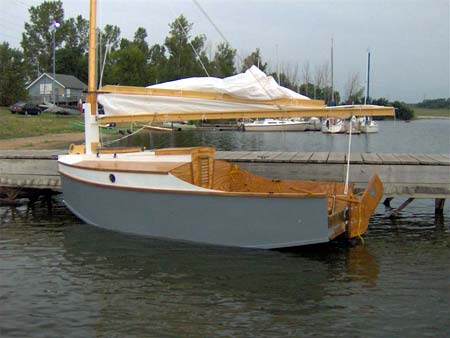
This is Ted Arkey's Jukebox2 down in Sydney. Shown with the "ketchooner" rig, featuring his own polytarp sails, that is shown on the plans. Should have a sailing report soon.
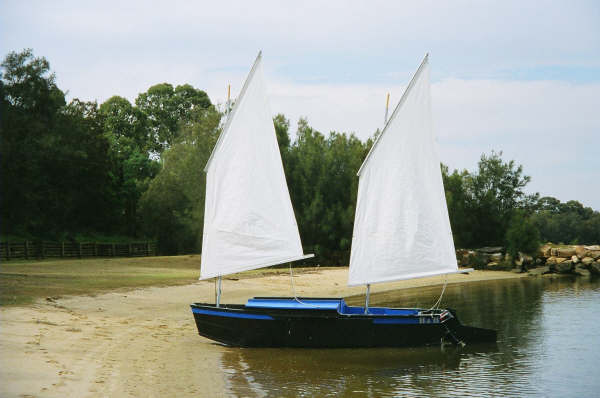
And the Vole in New York is Garth Batista's of www.breakawaybooks.com, printer of my book and Max's book and many other fine sports books. Boat is done, shown here off Cape Cod with mothership Cormorant in background, Garth's girls are one year older. Beautiful job! I think Garth is using a small lug rig for sail, not the sharpie sprit sail shown on the plans, so I will continue to carry the design as a prototype boat.
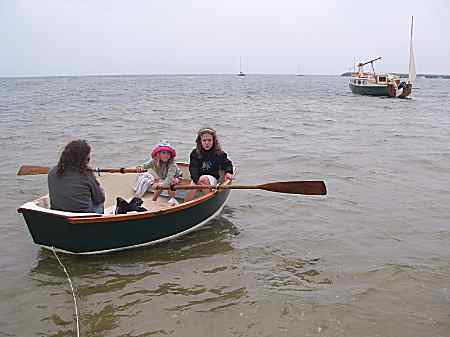
And the Leinweber's make another prototype! This one by Sandra, an Imresboat shown here on its first outing. They are taking it on a "cruise" so more about it later.
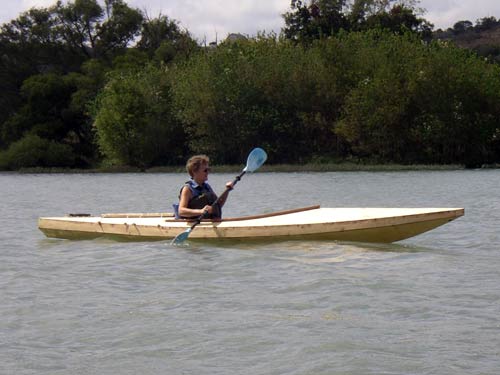
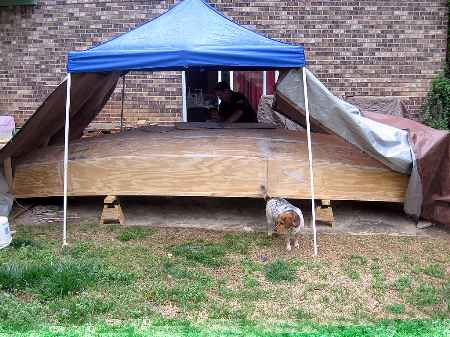
The Mikesboat project has had a polytarp temple built around it to allow worship in this spring's stormy weather:
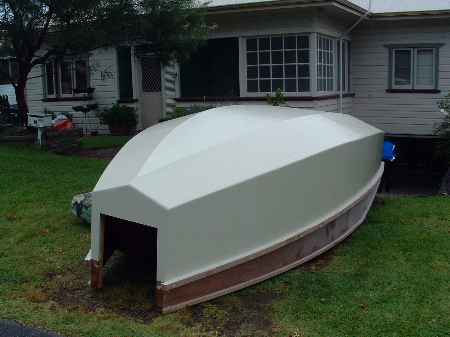
And a new Down Under Blobster, now upside down....
The prototype Ozarkian is complete. Now for some river testing and maybe some good weather:

AN INDEX OF PAST ISSUES
Hullforms Download (archived copy)
Plyboats Demo Download (archived copy)
Brokeboats (archived copy)
Brian builds Roar2 (archived copy)
Herb builds AF3 (archived copy)
Herb builds RB42 (archived copy)