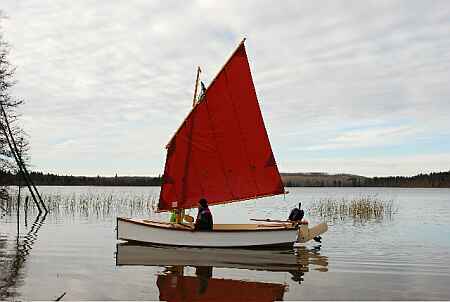
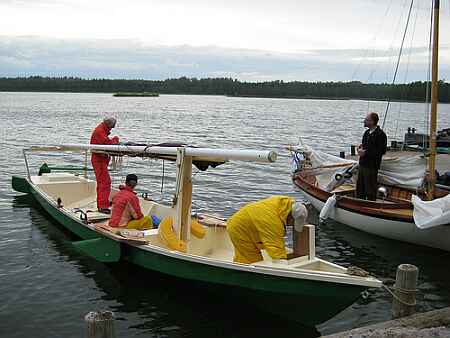
Murray Stevens gets his beautiful Ladybug launched just before the Canadian ice.
Contents:
Contact info:
Jim Michalak
118 E Randall,
Lebanon, IL 62254Send $1 for info on 20 boats.
Jim Michalak's Boat Designs
118 E Randall, Lebanon, IL 62254
A page of boat designs and essays.
(1Nov08)This issue will take a look at polytarp sails. The 15 November issue will continue the topic.
THE BOOK IS OUT!
BOATBUILDING FOR BEGINNERS (AND BEYOND)
is out now, written by me and edited by Garth Battista of Breakaway Books. You might find it at your bookstore. If not check it out at the....ON LINE CATALOG OF MY PLANS...
...which can now be found at Duckworks Magazine. You order with a shopping cart set up and pay with credit cards or by Paypal. Then Duckworks sends me an email about the order and then I send the plans right from me to you.

|
Left:
Murray Stevens gets his beautiful Ladybug launched just before the Canadian ice.
|
|
|
Lugsails From Polytarp 1
I FIRST WROTE THIS TEN YEARS AGO!!!
...And even then the info was based on polytarp sails I had made 15 years ago. Up to then I had used real Dacron sailcloth to make my sails but as I recall there were only two sources and only one would sell in small lots. Then even that one cut off us little fellows and we were left with retail outlets at two or three times the cost. And I went looking for an alternate material. I had seen polytarp and bedsheets used without much success. Traditional light canvas might have also been a good alternate material. But I took a whack at polytarp again. None of the attempts at polytarp sails had tried 3 dimensional shaping or other tricks like allowing for spar bending. I had a handle on those two problems and a could try them with polytarp.
(Right here I should say that I think there are limits to using polytarp for sails. For a polysail that sees regular use, some of it hard, it seems that maybe three years is a reasonable life span. I know of two that reached their end in about that time span. One flaked apart as polytarp will do. The other stretched out and lost its shape. It was recut and is now back in use. As to how large and heavy a boat is possible with polytarp sails, I don't know yet. But I can say with confidence that polytarp works well with an ordinary day sailer of up to 500 pounds max. In general a sail made from polytarp will suit a light boat. Polytarp is no where as strong or as stiff as real sailcloth.)
A LITTLE HISTORY...
I made my first poly lugsail about 15 years ago. Until then I had used sails of real sailcloth sewing them with vertical panels according to pattern instructions in MAKE YOU OWN SAILS by Bowker and Budd. The first poly lugsail I made was a straight copy of the Bowker and Budd method. I cut the large one piece polytarp into 3' wide strips to simulate regular sailcloth and sewed it all back together using standard broadseams. (A broadseam is a seam of varying width which produces a draft "pocket" in a sail made from flat material.) For the next polysail I left the tarp in one piece, marked where the broadseams would normally be, slit the tarp at those locations, taped in an overlap of the slit pieces equivalent to the broadseam and sewed it all up with doublers over the slits. At the same time we were learning how to strenghten the poly sail in the corners and perimeter to better take the loads of on the sail. Then Robert Smith's wife sewed up the polysail for his Cubit using the standard dressmaker's dart in lieu of the slit and doubled broadseams that I had been using. Much simpler and strong enough.
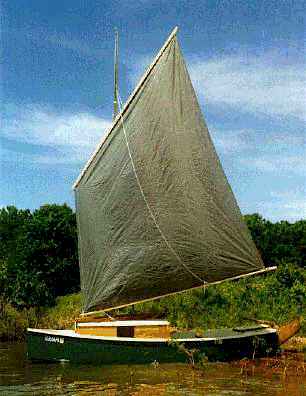
Three years ago I rethought making a lugsail from large polytarps, a way which really doesn't apply to real sailcloth. The picture shown above is of my Jinni in its last days. The sail is a 114 square foot lug made from a single poly panel and shaped with just two darts. There was really no trial and error involved with the new method because there is a way to size and shape the panel and darts before getting started.
Look down at Figure 1 to get the basics of how it was done. Figures 1 and 2 are actually the details that I used to make a 70 square foot sail for my Piccup Pram, not the Jinni sail.
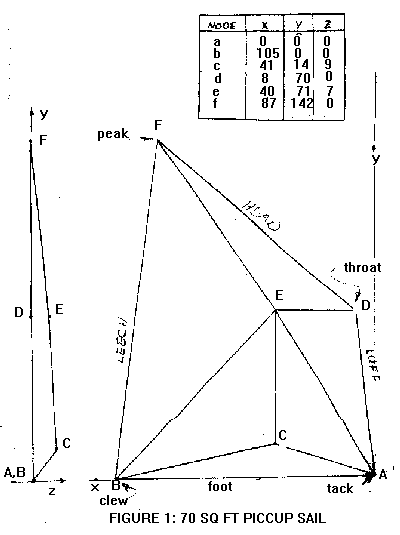
What we have here is a three view drawing of a lugsail in xyz cooridinates. As you look at Figure 1 remember that points C and E stick out of the page enough to give the sail roughly a 10 % draft. That is to say if the sail were 100" long from luff to leach, it would bow out in an airfoil shape about 10". So in a way the sail shape shown would approximate a double wedge airfoil. It is a three dimensional figure.
The idea is to imagine a shape that can be approximated by a bunch of triangles. Then imagine cutting along the edges of certain triangles such that the three dimensional pattern can be pressed flat. Then if you could reconstruct that cut pattern on a full sized piece of material and sew the cuts back together, you would have the three D figure again in full size.
In order to establish the cut pattern, which is shown down in Figure 2, you need to define true flat pattern shapes of all those triangles. It's actually pretty easy to do. You need to calculate the true lengths of all the lines in Figure 1. Take the easiest one first, line AB. A is drawn more or less as the origin of the plan at point x=0, y=0. B is at point x=105, y=0. So the distance between the two is 105". Next take line AC. C is at point x=41, y=14, z=9. To caluculate the length of line AC you need to use the Pythogorean theorem that the sum of the squares of the sides of a right triangle is equal to the square of the length of the hypotenuse. So for line AC, the length of the x side is 41, the length of the y side is 14 and the length of the z side is 9. 41 squared is 1681. 14 squared is 196. 9 squared is 81. Those squares add up to 1776. The square root of 1776 is 42.14 and that is the true length of line AC. You can program your computer to do this sort of work with any spreadsheet program but. to tell you the truth, a scientific hand calculator and pencil and paper are about as fast. You make out a table of the true lengths of all the lines in Figure 1.
NOW YOU CAN LAY OUT THE TRUE FULL SIZED PATTERN.....
Look again at Figure 2. You need to find a way to slit the 3D sail pattern along certain lines that will allow it to press flat. In the example I have slit it along AC and DE. I think it also could have been slit along BC and FE, or AC and FE, or BC and DE. But you see the effect.
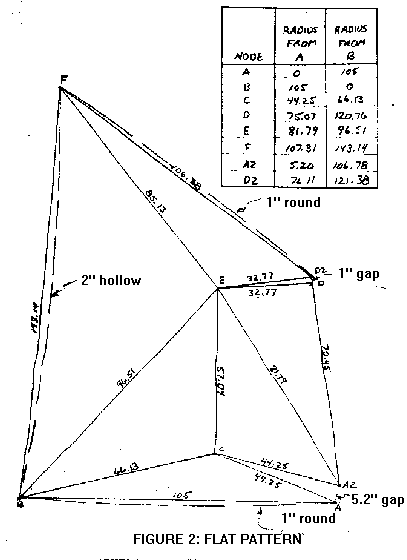
To lay out the pattern full sized on a sheet of polytarp, first unfold the polytarp and spread it out as flat as possible. That may not be easy. Stretch it and weigh it down. One problem with polytarp is that it is usually difficult to impossible to get it to lay truely flat without creases. The flatter you get it the better. The general idea is to lay out the pattern in such a way that no edge line comes within say 4" of the edge of the tarp. That way you will have some material along the edge lines to allow for spar bending and for sewing hems.
For this Piccup sail, I would start by laying out line AB. I use a steel measuring tape with its end at point A secured by a weight and stretched to B. Point B is marked well using a waterproof felt tip marker. Then I stretch a chalk line from A to B and snap a straight line. Next I use two steel tapes, one swung from point A and the other from point B to establish point C on the polytarp. The lengths used on the tapes while establishing point C are the true lengths AC and BC that were previously calculated. To get it right the measuring must be done with good accuracy. Then point C is marked with the felt tipped marker and lines AC and BC are snapped with the chalk line.
So we have established the true shape of triangle ABC on the tarp. We repeat the process to establish all the triangles in full size true shape. For example the next triangle would be BCE using BC of the first triangle as a starting point. When done we will have all the points of Figure 2 marked in felt tip pen and all the straight lines marked in chalk.
Next we mark the lines that will make up the real edges of the sail. Here we will adjust the straight lines for extra round required for spar bending and in the case of the leach, some hollow to prevent fluttering. I'm quite certain the luff is best left straight. So to mark these you will need a flexible battern long enough to span the points in question. For the leach you would anchor the batten at points B and F, push the batten center inward about 2" and mark with a felt pen. The rounds required for spar bending might vary quite a bit. You might seek guidance from the essay on that subject in a previous issue of this page. For the Piccup I guessed the spars would flex outward about an inch in normal service. So for the head of the sail, for example, the batten is anchored at points Fand D2, pushed outward an inch, and marked with the felt tip marker.
The lines AC and DE have been opened up, of course. So they now look like "V's" instead of a staright line. So I've shown two points as A2 and D2 to define the openings. There are shown at those points "gaps" of 5.2" and 1". But don't cut the pattern at those gaps. Instead cut straight across from A to A2 and from D to D2. We will close those gaps while sewing up the sail with a traditional sewing "dart" as opposed to cutting them along the edges and rejoining them somehow.
You might ask "Where is the round for the sail draft?" Good question. I've only shown round for the bending of the spars. The answer is that the pattern shown in Figure 2 has by nature extra material in it to allow for the "draft round" of traditional sail making. When the "gaps" are sewn shut you see that the pattern actually has the extra draft round material sewn in.
On the Piccup pattern shown in Figure 2 I carried the pattern a few steps beyond what I have described above. By using the true lengths of the triangles I was able to define all the points in XY coordinates with my computer, in short I was able to do the flat pattern lay out on paper. But there would have been no accurate way to lay out the pattern that way on the polytarp. So I took it another step and redefined the location of the flat pattern points as radii swung off points A and B. And those radii are shown in the table in the upper right of Figure 2. The idea was to stretch out the tarp, establish line AB, pivot one steel tape at point A and another at point B and then draw all the points by swinging the radii shown from just those two points. And laying out the sail took but a few minutes. Alas, figuring out the inersection points and radii took forever.
A COUPLE OF EXTRA THOUGHTS....
Getting the size of the "gaps" at points A and D is critical, I think. More so than any other dimension. If I were just making the sail taller or shorter, I would think the gap dimensions would stay the same on the new pattern. But if I were making the sail wider with no change in the draft percentage of the sail, I would think the gap dimension would increase in direct proportion to the width dimension. Clearly if the new sail were a a straight scale up or down of this one, the pattern including the gaps would be also be a straight scaling.
(What is interesting about the method shown above is that it appears that an effective way of shaping a triangular sail made of one sheet poly would be with a single seam from the tack, more or less the equal of seam AC on the above sail.)
NEXT TIME...
I'll show the details of sewing up a poly lug sail.
Piccup Pram
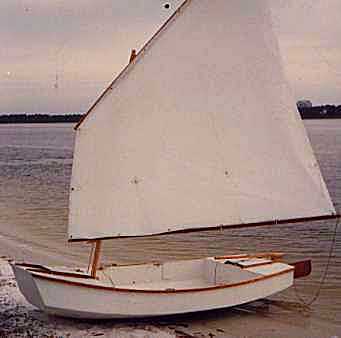
PICCUP PRAM, SAIL/ROW PRAM, 11' X 4.5', 90 POUNDS EMPTY
Piccup Pram was the first boat of my design to get built, back in 1990, I think. I still have the prototype and use it regularly. I designed it to be the best sail/row boat I could put in the back of my short bed pick up truck. But I found it to be a good cartopper, too. It has capacity and abilities I had previously thought impossible in a 90 pound cartopper. The photo above shows the original 55 square foot sail on Pensacola bay a long time ago. Piccup is a taped seam multichine hull which can take a fair amount of rough water.
Piccup continues to be one of my most popular designs and I get nice photos from builders. Here is one of Richard Donovan hoping for more wind up in Massachusetts.

Richard's Piccup has the larger 70 square foot sail that prefer myself. It's the same as the original but is 2' taller. This balanced lug sail sets on a 12' mast and rolls up easily for storage on its 9' yard and boom. The idea was to be able to store the rig easily in the boat during rowing and it works. There is a pivoting leeboard and kickup rudder on the boat and they can be left in place raised while rowing. Converting to full sail takes a couple of minutes as you step the short mast, clip on the halyard and tack lines, hoist the sail, lower the boards, and off you go. And the balanced lug sail reefs very well although reefing any small boat is best done on shore.
Here is a Piccup by Vince Mansolillo in Rhode Island, a nice father/son project. Piccup will be large enough to hold both of them. You can see the large open frameless cockpit, large enough for sleeping. And you see the buoyancy/storage boxes on the end.
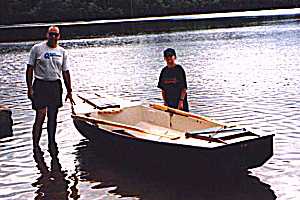
But Piccup will take two adults as seen in the photo of Jim Hudson's boat. Jim's boat has a polytarp sail as does my own Piccup.
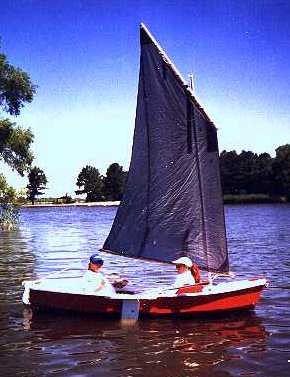
These boats have proven to be good for sail rig tinkerers (be sure to read and apply the Sail Area Math essay before starting). Here I am in Piccup with a polytarp sharpie sprit sail. The rig is different from the originals but the hull here is totally unchanged (except for paint) from the original shown on the beach at Pensacola.
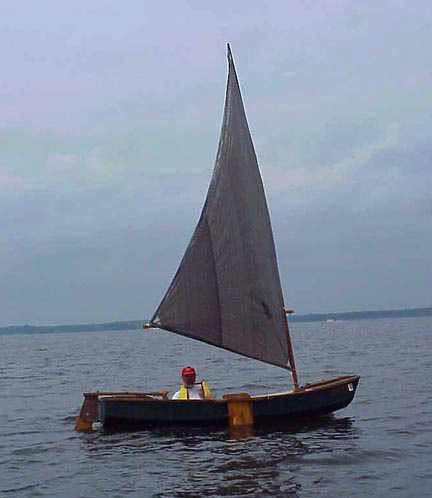
I think my own Piccup has had about six rigs of different sorts and was always the test bed for the polytarp sail experiments. But, hey!, that's nothing compared to the tinkering Reed Smith did with his out in California. Here is his Piccup rigged as a sharpie sprit yawl!
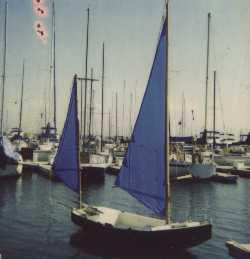
Here is Rob Rhode-Szudy's yawl rig Piccup that was featured in his essays about building Piccup that you can access through the old issue links.
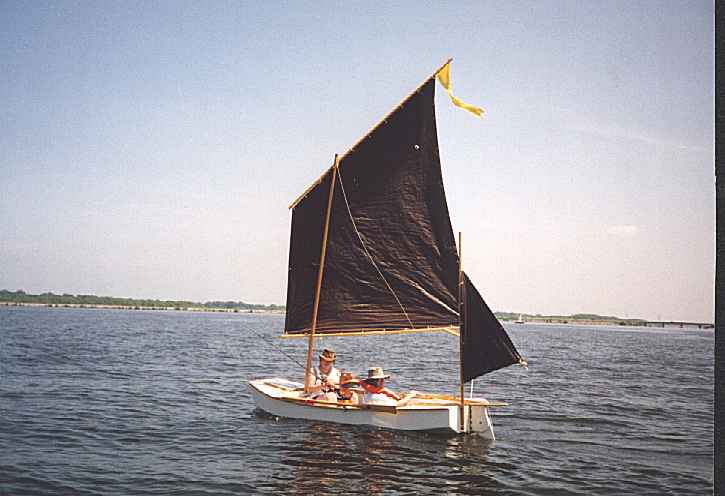
Here is another by Doug Bell:

This one is by Jim Islip:

And this one by Ty Homer:

Piccup Pram uses taped seam construction from five sheets of 1/4" plywood.
Plans for Piccup are still $20.
Prototype News
Some of you may know that in addition to the one buck catalog which now contains 20 "done" boats, I offer another catalog of 20 unbuilt prototypes. The buck catalog has on its last page a list and brief description of the boats currently in the Catalog of Prototypes. That catalog also contains some articles that I wrote for Messing About In Boats and Boatbuilder magazines. The Catalog of Prototypes costs $3. The both together amount to 50 pages for $4, an offer you may have seen in Woodenboat ads. Payment must be in US funds. The banks here won't accept anything else. (I've got a little stash of foreign currency that I can admire but not spend.) I'm way too small for credit cards.
I think David Hahn's Out West Picara is the winner of the Picara race. Shown here on its first sail except there was no wind. Hopefully more later. (Not sure if a polytarp sail is suitable for a boat this heavy.
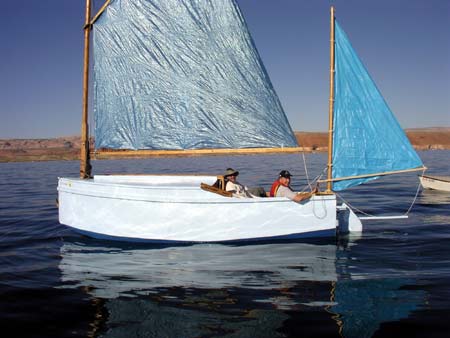
Here is a Musicbox2 I heard about through the grapevine.
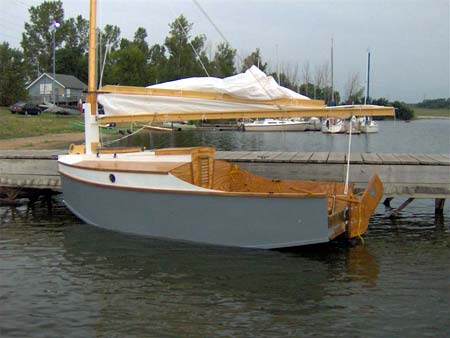
This is Ted Arkey's Jukebox2 down in Sydney. Shown with the "ketchooner" rig, featuring his own polytarp sails, that is shown on the plans. Should have a sailing report soon.
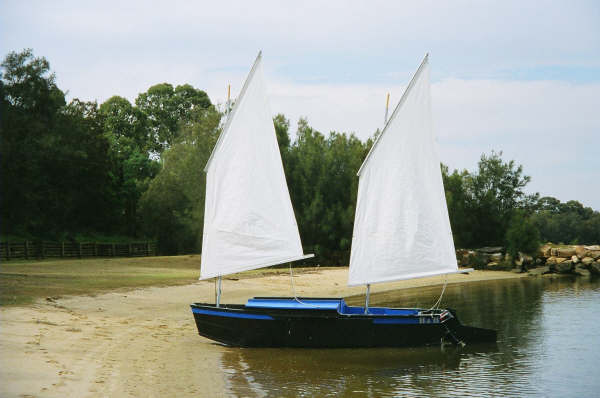
And the Vole in New York is Garth Batista's of www.breakawaybooks.com, printer of my book and Max's book and many other fine sports books. Boat is done, shown here off Cape Cod with mothership Cormorant in background, Garth's girls are one year older. Beautiful job! I think Garth is using a small lug rig for sail, not the sharpie sprit sail shown on the plans, so I will continue to carry the design as a prototype boat.

And the Leinweber's make another prototype! This one by Sandra, an Imresboat shown here on its first outing. They are taking it on a "cruise" so more about it later.
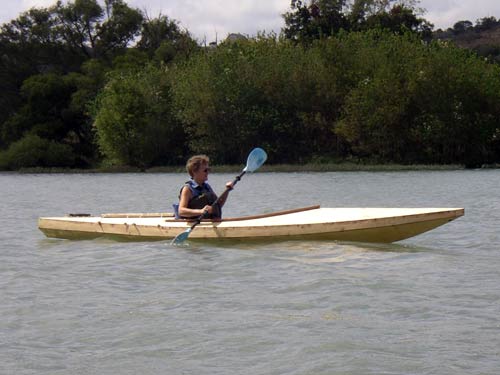
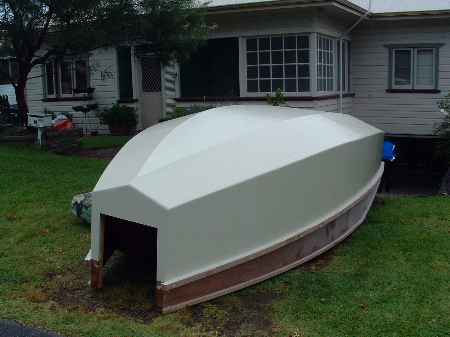
And a new Down Under Blobster, now upside down....
A view of the Caroline prototype showing a lot of the inside, crew on fore deck. Beautiful color:
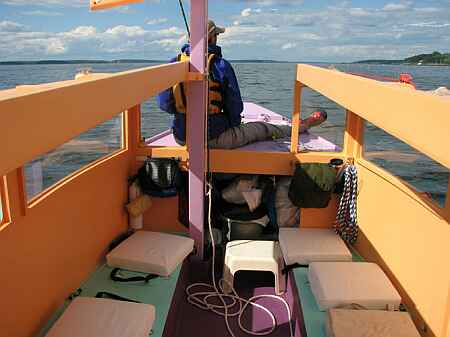
I gotta tell you that on the Caroline bilge panels I made an error in layout and they are about 1" too narrow in places on the prototype plans. I have them corrected but it always pays, even with a proven design, to cut those oversized and check for fit before final cutting.
And the Raider of Norm Wolfe did indeed make it to the Finnish Raid. I'll bet the paint was still wet.
AN INDEX OF PAST ISSUES
Hullforms Download (archived copy)
Plyboats Demo Download (archived copy)
Brokeboats (archived copy)
Brian builds Roar2 (archived copy)
Herb builds AF3 (archived copy)
Herb builds RB42 (archived copy)