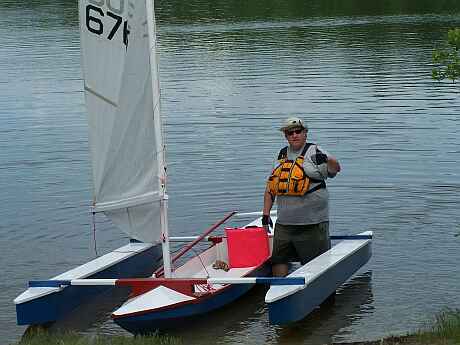
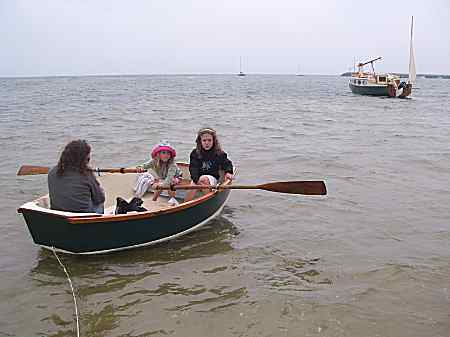
Tom Raidna launches his Trilars.
Contents:
Contact info:
Jim Michalak
118 E Randall,
Lebanon, IL 62254Send $1 for info on 20 boats.
Jim Michalak's Boat Designs
118 E Randall, Lebanon, IL 62254
A page of boat designs and essays.
(1June09)This issue will sew up a bimini boot. The 15 June issue will remember Phil Bolger.
THE BOOK IS OUT!
BOATBUILDING FOR BEGINNERS (AND BEYOND)
is out now, written by me and edited by Garth Battista of Breakaway Books. You might find it at your bookstore. If not check it out at the....ON LINE CATALOG OF MY PLANS...
...which can now be found at Duckworks Magazine. You order with a shopping cart set up and pay with credit cards or by Paypal. Then Duckworks sends me an email about the order and then I send the plans right from me to you.
MESSABOUT NOTICE:
THE REND LAKE MESSABOUT WILL TAKE PLACE ON JUNE 12 and 13 AT THE PINTAIL LOOP OF THE NORTH SANDUSKY CAMP GROUND AT REND LAKE IN SOUTHERN ILLINOIS. THIS IS A CHANGE FROM PREVIOUS YEARS. I WON'T BE IN CHARGE OF THE MEET THIS YEAR. INSTEAD OUR TIRELESS FRIEND ROB ROHDE-SZUDY WILL TAKE A STAB AT IT. CONTACT HIM AT robrohdeszudy@yahoo.com FOR MORE CAMPING INFO IF YOU NEED IT .

|
Left:
Tom Raidna launches his Trilars.
|
|
|
Bimini Boot
I WENT TO USE MY AF4 THIS SPRING AND....
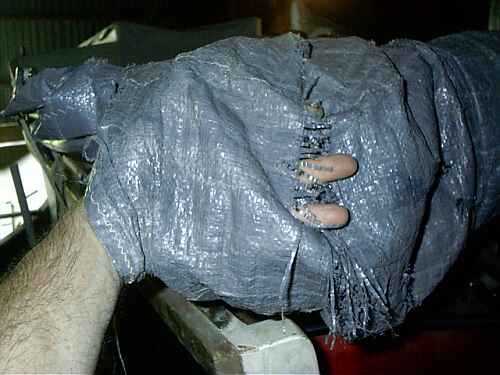
...found my hand went clear through the bimini boot. I made this from polytarp probably 8 years ago, or more, and cheap polytarp at that. That is OK by me. Remember that this boat is stored indoors so polytarp works for a good while here. If she were an outdoors boat I don't think you could get more than a year out of a polytarp boot.
Time to replace it.
The boot shown was made from seven pieces, each carved and sewn together for something of a tailored fit. But I have found a good boot can be made from a single piece of cloth. I learned that from looking at commercial boots.
First I measured up the bimini. It was 5.5' wide and wrapping the tape around the bundled bimini showed it needed about a 20" circumference. I've learned from experience that you don't want a boot that is too small for your bimini. After a long hot day on the water you won't want to fight getting your bimini stuffed back into the boot. And too big is OK.
I FOUND A PIECE OF SUITABLE...
... scrap white heavy polytarp and chopped off a rectangular piece 6' long and 24" wide. I did the chopping such that the "grain" of the tarp was parallel to the edges although that isn't really required.
THE BOOT IS SORT OF A LONG SHALLOW BAG AND WILL BE MADE INSIDE OUT...
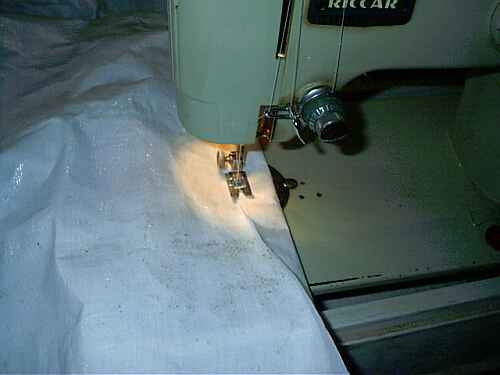
First I sewed the long side edges over with a 1-1/2" wide hem, like this:
Next I folded it lengthwise, so it was doubled 6' long and 12" wide, with the hems I had sewn on the outside. The piece was pinned together this way for the time being.
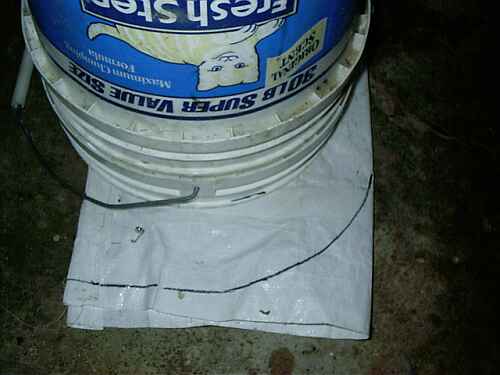
Now to sew up the ends of the "bag". I put rounded ends on mine but I have seen commercial boots that have squared off corners. If you round the ends then make sure your radius is about the same as those of your bimini frame. I marked mine with a special radius tool I keep shown here:
Then I sewed along the marked lines to close the ends of the bag. And trimmed the excess like this:
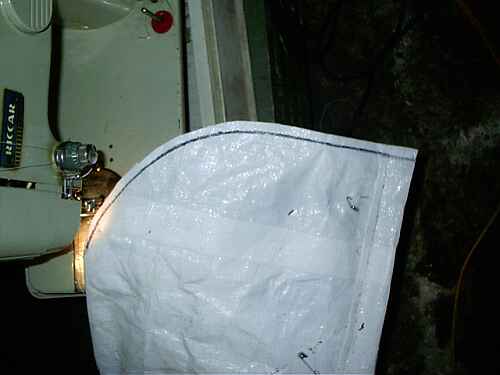
You can see I know have a long shallow bag, inside out, which will be the boot.
ON TO THE ZIPPER....
I reused the long zipper I had on the original boot and even then it was salvaged from an older commercial boot so there is no telling how old it is. It is black plastic and large and will probably last through many more boots. One trick I think to making zippers last is to avoid making them go around curves. They will usually do that but for only a million or so cycles.
Now, zippers have two ends, one has a "starter" end where you can start the slider to join the two strips, then slide it full length to some sort of "ending" that prevents the slider from going clear off the end. On a commercial zipper that ending is usually a crimped on blocker. But if you get a zipper that is longer than you need then you will be cutting that end off. If that is the case, as it was here, then cut it a few inches longer than you need and I will show you how to easily fit a new blocker for the cut end. But the zipper needs to be long enough to close the open edge of the boot but not so long that it doesn't allow enough room for the bimini frame to pass through.
Anyway, the zipper is centered on the open edge of the boot and one edge is pinned in place. The boot is still inside out at this stage and you will be sewing it on what is now the outside (such that when you turn the boot inside out the zip is actually on the inside of the finished boot with only its slider showing). Then starting from the slider end you sew the first zipper strip to the boot.
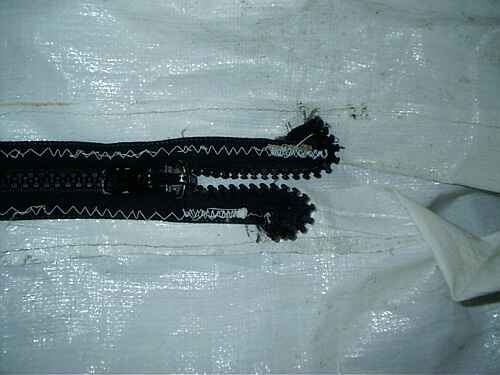
Now, when you get to the cut end of the zipper you need to give it a quick turn and sew that down. The idea is that the zipper can't make the quick turn and thus can't come off that end of the zipper. (A trick learned from studying boat canvas that came out of Florida where I suppose the sun required regular replacement of boat canvas, thus the Florida boat canvas ladies are always busy and know every trick). The turn looks like this:
After you get the first half of the zipper sewn in place 'tis time for the second strip of the zipper. You might think you could just start the second strip to match the first and just sew it down...but that won't exactly work! If you just start it in the right place and sew it down it will come out too long!!! I don't know why but it is guarenteed!. On a 50" zipper the second edge of the zipper, if unrestrained while you sew, might end up an inch or two longer than the first! So you will need to first zip the second strip to the first (which you just sewed into position), and pin it to the boot about every 6" along its full length. Like this:
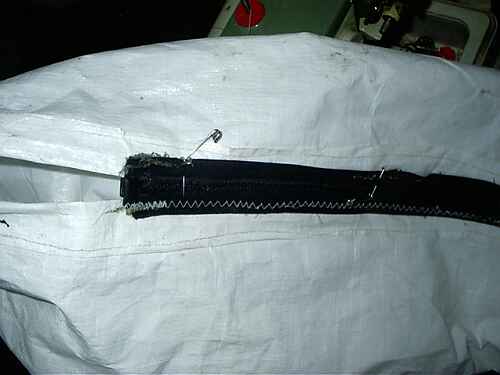
Then unzip the two strips and sew the second strip into position giving it a turn on the cut end if needed.
You're done!
TURN IT RIGHT SIDE OUT...
... and see if it fits.
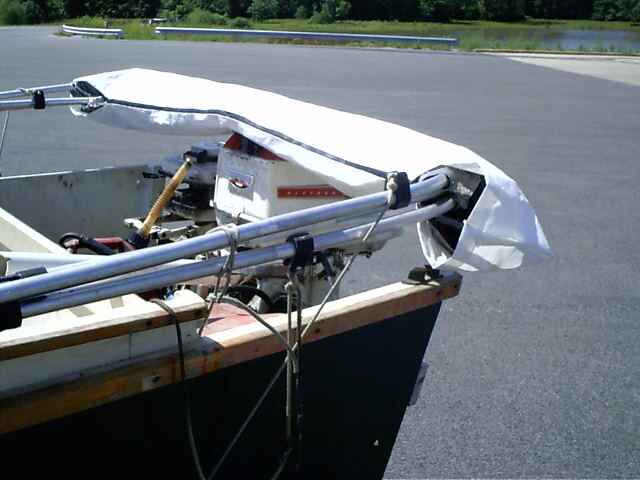
Not too bad for me. Might be a little long, thus the end openings are larger than needed but that is a lot better than too small. I could fix it quickly by sewing up new end corners maybe 1" inward from what I have now. But you know me...
Ozarkian
OZARKIAN, DRIFT BOAT, 20' X 4', 200 POUNDS EMPTY
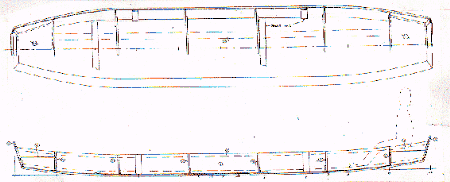
I do a "retro" design every now and then, an old design redone with modern techniques. Max Wawrzyniak sent me a wonderful copy of the article "Ozark John Boat" by Townsend Godsby, printed in the "Sports Afield Boatbuilding Annual" in 1956. I live on the edge of the Ozark Mountains right now and have seen have seen some of the beautiful streams mentioned in the article. These are small shallow rivers, clear and beautiful, that slide and riffle over clean gravel beds at about a walking pace. In the summer it gets really hot around here and it is still a happy way to kill time to float those rivers in aluminum canoes. In popular spots you could swear you could walk across the river by stepping from canoe to canoe, your ears treated to the sounds of birds, rippling water, and laughter, all to the beat of canoes crashing into each other. The Ozark jon boat predates the aluminum canoe by quite a bit, Godsey's article quoting a builder that had been floating the river as a fishing guide in his jon boats since 1900 and even then the design was well established.
The traditional Ozark boat is in some ways better than the aluminum canoe. For one thing it carries a huge load, being 20' long, 4' wide, and having a dead flat bottom. It is a drifting barge. Godsey gives the basic use: load with fishing guide and "sport" and gear to float 125 miles from Galena to Branson, Missouri, (first home of the mythical Jed Clampett), in five days. No motor, just a paddle for the guide to steer with. At Branson it all got shipped back to Galena (just 24 miles away by land) by rail for the next trip. In the old photos the amount of gear carried is enormous. The boats have seats in the ends but the photos show the people sitting very comfortably in canvas director's chairs.
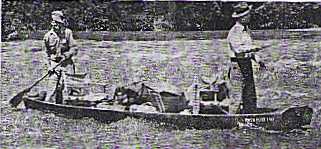
Construction in 1956 was what one could expect. You start with something you might not find at your lumberyard today - five "clean" pine boards 1" x 14" x 20' long. Three boards make the bottom with tongue and groove joints and one board makes each side, so these boats aren't too big on freeboard. I've shown wooden frames where the original boats had metal frames made from old iron wagon tires! The list of materials also included 15' of "Cow chain", whatever that is. I should add that I think a similar boat, but with pointy ends, was used in a similar way in Michigan that dragged a length of heavy chain from its stern, keeping the boat pointed reliably downstream.
Well, my Ozarkian uses standard simple plywood "instant" construction needing five sheets of 3/8" plywood. "They ain't nothin' to makin' a John boat," said Charlie the old guide. "Any hillbilly kin do it."
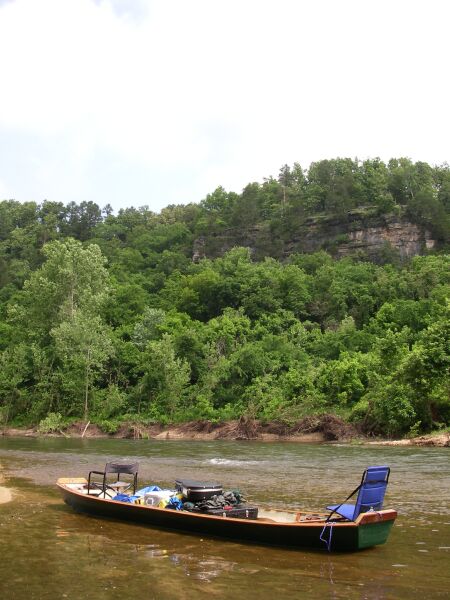
Well, Kyle Kosovich in Springfield, Mo, built the prototype. He knew the history of the boats and is using his just as the old ones were used, (which is pretty unusual). Don't even ask me about putting power on such a long light hull. You are on your own there. Remember these were never used at high speeds or in big open water. They are slow stream drifters. Here is Kyle's boat in the very waters the original boats floated:
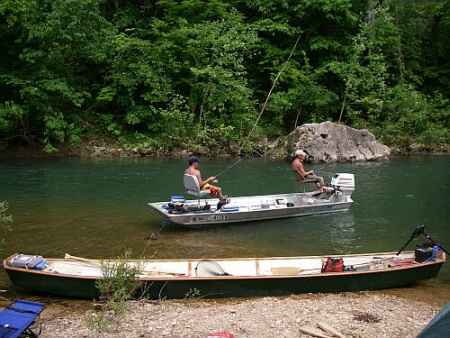
He sent another with a modern normal boat in the background to give the Ozarkian some scale:
And here is Kyle on his first voyage:
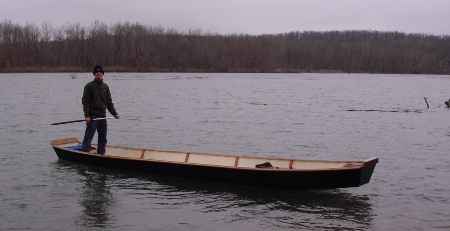
Kyle added: "It was a dream to run the river with. We floated on the Bryant Creek and caught smallmouth, and ran limb lines with the trolling motor for catfish. The trolling motor pushed it easily. This boat is great. I repeatedly over corrected it while fishing, all it takes is a little tip of the paddle to keep it straight. It is a lot easier than a canoe to steer."
Kyle runs an Ozark float/fish service at www.longboatoutfitters.com .
Great job!
Plans for Ozarkian are $25.
Prototype News
Some of you may know that in addition to the one buck catalog which now contains 20 "done" boats, I offer another catalog of 20 unbuilt prototypes. The buck catalog has on its last page a list and brief description of the boats currently in the Catalog of Prototypes. That catalog also contains some articles that I wrote for Messing About In Boats and Boatbuilder magazines. The Catalog of Prototypes costs $3. The both together amount to 50 pages for $4, an offer you may have seen in Woodenboat ads. Payment must be in US funds. The banks here won't accept anything else. (I've got a little stash of foreign currency that I can admire but not spend.) I'm way too small for credit cards.
I think David Hahn's Out West Picara is the winner of the Picara race. Shown here on its first sail except there was no wind. Hopefully more later. (Not sure if a polytarp sail is suitable for a boat this heavy.
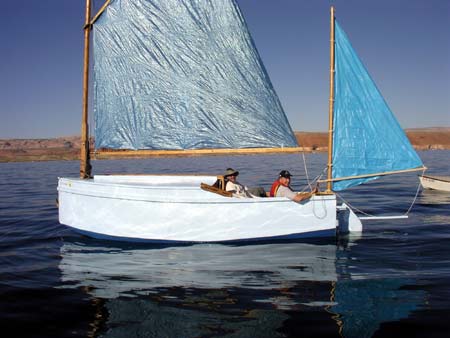
Here is a Musicbox2 I heard about through the grapevine.
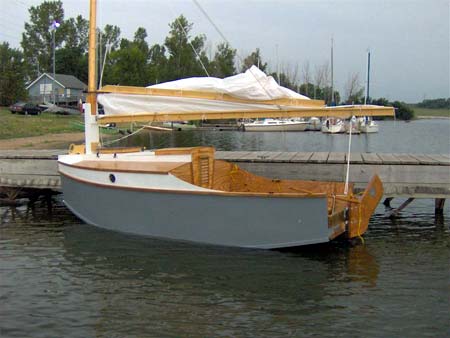
This is Ted Arkey's Jukebox2 down in Sydney. Shown with the "ketchooner" rig, featuring his own polytarp sails, that is shown on the plans. Should have a sailing report soon.
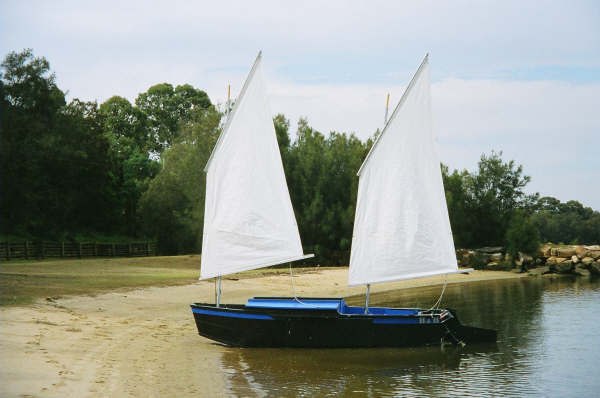
And the Vole in New York is Garth Batista's of www.breakawaybooks.com, printer of my book and Max's book and many other fine sports books. Boat is done, shown here off Cape Cod with mothership Cormorant in background, Garth's girls are one year older. Beautiful job! I think Garth is using a small lug rig for sail, not the sharpie sprit sail shown on the plans, so I will continue to carry the design as a prototype boat.
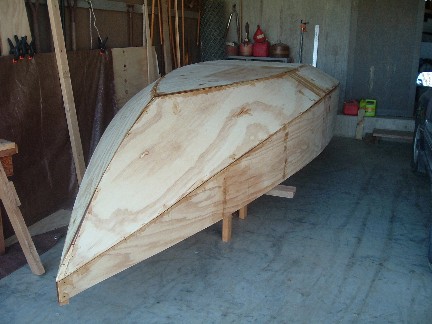
And a new Down Under Blobster, now rightside up for final finish. Looks like another beautiful job....
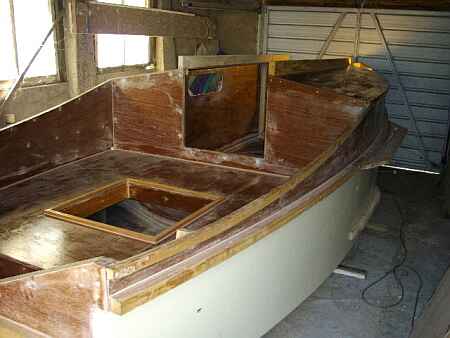
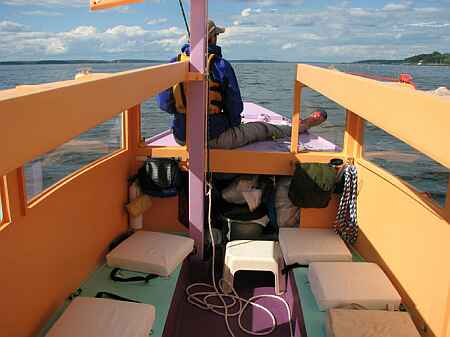
A view of the Caroline prototype showing a lot of the inside, crew on fore deck. Beautiful color:
I gotta tell you that on the Caroline bilge panels I made an error in layout and they are about 1" too narrow in places on the prototype plans. I have them corrected but it always pays, even with a proven design, to cut those oversized and check for fit before final cutting.
And a Family Skiff is going together in mid Missouri...
AN INDEX OF PAST ISSUES
Hullforms Download (archived copy)
Plyboats Demo Download (archived copy)
Brokeboats (archived copy)
Brian builds Roar2 (archived copy)
Herb builds AF3 (archived copy)
Herb builds RB42 (archived copy)