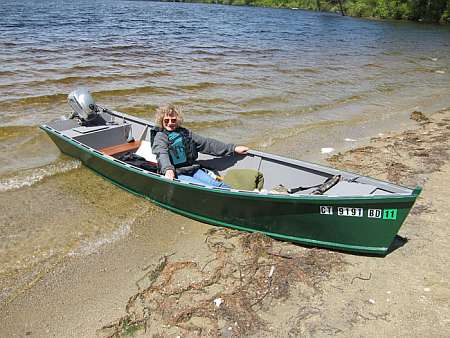
Ron Jakowski's beautiful delux QT Power Skiff in New England.
Contents:
Contact info:
Jim Michalak
118 E Randall,
Lebanon, IL 62254Send $1 for info on 20 boats.
Jim Michalak's Boat Designs
118 E Randall, Lebanon, IL 62254
A page of boat designs and essays.
(15May10)This issue will rerun the article about putting a new bottom on AF4. The 1 June issue will continue the topic.
THE BOOK IS OUT!
BOATBUILDING FOR BEGINNERS (AND BEYOND)
is out now, written by me and edited by Garth Battista of Breakaway Books. You might find it at your bookstore. If not check it out at the....ON LINE CATALOG OF MY PLANS...
...which can now be found at Duckworks Magazine. You order with a shopping cart set up and pay with credit cards or by Paypal. Then Duckworks sends me an email about the order and then I send the plans right from me to you.
MESSABOUT NOTICE:
THE REND LAKE MESSABOUT WILL TAKE PLACE ON JUNE 11 and 12 AT THE PINTAIL LOOP OF THE NORTH SANDUSKY CAMP GROUND AT REND LAKE IN SOUTHERN ILLINOIS. ALL OF THE SANDUSKY CAMP GROUNDS ARE FULL AS FAR AS I CAN TELL FOR THAT WEEKEND. THE GUN CREEK CAMP GROUND THAT WE USED FOR YEARS HAS BEEN CLOSED. BUT OUR BOATERS HAVE RESERVED SOME OF THE SITES AT SANDUSKY SO YOU (AND I) MIGHT PASS THAT WAY FIRST SINCE USUALLY SEVERAL TENTERS CAN SHARE A CAMPSITE. IF NOT, THEN I WOULD TRY THE WAYNE FITZGERRELL STATE CAMPGROUND WHICH IS ON THE MAIN CAUSEWAY LEADING TO SANDUSKY. THEIR WEBSITE SAYS IT IS STRICTLY FIRST COME FIRST SERVE, NO RESERVATIONS ALLOWED. IT IS A VERY QUICK DRIVE FROM THERE TO SANDUSKY. HOPE TO SEE YOU THERE!

|
Left:
Ron Jakowski's beautiful delux QT Power Skiff in New England.
|
|
|
New AF4 Bottom 1
BACKGROUND...
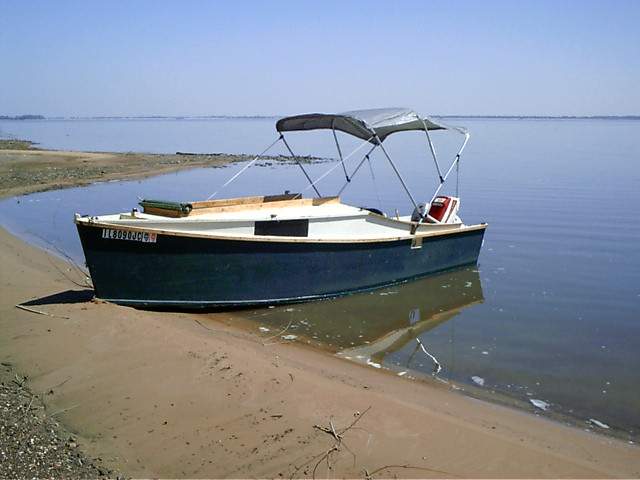
Spring, 2007, I decided to get my AF4 ready to launch. I noticed the butt plate in the cockpit bottom was getting pretty soft and rotten. I had already "repaired" it once a year earlier by scraping out the crud and pouring epoxy into the hole. I threw a bucket of water into the cockpit to see what would happen. It leaked out but sometimes with wood the leaks will seal after a bit. But I kept throwing in water and it kept leaking out. I decided to sideline the boat until repairs could be made and used the old Birdwatcher that summer.
NOW...
...the bottom of my AF4 was a bother from the day it was launched. I used 3/8" plywood except I didn't know that plywood now is in general 1/32" undersized. And this was only three ply. And one face had no flaws but was quite thin. And the other face was pretty bad, full of knots, checks and cracks. The inner core was thick without voids but where the inner laminations were joined there was a seam. When launched I would see eventually a wet line running from stem to stern where the water leaked through the flaws in the outer thick face, then through that seam in the inner ply, and then through the very thin inner face. The leaks would seal shortly.
But the bottom was always too flexible for me and I was used to flexing bottoms. I changed the bottom thickness in the drawing from 3/8" to 1/2".
SO...
...I decided that this time there would be no patching. I would replace the bottom with something thicker. Max Wawrzyniak's AF4 had a 5/8" bottom with a single 2x4 skid/stifferner down the bottom and it seemed rock solid to me. (Max built his boat after trying mine so he knew what to change.) Now I intended to copy Max.
FIRST, DEMOLITION...
I thought about this a lot. How to remove the old bottom. It was constructed like this:
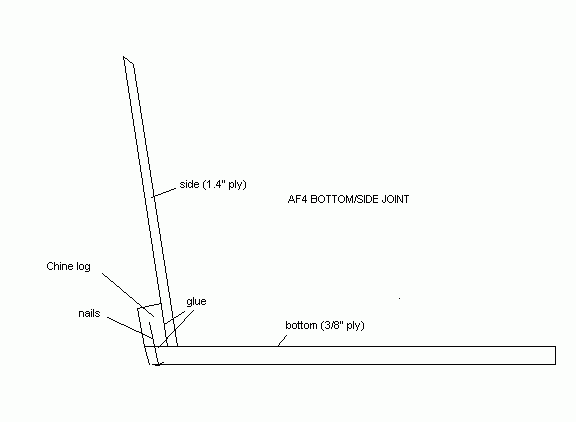
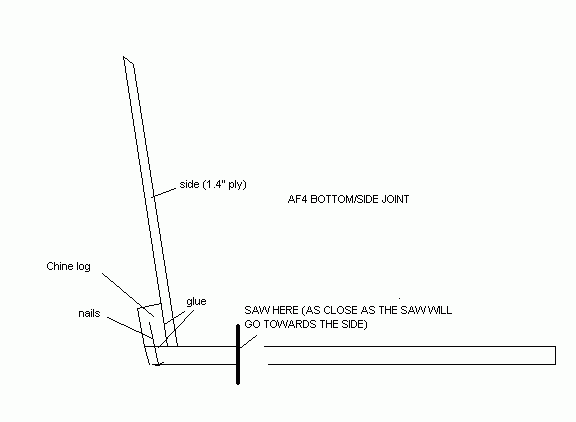
The bottom/chine joints all seemed totally intact. The first thought was to remove the old bottom where it joined the chines but that would involve destroying all the nails, etc. that I used to join it all together. Then I said to myself, "Why destroy that joint! What if I cut the bottom inboard, like this:"
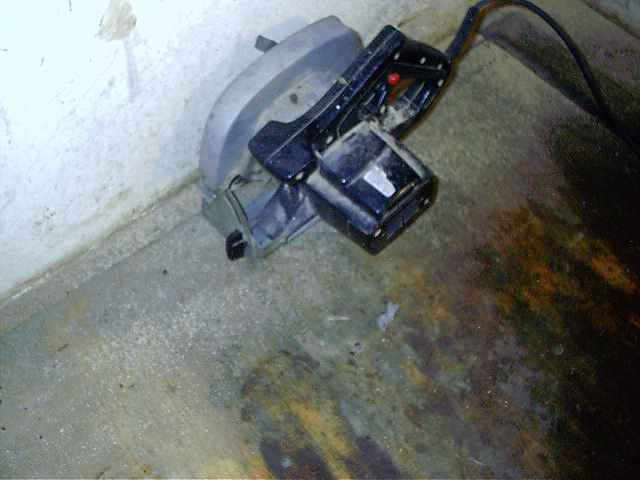
A bad photo of the operation might look like this:
Then I could grind the old paint and fiberglass off the remaining bottom and have a nice flat and wide surface to attach the new bottom, like this:
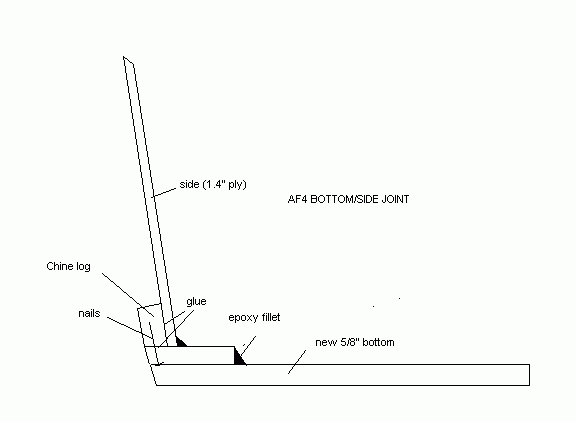
That was the plan. Now to real life demolition.
The initial sawing was quite easy to do. Done from the inside with the boat on the trailer. First I took my circular saw,with those great thin carbide tipped blades that Dave Carnell used to sell. It cared not if it hit a nail which was bound to happen. I set it as close to the side of the boat as possible and let her rip. This went very quickly but the circular saw would not get into the corners. In a few minutes the bottom was released from most of the sides and bulkheads but was still tabbed to the corners. Then I took my little saber saw and did the corners (careful to not let my body fall through as the bottom gave way at each corner). I would say in an hour I had the major sections removed. I left the little forward tip of the bow intact since the saws would not fit down in that little well. I saw no real need to remove that part.
AUTOPSY....
I made a point now to look over the sawn out bottom panels. In spite of all the trouble that plywood gave me it was all totally intact. No delams of any sort. All the rotting was in the pine boards used to butt the panels together just behind the cabin. Perhaps that piece was rotten from the start but the interesting thing was that the rot was centered on the seam and also where the bottom skids passed under the butt plate. Go figure.
FLIPPING IT OVER...
Had to flip it over myself but with almost all the bottom removed it wasn't too heavy. It was awkward though because the shed was full of Birdwatcher too so the flip had to be confined to the AF4 trailer. I tipped it on its side and slid it as far to one side of the trailer as possible. Then tied a rope from deck to the roof rafter in hopes of holding it up sideways and then lowering it down gently under control. No such luck. As I fiddled with the rope tension it all went CRASH and, there, I had flipped it by myself without killing anyone. Actually I saw no damage.
THERE WERE STILL REMAINS...
...of the skids in the areas near the bulkheads and sides where the bottom has not been cut away. A hammer and chisel got them to go. The glue still held OK but I think it is very hard to get a really good glue joint on these skids when you are working by yourself. And there was some rot on the ply outer surface where the skids had been removed, indicating that water had seeped between skid and bottom. But it was not deep.
I STOPPED AT THE NAPA STORE...
...with the hope of finding a grinding gizmo of sorts that would buzz away the paint and bottom corner armor of glass and epoxy. I was pleased to find they had a very rough disk, open 24 grit, that would fit the 5" rubber backup disk I have used for years with a drill. OH JOY! It buzzed through it all down to bare plywood, filling the shed with a dust of paint, glass and epoxy. I found one area about a foot long where the epoxy used to glue down the corner glass armor had not set completely. It clogged my disk but luckily that was on the final stretch. I suppose I had about two hours in sanding. I suppose I had maybe six hours in the whole operation at this time.
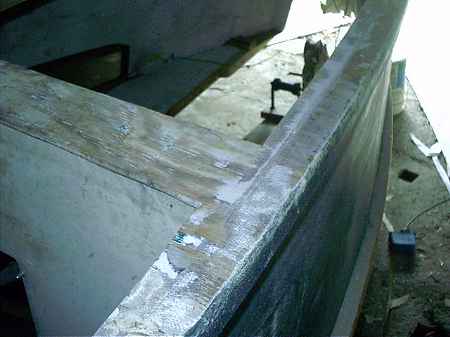
In real life it now looked like this. The curved chines still show a bit of fiberglass, the center web going across is the bottom of the cabin bulkhead:
WHEN WE GET BACK TO THIS REPORT...
...I hope to show the new bottom going on. Should be straight forward but I decided the repair glue with be epoxy and not Titebond as first planned. I will have to level fill those small rotted areas and also have a skim of glass and epoxy on the corners in areas. Not sure if Titebond will bond to those areas to will go with epoxy and nails (of course).
Catbox
CATBOX, A PDRACER, 8' X 4', 70 POUNDS EMPTY
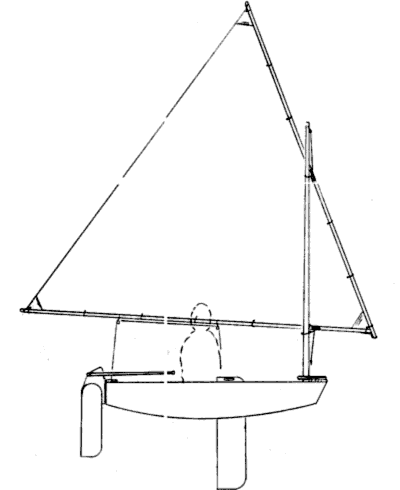
In recent years I've seen several PDR boats at our Rend Lake meets. Chuck Leinweber asked me to design one too but I guess I put it off thinking there was already a lot of variety. But enough arm twisting did the job and I ended up drawing Catbox.
The basic idea for the PDR class is pretty sound I think. The bottom of the boat is tightly controlled with variations of just 1" allowed, but I take that to be a "builder's tolerance" sort of thing and not a designer's tolerance. I took the shape shown right from the Wikipedia article on the PDRs so it must be true. Hull depth can be varied a bit. At the start I got fancy and tried to give it an elegant sheer but that never works for me. Whenever I try hard for elegant I always end up with ugly so I went back to a straight line which is I think what this class is all about.
I made it with an air box on each side. These serve many purposes. In a knockdown this boat should come up more or less empty of water because the side boxes are deep enough to float all high and dry. The inner wall of the box strengthens the bottom and that combined with the arc of the bottom should negate any need of added bottom stiffening even though the bottom is just 1/4" plywood. The wall also supports the decks which serve as seats. And if you put big deck hatches in them you can store your gear in the boxes and it should stay dry. Boxes like these need to be left open to the air anyway when not sailing to keep them from rotting. Very important.
Idid a lot of things with Catbox that I don't usually do. No external chine logs and no bottom stiffeners. I'm keeping the thing smooth as can be since this is a racing boat! I guess you could try it with external chines logs if you wish but I see no advantage here. The external sides and inner walls are all the same but don't forget you will need two righties and two lefties.
For the rig I took a Sunfish rig, at least I think I'm using the same dimensions. Catbox is a lot shorter than the Sunfish but it is also a wider so I don't think it will be overcanvased in general. The Sunfish sails are available new here and there but if I had one of these I would try polytarp first, very cheap and appropriate here and to my mind if properly done polytarp may have an edge over sailcloth in light winds.
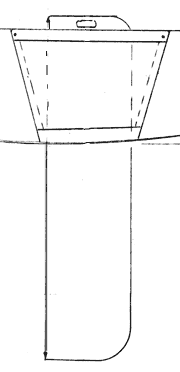
Let's see ... NO LEEBOARD! It is true. I didn't want to spoil a sleek racer with a leeboard so I gave it a daggerboard. It is attached to one of the inner walls, not in the middle and in the way. The hull/daggerboard interface should have less drag than a leeboard rig. I also arranged the board case such that the angle of the board can be changed - swept forward or aft to change sail trim. Should be a good speed trick in the right hands under the right conditions. Anyway, it will be something interesting to tinker with.
That's about it. Simple nail and glue construction needing four sheets of 1/4" plywood for all.
Catbox plans are $25 if you order directly from me and these will be two 2'x3' blueprints plus the building key. But you can also get an "instant download" for $20 from Duckworksmagazine.com.
Prototype News
Some of you may know that in addition to the one buck catalog which now contains 20 "done" boats, I offer another catalog of 20 unbuilt prototypes. The buck catalog has on its last page a list and brief description of the boats currently in the Catalog of Prototypes. That catalog also contains some articles that I wrote for Messing About In Boats and Boatbuilder magazines. The Catalog of Prototypes costs $3. The both together amount to 50 pages for $4, an offer you may have seen in Woodenboat ads. Payment must be in US funds. The banks here won't accept anything else. (I've got a little stash of foreign currency that I can admire but not spend.) I'm way too small for credit cards.
I think David Hahn's Out West Picara is the winner of the Picara race. Shown here on its first sail except there was no wind. Hopefully more later. (Not sure if a polytarp sail is suitable for a boat this heavy.
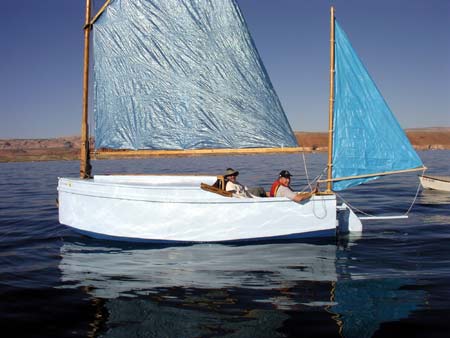
Here is a Musicbox2 I heard about through the grapevine.
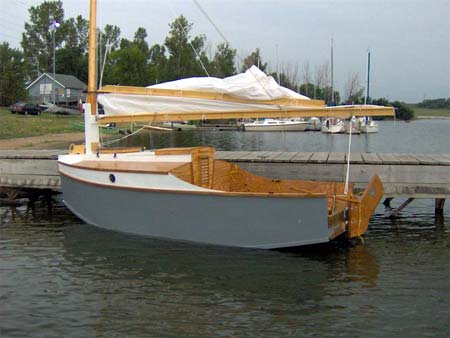
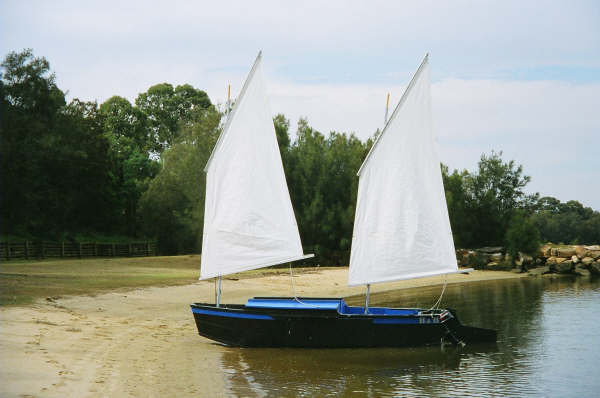
This is Ted Arkey's Jukebox2 down in Sydney. Shown with the "ketchooner" rig, featuring his own polytarp sails, that is shown on the plans. Should have a sailing report soon.
And the Vole in New York is Garth Battista's of www.breakawaybooks.com, printer of my book and Max's old outboard book and many other fine sports books. Beautiful job! Garth is using a small lug rig for sail, not the sharpie sprit sail shown on the plans, so I will continue to carry the design as a prototype boat. But he has used it extensively on his Bahamas trip towed behind his Cormorant. Sort of like having a compact car towed behind an RV.
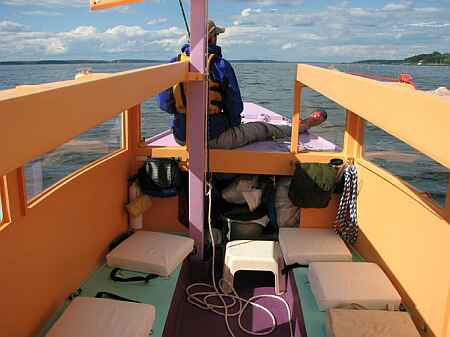
A view of the Caroline prototype showing a lot of the inside, crew on fore deck. Beautiful color:
And here is another making I think its maider voyage in the Texas 200. (I'm told the Chinese rig will be replaced by the blueprint rig.)
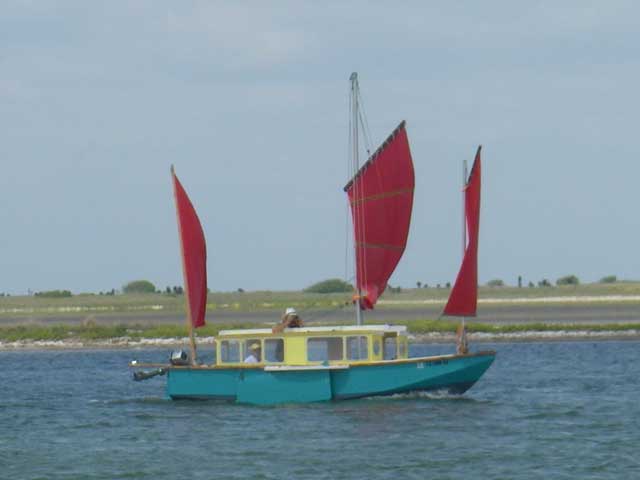
I gotta tell you that on the Caroline bilge panels I made an error in layout and they are about 1" too narrow in places on the prototype plans. I have them corrected but it always pays, even with a proven design, to cut those oversized and check for fit before final cutting.
And a Deansbox seen in Texas:
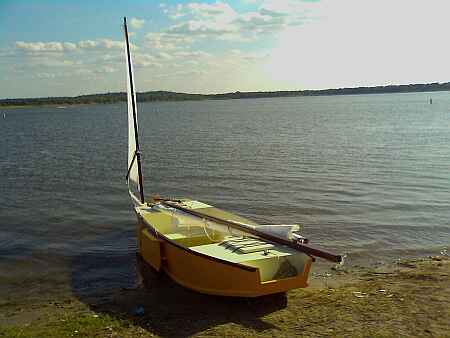
A Twister gets launched, tightrope walking down a slippery trailer tongue with freezing water just below, I've been there too. Used for now as low powered boat, awaiting its sail rig. Nice job!

AN INDEX OF PAST ISSUES
Hullforms Download (archived copy)
Plyboats Demo Download (archived copy)
Brokeboats (archived copy)
Brian builds Roar2 (archived copy)
Herb builds AF3 (archived copy)
Herb builds RB42 (archived copy)