Contents
New Bimini
A NEW BIMINI FOR AF4
...Well, the old bimini sort of died. It had faded away and gotten
holed over the years...
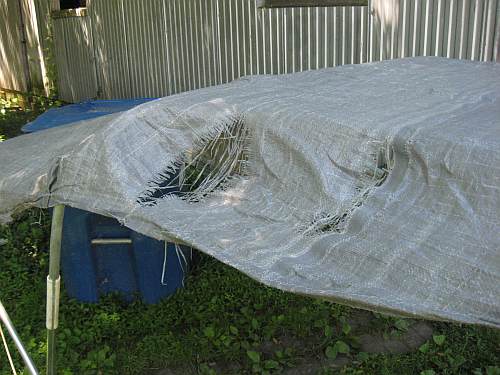
... and the storm at this year's Rend Lake meet gave it the final
rip...
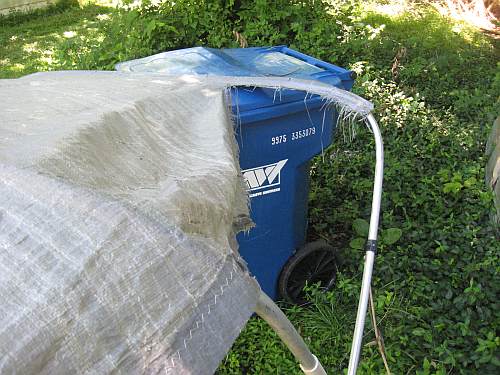
...So RIP, old bimini. It was made in a hurry ten years ago using a
thin junk tarp that I found and it cost nothing.
A WORD ABOUT THE OLD BIMINI BOWS...
I think the bows of the cover are sort of the base of it all and can be
the most difficult thing to come up with. In this case I had tried PVC
pipes and found them too heavy and flexible so I say don't waste your
time there. Rob Rhode-Szudy did a bimini article for Duckworksmagazine
where he made his own bows out of steel tubes. Aluminum tube is ideal
for a smaller bimini like this one, really large boats use stainless
steel tubes. What I have here is another find, a set of bows salvaged
from a pontoon boat that was caught in a bit of a fire. The fabric was
apparently totaled, the bows bent, and some of the plastic fittings
were partially melted but function. A great story! It was way too wide
and long for AF4. To make it the right width I cut sections out of the
middles of the cross tubes and then scarfed them back together with
smaller tube inserts secured with small bolt. Then the height was
reduced by shortening the sides of the bows. I never did get all of the
kinks out of the tubes though and I think that still haunts it a bit.
I say this with the idea that at the beginning at least you might
investigate buying an economy bimini which will come with aluminum bows
and the required fittings. My AF4 bimini is 7' long and 6' wide and
about 4' tall and a quick web check at overtons.com shows a new top
sells for about $300, so keep that in mind. In spite of all the hype
about top materials, I think they all last about the same, five to ten
years with normal use.
Anyway, I think the bows should be tall enough so that you can stand
under it without stooping, say 6.5' headroom in the middle. The cloth
sides come down about 6" on the sides. You should be able to see the
horizon without stooping I think.
One of the cool things about fitting these is that fitting can be done
essentially remotely. That is you don't have to fit it while it is on
the boat. Just measure the thing for the size you need and maybe mount
your deck hardware to take the fittings. That is why there is no
problem selling general purpose bimini tops for boats as overtons does.
BACK TO OUR STORY....
With that in mind I set up the old bimini by the barn with its guy
ropes staked to tent pegs, pulling them taut and stretching the old
bimini to shape...
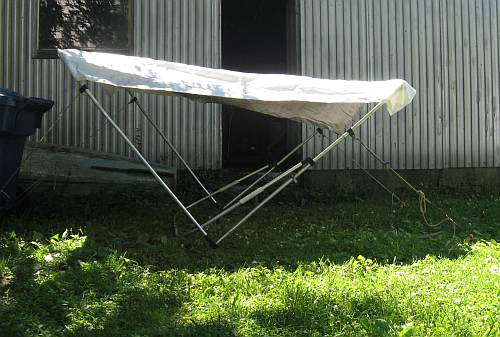
When you do this eyeball it in every way to make sure it is not
twisted. In particular I check to see that the tops of the bows are
parallel with each other, and, as shown in the photo, the front bow
legs are parallel and the back bow legs are parallel. In this case the
center support bow is let down because the idea with the new bimini is
that it will stretch straight from from to back with no hump in the
middle. But the middle bow will be used eventually to support the
middle of the bimini. (I need to mow the grass in the photo but it can
wait.)
In the photo the old top is still there under the new blank I have cut
from a piece of thicker white polytarp which I had on hand. The ripped
section of the old tarp is hanging down on one end. The new piece is
pinned right to the old top on the bows. If you just have bows and no
old top you will have to mock it all up with ropes or straps to get the
bows in proper position.
The new blank needs to be well oversided, about 6" longer than the
original and maybe 10" wider. It should come down on the sides about
6". When you have it secured to the bows as desired, mark the curve of
the ends, like this:
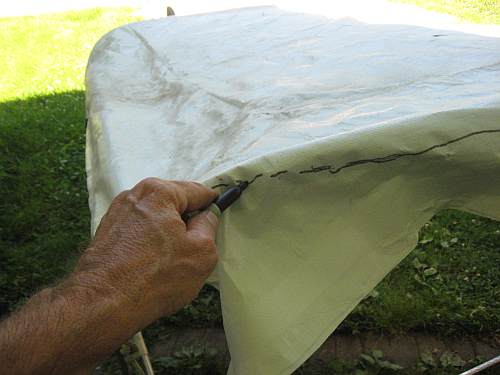
When you have the ends marked be sure to also mark the sides such that
they will all be the same height from the bottom. Looking at the photo
I should say I should have made the top tighter, with less sag, than I
did. But I'm not sure this can be done with great precision at this
stage, because...
THE GREAT BIMINI MYSTERY....
I think the thing about bimini fitting that gives one the fits is
getting the fit correct. It is stretched between bows which are
themselves usually fairly limber. You do your best to get the end
curves exact but when you put it together later and yank on the guy
ropes you pull the bows this way and that and they take on curves
slightly different than your original set up. And then your top is
tight in some places and loose in others. A quarter inch here or there
makes difference. At least that is my excuse. More about this later.
ANYWAY...
...mark the sides with a straight line. That is where the side will end
but there will be a hem along the edge so mark it again 3" past that
first line and cut it there.
YOU'RE GONNA HAVE TO SEW...
...so get over that. Practice if you need to. Use polyester thread like
the stuff Duckworks sells for light sail making. Here is my elaborate
sewing arrangement...
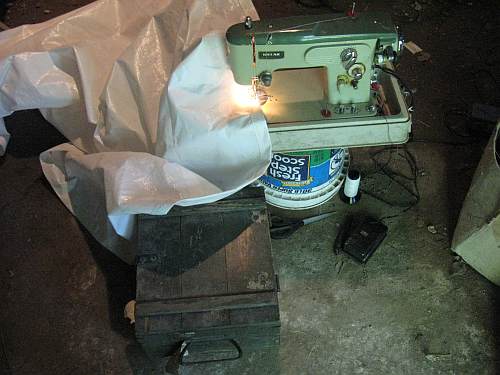
The work is done on the shop floor with a low seat, an old ammo box
here, and the old Riccar is atop a kitty litter pail. Use no
substitutes.
Cut the sides allowing for the hem but leave the ends uncut for now.
Sew in the side hems. I prefer to use the big zig zag stitch just as in
sailmaking. In my case I rolled the hem material twice so in the end
the hem band is 1-1/2" wide and a total of three layers thick there.
After the side hems are done, fold the top lengthwise down the center
so it is doubled and note the markings you make for the ends. They may
not match up well but the idea now is to cut the material now while it
is exactly doubled so the piece will at least be symetric about the
centerline. When you cut it cut about 1/2" past the line so you can hem
it over to double its thickness there. Here is mine at that stage,
sides sewn and ends cut...
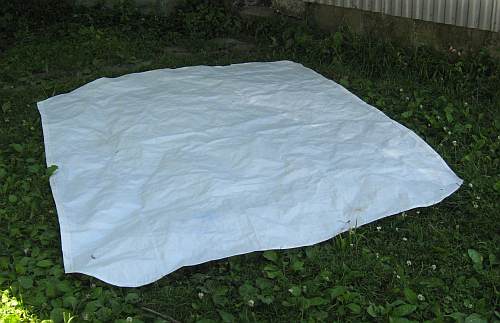
After you have cut the ends sew in a bit of a hem to double the
material there.
NEXT, MAKE THE SLEEVES FOR THE BOWS...
...The bows are attached with sleeves and a sleeve will start a lot of
arguments. Some like 'em tight and some like 'em loose and some like
'em straight and some like 'em curved. Some won't live with a sewn on
sleeve, they must be secured with long zippers so the top can be
removed quickly. Alas, unless you have the funds and permission to get
into places like Astrup that wholesales 10' long heavy duty zippers you
are sort of stuck with sewing them on permanently. The usual factory
biminis have sewn on bow sleeves in order to avoid the cost of the mega
zippers. Well, I'm too cheap for mega zippers right now. There is
another way. You could lace the bimini to the bows. You will need lots
of grommets. One wonderful advantage to lacing is that it is sort of
self adjusting. Hey, I'm too cheap for grommets even!
So, I'm a big sleeve guy. I see no advantage to a narrow bow sleeve. I
made these so wide that they took up the entire curve and have a
straight edge towards the middle of the top. Here are my sleeves cut
for the initial stage of fitting...
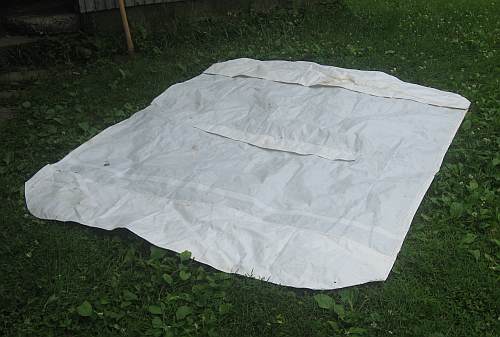
The sleeves are layed out so that the back edge of the sleeve is about
4" past where the curve of the bow meets the straight side. Note that
the top is really a flat piece of stuff now. The back edge of the
sleeve runs straight across to the other side with an allowance for a
hem. If you are rich and using zippers I suggest this sort of sleeve
because you won't have to sew a curve into your zippers. Anyway, pin
the pieces to the top so they won't shift and cut the sleeve to match
the curve of the ends. The sleeves also need a hem on the ends to make
them stout there. So first you unpin the sleeve from the top after
marking and cutting, sew in the hems on the ends of the sleeves, then
sew the long straight hems on the aft edges. Then pin it back on the
top and sew the curved edge of the sleeve to the top. Be sure to run
the machine back and forth several times at the ends of this sew line
because it seems guaranteed that the failure mode will be for the
sewing to rip out at the lower front edges of the sleeves. It looks
like this...
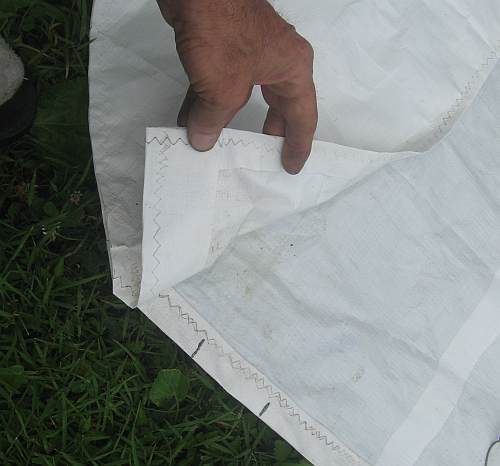
Lay it all out flat and then pin that straight edge into position for
final sewing of the sleeve. Use a pin about every 6" to keep it under
good control. Like this...
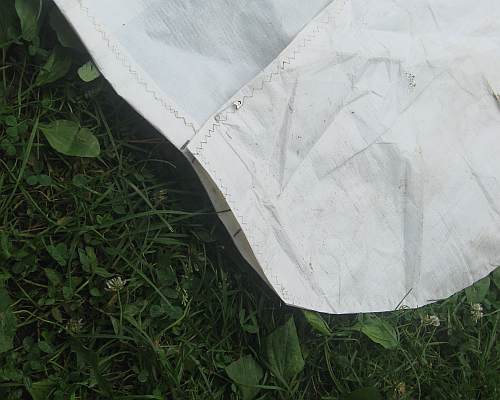
Sew her down. If you were rich and had long zippers you would sew them
here instead of using the single solid sewn seam as I did.
I haven't mentioned it yet but any center bows also need sleeves, but
they are far simpler than the end sleeves. Just a straight 3' long and
4" wide sleeve for this case. You can omit the center bow sleeve and
instead use straps to the fore and aft bows to control its position.
This is actually a better way to locate the bow except that the straps
are a big bother to a bimini that will be unfolded/folded a lot as they
seek out anything that they might tangle with.
LET'S SEE....
...HOLY CRAP! IT'S DONE!
Well, of course it is never done but now you have to take your bows
apart and slide the bows into their sleeves and reassemble. You rich
guys with your fancy zippered sleeves need only zip it on. My first
trial looked like this...
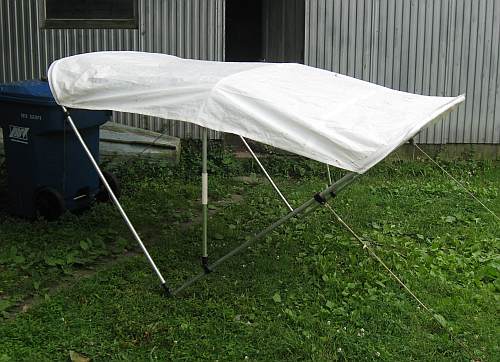
Not too bad. Could be worse. A bit wrinkled but you might be able to
pull some of that out in final fitting on the real boat so don't get
too carried away with tailoring yet. Next onto the boat...
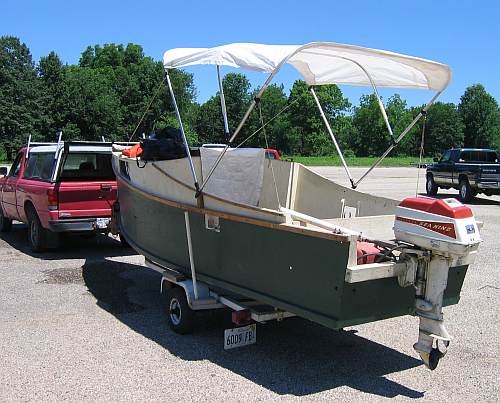
Same wrinkles but there is still hope in that with the boat on a beach
I could really scope it out and adjust with the guy straps. But I
wouldn't do any tailoring yet.
Here is how I would tailor it. This one is tighter on the edges than in
the center so it can be tightened up a bit in the center by taking a
bit of material out of the center. Stand at one end (best done with the
boat solidly beached) and pull out any extra material to tighten up a
loose spot, like this...
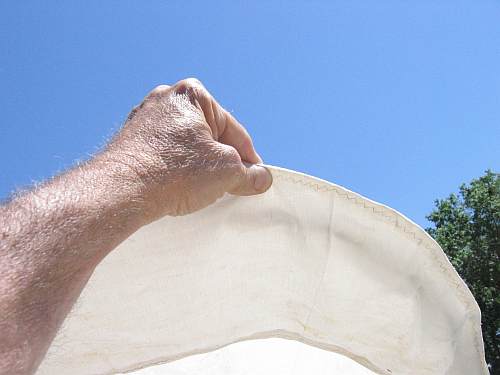
Then pin out the extra material like this...
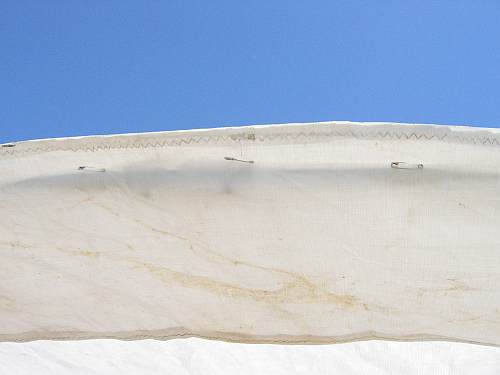
Then you can sew down the pin line to remove the extra and tailor the
fit. But of course you need to remove the top from the bows to do that.
My old buddy Harold would now be telling me that is where the expensive
zippers come into play. And he would have told me to hollow out those
front and back curves an inch in the first place, before I sewed it
together because bows always deform that way under pressure. You know,
that lacing idea looks better all the time.
I took AF4 out for a spin but there would be no final tweaking because
this year there will be no beaches. Carlyle Lake is ten feet over its
normal summer pool, all beaches are well flooded.
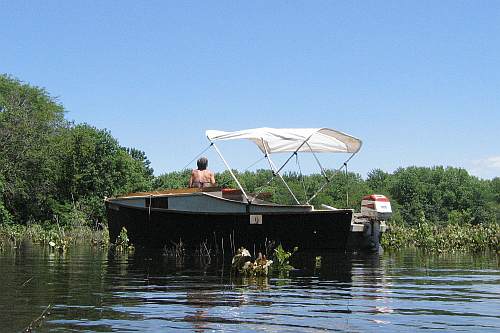
This photo shows the best we could do, parking the boat about a quarter
mile "inland" from our normal cove "beach" and even here the water was
nearly three feet deep. This is often a cultivated field. The water now
goes right through those trees all the way to the main lake again. But
the new bimini certainly did its job with no changes needed except for
cosmetics.
Contents
Mikesboat
MIKESBOAT, SAILBOAT, 17' X 5.5', 450 POUNDS EMPTY
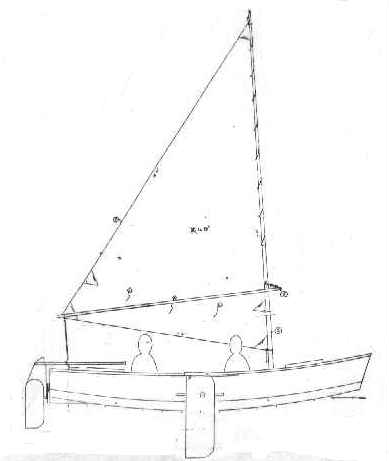
Mikesboat is a big Piccup Pram. It is slightly narrower in
proportion. The idea was to have something like Piccup that was
large enough to take the family so she has two bench seats 8' long.
It should be a good expedition solo boat with a boom tent fitted
over the cockpit. Mikesboat has the Piccup layout with
buoyancy/storage chambers fore and aft but now there is also enough
room for a small motor well across the stern. As a rule something
like this needs maybe 2hp to run at hull speed and even then there
would be some extra. This shape of hull with multichines has proven
good in rough water with fair speed.
Sail rig is the same 96 square foot sharpie sprit rig that I used
on AF3 and a few other designs (actually it is the mainsail from a
Bolger Jinni design I built 20 years ago). This is a change from
the balanced lug rig that Piccup uses but Mike had good experiences
with his Mayfly12 which used the sharpie rig and that is what he
wanted. I would expect the sharpie sprit to be slightly better to
windward than the lug but not by a lot and the sailmaker's talents
might be the deciding factor here. There is no doubt that the
sharpie sprit mast is perhaps 50% longer than a similar lug sail
might need.
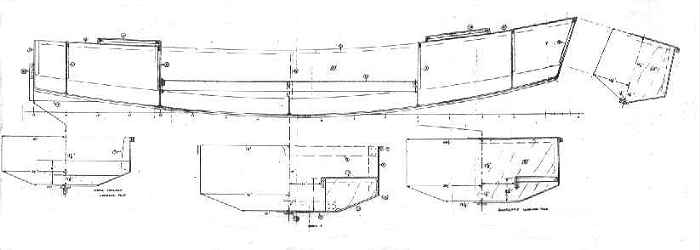
Mikesboat uses taped seam construction. Takes nine sheets of 3/8"
plywood and three sheets of 1/2", compared to Piccup's fives sheets
o 1/4". So you see that scaling up a boat makes for a lot more wood
and weight.
I dunno if Mike ever built his boat but Bill Moffitt in Atlanta
made one to run the Texas200. He is an experienced builder and
sailor and made a thorough job of it in a big rush towards the end.
Launching at the Texas200 was its first time in the water. His wife
sewed the sails the day before he left for the cruise, and this was
her first set of sails! The sail rig he wanted was a lug main with
a sharpie mizzen. I drew those up for him and they are now included
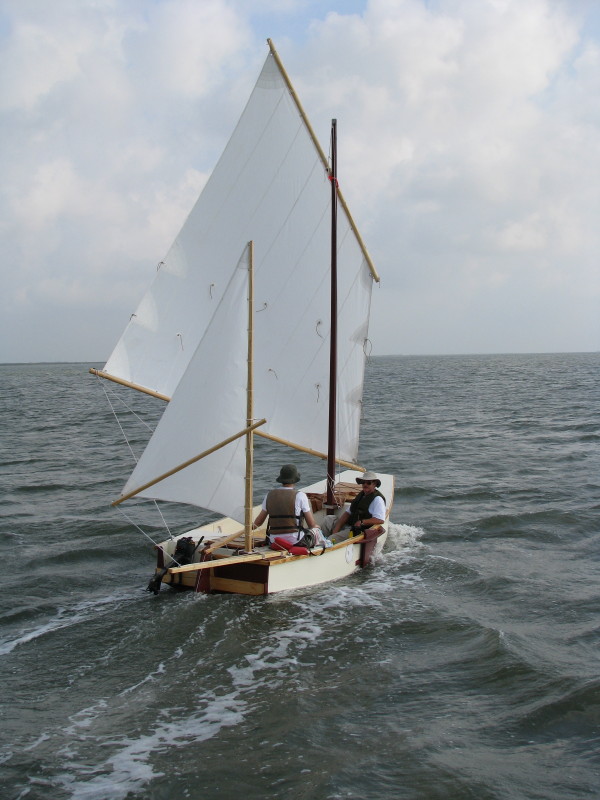
in the plan set. Here is his boat under sail:
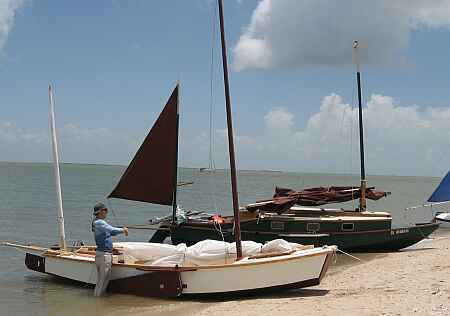
Here is another photo of the boat beached beside Chuck Leinweber's
mothership Caprice (which was designed originally for Bill
Moffitt!) at the end of the cruise:
The cruise involved camping through several nights and Bill did
something I have always thought about but had never seen. He
pitched a standard tent in the large Mikesboat cockpit. A lot
cheaper than a custom boat tent, for sure, but it takes a big
cockpit to handle it. Mike also had some sort of center platform to
fill the space between the long bench seats:

Well, three cheers for Bill and son Paul!!! As far as I know the
200 mile cruise went off without a hitch, the boat right on. But I
suggest that most of us couldn't get away with going on a long
cruise with an untested design.
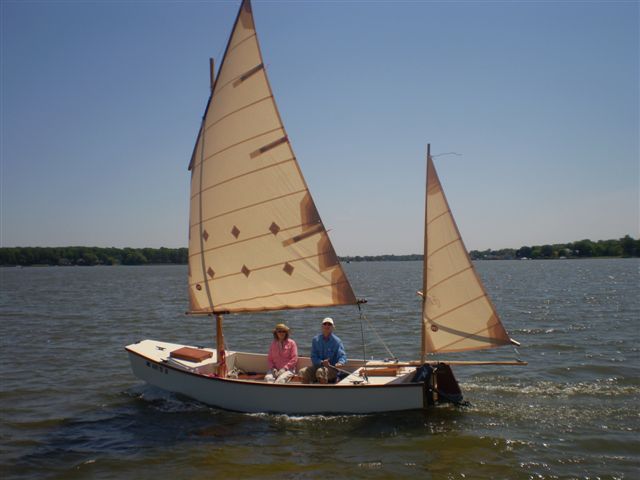
And here is another Mikesboat, owned by David Chase...
Plans for Mikesboat, showing both sailrigs, are $45.
Contents
Prototype News
Some of you may know that in addition to the one buck catalog
which now contains 20 "done" boats, I offer another catalog of
20 unbuilt prototypes. The buck catalog has on its last page a
list and brief description of the boats currently in the
Catalog of Prototypes. That catalog also contains some articles
that I wrote for Messing About In Boats and Boatbuilder
magazines. The Catalog of Prototypes costs $3. The both
together amount to 50 pages for $4, an offer you may have seen
in Woodenboat ads. Payment must be in US funds. The banks here
won't accept anything else. (I've got a little stash of foreign
currency that I can admire but not spend.) I'm way too small
for credit cards.
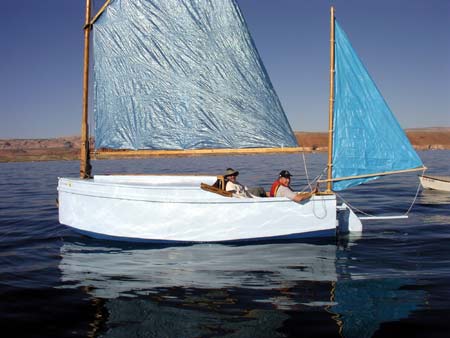
I think David Hahn's Out West Picara is the winner of the
Picara race. Shown here on its first sail except there was no
wind. Hopefully more later. (Not sure if a polytarp sail is
suitable for a boat this heavy.
Here is a Musicbox2 out West.
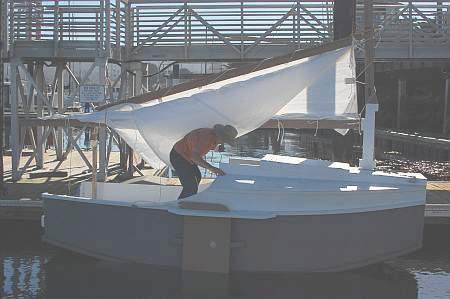
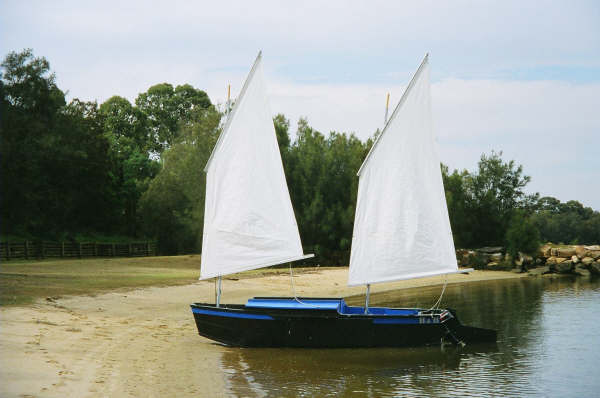
This is Ted Arkey's Jukebox2 down in Sydney. Shown with the
"ketchooner" rig, featuring his own polytarp sails, that is
shown on the plans. Should have a sailing report soon.
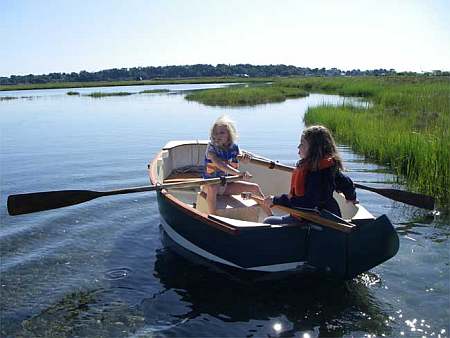
And the Vole in New York is Garth Battista's of
www.breakawaybooks.com, printer of my book and Max's old
outboard book and many other fine sports books. Beautiful job!
Garth is using a small lug rig for sail, not the sharpie sprit
sail shown on the plans, so I will continue to carry the design
as a prototype boat. But he has used it extensively on his
Bahamas trip towed behind his Cormorant. Sort of like having a
compact car towed behind an RV.
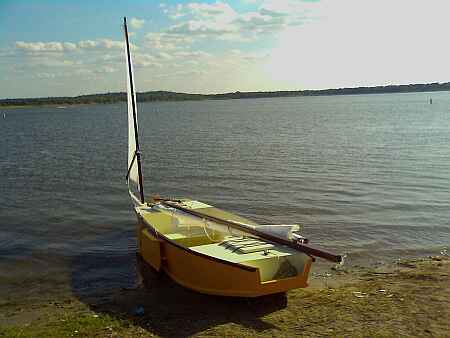
And a Deansbox seen in Texas:
The prototype Twister gets a test sail with three grown men, a
big dog and and big motor with its lower unit down. Hmmmmm.....
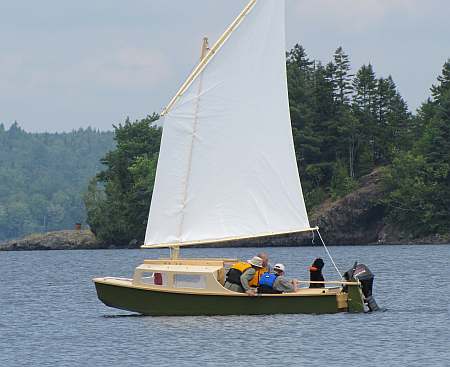
Jackie and Mike Monies of Sail Oklahoma have two Catboxes
underway....
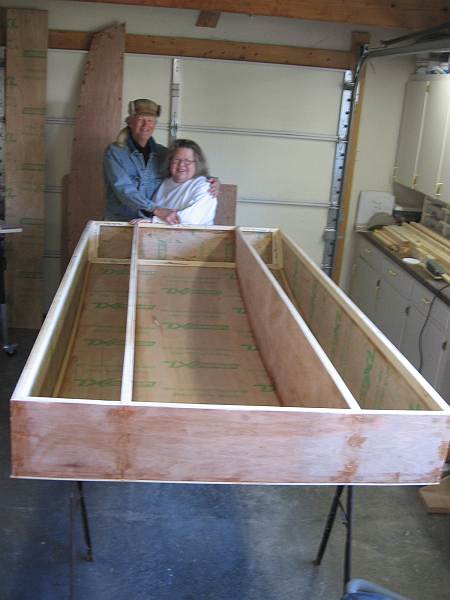
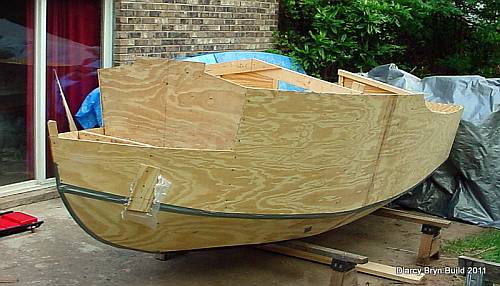
And the first D'arcy Bryn is ready for taping. You can follow
the builder's progress at http://moffitt1.wordpress.com/ ....
Contents
AN INDEX OF PAST ISSUES
BACK ISSUES
LISTED BY DATE
SOME
LINKS
Mother of All Boat
Links
Cheap
Pages
Duckworks
Magazine
The Boatbuilding
Community
Kilburn's Power
Skiff
Bruce Builds
Roar
Dave
Carnell
Rich builds
AF2
JB Builds
AF4
JB Builds
Sportdory
Hullforms Download (archived
copy)
Plyboats Demo Download (archived
copy)
Brokeboats (archived copy)
Brian builds Roar2 (archived
copy)
Herb builds AF3 (archived copy)
Herb builds RB42 (archived copy)
Barry Builds
Toto
Table of
Contents
