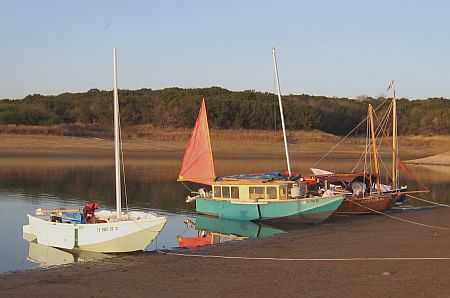
Stan Roberts sent this photo of his new Family Skiff beached during a mid winter cruise in Texas.
Contents:
Contact info:
Jim Michalak
118 E Randall,
Lebanon, IL 62254Send $1 for info on 20 boats.
Jim Michalak's Boat Designs
118 E Randall, Lebanon, IL 62254
A page of boat designs and essays.
(15March2011)This issue will rig a lugsail. The 1 April issue will review methods of calculating displacement.
THE BOOK IS OUT!
BOATBUILDING FOR BEGINNERS (AND BEYOND)
is out now, written by me and edited by Garth Battista of Breakaway Books. You might find it at your bookstore. If not check it out at the....ON LINE CATALOG OF MY PLANS...
...which can now be found at Duckworks Magazine. You order with a shopping cart set up and pay with credit cards or by Paypal. Then Duckworks sends me an email about the order and then I send the plans right from me to you.
Rigging A Lugsail
BASIC BALANCE....
This applies to any sort of sail rig. For proper sailing the sail rig forces need to balance around the hull forces.
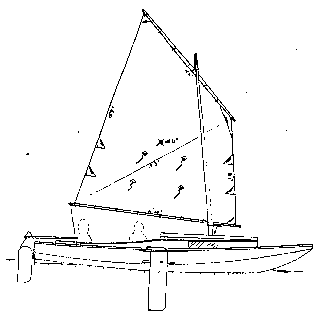
Look closely at Figure1 and see that the center of the sail area is placed right above the center of the leeboard's area. For boats like mine with shallow underbodies and deep narrow boards this is the way it has to be. You can't tinker very much with this if at all.
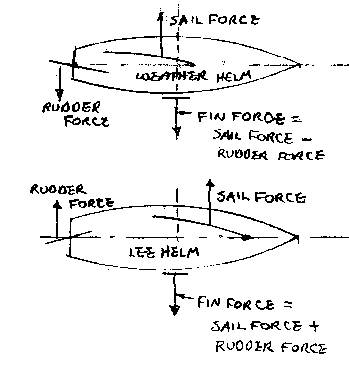
Here is what happens. In general you can think of the force of the wind as a giant finger pushing at the sail's center. Opposing that force is a giant finger pointing the other way at the center of the leeboard. The hull tends to rotate about that deep narrow board. So if those two forces are in vertical line the boat will not try to rotate and will in general maintain its heading.
If the center of sail area is moved aft of the leeboard, the boat will rotate into the wind if left on its own. To keep the boat on course the skipper needs to tug on the tiller as shown in the top of Figure 2. This is called "weather helm". Weather helm reduces the load on the leeboard and should result in a faster boat. If the skipper falls overboard the boat should rotate into the wind and stall and with luck wait for the skipper. A light weather helm is considered to be ideal.
Now take the case of the builder who modifies the rig so that the sail area centers forward of the leeboard. This might be by changing to a rig style with a jib, or perhaps by relocating the mast forward. Now the two opposing giant fingers on sail and leeboard are not in a vertical line and the boat will want to rotate around the leeboard bow going downwind. To hold the bow on course the skipper must correct by pushing the tiller as in the bottom of Figure 2. This is called "lee helm". Lee helm will increase the reaction load on the leeboard. If the skipper falls overboard the boat will turn downwind and take off without him. Lee helm is usually not considered to be good.
So the way I like to approach it is to keep the center of the sail area directly above the aft half of the leeboard. You might find lots of variations on the rules that hope to provide proper helm feel. Try them if you wish. But keep in mind that if you build the boat and it has lee helm, you need to move the sail area aft. If you have excessive weather helm, the sail area needs to be moved forward.
NOW, BACK TO THE RIGGING DETAILS.....
TYING ON THE SAIL...
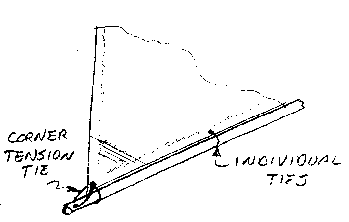
I greatly prefer individual ties through the grommets although lacing looks neat. But the individual ties allow for last ditch sail shaping. If you think you needed more round in the head of the sail for example, you could make the ties in the center of the yard tighter than those on the ends. Also, a failure of a tie or two is of little consequence where a failure of a lacing line will be total.
One important note. The ties in the corners take most of the load. They should be tied as shown in the figure in two directions.
HALYARD/YARD ATTACHMENT...
Let's look at the sail and halyard attachment in Figure 1:

As you see, the balanced lug sail pivots around the mast. I guess all sails do. But the balanced lug has the mast running through its middle somewhere, as do other Lugsails, junk sails and lateens. While the mast may interfere somewhat with the aerodynamics of the sail, great benefit is gained in proper "balance" of the sail areas that are in front of the mast. In particular if things are properly placed, the sail will twist less than similar sails that use the mast as a leading edge. As a result the lug is a low tech sail that can be more efficient to windward than you might expect.
One trick to rigging these efficiently is to get the "balance" correct. By my experience the yard should be hoisted about 40% aft on the yard. If you hoist farther forward than that you will get harmful sail twist when sailing to windward. Hoisting too far aft can make the sail uncontrollable. I have often seen in the older literature the advice to hoist at 33% aft. That will work OK but it has been my experience that all the stretches and sags in the system conspire to pull the sail aft with respect to the mast. So if you tie the halyard to the yard at 40%, in use the sail swings aft very close to that 33% value.
(You see the designer has little choice of mast placement once the sail has been chosen. The leeboard can only go at the hulls widest beam. The sail area must center right above it. The mast must cross the yard at a certain point. )
We need to rig the halyard so the sail stays near that 40% position by binding it somehow to the mast. This is especially important while reefed or while in rough water that will force the yard to pump back and forth on the mast. I know of three suggestions.
First for small simple boats that won't be reefed the best solution is to run the halyard through a simple hole in the top of the mast, tie it to the 40% position on the yard, and hoist solidly to the top of the mast. There must be a small amount of slack at the masthead of course to allow the yard to swing but that will appear automatically when you tension the sail with the tack line.
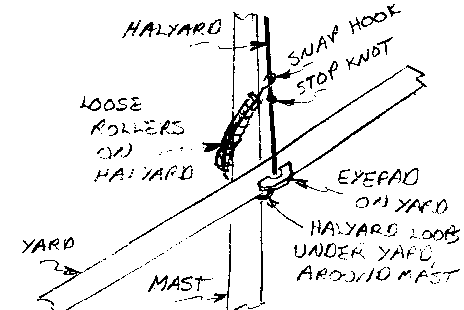
Second you can try the tightening noose system shown in Figure 3. Here the halyard runs in a loose loop around the mast before going to the masthead. It will stay loose until the yard is hauled up all the way. Then additional tension in the halyard constricts the noose (until it hits the stopper knot) and secures the yard to the mast. You will need rollers on the noose to keep the halyard from binding on the mast. I have a feeling that this is the most reliable system.
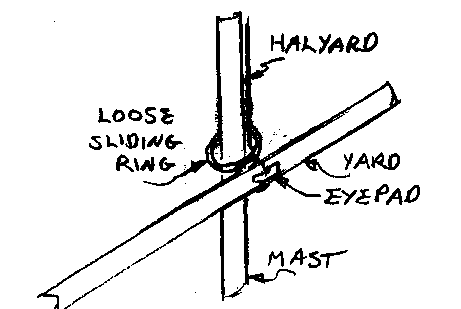
Third method works well with round and slippery masts. A loose slippery ring is simply dropped over the halyard and mast. I use this system on my Piccup Pram using a section of large PVC pipe as a ring.
THE TACK LINE....
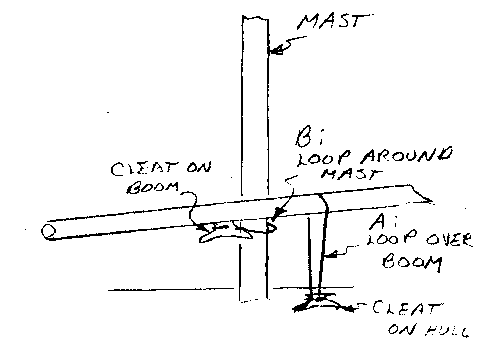
Figure 5 shows the tack arrangement I prefer. As with the yard, the boom must be secured to the mast to prevent pumping in rough water. The actual location of the tack on the yard is not too important. In fact if it were at the very front of the boom you would have a standing lug. The standing lug is probably easier to rig and reef than the balanced lug but in my experience lacks the great manners of the balanced lug in sailing downwind.
The boom has a small cleat on it with a lanyard that wraps around the mast to locate the boom fore and aft. That loop should be fairly loose to allow easy up and down motion of the boom. This loop needs to be set up before the yard is hoisted to prevent the sail from blowing around and making a spectacular and dangerous kite during hoisting.
The actual tack line I prefer is a simple line that runs from the mast step over the boom and down to a cleat at the step. So with the boom loop attached, the yard is hoisted, then the tack line is passed over the boom, pulled very very tight, and cleated. In effect you have now a two to one tackle. All sail tensioning is done with the short and handy tack line and not with the halyard. On my Piccup I run the tack line through a cam cleat to allow for quick adjustment although I don't consider that to be as secure as the good old jamb cleat. In my opinion the tack should always secure to the hull and not to the mast. Securing the tack to the hull will secure the entire mast and rig to the hull in event of a capsize.
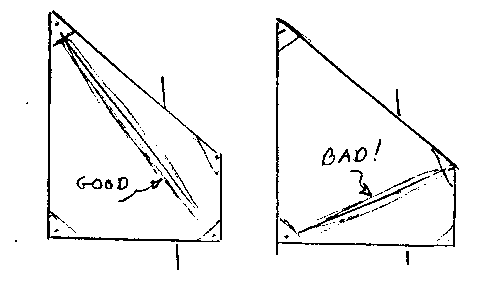
Here is some advice about how much to tension the tack line. It varies with wind strength. Look at the sail as you do it. See Figure 6. As you tension the sail with the force of the wind in the sail, stress folds called girts will appear in the sail. If the girt runs from throat to clew you need more tension. If the girt runs from head to tack you either have it right or can reduce the tension. A perfect setting will have no girts. Usually at the initial setup I put in a good girt from peak to tack. Then I watch it while sailing to see if that girt disappears. Then when convenient I trim as required. Remember that changing sailing conditions will change the tension requirements.
THE SHEET...
Nothing fancy needed here. Almost anything will work. Because the sail is balance already to a great degree the sheet forces are less than with other sail types. Because the tack is pulling down in the middle of the boom, the boom has less tendency to lift so downward pull of the sheet on the boom is of less importance. The location and lead directions of the sheet are of little importance also. It's another advantage of the balanced boom. By the was, if the boom is omitted to make the sail boomless, the sheet location is very critical and its needs change all the time. I think the boom is a great invention! The boom on a balanced lug can be quite light and still work.
SAILING ADVICE...
Watch the leading edge of the sail for luffing, as with about any sail. You should be able to tack through about 100 degrees effectively, although if you are really interested in getting somewhere you might sail it more freely, say up to 120 degrees between tacks, especially if the wind is unsteady. While reaching or running a balanced lug sail, even a cheap polytarp one, will keep up with any conventional sail.
Also it should be mentioned that one of the most effective ways to trim the boat, helm-wise, is to rake the mast as required to move the sail are fore or aft. You can see that a small amount of rake will move the mast head quite a bit and the entire sail will go with the masthead. Old time boats had adjustable mast steps or partners. On my designs you can usually shim the mast partner on the bulkhead. It's one place where tinkering pays off. Making a mast a bit longer than shown on the plans is also almost always a good idea as it allows for this tinkering not to mention real life stretch of the rigging.
Hapscut
Hapscut, Sailboat, 18' X 6.5', 450 POUNDS EMPTY
In 2010 I was lucky enough to sail the TX200 with Chuck Leinweber in his Caprice. Chuck had me design Laguna just for this event and the Laguna fleet did quite well with the mention on the side that apparently in 2010 the winds were abnormally light, the veterans complaining about how mild it all was even though we were at hull speed pretty much all the time. What a great time I had!
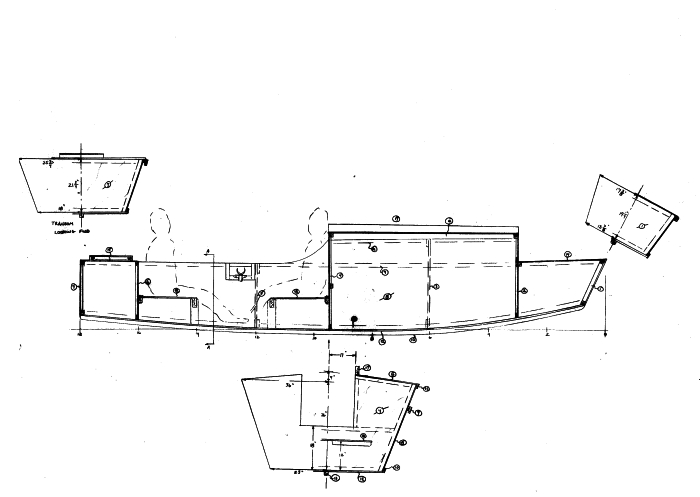
The first stop on the trip is at a place called "Haps Cut", a large drainage channel really from a large shallow lagoon to the intercoastal waterway, which is a man made ditch in this area. By this time Chuck was already talking about some sort of minimal cabin for Laguna, at least in the bow cockpit.
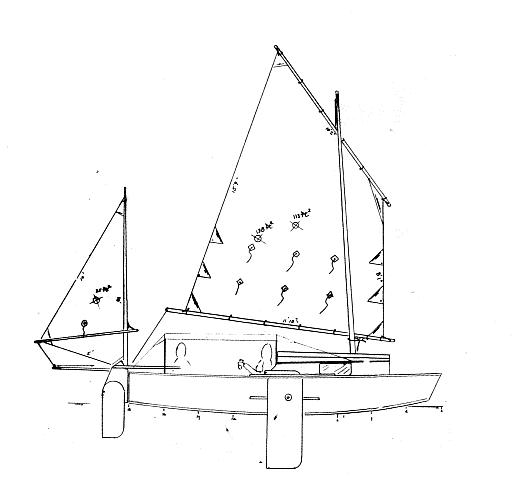
As we sailed along I started getting ideas about another possible TX200 boat. I play this little mind game all the time while I am boating - how could this boat be better?, etc. Well, the thing about the TX200 that I noticed was that the sun is a real killer. I noticed some of the local fishermen are totally covered, even though the daytime temp is in the 90's, right down to gloves. Some were wearing what looked like full body stockings, right up over the face and head, sort of like a super hero costume. All of the veteran boats on the cruise had serious bimini tops and such, Chuck's included, and for a new TX200 design that would be a must.
I thought shallow water beaching was important too, especially at Hap's Cut. If you could run your bow ashore you might be able to step on dry land and avoid the totally repulsive mud there, at least knee deep, at least that is how far I sank in when I tried it.
And some sleeping shelter like Chuck was talking about, mostly to avoid the land tenting situation. All the night spots had good places to tent but I know for experience that with a small cabin you can leave the tents behind, your comings and goings become much quicker and easier. And if you have a crewman you can maybe flop down inside for siesta while the copilot follows the ditch.
Another impression I got was that a crew of two was about ideal, much easier going overall than a solo effort. It's a lot like taking a long driving trip where the ability to swap drivers regularly means you can almost carry on forever.
There was almost no sailing to windward. Only when making ports did one have to do that. And maybe while running up the Aransas ship channel. So I thought a really refined hull shape was not required. A simple scow might do it, at least in 2010 winds.
So I drew up my best guess and called it Hapscut.
Simple scow flat bottomed square toed hull. Narrow on the bottom so like Laguna it could be planked with 4' wide plywood. Wide on the top, a lot more flare than I normally draw, because I was quite impressed with the small San Francisco Pelican on the trip as it handled 2 grown men in its 12' length with seemingly no problems. Square bow to make beaching easier mostly. The idea is that you can easily stroll through the cabin and out over the bow to avoid stepping at all in any nasty yuck.
The cabin itself is long enough to sleep on the floor but really only wide enough for one person. It is high enough to sit up in and read. It is minimal but I think a big advance over a land tent. Two people could wait out a storm in there. It has the usual slot top so with top stowed it becomes an open boat allowing one to walk from cockpit, through cabin and out the bow without climbing over anything more than 2' tall. With luck the cabin will prevent swamping of the entire boat in a knockdown, another good thing about a large amount of flare in the sides.
The crewmember is supposed to sleep in the cockpit but that requires the quick removal of the two large seating flats. Given a good sun top this might be the preferred place to sleep. On the 2010 trip there were no bugs or mosquitos but if needed you could quickly net in the sides of the cockpit. By the way, the length of the boat is really determined by the need to sleep two on the narrow bottom, thus you need 13' minimum just for that.
Aft of the cockpit is the buoyancy/storage volume. This buoyancy will save your butt in a knockdown since it will support the stern, float the boat level on it side until you recover. Don't compromise it.
One thing I goofed on maybe in Hapscut was that I did not draw a motor well as I did with Laguna. I know if I were building one of these for myself I would have it. Extend the stern back another 18" with the open well ending with a transom angled 15 degrees. Then you could easily mount a motor and store a lot of messy gear back there. The motor sounds like cheating but it can save you butt on occasions and in general you can cover a lot more water even if you seldom use it because you won't play light winds so cautiously. But I don't know if a motor can save your butt in really rough going.
Although Hapscut was designed for a long cruise, it clearly has the makings of a good daysail family boat as long as you stay out of rough water. It has the room, shelter, and ease of use that make for a good family boat. Finally, although designed to take two men on a long trip, it clearly is not too big or complicated for single handing.
Prototype plans for Hapscut are $30. It is all simple nail and glue construction needing nine sheets of 1/4" plywood and four sheets of 1/2" plywood.
Prototype News
Some of you may know that in addition to the one buck catalog which now contains 20 "done" boats, I offer another catalog of 20 unbuilt prototypes. The buck catalog has on its last page a list and brief description of the boats currently in the Catalog of Prototypes. That catalog also contains some articles that I wrote for Messing About In Boats and Boatbuilder magazines. The Catalog of Prototypes costs $3. The both together amount to 50 pages for $4, an offer you may have seen in Woodenboat ads. Payment must be in US funds. The banks here won't accept anything else. (I've got a little stash of foreign currency that I can admire but not spend.) I'm way too small for credit cards.
I think David Hahn's Out West Picara is the winner of the Picara race. Shown here on its first sail except there was no wind. Hopefully more later. (Not sure if a polytarp sail is suitable for a boat this heavy.
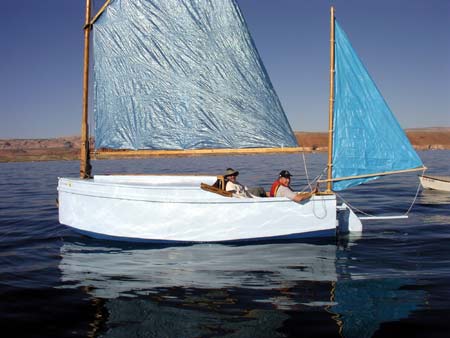
Here is a Musicbox2 out West.
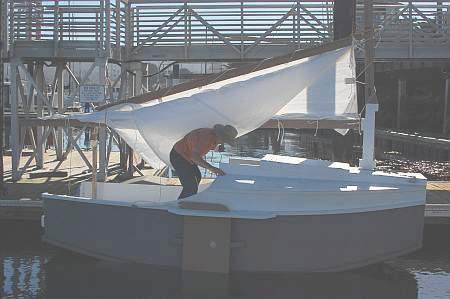
This is Ted Arkey's Jukebox2 down in Sydney. Shown with the "ketchooner" rig, featuring his own polytarp sails, that is shown on the plans. Should have a sailing report soon.
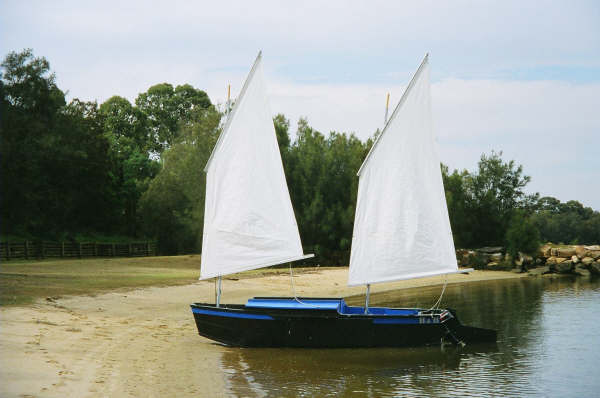
And the Vole in New York is Garth Battista's of www.breakawaybooks.com, printer of my book and Max's old outboard book and many other fine sports books. Beautiful job! Garth is using a small lug rig for sail, not the sharpie sprit sail shown on the plans, so I will continue to carry the design as a prototype boat. But he has used it extensively on his Bahamas trip towed behind his Cormorant. Sort of like having a compact car towed behind an RV.
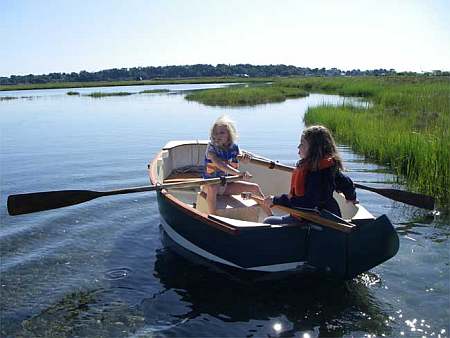
And a Deansbox seen in Texas:
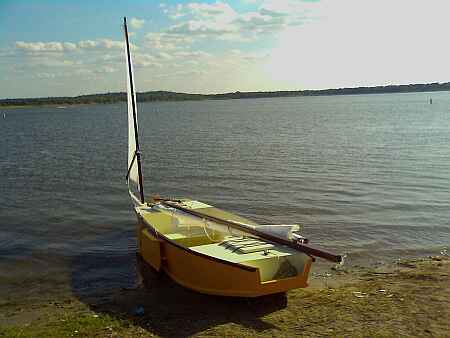
The prototype Twister gets a test sail with three grown men, a big dog and and big motor with its lower unit down. Hmmmmm.....
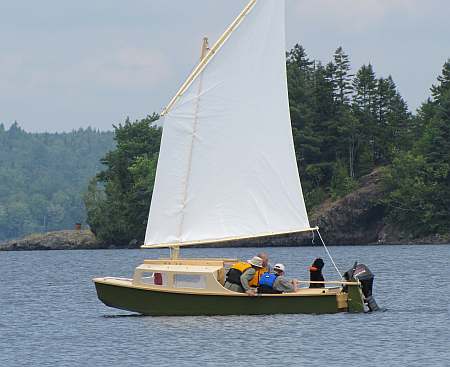
Jackie and Mike Monies of Sail Oklahoma have two Catboxes underway....
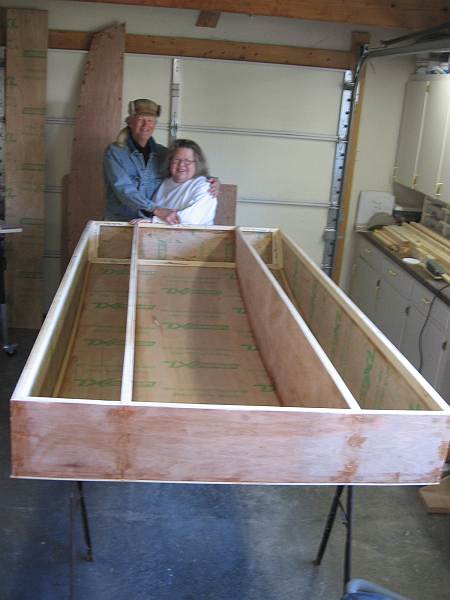
Tom Wolf has completed the first Toon2 that I know of and was waiting for some good testing weather...

AN INDEX OF PAST ISSUES
Hullforms Download (archived copy)
Plyboats Demo Download (archived copy)
Brokeboats (archived copy)
Brian builds Roar2 (archived copy)
Herb builds AF3 (archived copy)
Herb builds RB42 (archived copy)