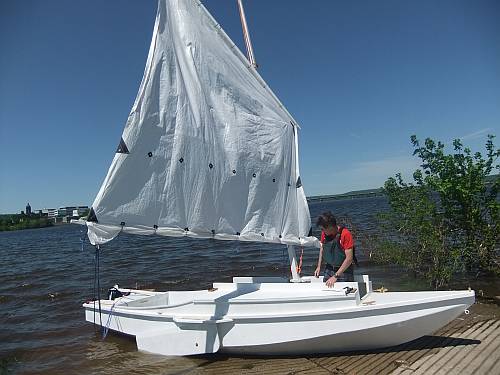
Peter Dunphy gets his new Frolic2 ready for its first sail on a breezy day in Canada.
Contents:
Contact info:
Jim Michalak
118 E Randall,
Lebanon, IL 62254Send $1 for info on 20 boats.
Jim Michalak's Boat Designs
118 E Randall, Lebanon, IL 62254
A page of boat designs and essays.
(15September2011)This issue will discuss rigging lugsail jiffyreefs. The 1 October issue will discuss the costs of boats.
THE BOOK IS OUT!
BOATBUILDING FOR BEGINNERS (AND BEYOND)
is out now, written by me and edited by Garth Battista of Breakaway Books. You might find it at your bookstore. If not check it out at the....ON LINE CATALOG OF MY PLANS...
...which can now be found at Duckworks Magazine. You order with a shopping cart set up and pay with credit cards or by Paypal. Then Duckworks sends me an email about the order and then I send the plans right from me to you.
First up is the 20th annual Lake Monroe Messabout near Bloomington, Indiana, on September 16, 17, and 18. Read the details at https://sites.google.com/site/lakemonroemidwestmessabout/.
Then comes Sail Oklahoma at Lake Eufala on October 7 thru 10. Read about this one at http://groups.yahoo.com/group/SailOklahoma/.

|
Left:
Peter Dunphy gets his new Frolic2 ready for its first sail on a breezy day in Canada. |
|
|
Balanced Lug Jiffy Reef
BACKGROUND...
Balanced lugsails are pretty interesting. I suppose they are one step away from a square sail. They no doubt have a long history that predates any fancy hardware, and now that fancy hardware is expensive and hard to find in some areas a fellow can still make an effective lugsail with stuff from the lumberyard. The spars are very short for the area set and need no standing rigging, making the lug ideal for a cartop or trailer boat that needs to be rigged in a few minutes. Here are the basics of the balanced lug sail:
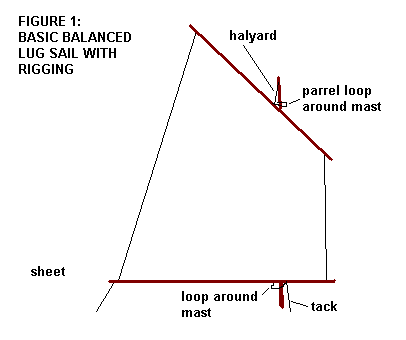
To review a bit, this sail is "balanced" a bit around the mast, the best place to fasten the halyard to the yard is about 40% aft of the luff. Further forward and the sail will twist a lot and lose the ability to point well into the wind. Properly set up these sails will tack through about 100 degrees, very good for such low tech. The yard needs to be fastened loosely to the mast at the halyard with a parrel loop of some sort to keep it located especially in rough water. There are lots of ways to do that and rigging a balanced lug was covered in detail in another issue of this site. Down at the boom is a tack line set about 15% aft of the luff, although this is not as critical as the halyard location. Again, the tack line needs a parrel loop of some sort to keep the boom from moving in rough water. The tack needs to be set VERY tight, thus putting great tension in the luff. Without that tension the sail will twist when sailed to windward with great loses. (In fact since the tack is so short and easy to get at I always make it at least a two to one tackle. A simple effective set up is a line running from the hull, over the boom, and back to the hull to a cam cleat. A quick yank at the cam cleat will retension the rig in an instant in a two to one effort.) Lastly there is the sheet, the location of which is usually not critical at all. When sailing the balanced lug, the sail is left standing from tack to tack. One tack will result with the sail draping over the mast but the effect is not noticable no matter how bad it looks. The sail is usually very gentle in a jibe.
There are two other types of lugsails that I know of. A dipping lug is as above but without a boom. In that case the tack is tied right to the hull and the location of the sheet is critical since it has to stretch out the foot of the sail. Usually the dipping lug needs several locations to anchor the sheet, each to deal with a different point of sail. When tacking a dipping lug the tack and sheet are disconnected and the entire sail shifted around the mast, not a good arrangement for sailing in close quarters but OK for making a long passage with enough crew to do the job. Viking ships of old would set their square sail as a dipping lug.
The other common lug type is the standing lug. It's exactly the same as the balanced lug except that the tack line is tied to the forward end of the boom and the boom pivots there at the mast as with a gaff sail. As a result the boom of a standing lug will lift when there is pressure on the sail. When close hauled that won't matter because the sheet will pull the boom down, but when running off the wind the boom can lift a lot, allowing the yard to twist forward and that is bad. That can be cured with a vang from boom to mast. The balanced lug needs no vang and is effectively self vanging, the lift of the boom being very small because of the location of the tack line.
JIFFY REEFING THE BALANCED LUG
The balanced lug is secured to the boat with just the halyard and tack, and their parrels, so when you disconnect them the sail rolls up in a nice package. But you can also fix jiffy reefing gear to the balanced lug that stays with the package. You run the reefing gear once and it is forever there ready for use.
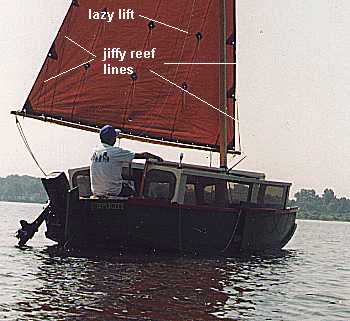
Here is a photo of Karl James' jewelbox with the jiffy reef lines (barely) visible. He has two reefs, both with jiffy reef lines permanently attached. Also shown in a "lazy lift" which is just a loose loop of line running from near the mast head, down around the boom though a pad to keep it located and back to the mast head. When Karl releases the halyard the sail will drop down, the boom lowers until the lazy lift becomes taut and then the sail will gather fairly neatly in the lazy lift.
Here is how the reef lines are run:
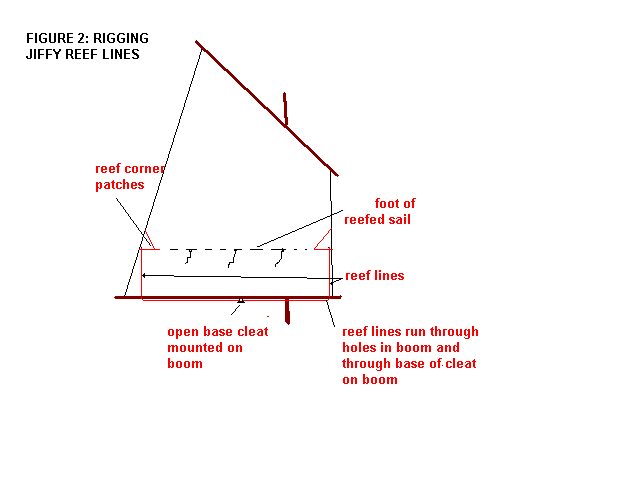
There is a reef line tied permanently to each corner patch of the new reef foot. Those lines run down through faired holes drilled in the boom end, then they run to an open based cleat near the center of the boom. In practice those two reef lines can really be just one continuous line running from one reef corner, through the boom, through the base of the cleat, throught the other hole and one to the other reef corner.
The location of the holes in the boom is fairly critical. They must be placed such that when the reef lines are pulled tight and cleated, the corners of the reefed sail are pulled down and slightly outward to stretch the foot of the sail just the right amount. Expect to experiment. Since lug sails usually taper a bit, the reef line holes tend to fall slightly inside the unreefed attachments.
The location of the cleat on the boom isn't too critical except that it should be in a place handy when reefing. Better towards the front of the boom than aft.
Here's how you reef the sail in action:
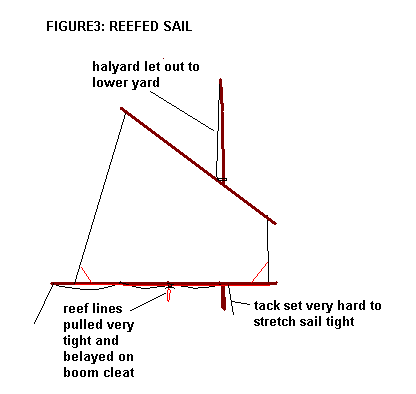
First you loosen the halyard to lower the sail. If you have a lazy lift it will gather there clear of the deck. If not, gather the lowered sail in the boat.
Next grab one of the jiffy reef lines and pull until the new reef corner is hard against the boom and cleat the line to keep it there. Then grab the other jiffy reef line and pull until that reef corner is hard against the boom and cleat that line.
Tie in the reef patches in the middle of the sail.
Hoist the sail with lots of tension in the halyard. You may want to reset the tack to put lots of tension in the luff of the sail but with this method the tack and sheet are not changed.
That's it!
Taking the reef out is even easier. Just untie the reef patches, uncleat the jiffy reef lines, and hoist back to full sail. Always make sure you have lots of tension in the luff by resetting the tack line.
Philsboat

PHILSBOAT, SAILBOAT, 15' X 5.5', 550 POUNDS EMPTY
Philsboat is essentially an IMB with the nose extended to a pointy bow. The width and multichine configuration are the same as IMB's. The cabin is 3" deeper because Phil is at least 3" taller than most of us. In a boat with a Birdwatcher cabin like this one added depth to the cabin makes it safer in that the righting forces in a knockdown are greater. That would be true of any boat if the center of gravity did not move with the cabin roof but with the normal cruiser adding depth to the cabin also means raising the crew deck up so the folks can see over the raised cabin. And that means the CG is elevated too, and then all bets are off concerning self righting. But with a boat like Philsboat eveyone rides down low inside looking out through the windows.
Here is a photo of Bob Williams' IMB:
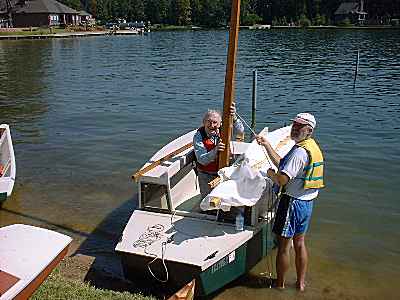
In addition to the pointy bow and added headroom I added what I hope is a serious motor mount. Probably 3hp will drive it as fast as it will ever go and that at part throttle. But the motor well gets to looking pretty large even for such a small motor. For one thing it must be deep to put a short shaft motor on a deep stern like this so I ran it straight down to the boat's bottom. Working on the motor down it its well will be about impossible and you might need to keep an eye on your knuckles when you pull the starting rope. And the well must be surprisingly wide to allow the motor to swivel in steering although the usual case here will be to keep the motor locked straight ahead and steer with the tiller. The wide well pushed the rudder off center and you need a crooked tiller or rudder linkage to make it all work. I opted for a simple but crooked tiller.
I also added low seats like those I saw added to the two IMB's that came to the Lake Conroe Messabout. Pretty much the same as what I have in Scram Pram where the seats do double duty as water ballast tanks. Philsboat seats could easily be converted into water ballast tanks also but the IMB capsize tests imply the ballast isn't needed.
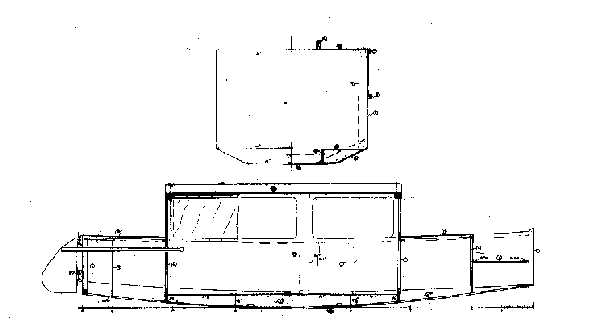
The sail rig uses a balanced lug, 113 square feet and the same as that of a Bolger Windsprint.
Philsboat uses taped seam construction. Five sheets of 1/4" plywood, five sheets of 3/8" and three sheets of 1/2" plywood.
Actually the size and material list for Philsboat are about the same as that of Scram Pram. So which boat would be better? Take Philsboat if you are a pointy bow guy. It should be better in really rough water. On the other hand Scram is wider and roomier. It has a flat step through bow that will splash and spit in rough water but makes beaching a very nice experience.
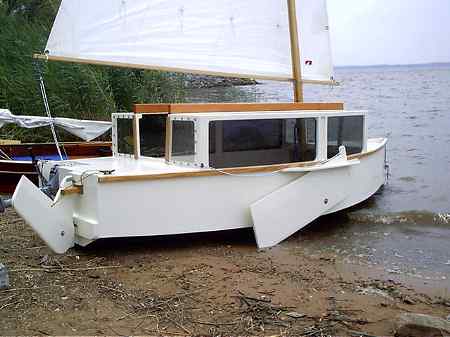
Update, 2007. Chris Feller completed his Philsboat, probably the first prototype completed, and brought it to the 2007 Rend Lake Messabout. Very well made and to plans except he used the 91 sq ft lugsail he had on hand for his AF3, with some mast rake changes he calculated with his "sail area math". Sailed correctly rigtht off the drawing board, so to speak. We had a chance to use it for a few really nice days. In a good sailing breeze, say 10 to 15 knots with occasional whitecaps, our gps bobbed between 5.5 and 6mph for two hours of reaching as we crossed back and forth on the big lake. When I used the Philsboat I thought it was probably just as easy to enter from a beach as the blunt bowed Scram. The front deck is about 2' high so you can sit on it and swing you legs around onto the deck and then into the cabin.
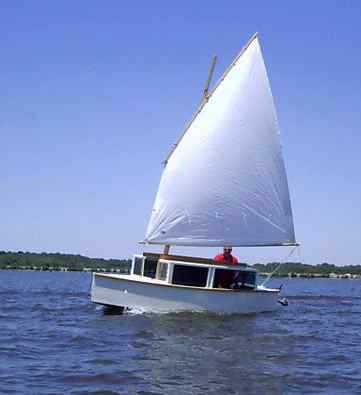
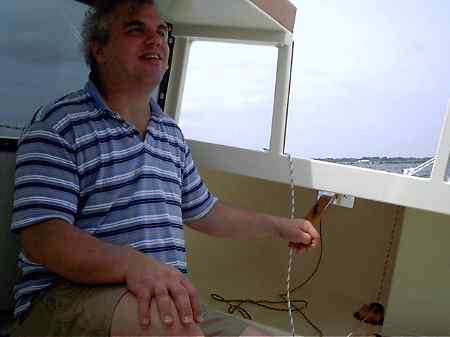
Chris is a big boy but there was plenty of room inside for the two of us and more. Rumor has it that at the campsite the night before Chris slept in the Philsboat on the trailer with an airconditioner in the front hatch plugged into the campsite power. So the boat is plenty big in the way most people would use it.
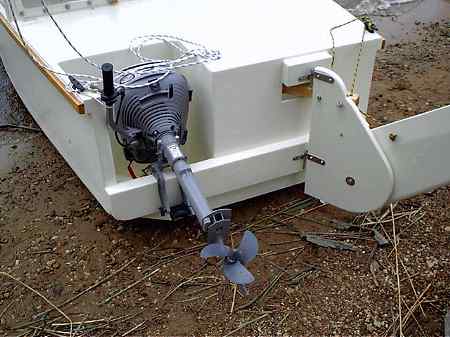
The stern layout has the motor in a small well to one side and the rudder offset to the other side to give the motor room to swing. There is no linkage to the tiller, the tiller is simply "unstraight" so that is falls on centerline at the skipper's hand. Seems to work well and is quite simple. Chris uses a 2hp Honda which has a fairly large cowling for its size and must be rotated 180 degrees to grab reverse. He said the motor well size is a bit too small for that. Karl James had the same problem with his Jewelbox a long time ago and simply cut away the side of the hull in top of the motor well region - after all it is just there for looks. Chris said he tried the boat under power and found it went 6 mph max, just like under sail. No surprize to me. My Birdwatcher also maxes out at 6mph under 3hp and under 5.5 hp. This sort of hull will only go so fast. Add more power and you just dig a deeper hole and make a bigger wake - you won't go faster. But sometimes more power is nice on a windy day.
(As an update, Chris has brought his Philsboat to several more Rend Lake meets. In 2008 the meet was very windy and Philsboat got a full windows wet knockdown with Chris and Tom Hamernik on board. She self righted with no issues and they kept right on sailing, but Chris confessed he has 100 pounds of lead shot under the seats. Also he is using a 3hp vintage Johnson which he says is quieter and smoother than the Honda.)
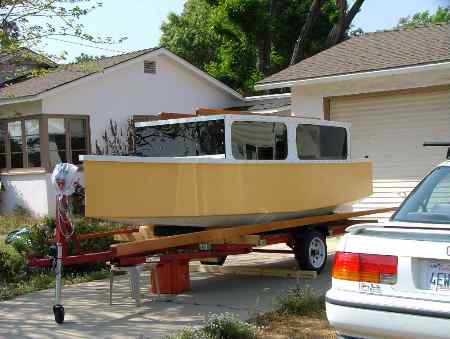
You might recall from the Prototypes section recently that there was another Philsboat being built in California. That one last I heard was about to be launched. Has more changes from blueprint than Chris's boat but still is pretty true to form. Seems to be known as Bumble and made by Rex Meach.
And in New Zealand Rob Kellock has been sailing his with a junk rig. He has been knocked down a couple of times and self righted as planned:

Plans for Philsboat are $45.
Prototype News
Some of you may know that in addition to the one buck catalog which now contains 20 "done" boats, I offer another catalog of 20 unbuilt prototypes. The buck catalog has on its last page a list and brief description of the boats currently in the Catalog of Prototypes. That catalog also contains some articles that I wrote for Messing About In Boats and Boatbuilder magazines. The Catalog of Prototypes costs $3. The both together amount to 50 pages for $4, an offer you may have seen in Woodenboat ads. Payment must be in US funds. The banks here won't accept anything else. (I've got a little stash of foreign currency that I can admire but not spend.) I'm way too small for credit cards.
I think David Hahn's Out West Picara is the winner of the Picara race. Shown here on its first sail except there was no wind. Hopefully more later. (Not sure if a polytarp sail is suitable for a boat this heavy.
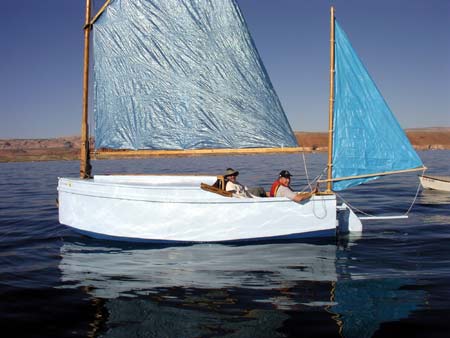
Here is a Musicbox2 out West.
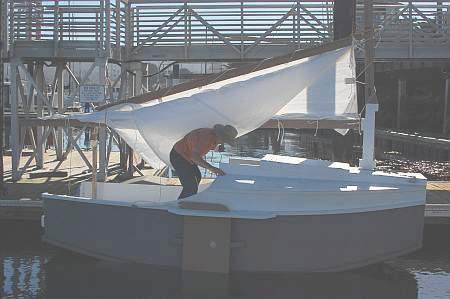
This is Ted Arkey's Jukebox2 down in Sydney. Shown with the "ketchooner" rig, featuring his own polytarp sails, that is shown on the plans. Should have a sailing report soon.
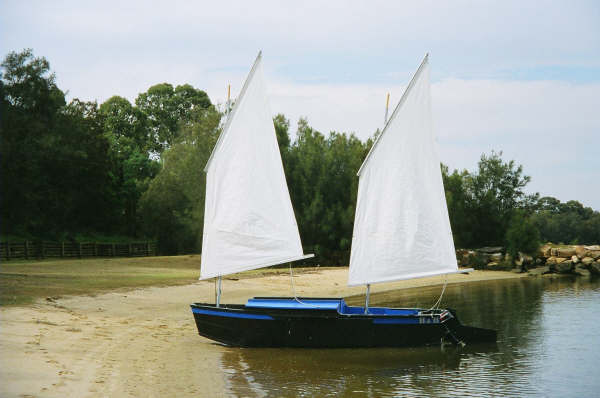
And the Vole in New York is Garth Battista's of www.breakawaybooks.com, printer of my book and Max's old outboard book and many other fine sports books. Beautiful job! Garth is using a small lug rig for sail, not the sharpie sprit sail shown on the plans, so I will continue to carry the design as a prototype boat. But he has used it extensively on his Bahamas trip towed behind his Cormorant. Sort of like having a compact car towed behind an RV.

And a Deansbox seen in Texas:

The prototype Twister gets a test sail with three grown men, a big dog and and big motor with its lower unit down. Hmmmmm.....

Jackie and Mike Monies of Sail Oklahoma have two Catboxes underway....
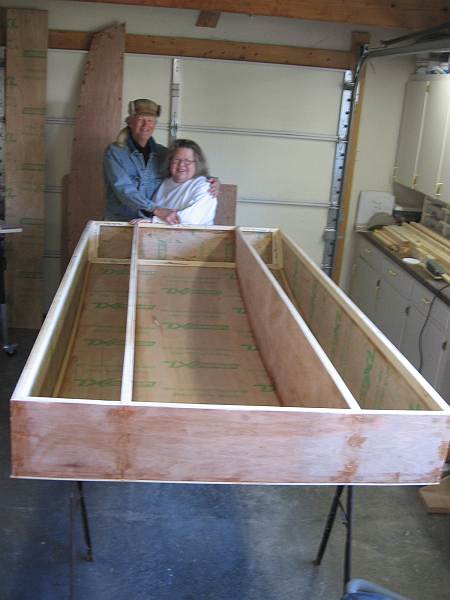
And the first D'arcy Bryn is ready for taping. You can follow the builder's progress at http://moffitt1.wordpress.com/ ....
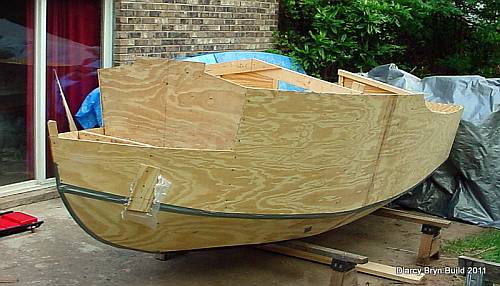
And the first Brucesboat is in the water for testing. A full report soon.
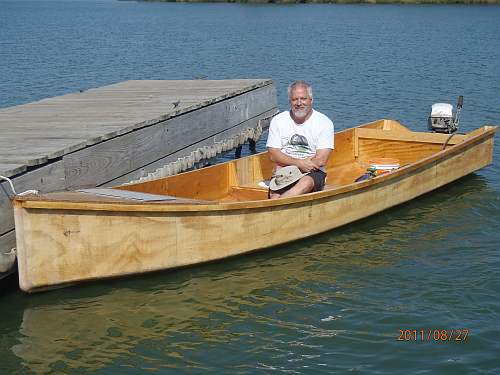
OK, so he found a major league goof in my plans on fitting the bilge panels. He did some cut and fit and did a great job of salvaging the work, but I have corrected the drawing for the aft end of the bilge panel (I drew it in upside down!!)
AN INDEX OF PAST ISSUES
Hullforms Download (archived copy)
Plyboats Demo Download (archived copy)
Brokeboats (archived copy)
Brian builds Roar2 (archived copy)
Herb builds AF3 (archived copy)
Herb builds RB42 (archived copy)