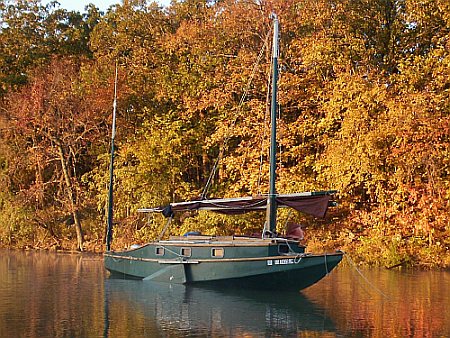
After Sail OK Kathy and Chris cruised the Arkansas River in full autumness.
Contents:
Contact info:
Jim Michalak
118 E Randall,
Lebanon, IL 62254Send $1 for info on 20 boats.
Jim Michalak's Boat Designs
118 E Randall, Lebanon, IL 62254
A page of boat designs and essays.
(1 November 2012) This issue will review capsize lessons learned at Sail OK. The 15 November issue will continue the sail sizing essay.
THE BOOK IS OUT!
BOATBUILDING FOR BEGINNERS (AND BEYOND)
is out now, written by me and edited by Garth Battista of Breakaway Books. You might find it at your bookstore. If not check it out at the....ON LINE CATALOG OF MY PLANS...
...which can now be found at Duckworks Magazine. You order with a shopping cart set up and pay with credit cards or by Paypal. Then Duckworks sends me an email about the order and then I send the plans right from me to you.

|
Left:
After Sail OK Kathy and Chris cruised the Arkansas River in full autumness. |
|
|
Capsize Lessons
RICHARD WOODS...
...is an Englishman, now living in Canada, who designs trimarans. But he has extensive dinghy sailing background and is an expert at capsize recovery. During Sail OK 2012 he spent a couple of hours explaining to all of us the process and details of recovery.
I've never gotten too deeply into this subject. I am essentially a non floater, thus a non swimmer, and for me to go overboard without a life jacket is like skydiving without a parachute. So I don't enjoy practicing capsizes and stop doing it long ago. The subject scares people away. But Richard's demonstrations certainly show it can be done reliably with proper preparation. And that is the point I took away from his excellent effort. Most of our boats are sort of prepared for a capsize, provided the designer has designed in the require emergency buoyancy and the builder hasn't compromised it. After that it comes down to nitty gritty details that most of us ignore. Luckily at the demostration Richard rubbed our noses into those details.

TO START WITH...
...he discussed the best type of life jacket to have. Unfortunately it sort of started with "they don't make this anymore" but I bet they do. You might need a bit of a search. Not supposed to have bulging pockets or straps, anything that will foul as you try to slither your way back into the boat. Richard is holding between his knees the jacket he used in the tests and to me it appears to be what I used to call a kayaker's jacket, many small segments, zippered without straps. The one I had long ago was I think an Omega and it was my all time favorite, for reasons other than capsize recovery, but it died of old age.
THEN...
...Richard walked down the line of boats at the meet, maybe 20 or 30 there, and one by one discussed the good and bad points of each boat with regard to capsize recovery. It was sort of cruel, although Richard is likeable and jovial. He didn't ask "whose boat is this?" or anything, just lit into each one. He was going to capsize test a boat to demonstrate the details of recovery and was chosing a subject as he did this. But this is when the real knowledge came out as he discussed details that would make a boat better for recovery.
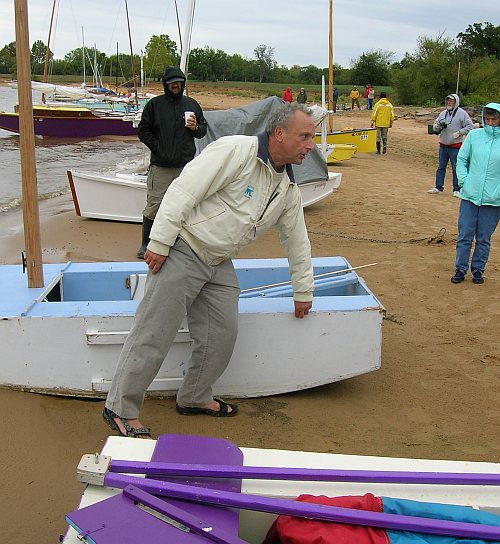
I think right now would be a good time to say what type boats are best for capsize recovery. Not too difficult to guess at this - the board sailing boats of yore, like the Laser and Sunfish, might be the best. They are totally decked so they take on no water, and they are low in the water so the swimmer can simply roll onto the righted hull with little hoisting required. One issue with really small light boats, to me, not sure if Roger discussed this, is that they can be so dominated by the swimmer's weight that reboarding might not be possible. Imagine a 250 pound swimmer trying to get into a 70 pound boat. You might think that as he presses down on the boat's edge to reboard that the boat might simply flop over on top of him. This wasn't demonstrated but I suspect it can be true.
Anyway, down the line of boats we went. Who wants to be Richard's test boat??
THE DEVIL IS IN THE DETAILS...
OK, LISTEN UP! If there is any message I took away from this it is that your boat must be prepared in detail to allow a routine recovery. Don't leave anything to chance. If anything can go wrong it will! Be prepared! WHEN A REAL CAPSIZE OCCURS IT WILL LIKELY BE IN VERY BAD CONDITIONS. IN VERY BAD CONDITIONS THERE MAY BE NO ONE AROUND TO HELP YOU!
Hope I haven't scared you away.
When your boat goes over don't get trapped beneath the rig if you can. Don't get tangled and Richard advised all carry a knife at the ready, secured and tethered to the life jacket for instant grabbing, with one handed easy blade extention, with which you can cut yourself loose if you do get tangled. I'm not a knife expert but I think he added it should have saw teeth on both edges so you need not worry about its orientation.
Next, give a lot of thought to how to right the hull. Normally you would step on a lateral board of some sort like a keel, but it might not be accessable to you for several reasons. It might be retracted at the time or too high out of the water for grabbing. So you really need something else and he suggested lines tied securely, and to hefty fastenings, on each side of the boat, clipped under the wale, that can be grabbed and used to pull the boat upright. He suggested securing the ropes with clips made of slitted pvc pipe that would secure the rope in normal use, but would easily release the rope when it is tugged. So that is one detail to think about.
ONCE THE BOAT IS RIGHTED...
...most of us will be faced with the task of getting back in. If you have a very low freeboard boat like a Sunfish you can just lean on one side and grab something and pull yourself back in. Sounds easy but many boats have no detail that allows you to "grab something". So you need to put it there. I think Richard preferred ropes that run along the inside of the side seats or decks that can be reached by the swimmer. Again they need to be stout and well attached. They will take the full weight of a frightened man. Another simple option is a grip lip on the inside of the seat. I suppose there is less chance of snagging that but I think it might require better hand strength than the rope. OK, so that will work with a shallow boat.
Also there should be nothing around to snag the recovering swimmer as he tries to reboard the boat. Richard pointed to external oar lock sockets as a real danger. The reboarding area needs to be slick and free of any brackets.
If you have a boat with a deeper hull that alone won't do. You will need a well planned step of some sort to allow you to reboard. A ROPE LADDER WON'T DO! I was glad Richard pointed that out because I had one once and found it impossible to reboard with one at any time, even after jumping over for a casual dip. As you step into one of these you almost always have you legs swing under the boat's bottom and you can't get up the ladder then. What Richard suggests, and what he used in the demostration, is to rig a stirrup which you can easily get to as you swim. The length of the stirrup needs to be just so and that part wasn't quite clear to me. I think it needs to be such that when you step into it and pull up that your knee is sort of even with the wale, allowing you to get right in. But I'm not sure and there was discussion about it and Richard did rerig the stirrup he rigged in the first demostration before he did the second. All this stuff again needs to be stout and secure enough to take the full weight of a frightened man.
There are other options of course. A real ladder would be great. I've suggested a simple toe slot in the rudder, although I notice no one ever builds a real boat that way. Then the rudder and its fittings need to be stout enough for the weight. I am sure Richard would point out that entering over the rudder, with its tiller and brackets and gear, is an invitation to a snag or sliced skin. A few of the boats at the meet did have a stirrup rigged which is a bit of a surprise.
ANYWAY...
I guess the big message is don't trust to luck. Have a plan, practice if you can. The details are actually pretty inexpensive. Have a reboarding zone with nothing to snag or cut you on the way up. Have a stirrup or ladder to give a boost up over those high sides, and have good hand grabs for the final pull. Richard also noted that you shouldn't reboard face down into the cockpit, as you would if you simply pulled yourself up and over the side on your belly. Do a bit of a roll in the end so you go over face up. Again, avoid all tangles and snags.
THE DEMONSTRATION...
At the time we had a strong onshore wind with whitecaps and no one was boating voluntarily. But Richard pointed out those things were ideal for testing, giving a chance for a real capsize and a fetching up on the launching beach if the recovery failed. It was cold as you see in the photos, no more than 50F, although I'm sure the water was warmer. Richard told of breaking ice in England to give capsize lessons so he was not deterred and no special suits were worn.
He chose Stan Roberts' nice new Family Skiff for the demo, saying it probably had the emergency buoyancy needed and also had the high sides that would make for a good "high sided boat" demonstration to show us the of the special rigging he was suggesting. He removed the mizzen to simplify things a bit. Family Skiff was designed without the mizzen so it would still handle well. Richard pointed out that although the mizzen was a complication on the stern that might need watching in a capsize, it also would provide more strong handholds for reboarding.
The Family Skiff had no motor mounted so the cut down area for the motor was open and Richard immediately rigged a stirrup for reboarding there. So if the outboard had been mounted the reboarding process would have to be rethought. He also rigged a rope running the length of the cockpit as a grab rope to be used when coming over the side, if needed.
Well, I gotta tell you as the designer that I had mixed emotions about having my design be the "winner" of the demo. Most likely Richard didn't know if was mine. But it needs to be done!
After the lecture and rigging of the emergency ropes, off they went into the blow....
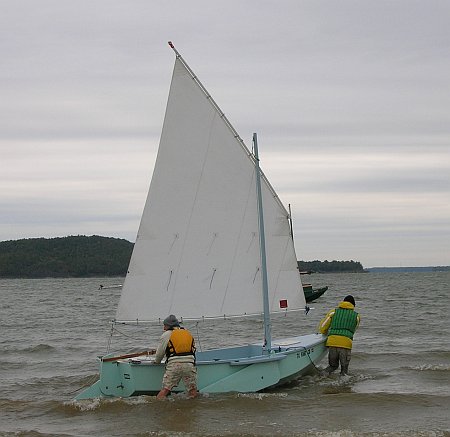
A half mile or so out they forced a capsize (pretty easy given the wind)...

It nearly turtled, which surprised me since the lug rigged boats I tested long ago never would turtle because the buoyancy of the wooden yard would hold them sideways. It might have gone full turtle since it was felt the mast had struck bottom preventing that...

They had capsized it with leeboard up high on purpose so that would not be used to right the boat. Richard grabbed the painter (bow line) and held it aft while Stan put his weight on it to lever the boat (slowly, be patient) upright. But a designated line just for this should be secured, with easy access by the swimmer, just for this.
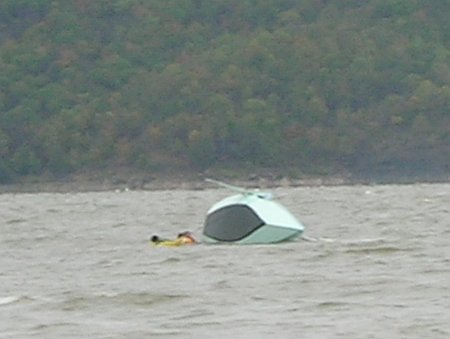
Once upright, Richard swam around to his recovery stirrup and got back in the boat at the stern.

Then I believe he helped pull Stan over the side, I've forgotten (if I ever knew)...

Then they sailed back easily. The whole process seemed fairly reliable and somewhat quick. I was impressed.
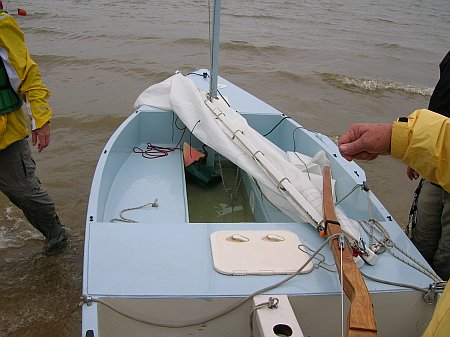
Once back on shore we had a peek at the carnage...except there really wasn't any. There was very little water inside and the did no bailing to return.
THEN THEY DID IT AGAIN...
This time capsizing such that they could reright the boat with the leeboard. Plus Richard had fine tuned his stirrup. Also Stan was instructed to reboard over the side solo, which he did, forgetting to roll as he entered so he went in belly down and got a bit tangled. But the second was a bit faster.
I guess that is about it. I really want to thank Richard Woods for the demo. Pretty sure it was the most significant demonstration I've ever seen at a messabout.
Contents
Piccup Pram
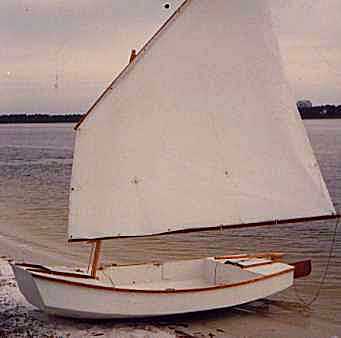
PICCUP PRAM, SAIL/ROW PRAM, 11' X 4.5', 90 POUNDS EMPTY
Piccup Pram was the first boat of my design to get built, back in 1990, I think. I still have the prototype and use it regularly. I designed it to be the best sail/row boat I could put in the back of my short bed pick up truck. But I found it to be a good cartopper, too. It has capacity and abilities I had previously thought impossible in a 90 pound cartopper. The photo above shows the original 55 square foot sail on Pensacola bay a long time ago. Piccup is a taped seam multichine hull which can take a fair amount of rough water.
Piccup continues to be one of my most popular designs and I get nice photos from builders. Here is one of Richard Donovan hoping for more wind up in Massachusetts.

Richard's Piccup has the larger 70 square foot sail that prefer myself. It's the same as the original but is 2' taller. This balanced lug sail sets on a 12' mast and rolls up easily for storage on its 9' yard and boom. The idea was to be able to store the rig easily in the boat during rowing and it works. There is a pivoting leeboard and kickup rudder on the boat and they can be left in place raised while rowing. Converting to full sail takes a couple of minutes as you step the short mast, clip on the halyard and tack lines, hoist the sail, lower the boards, and off you go. And the balanced lug sail reefs very well although reefing any small boat is best done on shore.
Here is a Piccup by Vince Mansolillo in Rhode Island, a nice father/son project. Piccup will be large enough to hold both of them. You can see the large open frameless cockpit, large enough for sleeping. And you see the buoyancy/storage boxes on the end.
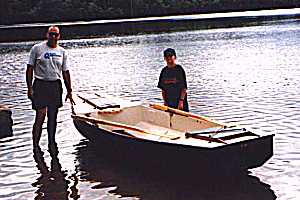
But Piccup will take two adults as seen in the photo of Jim Hudson's boat. Jim's boat has a polytarp sail as does my own Piccup.
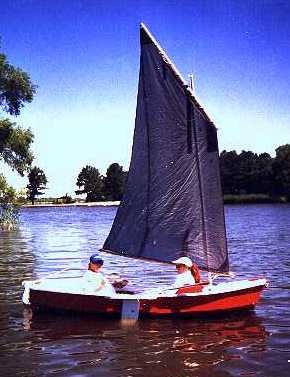
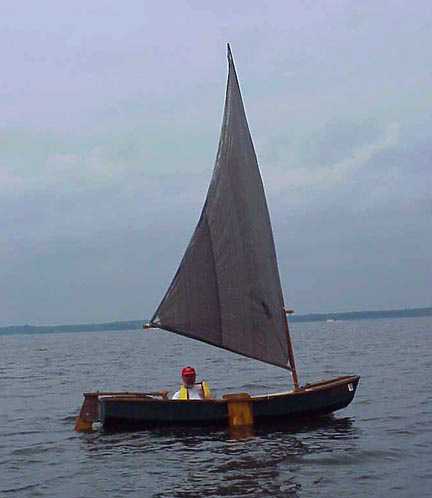
These boats have proven to be good for sail rig tinkerers (be sure to read and apply the Sail Area Math essay before starting). Here I am in Piccup with a polytarp sharpie sprit sail. The rig is different from the originals but the hull here is totally unchanged (except for paint) from the original shown on the beach at Pensacola.
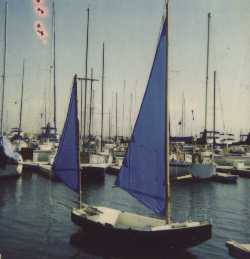
I think my own Piccup has had about six rigs of different sorts and was always the test bed for the polytarp sail experiments. But, hey!, that's nothing compared to the tinkering Reed Smith did with his out in California. Here is his Piccup rigged as a sharpie sprit yawl!
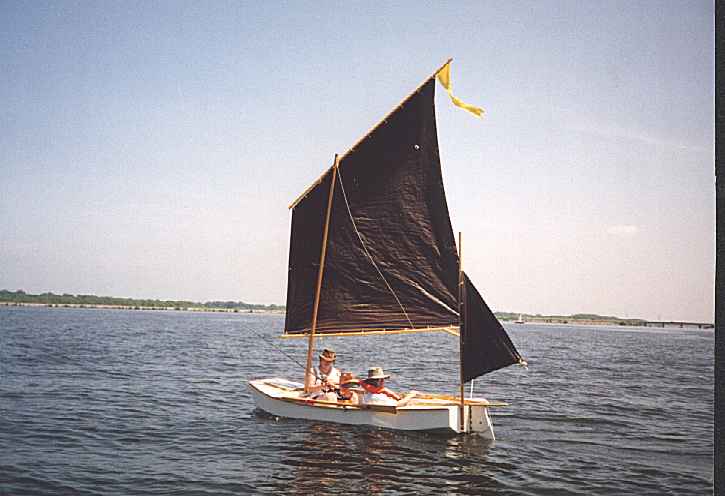
Here is Rob Rhode-Szudy's yawl rig Piccup that was featured in his essays about building Piccup that you can access through the old issue links.
Here is another by Doug Bell:
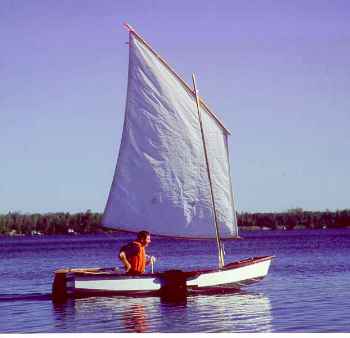
This one is by Jim Islip:

And this one by Ty Homer:
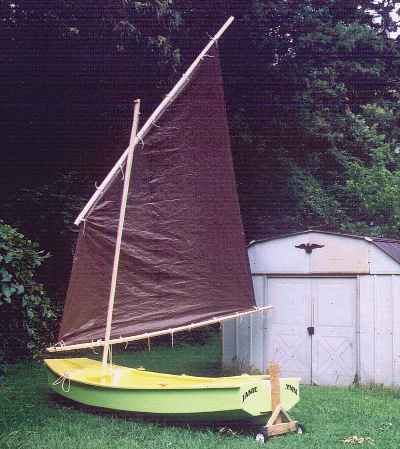
Piccup Pram uses taped seam construction from five sheets of 1/4" plywood.
Plans for Piccup are still $20.
Prototype News
Some of you may know that in addition to the one buck catalog which now contains 20 "done" boats, I offer another catalog of 20 unbuilt prototypes. The buck catalog has on its last page a list and brief description of the boats currently in the Catalog of Prototypes. That catalog also contains some articles that I wrote for Messing About In Boats and Boatbuilder magazines. The Catalog of Prototypes costs $3. The both together amount to 50 pages for $4, an offer you may have seen in Woodenboat ads. Payment must be in US funds. The banks here won't accept anything else. (I've got a little stash of foreign currency that I can admire but not spend.) I'm way too small for credit cards.
I think David Hahn's Out West Picara is the winner of the Picara race. Shown here on its first sail except there was no wind. Hopefully more later. (Not sure if a polytarp sail is suitable for a boat this heavy.
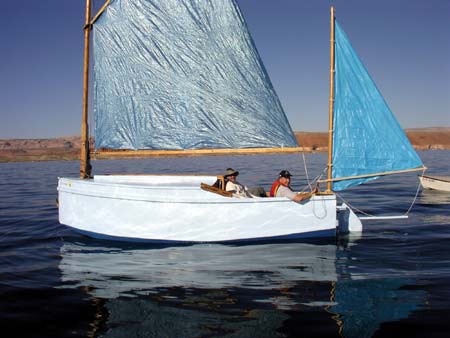
Here is a Musicbox2 out West.

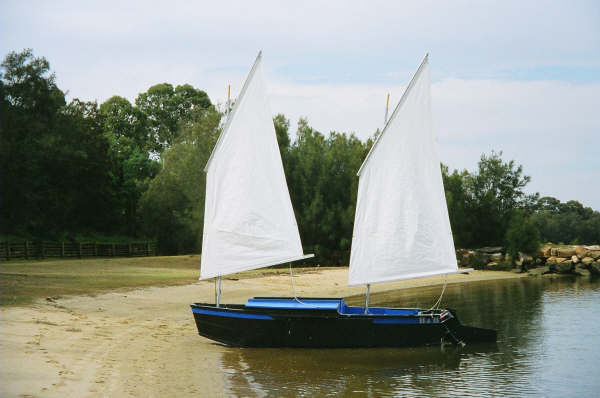
This is Ted Arkey's Jukebox2 down in Sydney. Shown with the "ketchooner" rig, featuring his own polytarp sails, that is shown on the plans. Should have a sailing report soon.
And the Vole in New York is Garth Battista's of www.breakawaybooks.com, printer of my book and Max's old outboard book and many other fine sports books. Beautiful job! Garth is using a small lug rig for sail, not the sharpie sprit sail shown on the plans, so I will continue to carry the design as a prototype boat. But he has used it extensively on his Bahamas trip towed behind his Cormorant. Sort of like having a compact car towed behind an RV.
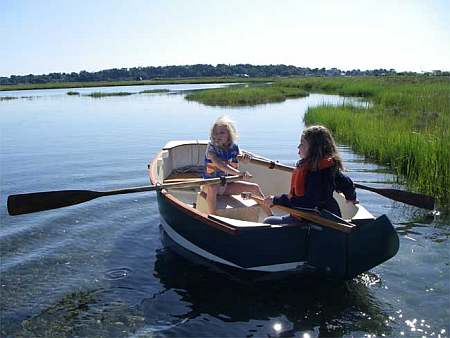
And a Deansbox seen in Texas:
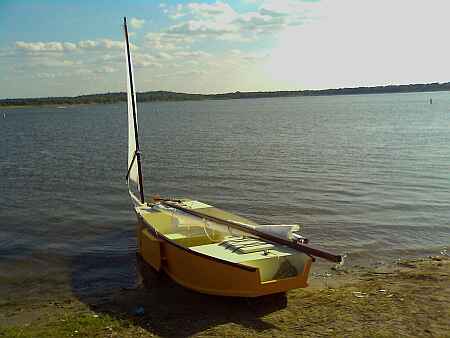
Another prototype Twister is well along:
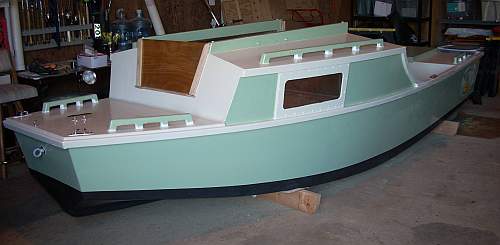
And the first D'arcy Bryn is taped and bottom painted. You can follow the builder's progress at http://moffitt1.wordpress.com/ ....
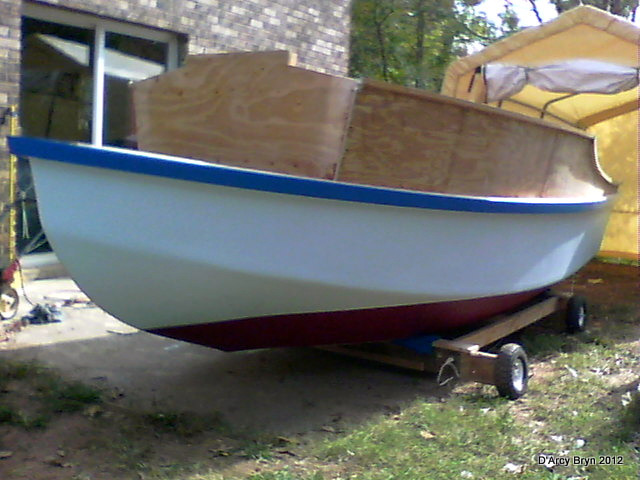
AN INDEX OF PAST ISSUES
A NOTE ABOUT THE OLD WAY BACK ISSUES (BACK TO 1997!). SOMEONE MORE CAREFUL THAN I HAS SAVED THEM. TRY CLICKING ON...
which should give you a saving of the original Chuck Leinweber archives from 1997 through 2004. They seem to be about 90 percent complete.
Hullforms Download (archived copy)
Brian builds Roar2 (archived copy)
Herb builds AF3 (archived copy)
Herb builds RB42 (archived copy)