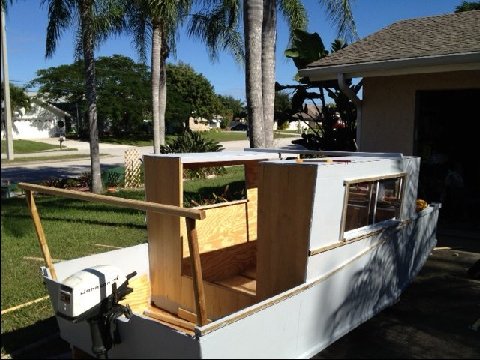
Mark Smith in sunny Florida plugs away at his Dockbox deluxe.
Contents:
Contact info:
Jim Michalak
118 E Randall,
Lebanon, IL 62254Send $1 for info on 20 boats.
Jim Michalak's Boat Designs
118 E Randall, Lebanon, IL 62254
A page of boat designs and essays.
(15December13) This issue will discuss trailering issues. The 1 January issue will take on the topic of beam/stability.
THE BOOK IS OUT!
BOATBUILDING FOR BEGINNERS (AND BEYOND)
is out now, written by me and edited by Garth Battista of Breakaway Books. You might find it at your bookstore. If not check it out at the....ON LINE CATALOG OF MY PLANS...
...which can now be found at Duckworks Magazine. You order with a shopping cart set up and pay with credit cards or by Paypal. Then Duckworks sends me an email about the order and then I send the plans right from me to you.

|
Left:
Mark Smith in sunny Florida plugs away at his Dockbox deluxe. |
|
|
Trailering Plywood Boats
...WHEN TO TRAILER...
A boat weighing over 100 pounds will be difficult to cartop solo. Get a boat trailer. Also consider getting one if your boat has lots of pieces to be assembled with each use, if you load a lot of fishing gear every time you go boating, or if your car isn't suited to roof carriage.
...TOW VEHICLE...
In general I've found it prudent to tow about half the manufacturer's rated tow weight. I don't think the guys who rate tow weight are concerned with you vehicle's longevity or its ability to pull the weight up a steep slippery ramp. I've seen several times where a vehicle could pull a boat on the highway, but couldn't pull the rig up a ramp.
...TRAILER TYPES...
In general, traditional boat trailers made of galvanized channel are best. Frames of tubing are stiffer in torsion but can rust out from the inside without warning. The simplicity of traditional leaf spring suspension is nice. Use "Bearing Buddy" type hubs. I've heard it's preferred to pump grease into the hubs at the ramp just before launching to boat so there will be no air pockets in the bearings when they go into the water.
A low trailer is best.
Used trailers are usually pretty inexpensive but can be hard to find. Look around for one as soon as you think you'll need one - say as soon as you start building a boat.
I've found it very convenient to finish a boat to the point of painting the bottom and turning it upright for the last time and then mounting it straight on the trailer to complete the interior and top. It's sort of a work site on wheels. Wheel it around the shop as required.
...CUSTOM BUNKS...
Most likely the trailer you get will be set up to carry a flat bottom or V bottom fishing hull with a long straight run. The bunks usually are padded 2x4's running fore and aft.
Most likely you'll have to scrap that bunk system and build a custom set for your boat. Most homebuilt sailers and rowboats have enough rocker in their bottoms to contact those longitudinal bunks only in one spot. The entire weight bears on that one spot and the hull will deform there. See Figure 1 for what can happen. We'll return to this subject after we've found the best place for your boat on the trailer.
...TONGUE WEIGHT...
First you need to locate your boat fore-and-aft on the trailer such that the tongue weight (the weight that rests on the hitch ball) is 10 to 15% of the total. I doubt if there are a dozen people in the world who know the weight of their boat/trailer combination. A fifteen footer like my plywood AF3 probably weighs 400 or 500 pounds with a typical trailer. So 50 pounds would be a good tongue weight. (It's also all most of us care to lift and push around. If your trailer tongue is too heavy to lift with reasonable effort you will need a wheeled trailer jack on the tongue.) Slide the hull fore and aft on the trailer until you've got it. Be ready for a surprise. Most likely a sailing or rowing hull will be well aft of the typical power fishing boat location the trailer manufacturer expected. I found a trailer meant for a 12 foot powered skiff is just right for a 16 foot plywood trailer sailer.
Most trailers will allow you to adjust the tongue weight by shifting the axle fore and aft. They have their suspension simply clamped in position. Unclamp the whole works and shift it to relocate the wheels and change the tongue weight.
...NOW FOR THOSE BUNKS...
With the boat located fore and aft, we'll size up some custom bunks. I can think of three ways to support the typical rockered hull and none include the 2x4 longitudinal bunks that come with most trailers. See Figure 2. Here a flattie is mounted on two crosswise bunks, one forward and one aft, such that the weight bears only on the chines. The chine corners are very stiff and strong and nothing will happen to her.
Look at Figure 3. Here a multichine is supported similarly, but with no hard chine to carry the load, she must be carefully cradled. The cradles should be located directly under hardpoints such as bulkheads to avoid deforming the hull. A V bottom hull with a lot of rocker should be supported the same way.
Look at Figure 4. Here a plywood sheet as wide as the bottom forms a "sling" and distributes the load over a wide area instead of just at a couple of points. This is probably the most gentle system and has other advantages such as being able to do general hauling. This type of bunk doesn't need padding, but the other two types should.
WINCH POST
Keeping in mind the tongue weight conditions, the winch post must be shifted to meet the boat and not visa versa.
This part provides a strong point for a winch and for a rubber block which acts as a forward stop for the hull. With the hull sitting on its bunks, the bow line to the winch should be almost all forward force with little down force. I've seen boat bottoms deformed by being winched down tightly at the bow.
For lighter boats - say 500 pounds or less, try going winchless. Fasten a very sturdy belaying cleat or bar to the winch post. Push the bow hard to the rubber stop block and belay the boat's bow line to the post.
...GOAL POSTS...
Trailers should have at least a pair of goal posts to keep a boat well aligned with the trailer as the boat is floated in a crosswind. See Figure 5. Without the posts, launching and retrieving solo in a crosswind is about impossible without getting wet and strained. You may not need posts if you have a V bottom sitting in high cradles which act as goal posts as in Figure 3.
I've seen fishermen use very tall posts with trailer lights mounted on the tops. Not only does that preclude having to disconnect the lights while launching, but the trailer is better illuminated in the driver's rear view mirror at night. (That's a problem with normal trailer lights. Sometimes you can't see your own boat and trailer tagging along behind you.) At any rate the posts need to be tall enough so they stick up about a foot out of the water when the trailer is immersed. Then you know exactly where your trailer is.
To launch a boat from a trailer with goal posts, you back down the ramp until the boat is almost totally afloat - perhaps only the bow is resting lightly on its bunk. You disconnect the bow line, push the boat aft, totally afloat now, beyond the goal posts, and pull the boat back to the ramp on the downwind side of the trailer.
People who go fishing everyday get very good at this. They untie the boat before backing and retie the bow line to the trailer with lots of slack. They back down the ramp until the boat is nearly afloat, jab the brakes, and drive forward a bit. The boat jerks off the trailer when the brakes are applied, the bow line catches it after it has drifted past the end of the trailer. Then the boat is pulled forward by the vehicle until its bow rests gently on the ramp. The driver now only disconnects the bow line which is totally high and dry at this point. Essentially he's launched his boat without getting out of his car!
To retrieve you put the trailer on the leeside of the boat and, HOLDING THE BOW LINE, push the boat beyond the goal posts and let the wind (or momentum) drift it between the posts. Then pull it onto the trailer with the bow line, secure it and drive off. Power boaters often just drive their boats onto the partially submerged trailer.
...SIDE BUNKS...
With a goal post on each side of your trailer your boat can still try to escape at an angle between the posts. The solution is another set of posts forward with padded boards connecting to the aft posts. See Figure 6. You create a slot in which to berth your boat. It's probably the most secure bunk system.
I recommend you make the side bunks fit into sockets for quick removal. I did that with my 24' Birdwatcher and have no trouble launching and retrieving solo. Here's how.
Arriving at the ramp I take close note of the wind direction and remove the bunk that will be upwind during the launch. I back down the ramp until she's just afloat, tied loosely at the bow, and the wind pushes her against the downwind bunk. Now I need only untie the bow and pull the boat off to the upwind side of the trailer and beach it next to the rig. I don't have to push the boat aft through the goal posts and float it to the downwind side of the rig, which can get pretty frightening with a big boat in a big wind. The downwind bunk is always there to catch and hold the boat. Retrieval is the reverse of the loading.
...TIE DOWNS...
Heavy boats will need winches to be pulled securely to the winch post. (You'll be surprized how greasing the trailer bunks makes this easier.) Then the boat is secure fore and aft. With the elaborate bunks that fishermen use, the hull is secure sideways, too. And that's all that's really needed. Sometimes the stern is also strapped to the end of the trailer.
With a sailing hull that weighs less than 500 pounds, I forego the winch. I leave the hull tethered loosely to the winch post while she's still on the ramp. The goal posts secure her sideways. Once I pull her up the ramp and onto the parking lot, the hull settles onto the bunks and I shove it forward hard against the winch post stop. Then I retie the bow line by belaying it to a heavy cleat on the winch post.
Next I have a 1/2" diameter line tied to the trailer frame, near the aft bunk, which I pass tightly over the hull and down to a stout cleat on the other side of the trailer frame, to which I belay the line. I prefer the pull of that aft line to be not only down but slightly forward to provide a backup for the line to the winch post. I usually run the aft line through oar sockets so it won't slip on the hull.
Between the two lines and the goal posts, there is redundancy. Only two of the three are needed to secure the boat. And yet untying the boat is a 30 second operation with no loose lines to keep track of. The bow line stays with the boat and the aft line stays with the trailer.
...LIGHTS...
Trailer lights should be unplugged before dunking in the water.
For a long sailboat which protrudes way beyond the end of the trailer, make a board which holds the lights to the stern of the hull, up high so you can see them yourself in the mirrors at night. It should be quickly removable. I mount the license plate up there too, but I'm not sure if that is legal. As for wiring, simply have a long loose lead that you unreel from the board down the boat's center to mate with your tow car's plug. This sort of rig is far better than normal trailer lights which are mounted low and well short of the hull's stern.
If your lights stop working and you've checkd all the plugs and switches, just remember the advice Dirk Fraser shared with me at a messabout saying, "It's the Ground, stupid." Yes, it was.
...FINALLY.....
Always keep in mind that your trailering should be a quick, safe and easy operation. After each use give some contemplation to any irritations and dream up some solutions.
SPORTDORY
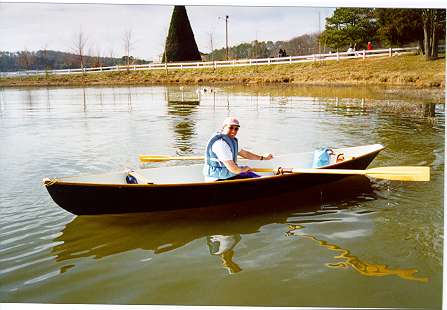
LIGHT ROWBOAT, 15' X 4', 70 POUNDS EMPTY
SPORTDORY
Sportdory is an attempt to improve upon the Bolger/Payson dory I built about 15 years ago. This boat is slightly smaller than my old dory. In particular the bow is lower in hopes of cutting windage. the stern is mostly similar. The center cross section is about identical. This boat has slightly more rocker than the original Bolger dory.
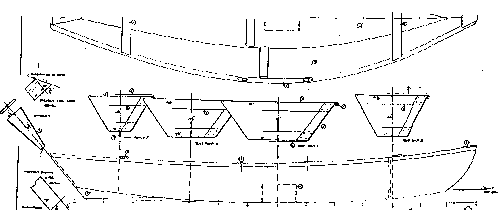
The hull is quite simple and light, taped seam from three sheets of 1/4" plywood, totally open with no frames. The wales are doubled 3/4" x 1-1/2" pieces to avoid the wale flexing my first boat had. I've added an aft brace to stiffen it up and give the passenger a back rest.
Mine once covered 16 statue miles in four hours. In rough water you will feel the waves are about to come on board but they won't. But if you try to stand up in one it will throw you out with no prayer of reentry.
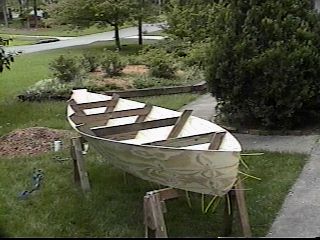
The prototype was built by John Bell of Kennesaw, Georgia. Here is a photo of John's Sportdory under construction. You can see the sides and bottom, precut to shapes shown on the plans, wrapped around temporary forms and "stitched" together with nylon wire ties in this case. I'm quite certain that with this design one must leave the forms in place until all the structural elements like the wales and cross bracing have been permanently installed. If they are removed before then, the assembly will change shape and you won't get the same boat. In particular I think the nose will droop to no one's benefit.
One might wonder about a comparison of Sportdory, Roar2 and QT. They are all about the same size and weight, a size and weight I've found ideal for the normal guy. They are small enough to be manhandled solo yet large enough to float two adults if needed. They are all light and well shaped for solo cartopping. Roar2 is probably the most involved to build and the best all around of the three. Sportdory is simpler and lighter, at least as fast and as seaworthy, but most likely will feel a little more tippy and less secure. You shouldn't really try standing up in either of these two. QT will be the least able of the three as far as speed and seaworthiness but may be the easiest and cheapest of the three and is stable enough to stand up in. So take your pick.
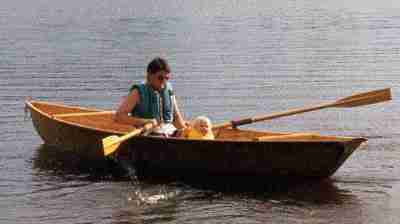
Sportdory plans are $20.
Prototype News
Some of you may know that in addition to the one buck catalog which now contains 20 "done" boats, I offer another catalog of 20 unbuilt prototypes. The buck catalog has on its last page a list and brief description of the boats currently in the Catalog of Prototypes. That catalog also contains some articles that I wrote for Messing About In Boats and Boatbuilder magazines. The Catalog of Prototypes costs $3. The both together amount to 50 pages for $4, an offer you may have seen in Woodenboat ads. Payment must be in US funds. The banks here won't accept anything else. (I've got a little stash of foreign currency that I can admire but not spend.) I'm way too small for credit cards.
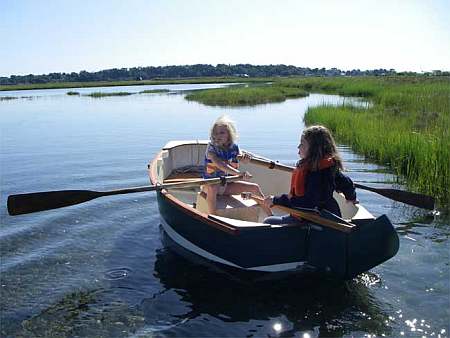
I think David Hahn's Out West Picara is the winner of the Picara race. Shown here on its first sail except there was no wind. Hopefully more later. (Not sure if a polytarp sail is suitable for a boat this heavy.
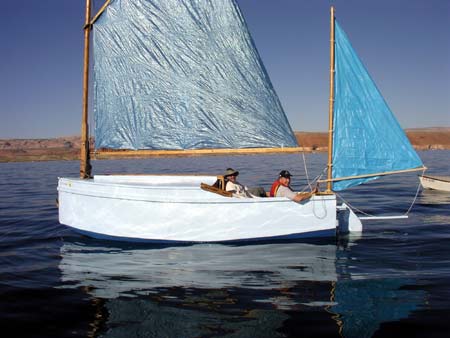
Here is a Musicbox2 out West.
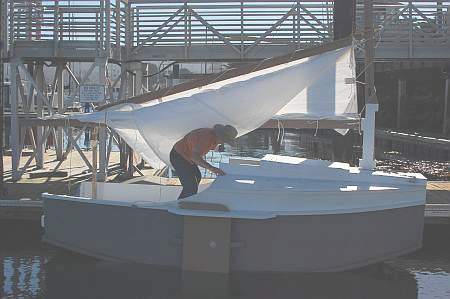
This is Ted Arkey's Jukebox2 down in Sydney. Shown with the "ketchooner" rig, featuring his own polytarp sails, that is shown on the plans. Should have a sailing report soon.
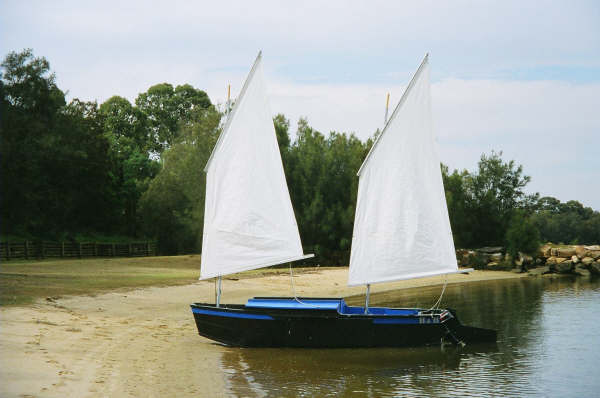
And the Vole in New York is Garth Battista's of www.breakawaybooks.com, printer of my book and Max's old outboard book and many other fine sports books. Beautiful job! Garth is using a small lug rig for sail, not the sharpie sprit sail shown on the plans, so I will continue to carry the design as a prototype boat. But he has used it extensively on his Bahamas trip towed behind his Cormorant. Sort of like having a compact car towed behind an RV.
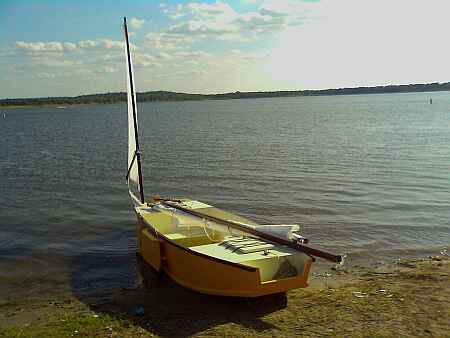
And a Deansbox seen in Texas:
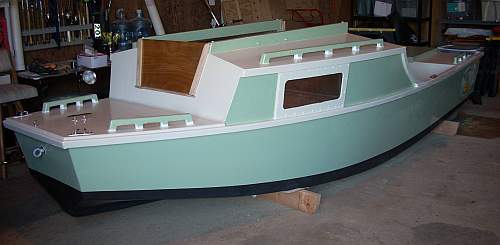
Another prototype Twister is well along:
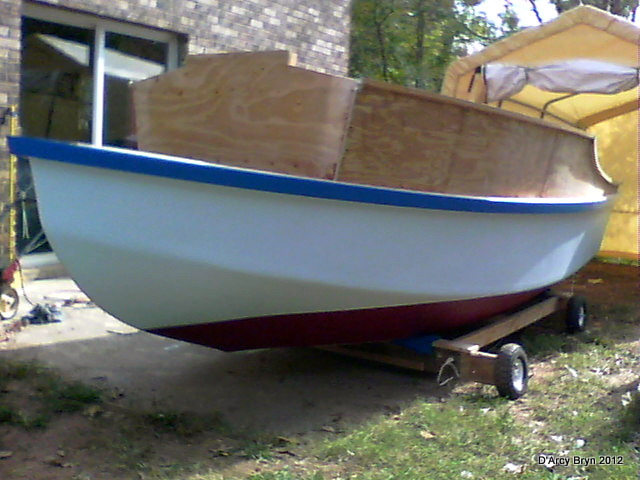
And the first D'arcy Bryn is taped and bottom painted. You can follow the builder's progress at http://moffitt1.wordpress.com/ ....
AN INDEX OF PAST ISSUES
THE WAY BACK ISSUES RETURN!
MANY THANKS TO CANADIAN READER GAETAN JETTE WHO NOT ONLY SAVED THEM FROM THE 1997 BEGINNING BUT ALSO PUT TOGETHER AN EXCELLENT INDEX PAGE TO SORT THEM OUT....
Hullforms Download (archived copy)
Brian builds Roar2 (archived copy)
Herb builds AF3 (archived copy)
Herb builds RB42 (archived copy)