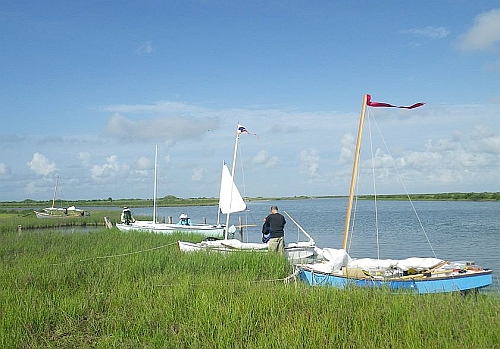
GOING LOOOONGER...
One of the most common and useful changes to a hull is to make it
longer without changing the beam or depth. Going longer clearly
increases the load ability of the hull. And in theory it increases
the "hull speed" of the boat which is related to the waves the hull
makes. Below planing speeds at least, longer is faster. I suppose it
might not always be true due to weights of the lengthenings but you
could end up with a hull that has both more capactiy than the
original, and more speed to boot with the same old engine! Bolger
points out in one of his books that this doesn't apply really to
boats that plane - in that case the weight is the deciding factor on
speed and longer boats are heavier.
THE CLASSIC WAY...
In olden days a set of boat plans would provide you with the "lines",
dimensions of section lines or frames or forms and the spacing of
those and the shapes of bows and sterns. Often little else was
provided and not needed (or wanted) as there were plenty of
experienced builders who all had their own way of building a boat.
All they wanted was the basic shape - no real building details were
needed. I think of it like house building where the basic house is
drawn but details like stud placement are not because those will be
"standard". Things like bevels would not be shown. Those might be
determined in "lofting", which is drawing the lines to full size on
the shop floor somehow, or maybe they could be determined by an
experienced building more or less on the fly as the boat is being
assembled.
So let's say our builder has drawings for a 12' boat which show the
section lines every 24". But the customer wants the same thing in
16'. So when the builder lofts the drawings he simply increases the
spacing of the sections from 24" to 32". The shape of the bow and
stern remain the same. The boat is longer but not leaner or deeper.
The builder then makes up his forms to match the section lines and
installs them at 32" spacing by attaching them firmly to the shop
floor somehow. Then he starts framing and planking although he has to
figure out bevels as he goes. All hand fitting of course but with
good wood, good tools, and a good experienced man (remember that
builders made boats this way every day all their lives and would get
very good at it - unlike us who might try this once or twice in a
lifetime) it went quickly.
And it might get a lot quicker with added boats since the builder
won't throw those basic forms made from the section lines away. When
the next customer comes in and wants the same thing in 18', the forms
quickly come out and are set up at 36" spacing and away we go - no
need to loft again.
INSTANT BOAT WAY...
OK, so right away you begin to see the advantages of building an
"instant" boat. Basically the designer has done all the lines and
lofting for you and determined the shape of all the major parts that
make up the hull. So when you starting laying out those parts on
plywood full size you aren't really "lofting" like the old builders
and don't really need that large space needed for full size lofting.
When you have all the pieces drawn and cut out you can assemble them
anywhere that is large enough - it doesn't need to be especially
flat. Actually many instant boats are just assembled on two sawhorses
in the back yard somewhere.
I think when I got the boat bug around 1980 what really put me off
about traditional building was the need to attach the forms and such
solidly to the concrete garage floor. Or the need of a sturdy stiff
strongback and support structure. At the time I was thinking about a
light dory and it was clear that the investment in lumber for the
forms and strongback would exceed that of the boat's wood. That is
fine if you are going to make lots of copies but that is not the case
for the usual builder. So I discovered Payson's and Bolger's books
just in time, although other designers like William Jackson had used
"instant" construction before and indeed, the method was used by flat
iron skiff builders for generations.
NOW, let's say you have 12' instant flat iron skiff plans in front of
you and the sides are drawn with dimensions every 24" to give you the
shape of the panel. And you really want a 16' boat. Remember that a
boat that is 12' long overall will have side panels longer than 12'
because it will take a curve on a way from bow to stern (usually, not
true for Puddle Ducks and such with straight sides). Can you simply
redraw the sides spacing the dimensions at a proportion of 16/12 to
get the longer boat?
In real life I would say "yes", it will work. It is not exactly
correct but in real life you won't tell any difference. This is
especially true of a simple flat iron skiff since its bottom will not
be precut to shape, the plywood is simply flopped atop the assembly
and cut to shape.
Note that the shapes of the forms and bulkheads will not change but
the edge bevels will as will the stem and stern pieces if they are
raked. So you will have to figure as you go. I'm pretty certain this
method has been done lots of times. And, by the way, if you are
building with taped seams then you worry not about bevels.
THE NEXT STEP.....
Now let's say you have an set of instant boat plans for a 12'
multichine hull and want it in 16'. Can you simply expand all the
side, bilge and bottom panels by a factor of 16/12 and get it all to
fit? Well I say, "Maybe but I don't really know." With the simple
flattie it will work because only the sides have been stretched and
the bottom simply cut to fit. The actual hull shape won't be a pure
stretch of the 12' design but I think the shape error will be small
and won't be noticeable. What happens is that if you stretch the
dimension spacing at the boat's center by 8" the finished boat will
get longer there by 8" because the sides are there parallel to the
boat's length. But near the stern or stem, where the panels curve
inward, the same 8" added spacing won't give you the same 8" added
boat length. For example if the panel curves inward at 20 degrees at
the stem (sort of typical) a 24" panel gives only 22.5" of boat
length. The 16' boat curves are less severe than the 12's. So the
12's bow angle is 20 degrees and the 16's bow angle is 15 degrees.
That panel stretched to 32" will give boat length of 30.9". Like
this...
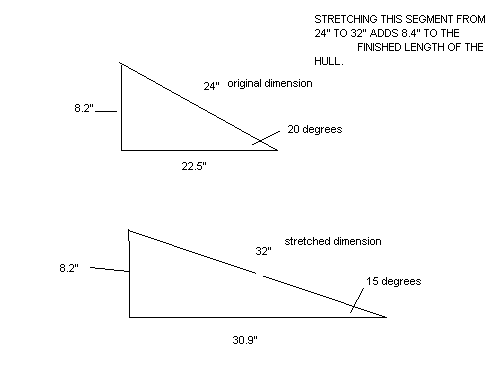
What you were thinking about was a hull length stretch there of 16/12
x 22.5" = 30". So it is there about .9" longer than expected because
of the difference in bow angles (because we are just making it longer
and not wider). There are twelve sets of side panel dimensions in
this example but the above would be the worse case. I would expect a
boat streched this way will end up a few inches longer than the
expected 16'.
But....if you were to expand all the panels of a multichine this way
there is another worry. The sides, bilges and bottom don't usually
bend to the same curve and so the curve errors that happen on the
sides, bilges and bottom might all be different and you may get
significant gaps in the assembly.
Given the example of the sides, I would say that stretching a
multichine this way will work with some but not all the time. But it
could still be done if you work this way. Don't cut the bilges and
bottom to line yet (always good advice even when you aren't
stretching). Start the assembly as usual with sides attached to the
forms and bulkheads, stem and transom. Now the shape is really
defined and you need only fill in the holes left for bottom and
sides. "Survey" the shape of the bottom either by making a pattern or
just flop the oversized bottom panel into place and trim to fit and
install. Then the same with oversized bilge panels. That is how I
would do it. Make sure the initial assembly is straight and sturdy as
you push and shove bottom and bilge panels into position. It's sort
of like sculpting, more like old time building. By the way my Toto
was "designed" this way since back then I didn't know how to do the
twisted bilge panel expansions with a computer.
BEST WAY...
But myself I would not do that. The slam dunk easiest and best way to
stretch a boat is to use a simple "plug" in the center. At the boat's
widest beam the panels should all be parallel to each other. Just
imagine cutting your 12' boat apart at the widest beam and inserting
a straight 4' piece between, joining all three pieces together and
off you go. The bevels of the bow and stern section have not changed
at all. The extra length has been added to the boat's greatest cross
section where it will give the greatest added buoyancy and capacity
and passenger room.
I think large steel ships are routinely lengthened this way - cut
them in two in the middle, spread the two ends apart as required, and
weld in plates to rejoin. I am ignoring the huge amount of interior
work needed and even the homebuilt boat may need some added bits to
stiffen. I guess I forgot to mention that the longer boat will have
greater stresses in the middle. I don't think that is much of an
issue with the typical plywood homebuilt - I've never heard of one
coming apart in the middle, but it would be an issue with stretching
out a tanker which sometimes do break in half.
But, you say it won't be sleek. It will look slab sided, just like
big ships are all slabs with pointy ends added. For some reason it is
not as bad as you might expect. I've drawn a few boat with constant
sections in the middle, just with the idea that someone will want to
lengthen/shorten without much use of the moaning chair. I did it long
ago when I stretched Toto...
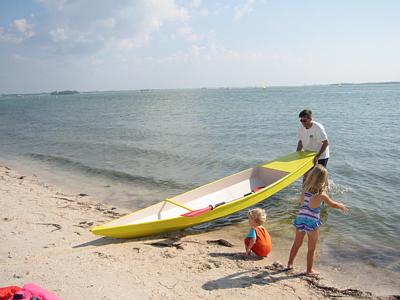
with a 30" plug to get Larsboat...
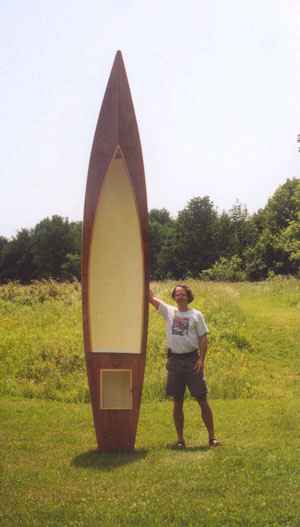
To make serious room for a second paddler. The 30" straight plug just
isn't noticable.
I hope to continue this next issue to cover in particular the nasty
surprises you can get when you stretch a hull without regard to
sailing rig.
Contents
Jonsboat
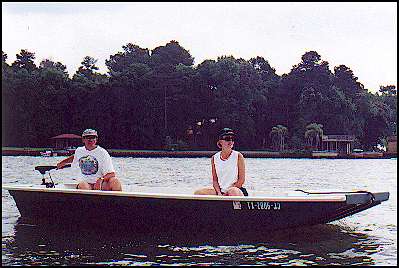
JONSBOAT, POWER SKIFF, 16' X 5', 200 POUNDS EMPTY
Jonsboat is just a jonboat. But where I live that says a lot
because most of the boats around here are jonboats and for a good
reason. These things will float on dew if the motor is up. This one
shows 640 pounds displacement with only 3" of draft. That should
float the hull and a small motor and two men. The shape of the hull
encourages fast speeds in smooth water and I'd say this one will
plane with 10 hp at that weight, although "planing" is often in the
eye of the beholder. I'd use a 9.9 hp motor on one of these myself
to allow use on the many beautiful small lakes we have here that
are wisely limited to 10 hp. The prototype was built by Greg Rinaca
of Coldspring, Texas and his boat is shown above when first
launched with a trolling motor. But here is another one finished
about the same time by Chuck Leinweber of Harper, Texas:
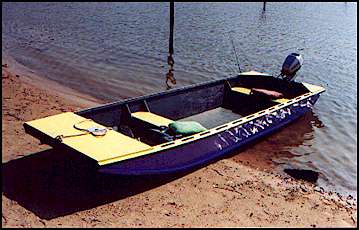
In the photo of Chuck's boat you can see the wide open center that
I prefer in my own personal boats. To keep the wide open boat
structurally stiff I boxed in the bow, used a wide wale, and braced
the aft corners.
I usually study the shapes of commercial welded aluminum jonboats.
It's surprising to see the little touches the builders have worked
into such a simple idea. I guess they make these things by the
thousands and it is worth while to study the details. Anyway,
Jonsboat is a plywood copy of a livery boat I saw turned upside
down for the winter. What struck me about that hull was that its
bottom was constant width from stem to stern even though the sides
had flare and curvature. When I got home I figured out they did it
and copied it. I don't know if it gives a superior shape in any way
but the bottom of this boat is planked with two constant width
sheets of plywood.
Greg Rinaca put a new 18 hp Nissan two cycle engine on his boat,
Here is a photo of it:
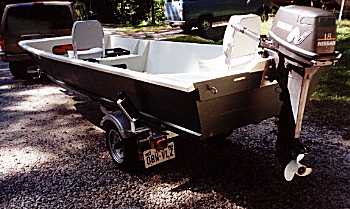
The installation presented a few interesting thoughts. First I've
been telling everyone to stick with 10 hp although it's well known
that I'm a big chicken about these things. Greg reported no
problems and a top speed of 26 mph. I think the Coast Guard would
limit a hull like this to about 25 hp, the main factors being the
length, width, flat bottom, and steering location. Second, if you
look closely at the transom of Greg's boat you will see that he has
built up the transom in the motor mount area about 2". When I
designed Jonsboat I really didn't know much about motors except
that there were short and long shaft motors. I thought the short
ones needed 15" of transom depth and didn't really know about the
long shafts. Jonsboat has a natural depth of about 17" so I left
the transom on the drawing at 17" and did some hand waving in the
drawing notes about scooping out or building up the transom to
match the requirements of your motor.
I think the upshot of it all is that short shaft motors need 15"
from the top of the mount to the bottom of the hull and long shaft
motors need 20". There was a lot of discussion about where the
"cavitation" plate, which is the small flat plate right above the
propellor, should fall with respect to the hull. I asked some
expert mechanics at a local boat dealer and they all swore on a
stack of tech manuals that a high powered boat will not steer
safely if the cavitation plate is below the bottom of the hull, the
correct location being about 1/2" to 1" above the bottom. But Greg
had the Nissan manual and it said the correct position is about 1"
BELOW the bottom. Kilburn Adams has a new Yamaha and its manual
says the same thing. So I guess small motors are different from big
ones in that respect.
But it seems to be not all that critical, at least for the small
motors. Greg ran his Jonsboat with the 18 hp Nissan with the
original 17" transom for a while and measured the top speed as 26
mph. Then he raised the transom over 2" and got the same top speed!
There is nothing to building Jonsboat. There five sheets of plywood
and I'm suggesting 1/2" for the bottom and 1/4" for everything
else. It's all stuck together with glue and nails using no lofting
or jigs. I always suggest glassing the chines for abrasion
resistance but I've never glassed more than that on my own boats
and haven't regretted it. The cost, mess, and added labor of
glassing the hull that is out of the water is enormous. My
pocketbook and patience won't stand it. Glassing the chines and
bottom is a bit different because it won't show and fussy finishing
is not required.
Plans for Jonsboat are $25.
Contents
Prototype News
Some of you may know that in addition to the one buck catalog
which now contains 20 "done" boats, I offer another catalog of 20
unbuilt prototypes. The buck catalog has on its last page a list
and brief description of the boats currently in the Catalog of
Prototypes. That catalog also contains some articles that I wrote
for Messing About In Boats and Boatbuilder magazines. The Catalog
of Prototypes costs $3. The both together amount to 50 pages for
$4, an offer you may have seen in Woodenboat ads. Payment must be
in US funds. The banks here won't accept anything else. (I've got
a little stash of foreign currency that I can admire but not
spend.) I'm way too small for credit cards.
I think David Hahn's Out West Picara is the winner of the Picara
race. Shown here on its first sail except there was no wind.
Hopefully more later. (Not sure if a polytarp sail is suitable
for a boat this heavy.
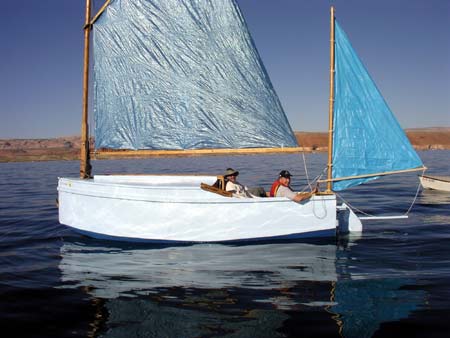
Here is a Musicbox2 out West.
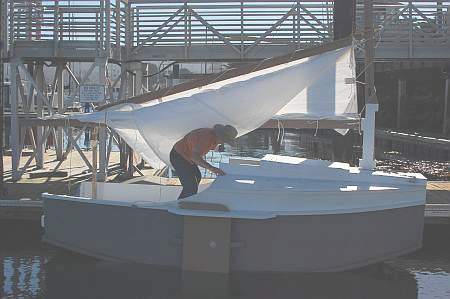
This is Ted Arkey's Jukebox2 down in Sydney. Shown with the
"ketchooner" rig, featuring his own polytarp sails, that is shown
on the plans. Should have a sailing report soon.
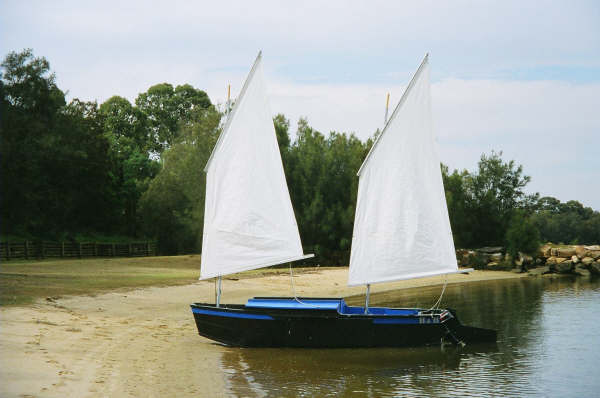
And the Vole in New York is Garth Battista's of
www.breakawaybooks.com, printer of my book and Max's old outboard
book and many other fine sports books. Beautiful job! Garth is
using a small lug rig for sail, not the sharpie sprit sail shown
on the plans, so I will continue to carry the design as a
prototype boat. But he has used it extensively on his Bahamas
trip towed behind his Cormorant. Sort of like having a compact
car towed behind an RV.

And a Deansbox seen in Texas:
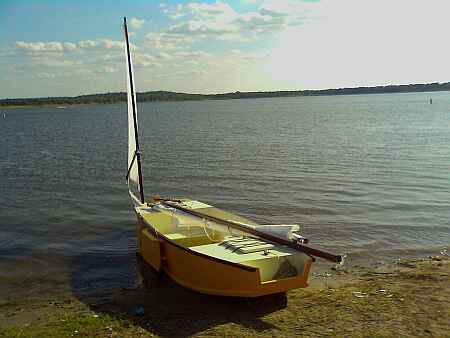
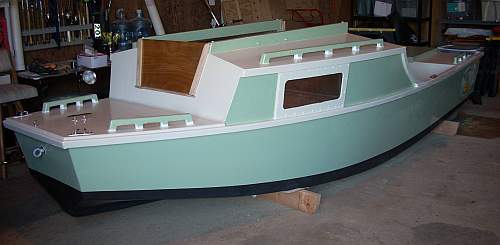
Another prototype Twister is well along:
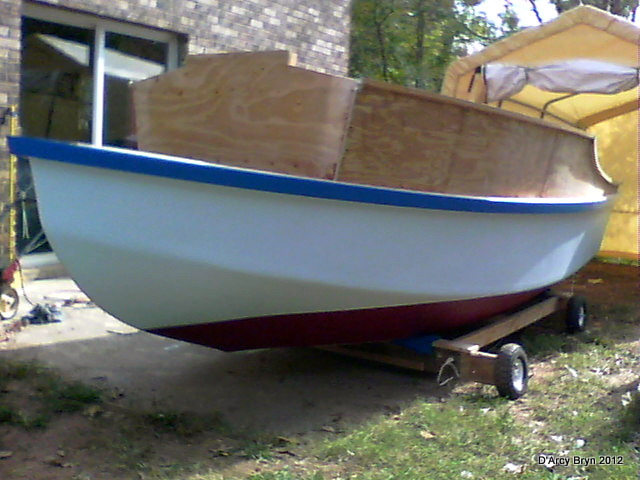
And the first D'arcy Bryn is taped and bottom painted. You can
follow the builder's progress at http://moffitt1.wordpress.com/
....
Contents
AN INDEX OF PAST ISSUES
THE WAY BACK ISSUES RETURN!
MANY THANKS TO CANADIAN READER GAETAN
JETTE WHO NOT ONLY SAVED THEM FROM THE 1997 BEGINNING BUT
ALSO PUT TOGETHER AN EXCELLENT INDEX PAGE TO SORT THEM
OUT....
THE WAY
BACK ISSUES
SOME LINKS
Mother of All Boat
Links
Cheap
Pages
Duckworks
Magazine
The Boatbuilding
Community
Kilburn's Power
Skiff
Bruce Builds
Roar
Dave
Carnell
Rich builds AF2
JB Builds
AF4
JB Builds
Sportdory
Hullforms Download (archived copy)
Puddle Duck
Website
Brian builds Roar2 (archived copy)
Herb builds AF3 (archived copy)
Herb builds RB42 (archived copy)
Barry Builds
Toto
Table of
Contents
