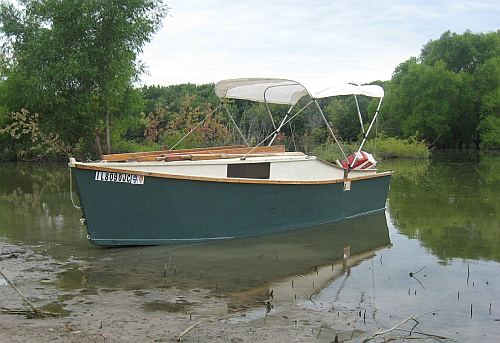
BACKGROUND...
Almost any boat you build from plywood will require panels longer
than the 8' lengths you will find at the lumberyard. For an "instant
boat" the usual manner of joining the panels together to get one long
panel is with a butt strap or butt plate. I've tried lots of
different ways to make the joint in the 15 or so boats I've built
over the years. All the methods worked. I have a feeling that the
butt joints on the usual instant boat hull are not highly loaded and
not too critical to overall boat strength. Since I've tried several
ways and they all worked I've gotten to be pretty nebulous about the
subject on my drawings. Lately I've been specifiying a butt plate as
something like "Butt plate from 3/4" x 3-1/2" lumber, or equal" which
doesn't tell you much. Most builders get by pretty well with just
that but recently one builder asked what in the world I meant, and
rightly so. So let's start the discussion with one joint I've never
tried in plywood.
TRADITIONAL PLYWOOD SCARF
JOINT...
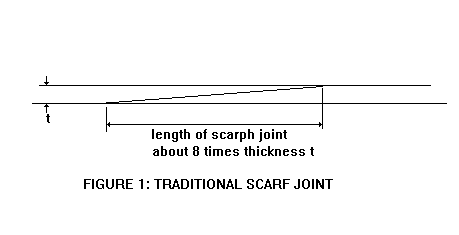
Figure 1 shows the traditional plywood scarf joint. I''ve never done
this in plywood although I've made a lot of scarf joints in plain
lumber. The two overlapping faces are tapered and glued together such
that both joined faces remain smooth. If you are building a
traditional lapstrake boat from plywood you have to make the joints
this way.
What's good about it? The faces are smooth both sides. Essentially
you have a single piece of wood to work with after making the joint.
It's quite strong, as strong as the base wood provided the taper is
long enough. I've seen the taper range from 6:1 to 12:1. The shorter
tapers are easier to make and probably just as good given modern
glues.
What's bad about it? The tapers can be hard to make properly although
thickened epoxy has made experts of most of us. Some experts have
special saw rigs to cut the taper. Most use power hand planes or belt
sanders, I think. When gluing the joint you must press it up against
a firm surface while the glue cures, making sure nothing glues to
that surface, and making sure the two pieces are secured lengthwise
so the tapers don't push them apart as you apply clamping pressure.
There is one more warning for instant boat builders. Almost all
instant boat designs have panels layouts which assume you will not be
using a scarf joint. If you join two 8' panels with a scarf joint you
will NOT end up with a 16' panel. It will be shorter by the overlap
amount. That might be just enought to negate the ply panel layout.
THE PAYSON TEAL BUTT STRAP...
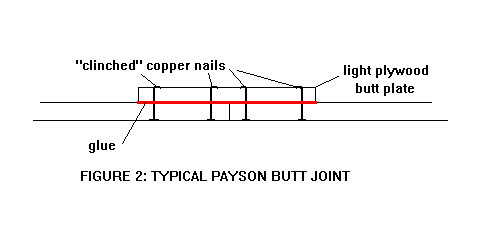
I think this type of joint was described in Payson's great book
INSTANT BOATS. I used it on my Teal which was my first homemade boat.
The side panels were 1/4" thick on my boat, the bottom 3/8". The butt
straps were 3/8" plywood, 6" wide. So the effect of the joint was
similar to a 12;1 scarf on the 1/4" ply sides and about 8:1 scarf on
the bottom. The nails were supposed to be copper, but I think Harold
might have also suggested copper rivets or short bolts for fasteners.
What's good about it? It's pretty simple to visualize and make. If
the fastening is good you can make the joint and go right on building
without waiting for the glue to set. You might do that with the
sides, for example. Another neat thing about this plain butt strap
joint is that, with a typical flat iron skiff type of assembly, the
bottom panels need not be joined before assembly onto the hull. In
that case you will have the hull inverted on sawhorses ready for the
bottom. Then you put the first bottom piece on attaching it to the
sides. Then you install the first butt strap at the end of that
piece. Then you install the next bottom panel to that butt strap and
the sides. And so forth until the entire bottom is planked, like
laying bricks.
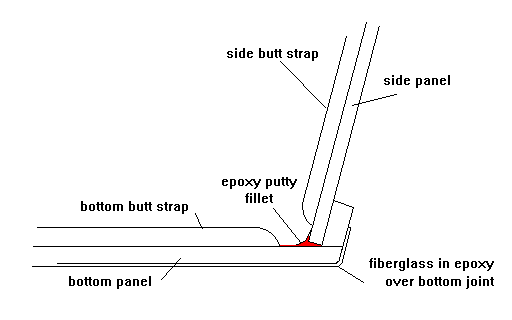
I might mention now that I think butt straps and plates should be
well rounded at the ends to avoid trapping dirt and moisture. In
boats that have taped seams I advise stopping the butt strap short of
the edge of the panel so you will have room to run the tapes
undisturbed. This is especially true of butt straps on the bottom.
You must have a clear limber channel around the perimenter of the
bottom. In that case I stop the strap about 1/2" short of the side,
fill the little gap with epoxy to keep the water out, and tape over
the bottom of the joint with glass tape and epoxy. Usually I don't
put glass tape over the outside of the side panel joints. But butt
joints in any deck should be well sealed with glass and epoxy. Here
is an end view of the treatment:
What's bad about the plywood strap? I think in Maine you aren't a man
until you've made a boat with clenched copper nails or rivets. Not so
where I live, can't buy them any place I know of. I got by with
bronze boat nails but they really aren't flexible enough for the job.
They didn't look too cool. And the edges of the plywood butt straps
don't look too cool either, wanting to have gaps and splinters
showing. It takes a while to finish them. And, of course, you have a
lump at each joint and folks will ask, "What's that?"
By the way, when I built my Toto I used the simple plywood strap
method with no fasteners. Just carefully lay the ply panels over the
straps which were well buttered with glue, weighed it all down with
concrete blocks to provide pressure, and stayed away for a few days
until I was sure the glue was totally set.
THE BIRDWATCHER BUTT STRAP... 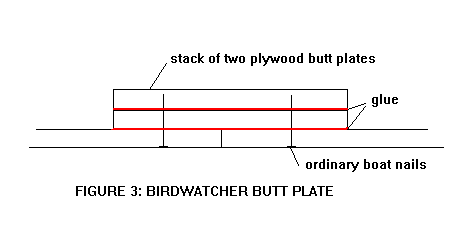
When I built my Birdwatcer in 1988 I think I piled on more layers of
plywood straps such that I wouldn't have to bend over the nails. And
by that time I was more expert at finishing the edges of plywood. It
worked but it was very obvious that I could have done the same thing
with regular lumber and saved a bit of work.
THE LUMBER BUTT PLATE...
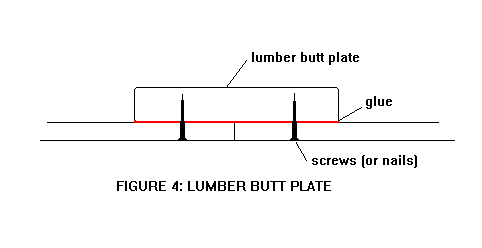
This is what I like to advise now. Not much to it. Very quick and
easy to make. Some say it looks too clunky for their tastes.
If there has been any structural problem with the above butt plate it
is at the ends of a plate that joins bottom panels, ending short of
the sides to allow a limber path. If the ends of the plate are not
solidly glued and fastened to the bottom panels the butt plate will
eventually loosen at the ends. I think that is due to the rapid
change in flexibility in the system where the plate suddenly ends. A
better solution might be to taper the end of the bottom butt plates
starting maybe 3" in from the end of the plate and tapering down to
maybe 3/8" thick at the ends. That will allow a gradual change in the
flexibility and prevent a stress riser at the end of the butt plate.
By the way, for any bulky butt joint care must be taken in design to
see that the joints don't fail in places where the butt plate will be
in the way.
LIGHT FIBERGLASS BUTT
JOINTS..
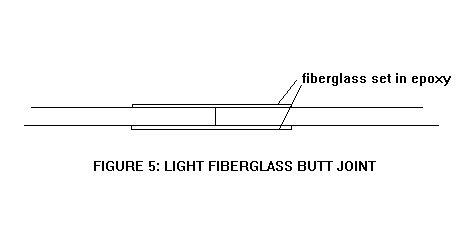
Both Harold Payson and Dave Carnell presented this one to U.S.
readers in the '80's but I'll bet the English inventors of taped seam
boats did it earlier. Simple as can be in theory. Just a layer of
fiberglass on each side of the plywood.
Dave Carnell presents
lots of details at his web site. He has done scientific load tests of
these joints and says the joint will be as strong as the base wood if
you use one layer of fiberglass cloth in epoxy on each side of 1/4"
plywood, two layers on 3/8" plywood, three layers on 1/2" plywood,
and four layers on 3/4" plywood.
I used the glass butt joint on my Roar rowboat but went back to
wooden butt joints later. At first it would appear that the joint is
easily made by laying the ply pieces on the floor, taping one side
with fiberglass, waiting to cure, flipping the panel and repeating on
the other side. But I found that plywood on its own often does not
want to lay flat enough to get a smooth fit, so I had to place the
joint over a board and screw the pieces down flat. Next the idea of
flipping the panel with only one side taped doesn't work well because
that one layer of glass has little strength by itself. But it can be
done carefully. Better yet is what both Payson and Carnell advise:
glass both sides at once. Lay the first side of fiberglass layers wet
with epoxy on a protected flat surface, lay the plywood to be joined
upon it, lay the second side of fiberglass over the top of the joint,
cover with plastic sheet and weigh down with concrete blocks. The
plastic sheeting not only protects everything from gooey epoxy, but
it should provide a smooth final finish and if you are lucky no
filling or sanding required afterward.
THE PAYSON HEAVY GLASS JOINT...
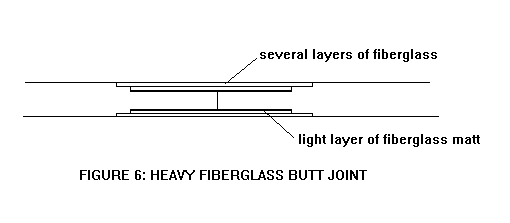
Harold Payson did a little more work on the glass butt joint. I'm
doing this from memory and hope I'm getting it right. To hide the
build up of glass on a thicker sheet of plywood he recessed the
surfaces roughly with a sanding disk in a drill. Then he added a
layer of light fiberglass matt to the wood before pasting in the
glass. Fiberglass matt is generally thought to provide better
adhesion to wood than glass cloth although by itself it has little
strength. Harold is big on using polyester resin on his boats instead
of epoxy so perhaps the matt is more important for the polyester
users. But you can see the advantage of the system: the final joint
can be more or less invisible as the multiple layers of glass are
recessed.
Paulsboat
PAULSBOAT, SAILING CANOE, 15' X 3', 120 POUNDS EMPTY

I had a request from Paul Moffitt, of the famous sailing
Moffitts, for a sailing canoe. Now, a "sailing canoe" can mean a
lot of different things. But to me the sailing canoes that you
read about from the late 1800's were what we both had in mind. I
had always put off designing one because I had the idea the usual
sailing canoe design is too wide to be good with a paddle, and
too narrow to be good with a sail. Many of the old classic
sailing canoe designs were actually small decked over rowing
boats that were wide enough to sail with some stability. I guess
there were still called canoes because of their double ended
shape and perhaps because they had recently evolved from true
canoes which were rigged with small sails.
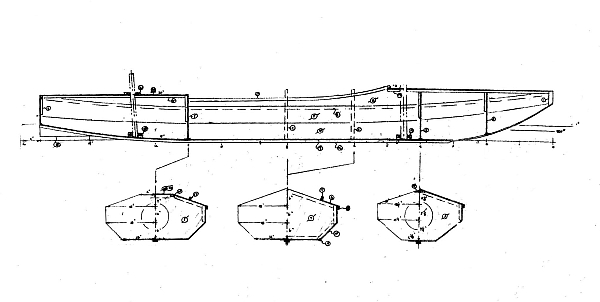
Anyway, it was going to be a compromise. Paul also wanted some
capacity to carry some camping gear. So I drew Paulsboat. It was
really based on my Larsboat which in turn was based on my Toto
which in turn was based on the Bolger/Payson multichine canoe,
etc. To get more sailing stability and more capacity Larsboat was
widened from 30" to 36" and the bottom plank also widened 6". I
gave the cockpit a 7' long open space with the idea that the
skipper could camp inside the boat, which by my experience is
quite superior to sleeping outside. For one thing setting up a
shore tent will usually quickly bring down the law almost
anywhere and sleeping inside discretely will not. I slept in the
smaller Toto many times. Anyway, the cockpit is large enough to
float two adults and is between buoyancy/storage chamber fore and
aft. Access to these chambers might be difficult. I've shown them
with large deck plates in the bulkheads but you likely won't be
able to reach way down in them. I've noticed many folks put
several smaller deck plates in the decks, as Paul did, to allow
access. The deck plates also allow for airing of the chambers and
if you ever build in a closed box and don't allow for airing you
can expect rot very quickly.
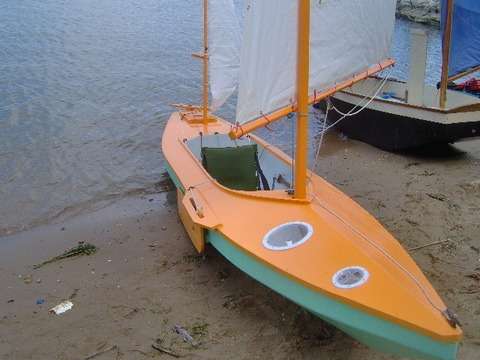
The sail rig was pretty well copied from the old sailing canoes
which often used something similar. I stuck with my usual
leeboard for lateral area and placed it such that the boat should
handle well under main sail alone. The rudder was something to
think over. Many of the traditional canoes had a tiller with
complications used to get the tiller to clear the mizzen mast. I
wanted to avoid all that since it usually means some metal
forming and welding and that will turn off many builders quickly.
What Paul wanted was to be able to steer with pedals and had
aquired from Duckworks some plastic kayak pedals where the pedal
did not pivot but could slide in a groove a total of 14". Well,
let me back up a bit. The rudder drawn simply has a tiller horn
on each side, each 12" long. That might sound long but in reality
it would be like steering with a 12" long tiller and then it
seems way short. The idea was to tie a line to the horns that
looped around the cockpit through pulleys forward such that you
could steer with your hands by pulling on the line. Not an
uncommon idea. The downside I thought would be that at times you
would hardly have enough hands to steer and work the sails. So
Paul got those pedals and installed them connected to that
steering loop. He says it all works fine and he was able to
reduce the length of the rudder steering horns. But don't give up
on the idea of the continuous loop around the cockpit. With the
loop you could let your passenger steer as you take a nap.
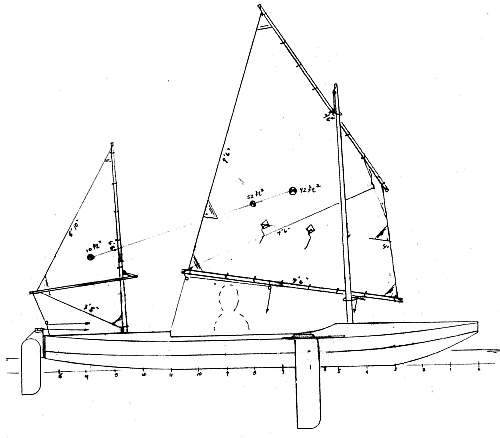
We pondered a bit about what would happen in a capsize. With the
decks and flotation chambers it should float high with little
water inside but getting back in could be a challenge. I am
pretty sure you should prepare, and test, a stabilizing system
which uses a float attached to your paddle which is somehow
secured across the cockpit to steady the boat enough to allow you
to enter over the side. Nothing new about that idea. You probably
need to be somewhat strong and nimble.

Paul has been paddling with a single paddle and reports no
troubles. Having the pedal operated rudder would be a big plus
especially with the single paddle. I have a feeling we did a good
job compromising on the width of the boat.
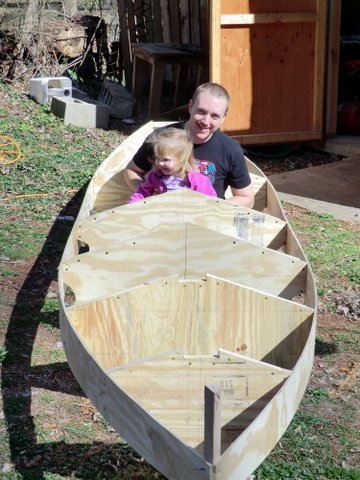
Construction is the usual taped seam requiring six sheets of 1/4"
plywood. It is going to weigh a bit, no getting around that, but
Paul has been cartopping without trouble.
Plans for Paulsboat are $35 when purchased direct.
Contents
Prototype News
Some of you may know that in addition to the one buck catalog
which now contains 20 "done" boats, I offer another catalog of
20 unbuilt prototypes. The buck catalog has on its last page a
list and brief description of the boats currently in the
Catalog of Prototypes. That catalog also contains some articles
that I wrote for Messing About In Boats and Boatbuilder
magazines. The Catalog of Prototypes costs $3. The both
together amount to 50 pages for $4, an offer you may have seen
in Woodenboat ads. Payment must be in US funds. The banks here
won't accept anything else. (I've got a little stash of foreign
currency that I can admire but not spend.) I'm way too small
for credit cards.
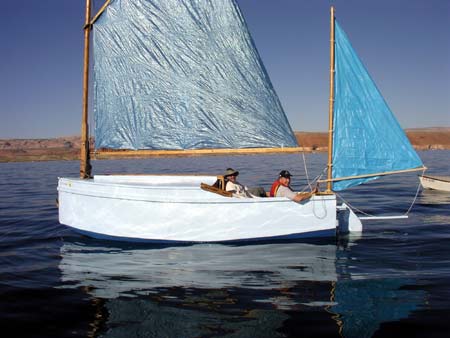
I think David Hahn's Out West Picara is the winner of the
Picara race. Shown here on its first sail except there was no
wind. Hopefully more later. (Not sure if a polytarp sail is
suitable for a boat this heavy.
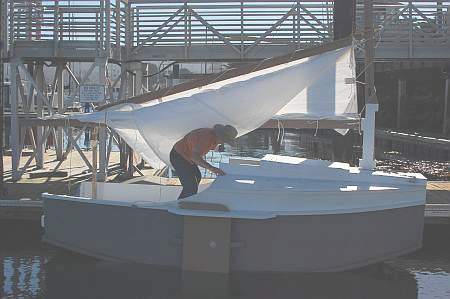
Here is a Musicbox2 out West.
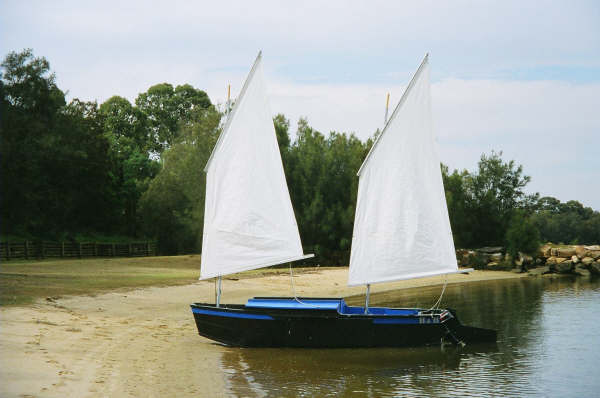
This is Ted Arkey's Jukebox2 down in Sydney. Shown with the
"ketchooner" rig, featuring his own polytarp sails, that is
shown on the plans. Should have a sailing report soon.
And the Vole in New York is Garth Battista's of
www.breakawaybooks.com, printer of my book and Max's old
outboard book and many other fine sports books. Beautiful job!
Garth is using a small lug rig for sail, not the sharpie sprit
sail shown on the plans, so I will continue to carry the design
as a prototype boat. But he has used it extensively on his
Bahamas trip towed behind his Cormorant. Sort of like having a
compact car towed behind an RV.
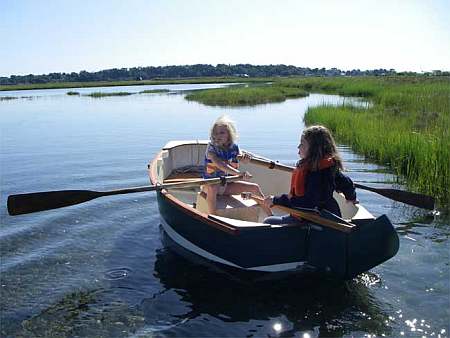
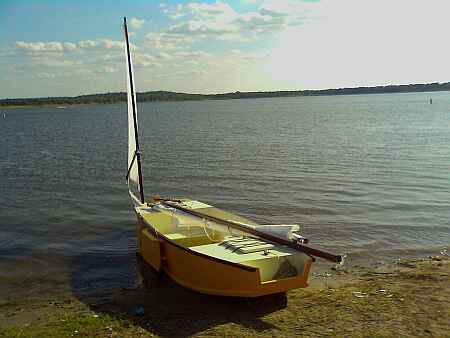
And a Deansbox seen in Texas:
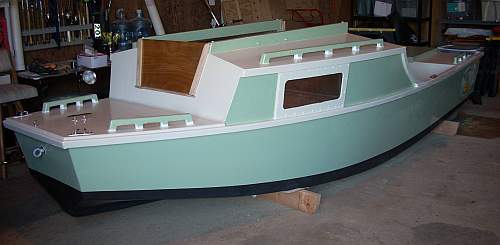
Another prototype Twister is well along:
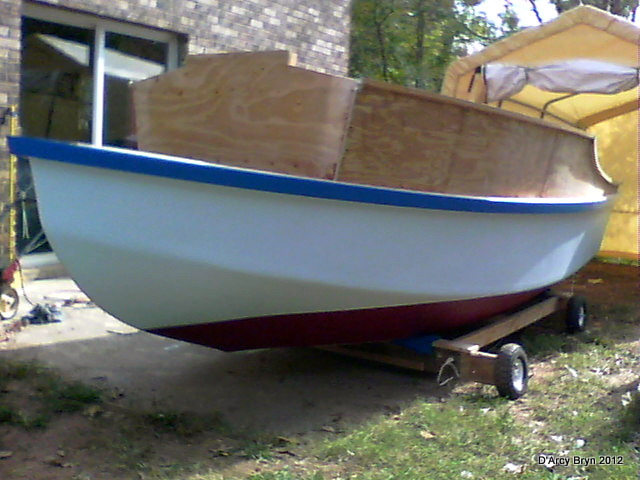
And the first D'arcy Bryn is taped and bottom painted. You can
follow the builder's progress at http://moffitt1.wordpress.com/
....
Contents
AN INDEX OF PAST ISSUES
A NOTE ABOUT THE OLD WAY BACK ISSUES
(BACK TO 1997!). SOMEONE MORE CAREFUL THAN I HAS SAVED
THEM. TRY CLICKING ON...
http://web.archive.org/web/20050308025339/http://marina.fortunecity.com/breakwater/274/michalak/alphabetical.htm
which should give you a saving of the
original Chuck Leinweber archives from 1997 through 2004.
They seem to be about 90 percent complete.
BACK ISSUES
LISTED BY DATE
SOME LINKS
Mother of All Boat
Links
Cheap
Pages
Duckworks
Magazine
The Boatbuilding
Community
Kilburn's Power
Skiff
Bruce Builds
Roar
Dave
Carnell
Rich builds AF2
JB Builds
AF4
JB Builds
Sportdory
Hullforms Download (archived copy)
Puddle Duck Website
Brian builds Roar2 (archived copy)
Herb builds AF3 (archived copy)
Herb builds RB42 (archived copy)
Barry Builds
Toto
Table of
Contents
