Drawing Boats 2
LAST ISSUE....
I discussed the equipment needed to draw a boat. Not much required
really. No computer needed, not for now at least.
FIRST, TWO TRUE STORIES ABOUT COMPUTER DRAFTING...
Before you decide I should get with the 21st century and give up the
hand drafting I will present two stories.
First goes back about 25 years when I was still a young man and an
engineer at McDonnell Douglas which was converting to CAD at the time.
They wanted all of us to be familiar with it and we found ourselves
sitting in a darkened room, in front of a large tube with a light pen
and big cables to a super computer that filled up the building next
door. PC's were infants then. After a few lessons the prof asked us to
bring in a pet project to practice with. I was starting boating then
and had a copy of Payson's Instant Boats and wanted to draw on the tube
Bolger's Teal skiff, which is nearly the simplest boat you could ever
build. To recap the Teal construction, the sides are constant width
planks bent around three (or was it two) forms and a shapely boat
results. In fact Bolger did some very large and elaborate boats,
including Birdwatcher, to the same form. All this is done without
lofting or offsets. I was brand new to CAD and couldn't get the
supercomputer to figure it out. I showed it to the instructor.
"Simple," he said, "Just figure out the offsets and type them into the
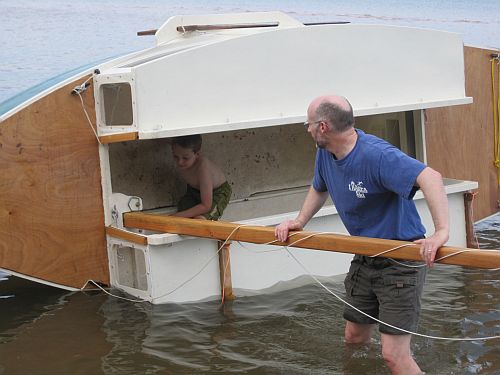
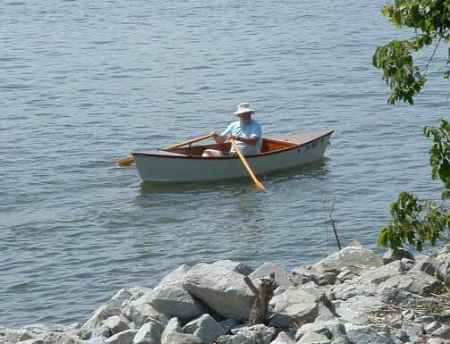
computer." {Photo of John Sellers' Teal shown below.}
I think you see the problem here. Before the supercomputer would draw
the boat I had to draw it in detail in the old fashioned way and figure
it all out that way. All the supercomputer could do was redraw it.
Now fast forward ten years to the second story. I've started selling my
own designs and am at the blueprint shop getting prints. He also sells
CAD programs there for $600 as I recall. "Save a lot of time and
convert to CAD," he said. "Will the computer draw all these curved
lines well?" I asked. "Of course," he said. "Just figure out those
offsets and type them into the program."
Same problem as before, right? You have to draw the boat before you can
use the CAD program to redraw it. We might as well fast forward another
ten years to when he gave me an unsold copy of the $600 CAD program,
now obsolete as to be worth nothing. I suppose I spent a month getting
it into the computer and practiced only to find I could still draw it a
hell of a lot faster by hand. There were other newer programs out by
then that were just for boats. No doubt they are a lot better. No doubt
in some applications the CAD is best. But not for little boats. In all
the programs I have tried, you either end up designing the thing by
hand so the computer can redraw it, or, in the case of real "boat
design" CAD programs, there are limits to what it will draw as far as
shaping is concerned.
So forget the idea that you will be limited by hand drafting a boat. It
is quite the opposite. You will have many more options than the CAD
designer.
SOME BASICS...
In using basic mechanical drawing you will see the boat in a 3 view
way. Imagine your dream boat in a glass box with its side view
projected onto the side face of the box, the top view projected to the
top face of the box and an end view projected to the end face of the
box. I don't think folks have any problem reading drawings this way
since I have never gotten a complaint about not being able to
understand the layout. But some folks don't design in the usual 3 view
way. I've seen some done totally with sketches. And a hundred years ago
it was common to build even large ships without drawings. Instead they
carved a large wooden model, usually a "half hull", sort of like
sculpting instead of drawing and why not? Then they took offsets from
the model and then to the shipyard with it. Not sure if any real
drawings were made of some of the ships. I suppose the details of
building were routine to a busy shipyard so no detail drawings were
needed. You can still see the old half hull models around, usually hung
on the wall as "art" but they were once workmen.
A SKETCH...
Before you go to the drawing board make a sketch of what you are
thinking about. I use paper with quarter inch squares on it but I'm
pretty sure that Bolger, who is much more of an artist than I, uses
plain white typing paper and a ballpoint pen. In one of his books he
said he starts each day doing a sketch. I have to use a pencil because
I make so many mistakes. Best place to do a sketch is on the water on a
boat. You don't need much. Paper and pencil and maybe a scaled ruler
and maybe a hand calculator. While on the water you will get a better
perspective on what a boat should really be. (In one of L Francis
Herreshoff's books I think there is a passage where he takes carving
materials on board his cruiser to carve half hull models while
underway.) Here is a sketch I did a while back (that did not become a
real design, not yet at least)
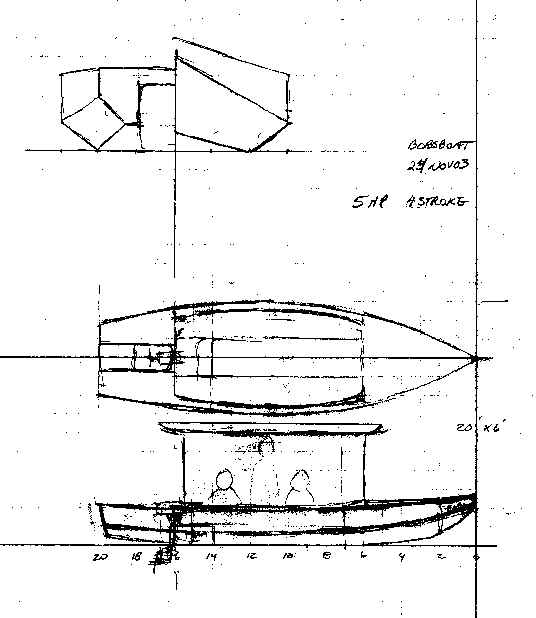
You see the basics here, top view, side view, scale. I draw some six
foot people in it to make sure I'm not drawing a doll house.
The end view has been placed above the others although in regular
mechanical drawing it would be to the right of the other views. But on
my quad paper there is no room to the right. Also I have drawn it at
about twice the scale of the other views.
In mechanical drawing you can completely describe an object with two
views. The third view is really not needed and in some of my plans I
don't present the end view if there is not much room on the sheet. When
I started drawing boats about 1980 I suppose I thought the end view was
sort of just for laughs or for final fairing of a hull. But after a few
years, certainly by the time I drew Toto, I came to think that the end
view tells it all!
SECRETS OF THE END VIEW...
Of couse by looking at the end view you can instantly get an idea of
how burdensome the boat will be. A wide flat bottom tells you it will
carry a lot of weight but is not a good rough water shape. A V bottom
will mean better rough water ability but maybe tippy and deeper draft.
A multichine will be somewhere between. You see the flare of the sides
in an instant too. Lots of flare means less capacity but probably
better rough water ability.
For some reason, and don't ask me why because I don't know, you will
get a nicer looking boat, at least in terms of a plywood boat, if all
the lines in the end view are straight. Once you think that you sort of
design things in reverse. Normally you might draw a pretty side view
and then a pretty top view and then way down the road construct the end
view from those two. But now I often start by drawing the end view, all
with straight lines. Then you might add a top view and then the side
view but by then they have become the slaves of the end view. Look at
it this way: If you have the end view nailed down and draw the sheer
line in the top view, the sheer line in the side view is already
determined. Etc. I suspect the reason the end view all of straight
lines gives a better looking boat is because it prevents you from
getting too kinky with the other views. But you can tell a lot more
just by looking at the end view.
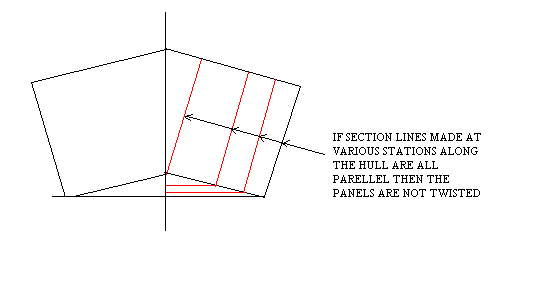
If the section lines of the hull are all parallel when presented in the
end view, then the planks that make the boat have no twist. This is one
issue that you will need to force into your design if you are to avoid
twisted planks. If the planks are not twisted then the boat will be
easier to build. But maybe more important, if the planks are not
twisted you will be able to determine their shape before the boat is
built by conventional drafting.
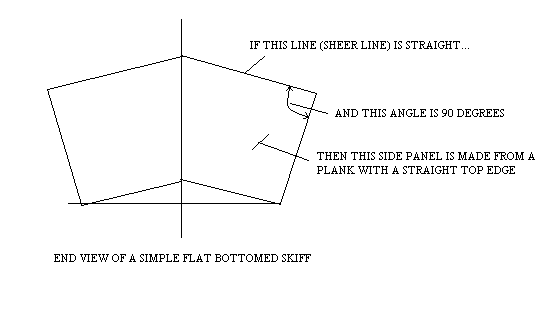
Next, if the sheer line in the end view is straight, and the section
lines of the side are perpendicular to it, then you know the plank that
forms the sheer, the side panel in say a flat bottomed boat, can be cut
with its top edge straight. That usually saves labor and materials but
I found is not a major driver in a design. Like this:
And if the other hull lines are perpendicular to the section lines then
those lines will become straight lines when you go to cut them to shape
in a prefabricated design. Like this:
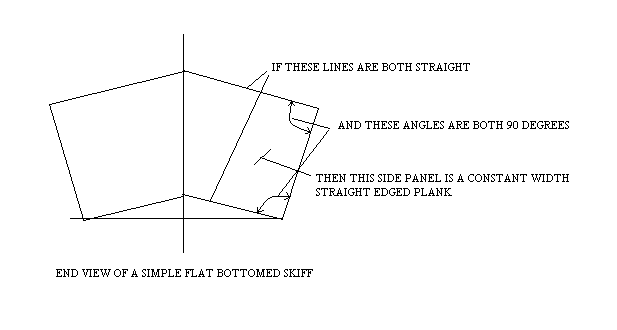
So that is how a boat like Bolger's Teal, curved in all ways, is
designed from the start with side planks that are constant width and
all straight lines. Panels like that sitting flat on the floor don't
look like much of a boat, but when bent around forms with flare they
end up with rocker and sheer sweep and all the elements of a sweet
boat.
We'll continue this topic next issue...
Contents
Shanteuse
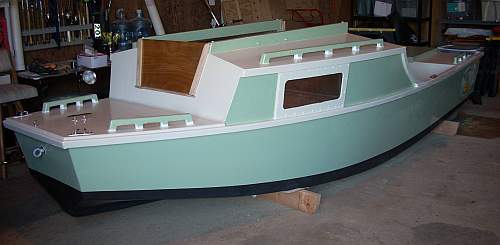
SHANTEUSE, SHANTYBOAT, 16' X 6', 700 POUNDS EMPTY
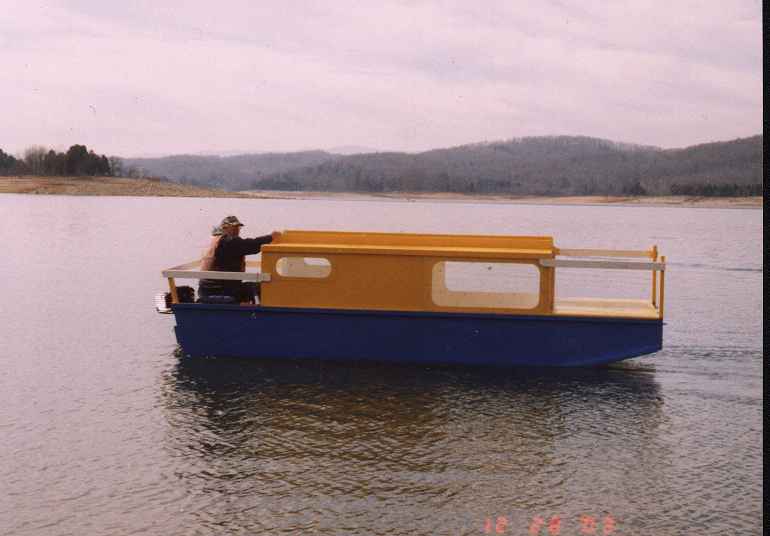
Shanteuse is a slight enlargment of the mini shanty Harmonica.
Shanteuse is 1' wider than Harmonica and has a 3' extension on the
stern to allow a small back porch and a motor mount that is totally
out of the living area.
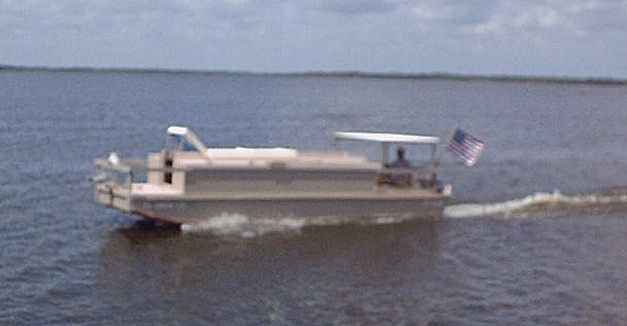
Above is a Shanteuse built in Florida by Vince SantaMaria a couple
of years back but he stretched his to 24' so I couldn't really call
that one a Shanteuse. But here is one by Douglas Snelson in
Tennessee that looks to be right to the plans so I will call this
one the prototype. He sent a bunch of photos:
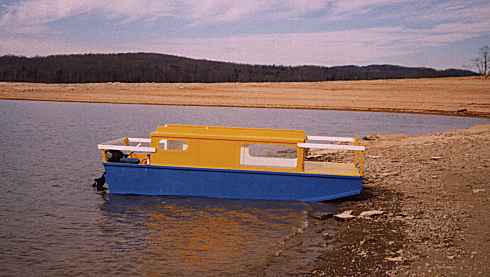
I've also made Shanteuse a little heftier. I'm thinking this one
will weigh about 700 pounds empty where Harmonica comes in at
around 400 pounds. I'm not sure if the extra beef is needed because
Harmonica seemed totally adequate to me as far as strenght and
stiffness go. But the extra size of Shanteuse is probably going to
take it out of the compact car tow class. The plywood bill for
Shanteuse looks like six sheets of 1/2" plywood and eight sheets of
1/4" plywood. I would not use fancy materials on a boat like this
and am reminded of Phil Bolger's warning to never spend a lot of
money building a design that was intended to look cheap. I see pine
exterior plywood at my local lumberyard selling for $11 or a 3/8"
sheet and this entire boat could be built of it. So the plywood
bill would be less than $200 and I'm thinking the entire bill less
than $500. The pine plywood looks quite good to me, its main
drawback being that it doesn't lay very flat.
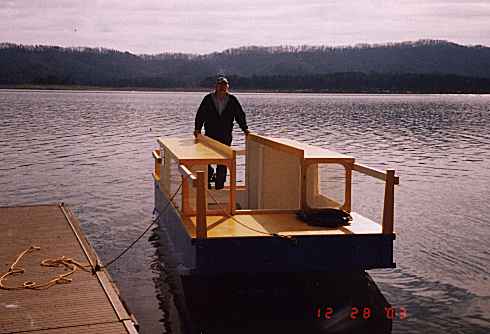
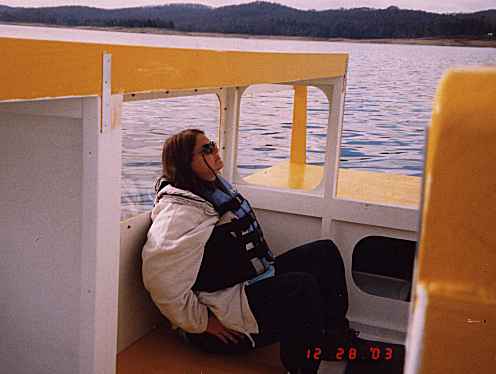
These boats can be very comfortable to camp in. The interior volume
and shape are not unlike the typical pickup camper or the volume in
a full sized van. It's not huge, it's cozy. The top has an open
slot 28" wide from front to back on centerline. You can close it
over with a simple tarp, leave it open in good weather, or rig up a
full headroom tarp that covers the entire boat. I've shown lots of
windows but the window treatment can be anything you like. You do
need to see out. I would be tempted to cover the openings with
screen and use clear vynal covers in the rain or cold. For hard
windows I think the best material might be the Lucite storm window
replacements sold at the lumberyard. Easily worked, strong, and not
expensive.
As for operation, these are smooth water boats. So it is best to
stay on small waters that never get too rough. On bigger waters you
need to watch the weather very carefully. For power I would stick
to 5 or 10 hp but I'm very much a chicken about these things. To
plane a boat like this, remember the good old rule of a horse for
each 50 pounds. So if you are running at 1000 pounds total you will
need at least 20hp to do the job and then at full throttle. So I
think you would want at least 30 hp to plane at 2/3 throttle. And
this boat could easily be loaded to over 1000 pounds.
Plans for Shanteuse are $35.
Contents
Prototype News
Some of you may know that in addition to the one buck catalog
which now contains 20 "done" boats, I offer another catalog of
20 unbuilt prototypes. The buck catalog has on its last page a
list and brief description of the boats currently in the
Catalog of Prototypes. That catalog also contains some articles
that I wrote for Messing About In Boats and Boatbuilder
magazines. The Catalog of Prototypes costs $3. The both
together amount to 50 pages for $4, an offer you may have seen
in Woodenboat ads. Payment must be in US funds. The banks here
won't accept anything else. (I've got a little stash of foreign
currency that I can admire but not spend.) I'm way too small
for credit cards.
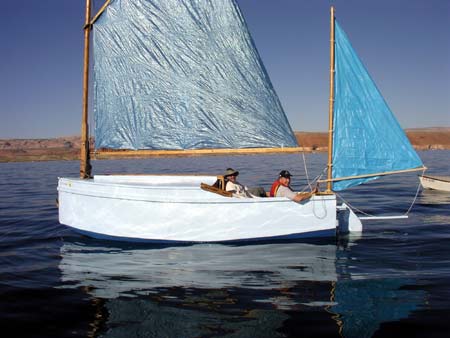
I think David Hahn's Out West Picara is the winner of the
Picara race. Shown here on its first sail except there was no
wind. Hopefully more later. (Not sure if a polytarp sail is
suitable for a boat this heavy.
Here is a Musicbox2 out West.
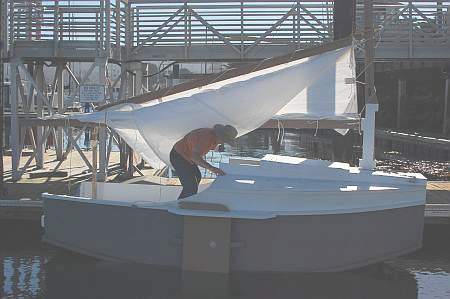
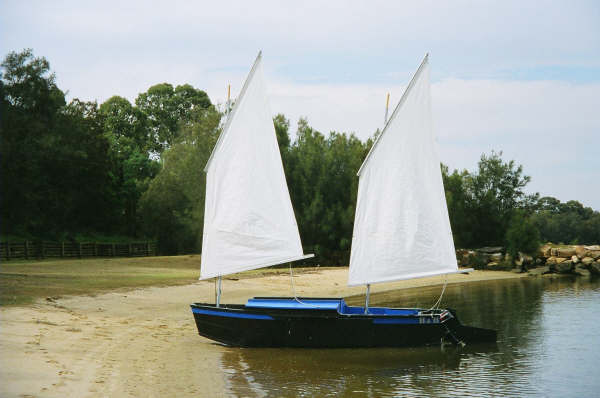
This is Ted Arkey's Jukebox2 down in Sydney. Shown with the
"ketchooner" rig, featuring his own polytarp sails, that is
shown on the plans. Should have a sailing report soon.
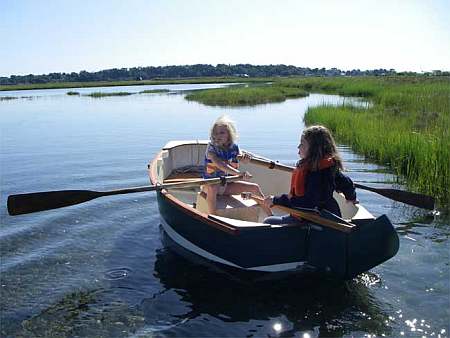
And the Vole in New York is Garth Battista's of
www.breakawaybooks.com, printer of my book and Max's old
outboard book and many other fine sports books. Beautiful job!
Garth is using a small lug rig for sail, not the sharpie sprit
sail shown on the plans, so I will continue to carry the design
as a prototype boat. But he has used it extensively on his
Bahamas trip towed behind his Cormorant. Sort of like having a
compact car towed behind an RV.
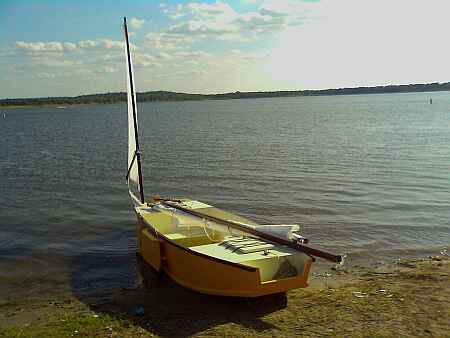
And a Deansbox seen in Texas:
Another prototype Twister is well along:
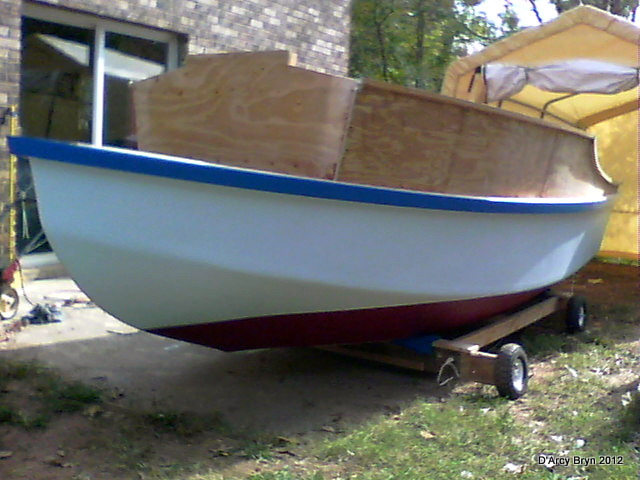
And the first D'arcy Bryn is taped and bottom painted. You can
follow the builder's progress at http://moffitt1.wordpress.com/
....
Contents
AN INDEX OF PAST ISSUES
A NOTE ABOUT THE OLD WAY BACK ISSUES
(BACK TO 1997!). SOMEONE MORE CAREFUL THAN I HAS SAVED
THEM. TRY CLICKING ON...
http://web.archive.org/web/20050308025339/http://marina.fortunecity.com/breakwater/274/michalak/alphabetical.htm
which should give you a saving of the
original Chuck Leinweber archives from 1997 through 2004.
They seem to be about 90 percent complete.
BACK ISSUES
LISTED BY DATE
SOME
LINKS
Mother of All Boat
Links
Cheap
Pages
Duckworks
Magazine
The Boatbuilding
Community
Kilburn's Power
Skiff
Bruce Builds
Roar
Dave
Carnell
Rich builds
AF2
JB Builds
AF4
JB Builds
Sportdory
Hullforms Download (archived
copy)
Puddle Duck
Website
Brian builds Roar2 (archived
copy)
Herb builds AF3 (archived copy)
Herb builds RB42 (archived copy)
Barry Builds
Toto
Table of
Contents
