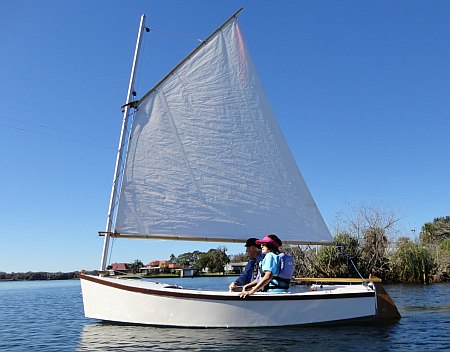
A very recent photo of Dennis Marshall & Co sailing his new Skat in Florida, to make those of us suffering from the flu in the cold jealous!
Contents:
Contact info:
Jim Michalak
118 E Randall,
Lebanon, IL 62254Send $1 for info on 20 boats.
Jim Michalak's Boat Designs
118 E Randall, Lebanon, IL 62254
A page of boat designs and essays.
(1January2013) This issue will remind us about bevels, again. For the 15 January issue I will try to dig up the old "make a hull" essays.
THE BOOK IS OUT!
BOATBUILDING FOR BEGINNERS (AND BEYOND)
is out now, written by me and edited by Garth Battista of Breakaway Books. You might find it at your bookstore. If not check it out at the....ON LINE CATALOG OF MY PLANS...
...which can now be found at Duckworks Magazine. You order with a shopping cart set up and pay with credit cards or by Paypal. Then Duckworks sends me an email about the order and then I send the plans right from me to you.
BULKHEAD BEVELS
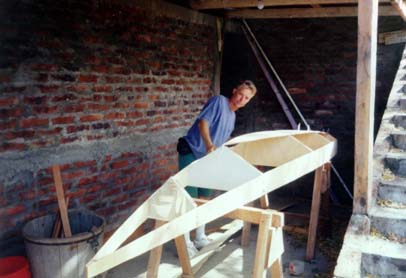
I don't know if there are many topics that cause more confusion to boatbuilders than bevels at bulkheads and transoms. Some slant in and some slant out. Sometimes you can measure them right off the lines drawing but often you can't. To a certain extent the subject has become less important with taped seam construction, but many glue and nail boats are still being built and as you will see, I like to use nail and glue construction in the very early stages of building a taped seam boat because it allows a quick and solid alignment when that is most appreciated, as shown in this photo of Dale Dagger in Nicaragua with a Toto project. At this stage the hull has used conventional construction which required cutting bevels on some of the elements. Dale asked for clarification on one of them.
I did update the Toto drawing to include the full sized bevel drawings shown below. One is for the side edges of bulkhead 10 and the other is for the side edges of the transom.
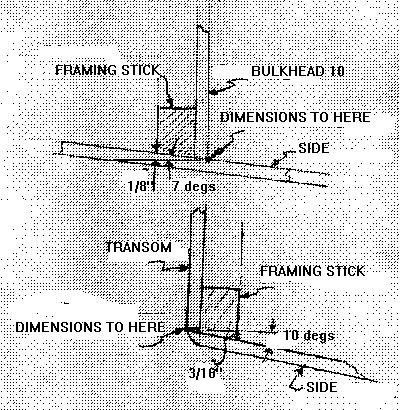
When I figure out the dimensions of the plywood piece that forms the shape of the bulkhead or transom, I take its dimensions off my lines drawing as if the piece had no thickness.
But the real panels do have thickness. So I rig it such that one face of the panel lies on the plane where I took the panel dimensions and mark that face "Dimensions to Here". Now if the side or bottom panels are sweeping in or out from the dimensioned face, then the other face of the bulkhead or transom will need to be smaller or larger than the dimensioned face.
Let's take the case where the adjacent panels are sweeping outward from the dimensioned face. We'll call this one an "outy". The transom bevel on Toto is as outy. The dimensioned face of the Toto transom is on the plane of the end of the boat and the transom's forward face needs to be slightly larger than the dimensioned face to allow for the outward sweep of the side panels, which measures 10 degrees at that point. How much larger? The Toto transom is supposed to be 1/4" plywood with a 3/4" thick framing stick, for a total of 1" thick. So to allow for the 10 degree bevel each side needs to have 1" X tan10 = .176" extra material which is 3/16" to most of us. But when I build one of these outy's myself, I pay no attention to that extra thickness. See the figure below to see how I do it on my own boats.
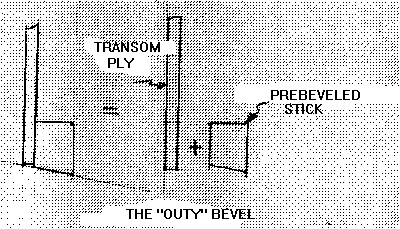
I've found the best tool to cut straight bevels is a table saw. First I cut the side sticks on the table saw to the correct bevel. Then I cut the transom (or bulkhead) panel out of plywood to the dimensions with no bevel, just a square cut. Then I glue and nail the beveled sticks to the plywood piece such that a straight edge along the beveled stick will just kiss the "Dimensions to Here" edge. That's it. I haven't fussed with that "extra material needed" measurement at all. This gives a nice straight edge to the right dimensions and it doesn't really get involved with thicknesses - if you use thicker or thinner wood than specified it will still fit.
"But," you say,"there's a little triangular area on the edge of the plywood that isn't right." True. I fill that with glue when the panel is glued and nailed to the side. That triangle isn't very big. On this 10 degree bevel it would max at .045". No problem. To me the glue there is really a hope of sealing the grain on the edge of the plywood, not a strength issue since a lot of that ply edge will be end grain anyway and about useless for glue strenght.
Now let's talk about the inny. Bulkhead 10 on Toto is an inny. (I suspect the trouble Dale had was that he made this one an outy the first try.) The basic dimensions of bulkhead 10 were taken 10' aft of the bow tip of the boat. That is the actual front face of the bulkhead, the face marked "Dimensions to Here". At that point the sides are sweepin inward 7 degrees as they go aft. This bulkhead is also 1/4" plywood with 3/4" sticks for a total of 1" thick. So the aft face of the bulkhead needs to be 1 X tan7=.12" smaller on each side edge than the front side edges.
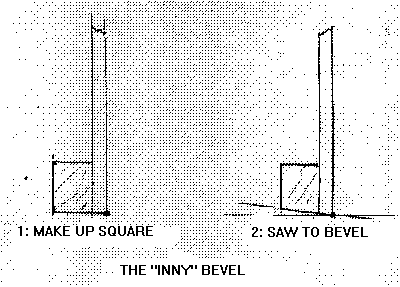
Innys are a little easier to picture. You could make all the edges square to the basic dimensions and then run them through a saw set to the proper bevel to shave off the extra material. I used to do them that way and still do on occasion. The problem I have is that I use a bandsaw for this which doesn't care to cut straight. And a large bulkhead is a beast to run through the saw all at once. You could try a saber saw or circular saw set to the proper bevel if you think you are good enough at it to keep the blade just kissing the edge marked "Dimensions to Here". I' not.
So I've gone to making the inny bulkhead the same way as I make an outy. First I prebevel the framing sticks with a table saw. Then I cut the plywood panel to shape with no bevel, just a square cut. Then I glue and nail the sticks to the sides of the panel. If the bevel is severe I do try to line up the face of the bevel stick with the "Dimensions to Here" edge of the plywood. Then I will have a small triangle of plywood protruding from the beveled face. I can trim that off later. In the case of a small bevel, I don't do that. I just line up the stick with the back edge of the panel. When I assemble it to the sides there will be a little triangle to fill with glue again. And the panel will be slightly wider than what the lines call for. In the case of Toto's bulkhead 10 the error would be .25" X tan7 = .03". Nothing to worry about.
Contents
OliveOyl
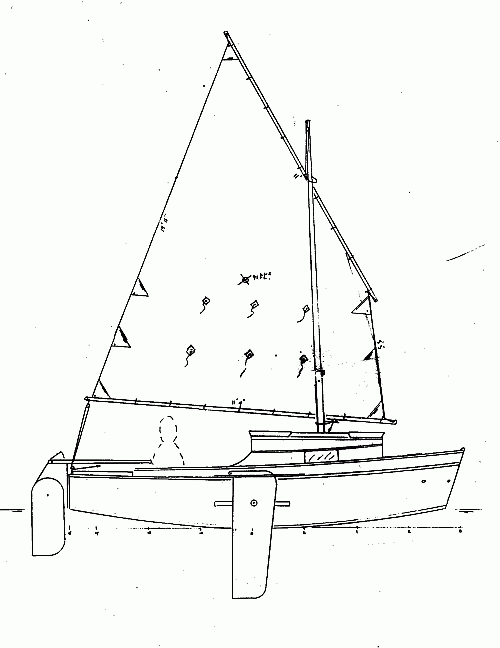
OLIVEOYL, Cabin Sailboat, 15' X 6', 500 pounds empty
OliveOyl was designed for someone who likeD AF3 but wanted more cabin room and comfort, but not more length. So I actually had some AF4breve drawings handy when I drew the lines for the new boat. Although Olive is the same length as AF3 the cabin is deeper and the bottom a foot wider. One thing the owner did not want, which made the larger cabin possible, was a large cockpit. So I've drawn a bridge deck which extends into the cockpit, reducing foot space there, and also just borrowed length from the cockpit and put it in the cabin. So the floor length in the cabin is over 8'long but you will probably sleep with your feet stuck under the bridge deck. I suppose the downside is that the cockpit is less than 5' long so two adults would fill it. I am guessing an empty weight of 500 pounds but it will take 2000 pounds to put its stem in the water so she should take a fair load.
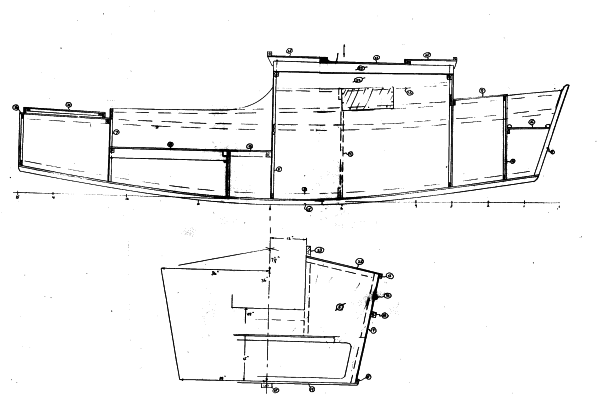
I suppose I've learned a bit since I drew AF3 a while back. One thing I've learned is that when beached a boat like this is much easier to board if the bow is not too high, thus on this boat I've cut down the bow enough so you can sit on it anD swing your legs around right into the cabin entry in the bulkhead, I hope. The owner did not care about that and I don't think she beaches much in her area.
Now, the owner wanted a conventional cabin with sliding hatches so I drew that. And with it went a mast mounted on a tabernacle. I drew the mast off center as I normally do, attaching it to one of the main cabin deck beams. That moves it out of the center of the boat where you will be sleeping. But this boat could be simpler if it had my usual open slot top with a one piece mast. Such a layout would be a lot better I think for a boat which would be sailed off a beach too since it would allow the skipper to hop on the bow after pushing off, and then run upright back to the cockpit. As is he would have to creep down and tHrough the cabin or go over the cabin but I should warn you that, with AF3 at least, standing on the cabin top is an invitation for capsize. After all, these are not large boats.
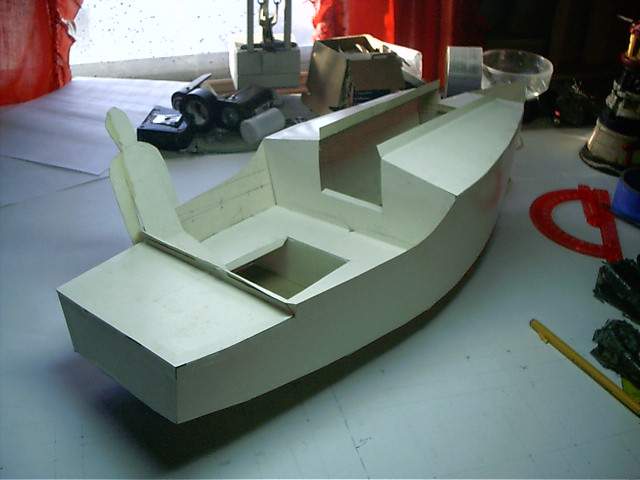
The rig shown is pretty much right out of the AF3 experience, in particular with AF3's balanced lug rig. The spars are short and cheap and the mast short enough that the tabernacle won't be required if the open slot top is used.
But I doubt if OliveOyl would stay with an AF3 in a race. She has the same rig but she is wider, deeper and heavier and bound to be slower. On the other hand she is a much better overnighter since the AF3 has a minimal cabin suited for a backpacker.
In a lot of ways I think OliveOyl is more of a shortened Normsboat and if you don't mind the extra length and the weight and cost that go with the extra length, Normsboat would be I think a lot more boat for the buck.
Conventional nail and glue construction. She needs seven sheets of 1/4" plywood, two sheets of 3/8" ply, and four sheets of 1/2" ply.
Prototype plans for OliveOyl are $35.
Prototype News
Some of you may know that in addition to the one buck catalog which now contains 20 "done" boats, I offer another catalog of 20 unbuilt prototypes. The buck catalog has on its last page a list and brief description of the boats currently in the Catalog of Prototypes. That catalog also contains some articles that I wrote for Messing About In Boats and Boatbuilder magazines. The Catalog of Prototypes costs $3. The both together amount to 50 pages for $4, an offer you may have seen in Woodenboat ads. Payment must be in US funds. The banks here won't accept anything else. (I've got a little stash of foreign currency that I can admire but not spend.) I'm way too small for credit cards.
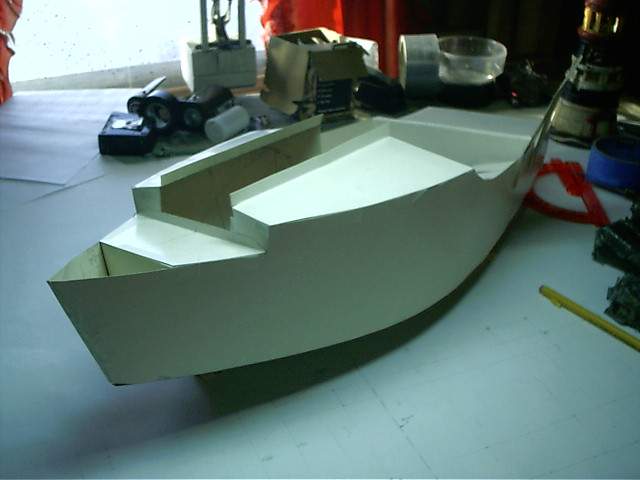
I think David Hahn's Out West Picara is the winner of the Picara race. Shown here on its first sail except there was no wind. Hopefully more later. (Not sure if a polytarp sail is suitable for a boat this heavy.
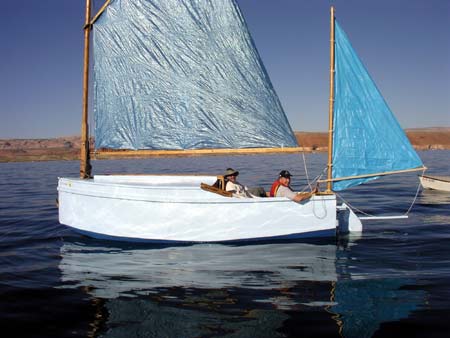
Here is a Musicbox2 out West.
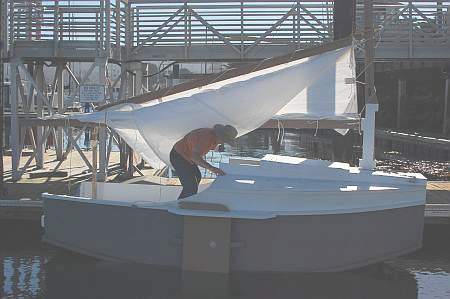
This is Ted Arkey's Jukebox2 down in Sydney. Shown with the "ketchooner" rig, featuring his own polytarp sails, that is shown on the plans. Should have a sailing report soon.
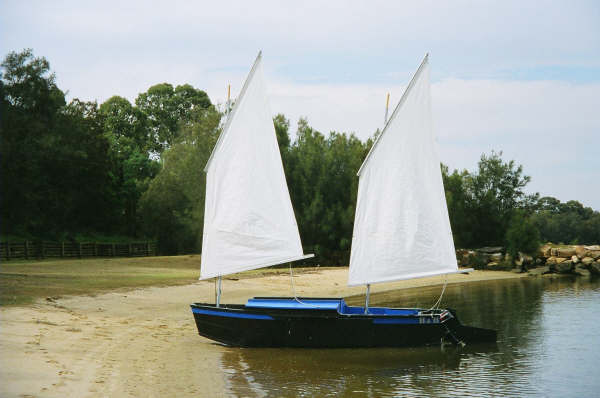
And the Vole in New York is Garth Battista's of www.breakawaybooks.com, printer of my book and Max's old outboard book and many other fine sports books. Beautiful job! Garth is using a small lug rig for sail, not the sharpie sprit sail shown on the plans, so I will continue to carry the design as a prototype boat. But he has used it extensively on his Bahamas trip towed behind his Cormorant. Sort of like having a compact car towed behind an RV.
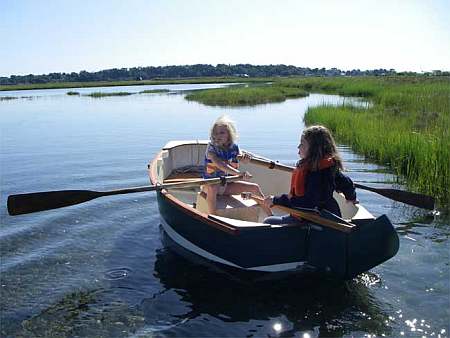
And a Deansbox seen in Texas:
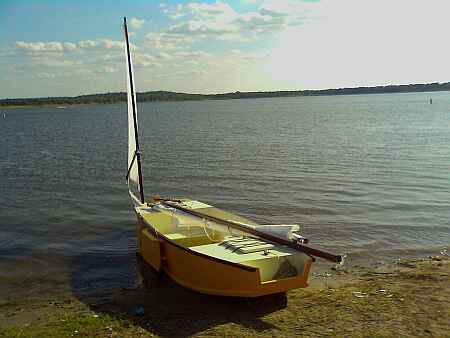
Another prototype Twister is well along:
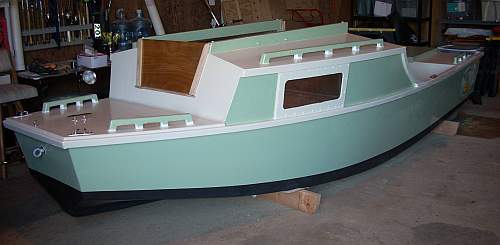
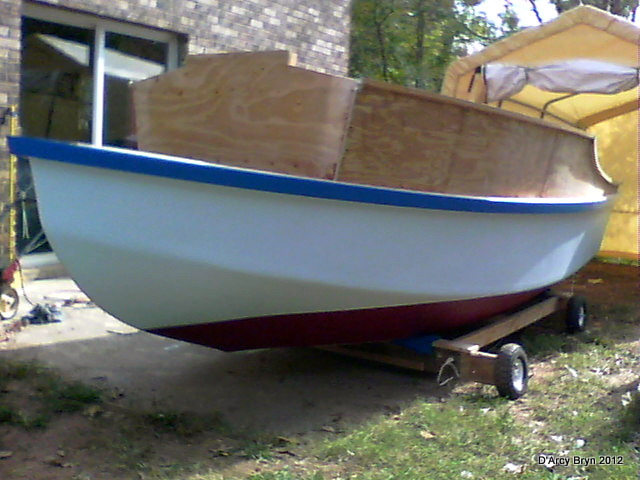
And the first D'arcy Bryn is taped and bottom painted. You can follow the builder's progress at http://moffitt1.wordpress.com/ ....
AN INDEX OF PAST ISSUES
A NOTE ABOUT THE OLD WAY BACK ISSUES (BACK TO 1997!). SOMEONE MORE CAREFUL THAN I HAS SAVED THEM. TRY CLICKING ON...
which should give you a saving of the original Chuck Leinweber archives from 1997 through 2004. They seem to be about 90 percent complete.
Hullforms Download (archived copy)
Brian builds Roar2 (archived copy)
Herb builds AF3 (archived copy)
Herb builds RB42 (archived copy)