Jim Michalak's Boat Designs
1024 Merrill St, Lebanon, IL 62254
A page of boat designs and essays.
(15 March 2022) We make some sink weights for your rudder. The 1 April issue will discuss sailing spars.
ORDER NEWS
THE BOOK IS OUT!
BOATBUILDING FOR BEGINNERS (AND BEYOND)
... is out now, written by me and edited by Garth Battista of Breakaway Books. You might find it at your bookstore. If not check it out at the....
ON LINE CATALOG OF MY PLANS...
...which can now be found at Duckworks Magazine. You order with a shopping cart set up and pay with credit cards or by Paypal.
ALSO...In addition to the Duckworks downloads I also now have access to a large format inkjet printer which is making very nice full sized prints on paper. So I can return to what I started 30 years ago, you order direct from me by snail mail using the address above only with cash or check in US funds with the prices shown on this website, and I mail you full sized 2'x 3' paper prints. The price includes first class mail to US and Canada.
Making Sink Weights
WHY SINK WEIGHTS????....
Tidmarsh Major has been plugging away at the prototype Skat for a while now and sent me some fine photos of his method of pouring the lead sink weights in his centerboard and rudder blade. Why do they need sink weights? They are made of wood and will float up a lot if they are not ballasted to stay down.
Right here I need to say that the pivoting leeboards that I design don't seem to need sink weights. When they are all the way down and snugged up a little bit they usually stay put in ordinary sailing. And when they hit something they pop up maybe 70% and will stay up until you haul them down again. I have designed very few centerboard boats, Skat being one of them and don't consider myself to be expert on ballasting them. My Birdwatcher, the last Bolger design I built before trying my own, has I think about 40 pounds of lead in its centerboard.
But pivoting rudders always need lead weights I'm quite sure. Some will be shown with a large wing nut that you are expected to tighten when afloat. That just doesn't work. Once out on the water in a small boat with the sails already up the last thing you want to have to do is lean over the stern to try to get the rudder down and locked.
And if you think that a clever set of lanyards to pull the rudder up and down will be fine you are quite wrong also. I tried that for a couple of years. Here is what happens. You approach a shallow area or beach with rudder held down by a lanyard that you have cleated to somewhere convenient. Your leeboard starts to bump the bottom and rise on its own. You have one hand on the sail's sheet and another on the tiller. Now you rudder starts to bump the bottom but won't swing upward until you release the lanyard which you can't do in spirited conditions because your hands are already quite full. OK, you take a chance and release the sheet and release the rudder and grab that sheet again. Now your rudder blade swings up and trails behind the boat so now you have no rudder! So eventually I weighted my rudders and they bump along the bottom very nicely and swing full down again as soon as they can. None of you are as persistant as gravity!
MELTING THE LEAD...
This is Tidmarsh's setup.
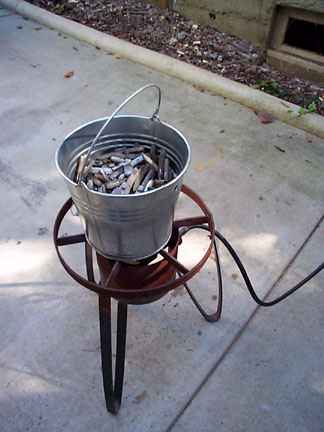
Looks like maybe a plumber's melting stove with a pail of wheel weights on top. I also use wheel weights which I got from my local tire guy. For heat I use the normal campers propane stove. For a pail I use a coffee can with a handle bolted to it. There is a pour hole on mine about half way up the side of the can so I don't have to tip the can all the way to pour the lead and there is little chance of it sloshing over the top by accident. The pour hole is too small to pass the steel clips of the wheel weights (they float nicely on top of the molten lead).
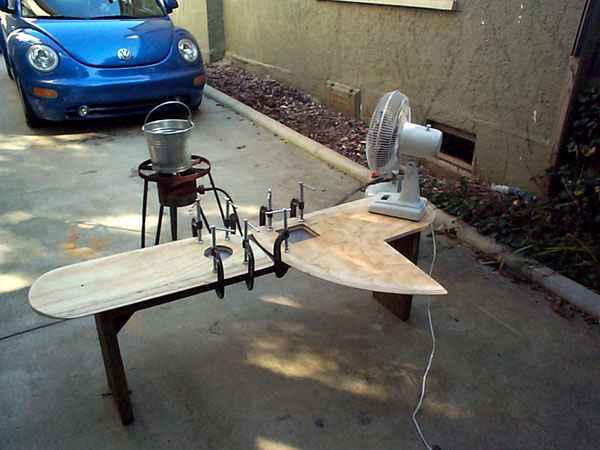
Here is a photo of Tidmarsh's total set up. Lead melting, fan to blow away any fumes, rudder and leeboard near and ready for the pour, and Volkswagen warmed up and ready to go for more wheel weights if needed.
Here is a close up of the holes prepared for the lead pour:
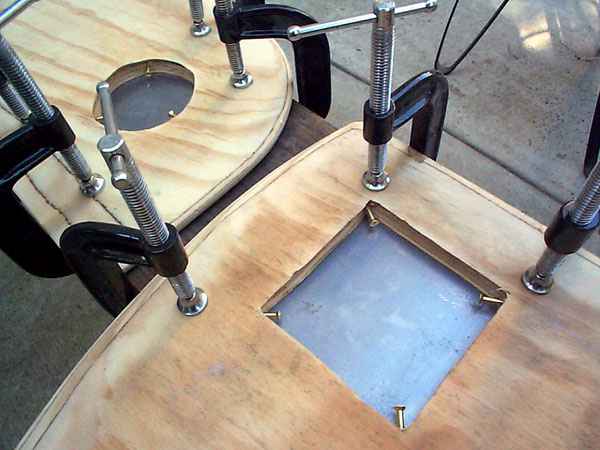
They are clamped to a metal plate the will form the bottom side of the casting form. Note the screws in the corners of the pour holes. The idea is that the lead will flow around the screws and harden, locking the lead solid to the wood. Use nails or screws that won't rust. I might add here that it is also good to bevel the edges of the holes. The lead will flow into the bevels and form flanges that also help to trap the lead.
Now the lead is poured into the holes, slightly overfull to allow for some shrinkage when the lead cools.
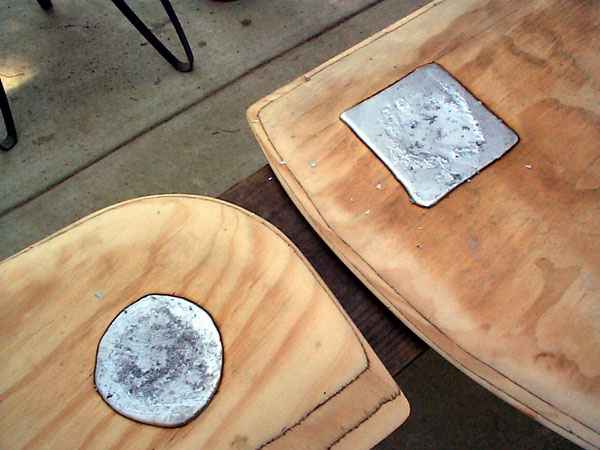
That is about it except sometimes shinkage will cause the lead block to loosen. I found I could put the lead over an anvil and whack it with a hammer. That flattens it a tiny bit but expands it at the perimeter, tightening it in the hole. You might have to trim the lead flush with the wood's surface. Lead likes to clog files and sandpaper so I found a rasp is a good start and something like a 20 grit disk gets it down to where you want it.
Scram PramSCRAM PRAM, SAILING BEACHBOAT, 16' X 6.5', 500 POUNDS EMPTY
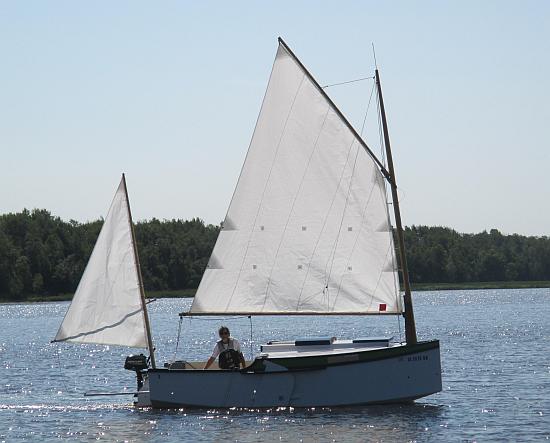
Scram Pram is an interesting boat that I designed for Wil Gordon of Houston a few years ago. He built the prototype shown above, including making that multicolored sail. Wil had owned some production pocket cruisers and had sailed in Karl James' Jewelbox. He wanted a huge rig all in one sail for moving in very light winds. We started the design process by enlarging IMB and it turns out that at least two Scrams have been built while the prototype IMB is still abuilding.

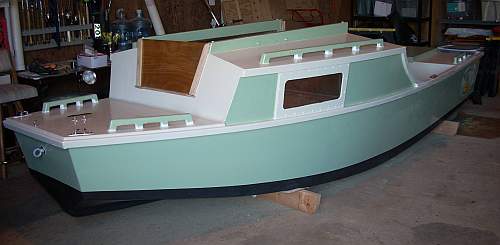
The lines show that Scram has a multichined cross section, like my Piccup Pram, and I've found that makes for a very fast and seaworthy boat. The top is built up like a Birdwatcher. Everyone sits inside, including the skipper. The boat can also be steered by sitting in the open top slot as shown in the photo. The top of the cabin has a slot that runs full length. If you sit to the side you are inside under the deck, but you can stand up in the middle. In bad weather the slot is covered with a snap-on tarp. If you have children this is a good boat type because they will never be on deck. If you use tinted plastic for the windows and a white hull, the boat will be cool in hot weather.
But the main advantage for the Birdwatcher cabin, invented by Phil Bolger, is that the crew sits low and the crew's weight acts as ballast, instead of making a boat top heavy as with a normal cruiser where you sit on a raised deck. Sometimes the effect is so strong that the Birdwatcher boat will be quite self righting with no ballast other than the crew weight. So you can get a nice light simple self righting cruiser. With Scram it didn't quite make it. In tests of the prototype, the boat was just barely self righting with a crew of one against the floor when the boat was rolled over 90 degrees by a rope attached to the masthead. But the design has water ballast tanks on the floor to take 300 pounds of water. With the tanks full the boat is so stable that the test crew had trouble rolling the boat 90 degrees with the mast rope. When released, Scram popped right up. The testing was done by Tim Weber of Houston and was written up in this web site last year. You can access the back issues to review. Tim felt that Scram would be OK with 100 pounds of ballast and that there was little need for more than 200 pounds.

A second Scram was built to prototype plans by UT Roberts of Savannah. His boat is shown above. UT's boat had two significant changes. He reduced sail area to 150 square feet from the original 170+. I made the sail shown in the photo and I feel it is quite enough, especially since the boat has a motor well built in and only 2 or 4 horsepower will push it fine on very light days. Very few people have the patience or time to sail in light flukey winds. Almost any boat this size will end up with a motor which will get used a lot. Then a huge sail rig is not the best thing to have. UT's boat also did not have water ballast. I think he has sand bags lashed below seating benches he has built in, a good option probably if the bags are very low down and very well secured. The idea of bench seating is nice but one must scope out the bench height very carefully to get enough headroom. As is, the water ballast tanks have a foot well. If I were building a Scram, and I would do so if I didn't already have 7 boats in the shed, I would build in the ballast tanks and use the smaller sail.
Scram uses taped seam construction with five sheets of 1/4" plywood, nine sheets of 3/8" plywood, and one sheet of 3/16" dark Plexiglass.
Scram plans are $35.
Prototype News
Some of you may know that in addition to the one buck catalog which now contains 20 "done" boats, I offer another catalog of 20 unbuilt prototypes. The buck catalog has on its last page a list and brief description of the boats currently in the Catalog of Prototypes. That catalog also contains some articles that I wrote for Messing About In Boats and Boatbuilder magazines. The Catalog of Prototypes costs $3. The both together amount to 50 pages for $4, an offer you may have seen in Woodenboat ads. Payment must be in US funds. The banks here won't accept anything else. (I've got a little stash of foreign currency that I can admire but not spend.) I'm way too small for credit cards.
We have a Picara finished by Ken Giles, past Mayfly16 master, and into its trials. The hull was built by Vincent Lavender in Massachusetts. There have been other Picaras finished in the past but I never got a sailing report for them...
And the Vole in New York is Garth Battista's of www.breakawaybooks.com, printer of my book and Max's old outboard book and many other fine sports books. Beautiful job! Garth is using a small lug rig for sail, not the sharpie sprit sail shown on the plans, so I will continue to carry the design as a prototype boat. But he has used it extensively on his Bahamas trip towed behind his Cormorant. Sort of like having a compact car towed behind an RV.
And a Deansbox seen in Texas:
Another prototype Twister is well along:
A brave soul has started a Robbsboat. He has a builder's blog at http://tomsrobbsboat.blogspot.com. (OOPS! He found a mistake in the side bevels of bulkhead5, says 20 degrees but should be 10 degrees.) This boat has been sailed and is being tested. He has found the sail area a bit much for his area and is putting in serious reef points.
AN INDEX OF PAST ISSUES
THE WAY BACK ISSUES RETURN!
MANY THANKS TO CANADIAN READER GAETAN JETTE WHO NOT ONLY SAVED THEM FROM THE 1997 BEGINNING BUT ALSO PUT TOGETHER AN EXCELLENT INDEX PAGE TO SORT THEM OUT....
THE WAY BACK ISSUES
1apr21, Sail Rig Spars, RiverRunner
15apr21, Water Ballast, Mayfly16
1may21, AF3 Capsize, Blobster
15may21, Mast Tabernacles, Laguna
1jun21, Underwater Boards, QT Skiff
15jun21, Capsize Lessons, Mixer
1jul21, Scarfing Lumber, Vireo14
15jul21, Rigging Lugsails, Frolic2
1aug21, What Is Horsepower, Oracle
15aug21, Sharpie Sprit Sails, Cormorant
1sep21, Measuring Prop Thrust, OliveOyl
15sep21, Leeboard Issues, Philsboat
1oct21, Sizing Underwater Boards, Larsboat
15oct21, Choosing A Design, Jonsboat
1nov21, Lugsail Jiffyreef, Mayfly14
15nov21, Sharpie Sprit Reef, Piccup Pram
1dec21, Junk Rig Test, Ladybug
15dec21, Taped Seams , Sportdory
1jan22, Rowboat Setup , Normsboat
15jan22, Sail Area Math , Robote
1feb22, Bulkhead Bevels , Toto
15feb22, Trailering Boats , IMB


