Jim Michalak's Boat Designs
1024 Merrill St, Lebanon, IL 62254
A page of boat designs and essays.
(15 November 2018) We will take a look at Piccup Pram spinoffs. The 1 December issue will look at electric power.
THE BOOK IS OUT!
BOATBUILDING FOR BEGINNERS (AND BEYOND)
is out now, written by me and edited by Garth Battista of Breakaway Books. You might find it at your bookstore. If not check it out at the.... ON LINE CATALOG OF MY PLANS......which can now be found at Duckworks Magazine. You order with a shopping cart set up and pay with credit cards or by Paypal. Then Duckworks sends me an email about the order and then I send the plans right from me to you.
|
| Left:
Another Harmonica, this one is totally solar! By Jason Amundsen. |
|
PICCUP SPINOFFS
PICCUP SQUARED...
Piccup Pram was my first design to get built. Here is a photo of it about ten years ago at Big Lagoon near Pensacola, Florida:
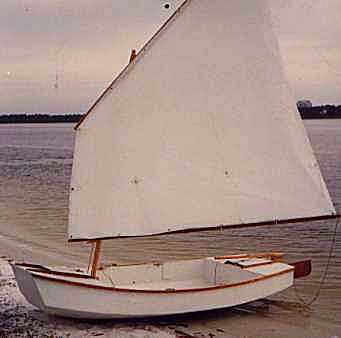
She is shown with the original 55 square foot rig. I still have the boat. The sail rig has been experimented with many times but the hull is identical today as then, except for color. You can see the big bow transom, the sweeping sheer and the multichine section. She's 4' wide and 11' long, wide and short and she sails so well because of those multichines I think. The size was quite right, easy to slide into the back of my pickup truck, which was the original idea behind the boat. And at 90 pounds light enough to cartop on an economy car. In the center is a 6-1/2' long cockpit which will hold two adults and sleep one on its 2' wide flat bottom plank. At each end are buoyancy/storage chambers, about 6 cubic feet each as I recall, plenty to keep a swamped cockpit floating very high although Piccup never capsized on me except on purpose.
After a couple of years with Piccup I got to wondering how much the boat's success was due to the multichines. I dreamed up a flattie version of it, the same overall length and layout, but with a 3' wide bottom plank with hard chines in lieu of the multichines. I called it Piccup Squared. Here are the lines:
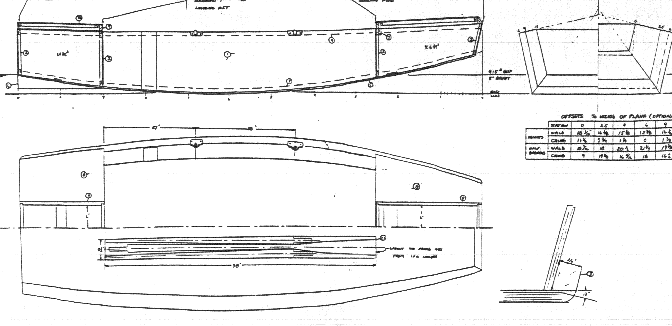
I gave the boat a small amount of flare which allowed a good spread of the oar locks while maintaining the 3' bottom width. I thought the 3' bottom width was about the most I could use and expect any sort of handling in rough water. It was the bottom width of my old Bolger Teal and I was familiar with it. Also in the best Bolger theory I gave the sides and bottom the same curvature, a feature which is supposed to provide the least turbulence at the hard chine. I swept the bow well up to clear waves, but the stern was kept a bit low such that the transom would just meet the waterline with two adults. That feature also resulted in a fairly wide stern. The extra stern volume was supposed to give the boat a chance at using a motor.
I built the boat in my usual cheap way. I used lauan underlayment for the sides and fir exterior plywood for the bottom. It was a nail and glue job all the way with lumberyard stuff with external chine logs as you might notice in the line drawings. I had a bunch of old paint around and dressed it up in a camouflage paint scheme, a feature I copied in later boats. (The funny thing about the camo paint job is that sportsmen like fishermen and duck hunters took to the boat immediately even though I was sailing it, unlike a white boat which is apparently a yacht paint scheme.) I found that the boat blended in with surroundings much better as I went beachcombing or bushwacking or shore camping. And from a practical standpoint it's the easiest sort of paint scheme to apply and touch up since nothing is supposed to match or be smooth and shiney. I varnished the interior with no sanding between coats so the interior has a dull natural wood finish. No slipping on the bottom and doesn't show dirt or mud. Since it is best left rough for footing, refinishing the inside bottom is a breeze - just sweep out the big chunks and add another coat or two of varnish. I'll add that varnishing a natural wood boat all over might be the very best camouflage scheme.)
By the time I'd built Piccup Squared I was already thinking Piccup could stand more sail area and Piccup Squared quickly became a test bed. My first polytarp sail was tried on it as shown below. This sail has 74 square feet of area and is to the Woobo sail plan. This sail was made exactly as a Dacron sail would be made. I cut the tarp into 3' wide strips and sewed it up with normal broadseams.
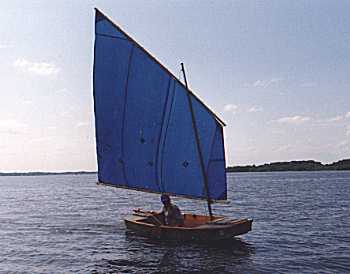
Looking at this great photo reminds me of how it came to pass. Karl James had called me saying he was thinking about making my Jewelbox design but was unsure about the lug sail rig. He was returning to Texas from Woodenboat School and stopped by Rend Lake for a sail in Piccup Squared with a lug rig. That's Karl at the helm. Karl went on to build the Jewelbox and went on to many adventures with it. (Jewelbox has a new owner now in Florida somewhere. Karl replaced it with his own design, sort of a blend of Bolger's Black Skimmer and Martha Jane but he's stuck with the balanced lug rig.)
In the photo you can see the wind is quite light but the boat is moving well under that big sail. She is heeled a bit and Piccup Squared is in her element. Under these conditions she is probably as fast and as good as the original Piccup. Many folks would think she is more comfortable because of her wider bottom. The heeling is pretty important to a flattie and I think the trick to sailing one is to keep the heel just right with the windward chine barely out of the water. In really light winds you might sit on the "wrong" side of the boat to keep that chine out. Piccup is different - sail it flat whenever you can. In high winds you need to tend the sail so the heel is just right. I never capsized Piccup Squared except on purpose. The sides were low enough that I'm pretty sure she will take water over the side before capsizing, unlike higher sided flatties, and I feel that is a good feature in that you get a small wet warning instead of a big wet surprize. The original Piccup really is better in rough water but you would expect that.
Here was another test sail on Piccup Squared. Jim Huxford was at the helm here. The green sail was my second polytarp sail. This one was made in one piece though, no cutting the tarp in strips and sewing it back together. "Darts" were sewn in four places where a Dacron sail would have variable seam widths. This sail was also the first 68 square footer, the sail I advise everyone to use on the Piccup family. The yard and boom are the same length as with the original 55 square footer, but the hoist is 2' taller. When reefed this sail returns to 55 square feet.
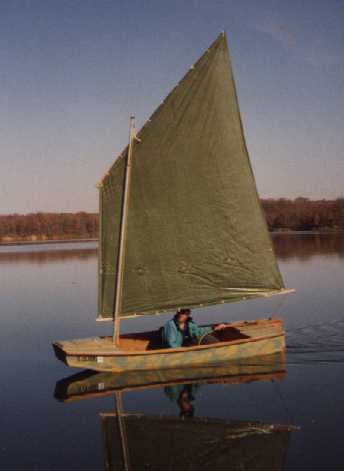
Looking back at this photo I'm reminded of the troubles I had with stretching of the luff. A balanced lug sail will set closer to the wind if there is a lot of tension in the halyard, as will almost any sail. But the stretchy polytarp had trouble in the highly stressed luff. It didn't tear, but it would stretch a lot of the draft out of the front of the sail. The result was the front of the sail was very flat and the draft was mostly in the aft half of the sail - not the ideal. This sail luff was later stiffened with a couple of fiberglass tapes which helped a lot.
TWIXT...
After a couple more years I wondered if Piccup Squared could be improved with a V entry in her bow. By this time I had a season or two with WeeVee and knew it sliced and hopped over waves instead of pounding over them. But the deep V middle was very uncomfortable especially while sailing, and she was too tippy for the general public. Could I combine the deep V entry with Piccup Squared's flat bottom? By this time I had figured out how to do twisted panel expansions, too.
Here is what I had in mind, shown here as the lines of the 8' dink Tween.
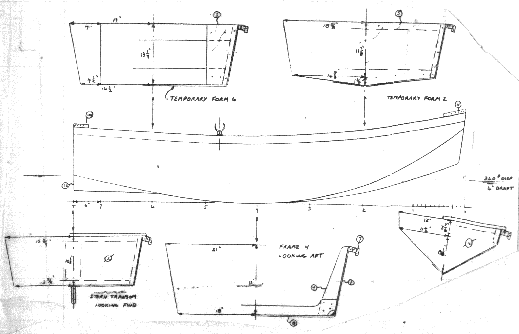
To make a bottom like this the idea is to slit a single panel up in the bow and twist the two sides into position and tape over the slit. The aft part of the boat is one piece flat bottom. This sort of construction is something I had seen in my youth, and I kept all those old magazines like Science And Mechanics which had a boat article in every issue. William Jackson, another midwesterner, was the creator of many of them.
Rather than build a new hull to test the idea I chopped the forward bottom off Piccup Squared and converted it to Twixt. Here is Twixt on shore. You can make out the point of the deep V bow and see she still sits very upright on her flat middle.
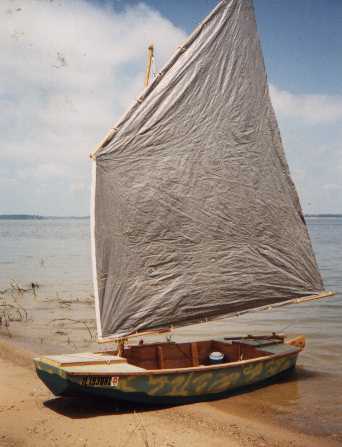
The constrution of the mod was a bit interesting - taped seams for the first 5' or so and external chine logs for the rest. But it worked.
How did she go?? It was a success to me. Not as smooth as Piccup but smoother than Piccup Squared. She was indeed twixt! One thing I remember about sailing the rebuild was that at speed the bow shot water out to the side where the original Piccup Squared always went up and over the water.
That Twixt photo also shows another episode in polytarp sail evolution. This one had the fiberglass tape on the luff as you see. But it also had darts on the luff to simulate a crosscut sail where my previous ones were seamed to simulate a vertical cut sail. The idea was to increase the draft towards the front of the sail. It was quite a success and you can see that this sail has a lot more draft than the green one. This grey sail was about as good as anything I have tried or could expect from my own sailmaking. It had one problem - I didn't keep track of what I had done and had no idea how to reproduce it much less describe it to someone else. I kept it until I came up with the radial dart system I use now and which I've described in detail on this web site. The new method is just as good and I know how to change the pattern shape to get just the results I want. Also in the photo I notice that I had learned that these sails go better if the yard crosses the mast about 40% aft from the throat.
TESTS WITH MOTORS...
You might remember that the stern lines of these boats were kept full with the idea of maybe using a motor. Piccup Squared was tried with a small Minnkota and Twixt was tried with an old Sears 7.5.
The Minnkota clamped straight to the stern locker opening. These motors are actually meant to be clamped to the side of a hull and have a lock to keep them in position. When clamped to the stern I found I could get the motor to swing up if it hit anything by holding the locking pin down with a wire. Normal thrust kept it down otherwise.
Even with the wide and deep lines aft, these little boats can't take a lot of weight in the stern. The motor weight is probably acceptable, but the weight of the battery makes it worse, and the weight of the skipper back there makes it impossible. I warn folks several times a week about this but I still see motor plates on fine sterned rowing boats. That doesn't bother me like it used to since I've positioned myself to get an "I told you so!" and since I'm pretty sure no one will try a motor like that more than once.
But the electric conversion was eventually quite a success. Here is what I did:
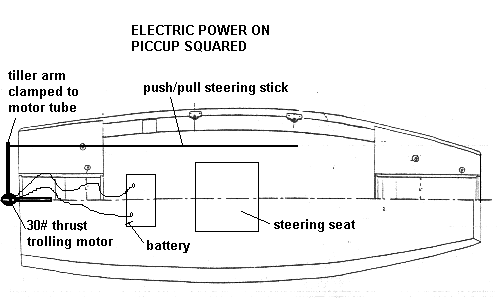
The motor was not modified except to disable the locking pin and to clamp a wooden tiller arm to the shaft. The tiller stick was an old cane pole with twist together ferrules (a "found' cane pole, the best kind). The connection of tiller arm to tiller stick had to be a universal joint of sorts. I loosely lashed the two together and wrapped it over with some light shock cord, the stuff used to lash tent poles together. The tiller stick ran forward into the cockpit and I could steer the boat from anywhere up there. I sat facing forward in the center of the boat. The battery was right behind me, so the major weights of the system, me and the battery, were in the middle of the boat and she trimmed level. I was unable to reach the motor speed controls easily but that was not a problem. I set the speed handle to something appropriate and ran the cables with clamp ends forward to the battery which was right behind the seat. I could reach back and connect them easily when ready to go. To maneuver at slower speeds near a dock or obstacle I simply pulsed the motor by connecting/disconnecting one of the battery leads.
It worked very very well and I would suggest this method for any small boat that was not designed to really use a motor, that is for a boat without a deep wide square stern. She would go a bit faster than rowing speed under full control. I thought once she would go faster with more pitch to the prop since these trolling motors are intended to hold a heavy boat nearly still in a wind, and not to push a light boat quickly. I bought another plastic prop and found that by heating it in the toaster oven when my wife was not around I could reset the pitch of the blades. I tried it once but I gave up on it when I realized that I was only resetting the tip pitch.
One eye opener with the electric set up was that you need a very large battery to really go anywhere. Don't bother with a small car sized battery. You need a real trolling battery and they will weigh 70 pounds or more. (I know you are going to try a car battery but I've just positioned myself for another "I told you so!") A 10 horse Johnson weighs less than a trolling motor battery. And a pound of gasoline has 30 times the energy as a pound of storage battery.
Twixt with the gas motor was never really a success. There was no way to keep the weight towards the middle of the boat although Idid use a short tiller extension made of PVC pipe. I recall making only one full speed run carefully under totally calm condions, my weight as far forward as possible and everything loose in the boat stuffed up in the front of the bow locker. Boy did that bow point to the sky when I opened it up! I could hardly see over the bow even though it was only 7' in front of me! My records show it went about 9 knots at full throttle, consistant with about 5 hp, which is believable for a 25 year old air cooled motor that has "7.5" stamped on it. It might work with maybe 2 hp and be useful and sane. I think it would go 6 mph or so, a lot faster than while sailing or rowing. Better yet is to build a Jon Jr. which is the same size and style but with a flat run aft.
LAST THOUGHTS...
I don't know if the experiments proved anything that wasn't already known. The more complex Piccup was better all around but the simpler Piccup Squared was about as good with smooth water. And Twixt was 'twixt.
I used the Twixt shape in a couple of other designs that were built. The little dink Tween was a success, the builder saying it easily cut the motorboat chop at his lake. And the shape found its way into the 24' Petesboat. Pete James told me the V entry was a wasted effort on the bigger boat which is a planing motorsailer and spends a lot of its time with that V entry totally out of the water while planing. So I'm left with the idea that the V entry is more and more important as the boat gets smaller and smaller!
Piccup Pram
PICCUP PRAM, SAIL/ROW PRAM, 11' X 4.5', 90 POUNDS EMPTY
Piccup Pram was the first boat of my design to get built, back in 1990, I think. I still have the prototype and use it regularly. I designed it to be the best sail/row boat I could put in the back of my short bed pick up truck. But I found it to be a good cartopper, too. It has capacity and abilities I had previously thought impossible in a 90 pound cartopper. The photo above shows the original 55 square foot sail on Pensacola bay a long time ago. Piccup is a taped seam multichine hull which can take a fair amount of rough water.
Piccup continues to be one of my most popular designs and I get nice photos from builders. Here is one of Richard Donovan hoping for more wind up in Massachusetts.
Richard's Piccup has the larger 70 square foot sail that prefer myself. It's the same as the original but is 2' taller. This balanced lug sail sets on a 12' mast and rolls up easily for storage on its 9' yard and boom. The idea was to be able to store the rig easily in the boat during rowing and it works. There is a pivoting leeboard and kickup rudder on the boat and they can be left in place raised while rowing. Converting to full sail takes a couple of minutes as you step the short mast, clip on the halyard and tack lines, hoist the sail, lower the boards, and off you go. And the balanced lug sail reefs very well although reefing any small boat is best done on shore.
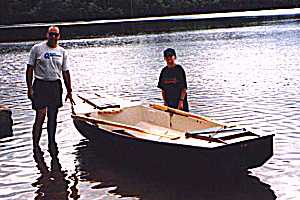
Here is a Piccup by Vince Mansolillo in Rhode Island, a nice father/son project. Piccup will be large enough to hold both of them. You can see the large open frameless cockpit, large enough for sleeping. And you see the buoyancy/storage boxes on the end.
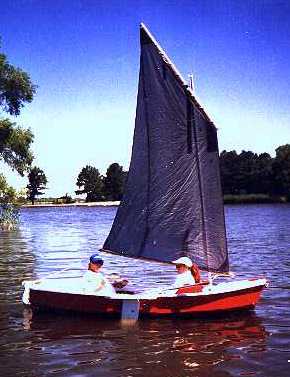
But Piccup will take two adults as seen in the photo of Jim Hudson's boat. Jim's boat has a polytarp sail as does my own Piccup.
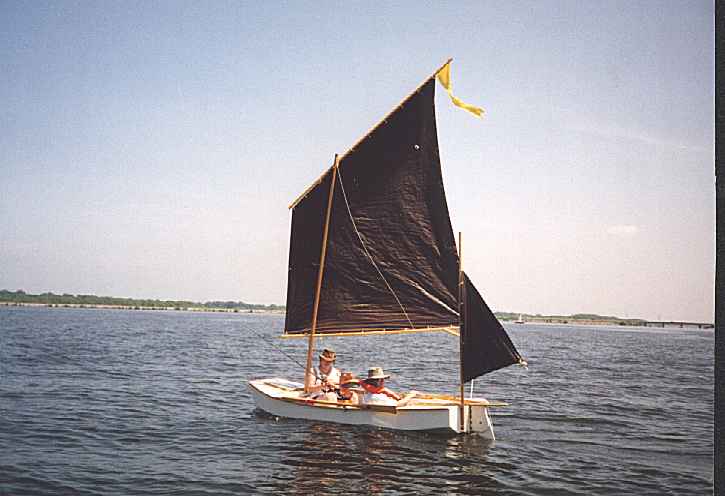
These boats have proven to be good for sail rig tinkerers (be sure to read and apply the Sail Area Math essay before starting). Here I am in Piccup with a polytarp sharpie sprit sail. The rig is different from the originals but the hull here is totally unchanged (except for paint) from the original shown on the beach at Pensacola.
I think my own Piccup has had about six rigs of different sorts and was always the test bed for the polytarp sail experiments. But, hey!, that's nothing compared to the tinkering the late and great Reed Smith did with his out in California. Here is his Piccup rigged as a sharpie sprit yawl!
Here is Rob Rhode-Szudy's yawl rig Piccup that was featured in his essays about building Piccup that you can access through the old issue links.
Here is another by Doug Bell:
This one is by Jim Islip:
And this one by Ty Homer:
Piccup Pram uses taped seam construction from five sheets of 1/4" plywood.
Plans for Piccup are still $20.
Prototype News
Some of you may know that in addition to the one buck catalog which now contains 20 "done" boats, I offer another catalog of 20 unbuilt prototypes. The buck catalog has on its last page a list and brief description of the boats currently in the Catalog of Prototypes. That catalog also contains some articles that I wrote for Messing About In Boats and Boatbuilder magazines. The Catalog of Prototypes costs $3. The both together amount to 50 pages for $4, an offer you may have seen in Woodenboat ads. Payment must be in US funds. The banks here won't accept anything else. (I've got a little stash of foreign currency that I can admire but not spend.) I'm way too small for credit cards.
We have a Picara finished by Ken Giles, past Mayfly16 master, and into its trials. The hull was built by Vincent Lavender in Massachusetts. There have been other Picaras finished in the past but I never got a sailing report for them...
And the Vole in New York is Garth Battista's of www.breakawaybooks.com, printer of my book and Max's old outboard book and many other fine sports books. Beautiful job! Garth is using a small lug rig for sail, not the sharpie sprit sail shown on the plans, so I will continue to carry the design as a prototype boat. But he has used it extensively on his Bahamas trip towed behind his Cormorant. Sort of like having a compact car towed behind an RV.
And a Deansbox seen in Texas:
Another prototype Twister is well along:
A brave soul has started a Robbsboat. He has a builder's blog at http://tomsrobbsboat.blogspot.com. (OOPS! He found a mistake in the side bevels of bulkhead5, says 20 degrees but should be 10 degrees.) This boat has been sailed and is being tested. He has found the sail area a bit much for his area and is putting in serious reef points.
AN INDEX OF PAST ISSUES
THE WAY BACK ISSUES RETURN!
MANY THANKS TO CANADIAN READER GAETAN JETTE WHO NOT ONLY SAVED THEM FROM THE 1997 BEGINNING BUT ALSO PUT TOGETHER AN EXCELLENT INDEX PAGE TO SORT THEM OUT....
THE WAY BACK ISSUES
1dec17, Sail Area Math, Ladybug
15dec17, Cartopping, Sportdory
1jan18, Trailering, Normsboat
15jan18, AF3 Capsize Test, Robote
1feb18, Bulkhead Bevels, Toto
15feb18, Sail Rig Spars, IMB
1mar18, Sail Rig Trim 1, AF4Breve
15mar18, Sail Rig Trim 2, Harmonica
1apr18, Two Totos, River Runner
15apr18, Capsize Lessons, Mayfly16
1may18, Scarfing Lumber, Blobster
15may18, Rigging Sharpie Sprit Sails, Laguna
1jun18, Rigging Lug Sails, QT Skiff
15jun18, RendLake 2018, Mixer
1jul18, Horse Power, Vireo14
15jul18, Motors per the Coast Guard, Vamp
1aug18, Propeller Pitch, Oracle
15aug18, Propeller Slip, Cormorant
1sep18, Measuring Prop Thrust, OliveOyl
15sep18, Taped Seams, Philsboat
1oct18, Plywood Butt Joints, Larsboat
Table of Contents
