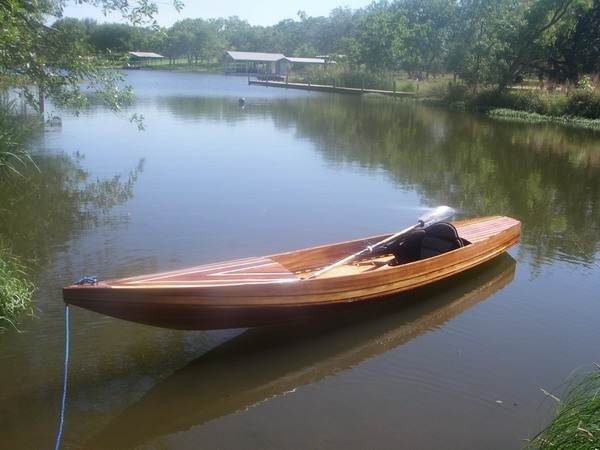
CARTOPPING BOATS...
This essay, written back when this website was invented, is dated in areas. In particular you can't buy a car with real rain gutters anymore and even the cars I suggested that were fairly new then are now probably melted down and remelted several times over. But, here it goes.....
If you've got a light boat, cartopping can be a great way to move it around. Your boat
is up and out of the way - almost a portable car port. Compared to trailering, cartopping
allows more normal maneuvering and parking and freedom from fees and maintenance. I
wouldn't consider going on a car vacation without a good rowboat or canoe strapped to the
car's roof. The only things carried in the car's trunk are the cushions, PFDs and row
locks. The convenience of it all struck home one time when we were leaving for a
non-boating weekend. "Where's the boat?" my wife asked. It turns out it's a lot
easier to find the car in a shopping mall parking lot with a boat atop!
...THE CAR...
I grew up in a time when everyone drove Detroit iron. Even family sedans had chassis
and drive trains roughly equal to today's half ton trucks. You could stand on the roof,
hood, and trunk without buckling anything. Rain gutters and bumpers were bull stout.
Those days are gone forever and it is probably just as well. Those cars got 10 miles to
the gallon of gas, wore out a set of tires in 10,000 miles and went to the junk yard
before 100,000 miles. New cars weight half as much, get 40 miles to the gallon, and
100,000 miles to a set of tires. But, HEY!, Mr. Designer, what happened to our rain
gutters and bumpers.
I'm not certain if any late cars have gutters and bumpers designed for moving boats.
Even some new pickups lack them. But there are still lots of suitable good cheap used cars
on the market. Ford Escorts up to 1988 had good bumpers and gutters as did all the
Plymouth Horizons and Dodge Omnis and I think they made a billion of them. With their
short trunks and good gas mileage, these are good cartoppers. If you insist on gold plate,
I've noted that some BMW's and Volvo's have excellent gutters. Bolger once suggested that
a low flat car like a Lamborghini is ideal (although I noticed he was driving an Escort
with roof bars). Also, the man who designed the Yugo was probably much more a boater than
a driver, giving it fine bumpers and gutters and not much else.
A very short trunk or a station wagon will make loading easier, too.
...THE BOAT...
You should be able to load your boat easily by yourself. If you can't you should get a
trailer. As for weight, a hundred pound hull is the heaviest I care to load. Lighter is
better but to tell you the truth, a seventy pounder is about as easy to load as a fifty
pounder. So building an ultralight hull to the point of degrading strength or increasing
costs can be a marginal decision in my mind.
As far as length goes, it is nice if she doesn't overhang the car's ends very much. The
long ones are actually easier to get up to the rooftop but must have their ends tied to
the bumpers to be secure. That takes a little time, but, worse yet, many cars don't have
suitable bumpers. I think the day has arrived when we'll drill holes in the fenders of our
cars to install eyebolts to secure our boats.
But I've found that hulls under about twelve feet long will stay put without bumper
lines as will some long slender canoes and kayaks. The short ones are much less affected
by wind and turbulence.
As for shape, a springy sheerline is not good for cartopping. Inverted on your roof,
the boat's ends will droop down in your view. It's also harder to see when you're loading
the hull on the rack. Lift the stern to see what you are doing and the bow dents your
roof. It's happened to me.
If you've got a springy sheer and a double ended hull, as in most canoes, you've got
troubles. She will have no natural stability inverted. That's great on the water, but
having her self right when you've got her halfway to the cartop is a guaranteed dent. My
first homemade boat, a Teal skiff, had this problem. Eventually I bored large holes in the
stern just under the wales and, after inverting the hull on the ground in preparation for
the lift to the roof, passed a stick through the holes. That kept her from getting self
righteous while loading. I called it my "flippin' stick" although "anti
flippin' stick" would have been better.
Later I built a Bolger dory whose tiny transom was only about 10" wide on top.
That's all it took to stabilize her when inverted and I didn't need my flippin' stick.
I've learned my lesson and haven't designed any double enders for cartopping.
As for aerodynamics, I've cartopped big dories to little prams and I think they've all
degraded the car's performance about the same. Gas mileage on my Escort dropped from the
high thirties to the low thirties no matter what was up there. So I'm doubtful about some
promised hull or setup having shockingly improved aerodynamics for your cartop. But it
could happen.
As for boat details, it's best if there are no lumpy or bumpy things on the wales to
interfere with sliding the inverted hull onto the racks. Also on an open rowboat or canoe,
6" cleats mounted inside on the stem and stern will make tying to the bumpers very
quick, tight, strong and easy
.
...THE RACKS...
The roof-to-rack brackets I prefer were purchased years ago at a canoe shop and it says
on them "Quick 'n' Easy Industries, Monrovia, Ca". They are bullet proof and
attach with clever and foolproof over-center lever latches with no tools. Both racks go on
in about a minute.
(I think the Quick 'n' Easy brackets shown are too beefy to fit in the gutter slots of
many cars. If you need to, visit a yuppie bike shop for roof racks for gutterless cars.
They've got new tech gear but keep in mind they're putting a 20 pound carbon fiber bike on
a Porche. I think they are made by Yakima. Perhaps we'll see the return of suction cup racks. Perhaps we'll be drilling
holes in our roof and installing permanent pads with sealant and strong blind rivets. Why
not? Try it on your clunker first and tell me how it works.
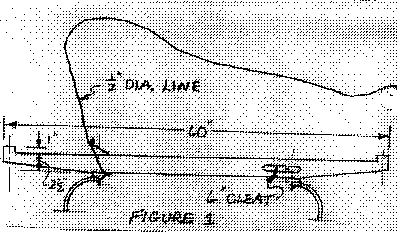
My cross bars, shown in Figure 1, are from 2x4's although fancy pipe bars are
available. Make your bars a foot wider than the boat so you can strap oars and sail rigs
up there too. Add blocks to the top ends of your cross bars so your hull won't accidently
slip over the ends while loading.
My tie downs are 1/2" lines. You want big stuff here that won't stretch and make
them plenty long, too. One end is secured with a loose bowline around the interior section
of the cross bar. The free end goes over the boat, under the cross bar and belays on a
sturdy 6" cleat which is well fastened to the bar. You can secure the rope very
tightly and quickly. My system has no redundancy. If any line or cleat comes loose, the
boat comes loose. So everything needs to be solid and secure. The benefit is that there is
a minimum of things to attend to.
...THE LOADING...
With the major elements in place it's time to load up. Practice helps a lot. First
place the inverted boat next to the hull as in Figure 2, position A. (If it worries you
that all this flipping and dragging will scratch your boat, most likely you are correct
and will be better off with a well padded trailer.) From position A lift the bow ans swing
it up to the aft cross bar and rest it in position B. Now lift the stern and push it
forward to position C. After a few times you'll get a good feel for where each position is
in relation to your car.

Experience will show how far forward the boat should be and you might experiment. I
prefer the boat shifted slightly aft of center. Also I find shifting the boat to the right
side of the rack reduces buffeting from passing trucks. Don't go to an extreme though,
because it's best if the ties pull mostly straight down.
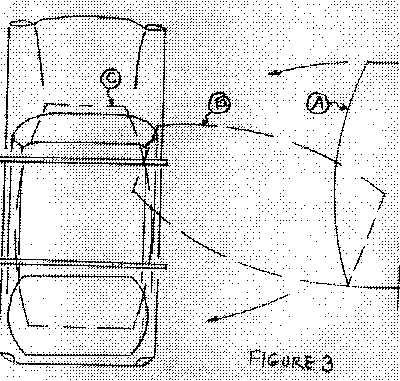
If your boat is too short (or your car too long) to bridge the span from ground to rack
in position B, then try the alternate method shown in Figure 3. I use this for short
dinghies. Be very careful she doesn't fall off the front crossbar as you swing the stern
around.
The hard work is done. You shouldn't have lifted more than 50 pounds at one time.
Securing the boat starts with tying on a 1/4" line to keep her from shifting fore
and aft on the rack. I cartopped for years without this line, relying on friction alone to
the job. But when friction gives out things get exciting. Once, while exiting the
interstate in Birmingham, Alabama, at night, my dory slid forward on the rack a foot or
more and every line up there went slack. Luckily I was coming to a stop anyway and retied
the boat. But when that happens while you are being passed by a convoy of semis in a
crosswind, you'll get some new grey hairs. The fore and aft line cures that problem
completely. I usually tie it through an oar socket but it could also be permanently
attached about anywhere in the center of the boat. Pull tight on one end and belay on the
cleat on the front crossbar. Pull the other end tight to the aft bar and cleat there. Now
your boat is secure fore and aft.
Pass the large 1/2" lines over the hull, pull tight, and belay to the cleats right
over the fore and aft line. Now she can't go up, down, or sideways either. For a boat
about 12 feet long or less this is all you need. Skinny low canoes a bit longer than that
will be OK too.
The whole process from flipping the boat to drive away takes less than five minutes.
If you have a longer boat you should really secure the ends, at least the bow, to the
bumpers to keep it pulled down and centered. The best way is to have 6" cleats
screwed to the bow and stern with long lines tied permanently to them. Pass each line
around a bumper support on one side and pull tight, then around the other support, back to
the cleat on the boat, pull tight and belay. The line forms a triangle from bow to bumper
corners and back to the bow. She can't go up or sideways.
Oars and sailing spars can go up there too, secured instantly with bungee cords.
Here's a major suggestion: Once you've mastered the solo loading process, don't accept
help no matter how well intentioned. You may get some new roof dents or, worse yet, be
distracted from some important tiedowns. Your "help" needs to be well educated
in your system first.
...THE DRIVE...
The beauty of cartopping is that now you can drive around as you normally would. Well,
almost. I should warn you about two things.
First is high winds. Once I drove the beautiful hills of Western Kentucky on a
sparkling autumn day with my 16 foot dory atop a 1.6 liter car, pushing straight into a 30
mph wind. Full throttle gave me about 55 mph on the flat, of which there ain't none in
Western Kentucky. Driving straight into high winds is primarily an inconvenience but high
crosswinds can be dangerous. I almost lost that dory, and maybe the car, over the side of
the Pensacola Bay Bridge in a crosswind. High crosswinds can always make for spooky
handling, especially when the boat on the roof is almost as big as the car.
The second warning involves turbulence near large trucks. Car transporters seem the
worst. Never stay in the turbulence near a truck on the highway. Your boat will start
dancing around on the rack and add jerking loads to your rack. Either pass that truck or
drop back clear of his wake.
If a truck approaches you at speed in the opposite lane of a two lane road, get as far
to the right as possible. His bow wave will pass quickly but can give you a good jolt. The
wave seems to attenuate rapidly with distance and a few extra feet of spacing on him will
make a difference. That's why I suggest loading a hull on the right hand side of the rack.
The combination of the truck wake in a crosswind is the worst case.
.
Contents
Family Skiff
FAMILY SKIFF, SAILBOAT, 15' X 5.5', 350 POUNDS EMPTY
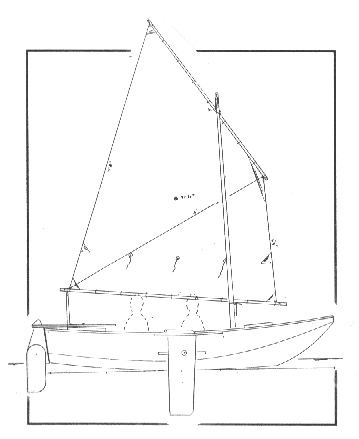
The Family Skiff is large enough to swallow up three men or maybe a family with two kids. She has two benches that are 7' long and there should be plenty of room for all. I would say her fully loaded maximum weight might be 900 pounds and her empty weight about 350 pounds, leaving about 550 pounds for captain and crew and gear.
At the same time the Family Skiff can easily be handled solo, although with just the weight of the skipper she will not be a stable as when heavily loaded. The boat also has two large chambers for buoyancy/storage and I can see her used as a solo beach cruiser because the benches and the floor space are large enough for a sleep spot. This shape of hull has proven to be both fast and able in rough water, a lot better than a similar flattie. I've made her deep, too, with lots of freeboard.
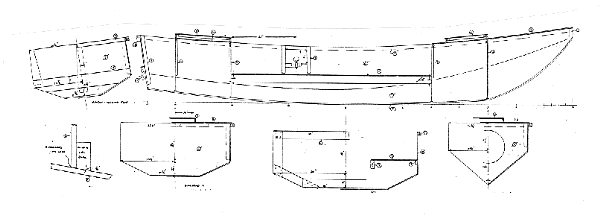
The balanced lug rig sets on short spars and sails very well reefed, in fact can be set up with jiffy reefing. The spars are all short and easily made and stowed, the mast being but 14.5' long and setting 97 square feet of sail. In addition there are oar ports for those with lots of time and little money and a motor well for those with lots of money and little time. Two horsepower is all that a boat like this can absorb without going crazy. The motor well is actually an open self draining well that uses the full width and depth of the stern. It will come in handy for storing the wet and muddy things you don't want inside the boat, like anchors and boots. I've suggested in the plans that the rudder can be offset to one side a bit to give more room for the motor. both Petesboat and Frolic2 have used an offset rudder with no harm other than perhaps needing a curved tiller to make it more comfortable. In the case of Petesboat the 60hp motor was on centerline and the rudder way over yonder to one side with linkage to a centerline tiller. Pete said the large rudder offset had no effect on steering.
Paul Ellifrit built the prototype in Missouri in a matter of a few weeks as I recall, including this model first:
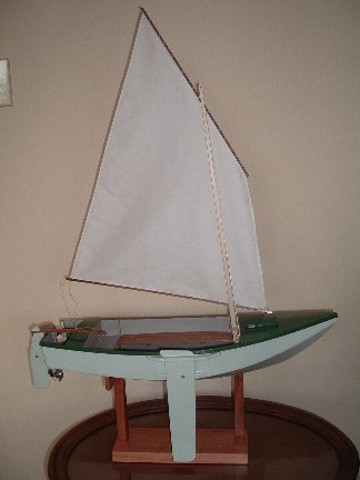
Then construction went quickly in spite of cold epoxy weather:

... and his own polytarp sail. He brought it to the Rend Lake Messabout:
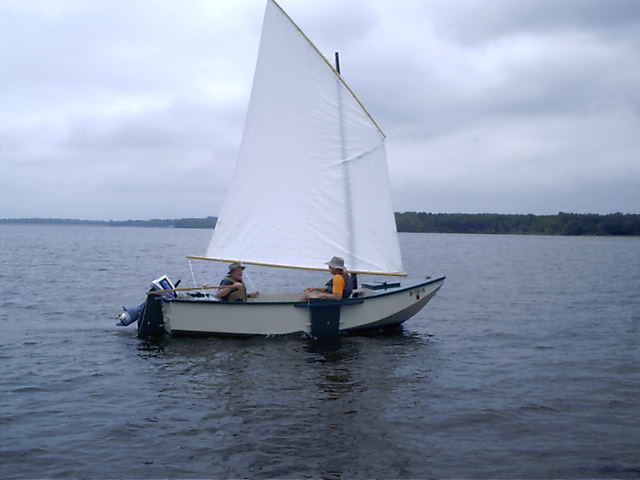
We agreed there that I should have drawn the mast taller but she was otherwise right on. We had no strong wind that weekend so we don't know yet how she would handle that but this shape hull is about the best I can draw for rough water. She is big and roomy inside...
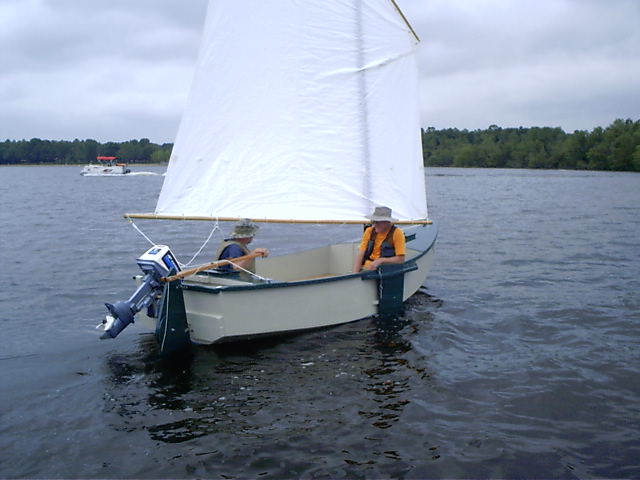
An ideal family boat in a way. The offset motor/rudder all seemed to work well. We were all happy with the outcome.
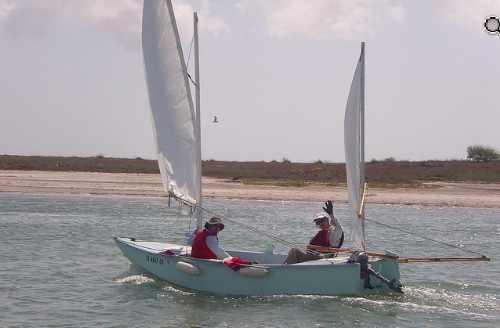
Stan Roberts built one of these down in Texas and ran the very windy 2011 Texas 200 with it, carrying all his supplies for the five day cruise. He added a mizzen, a good idea for long cruises, and he said he lowered the sheer at the bow...
Family Skiff is a tape seam hull requiring two sheets of 1/2" plywood, five sheets of 3/8" plywood and two sheets of 1/4" plywood.
Plans for Family Skiff are $40.
Contents
Prototype News
Some of you may know that in addition to the one buck catalog which
now contains 20 "done" boats, I offer another catalog of 20 unbuilt
prototypes. The buck catalog has on its last page a list and brief description
of the boats currently in the Catalog of Prototypes. That catalog also
contains some articles that I wrote for Messing About In Boats and Boatbuilder
magazines. The Catalog of Prototypes costs $3. The both together amount
to 50 pages for $4, an offer you may have seen in Woodenboat ads. Payment
must be in US funds. The banks here won't accept anything else. (I've got
a little stash of foreign currency that I can admire but not spend.) I'm
way too small for credit cards.
I think David Hahn's Out West Picara is the winner of the Picara race. Shown here on its first sail except there was no wind. Hopefully more later. (Not sure if a polytarp sail is suitable for a boat this heavy.
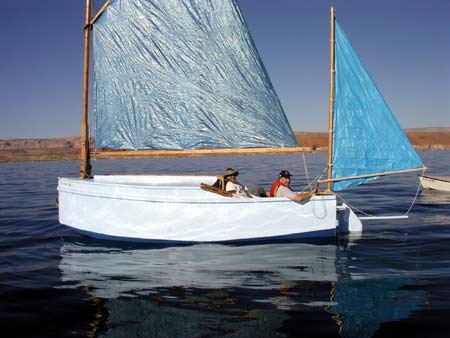
Here is a Musicbox2 out West.
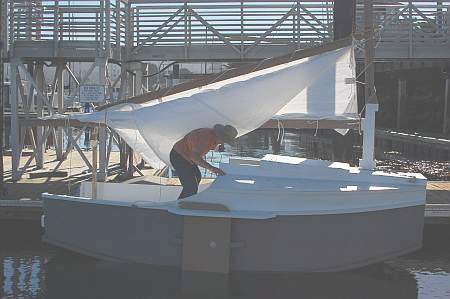
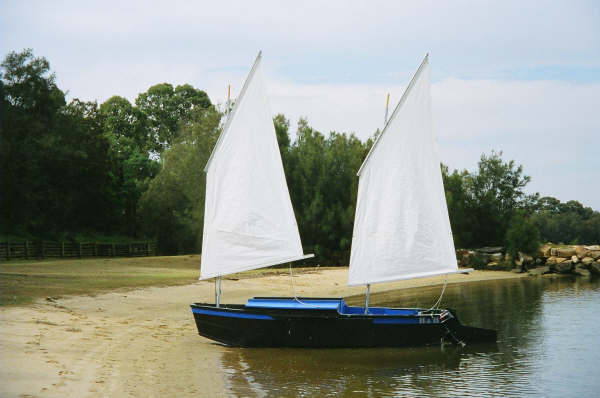
This is Ted Arkey's Jukebox2 down in Sydney. Shown with the "ketchooner" rig, featuring his own polytarp sails, that is shown on the plans. Should have a sailing report soon.
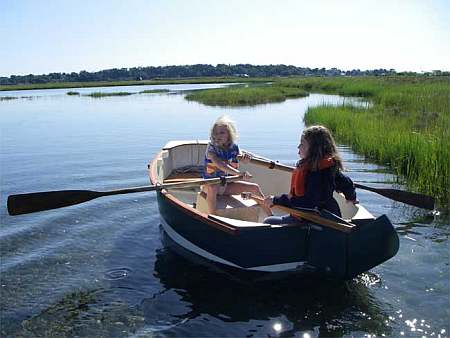
And the Vole in New York is Garth Battista's of www.breakawaybooks.com, printer of my book and Max's old outboard book and many other fine sports books. Beautiful job! Garth is using a small lug rig for sail, not the sharpie sprit sail shown on the plans, so I will continue to carry the design as a prototype boat. But he has used it extensively on his Bahamas trip towed behind his Cormorant. Sort of like having a compact car towed behind an RV.
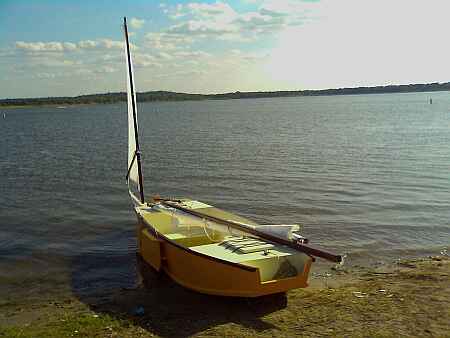
And a Deansbox seen in Texas:
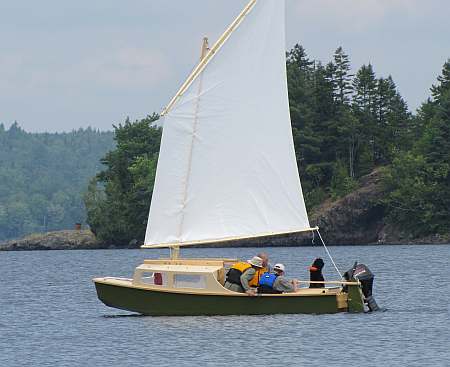
The prototype Twister gets a test sail with three grown men, a big dog and and big motor with its lower unit down. Hmmmmm.....
Jackie and Mike Monies of Sail Oklahoma have two Catboxes underway....
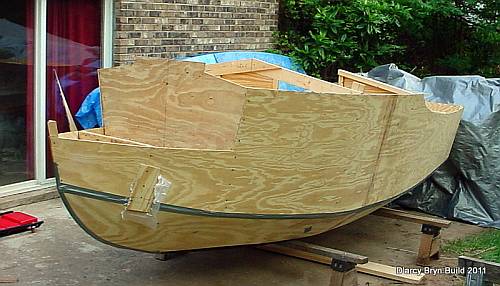
And the first D'arcy Bryn is ready for taping. You can follow the builder's progress at http://moffitt1.wordpress.com/ ....
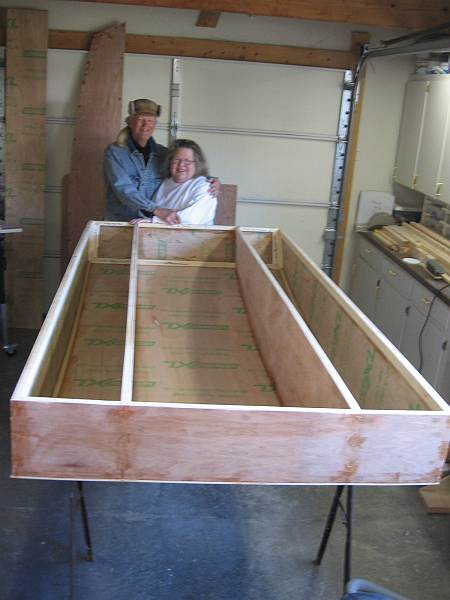
And the first Brucesboat is assembled, ready for taping...
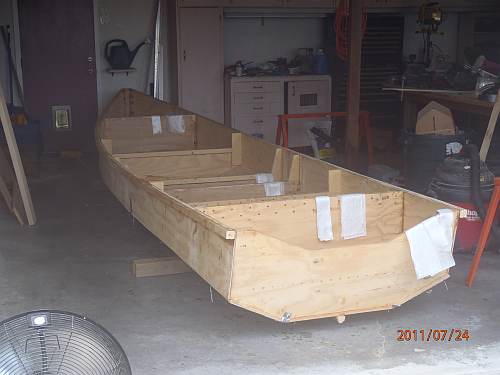
OK, so he found a major league goof in my plans on fitting the bilge panels. He did some cut and fit and did a great job of salvaging the work but I have to correct the drawing for the aft end of the bilge panel (I drew it in upside down!!)
Contents
AN INDEX OF PAST ISSUES
THE WAY BACK ISSUE ARCHIVES
15aug10,Texas200c, Cormorant
1sep10,Texas200d, Trilars
15sep10,Texas200e, Philsboat
1oct10,Texas200f, Larsboat
15oct10,Sail Area Math, Jonsboat
1nov10,Sail Oklahoma a, Piccup
15nov10,Sail Oklahoma b, Caprice
1dec10,Taped Seams, Trilars
15dec10, Bulkhead Bevels, Raider
1jan11, Mast Tabernacles, OliveOyl
15jan11, Knockdown Recovery, DarcyBryn
1feb11, Knockdown Recovery 2, Caroline
15feb11, Windsurfer Mod, IMB
1mar11, Rowboat Setup, Paddleplank
15mar11, Rigging A Lugsail, Hapscut
1apr11, Displacement, Marksbark
15apr11, Sharpie Sprit Sails, Toon2
1may11, Small Boat Rudders, Blobster
15may11, Sail Sizing1, Mayfly16
1jun11, Sail Sizing2, Ladybug
15jun11, Rend Lake 2011, Toto
1jul11, Trailers, Wooboto
15jul11, Bimini, Mikesboat
SOME LINKS
Mother of All Boat Links
Cheap Pages
Duckworks Magazine
The Boatbuilding Community
Kilburn's Power Skiff
Bruce Builds Roar
Dave Carnell
Rich builds AF2
JB Builds AF4
JB Builds Sportdory
Hullform Download
Plyboats Demo Download
Brokeboats
Brian builds Roar2
Herb builds AF3
Herb builds RB42
Barry Builds Toto
Table of Contents
