Jim Michalak's Boat Designs
118 E Randall, Lebanon, IL 62254
A page of boat designs and essays.
(1September2011)This issue will be about scarfing solid lumber. The 15 September issue will discuss rigging lugsails.
THE BOOK IS OUT!
BOATBUILDING FOR BEGINNERS (AND BEYOND)
is out now, written by me and edited by Garth Battista of Breakaway Books. You might find it at your bookstore. If not check it out at the....ON LINE CATALOG OF MY PLANS...
...which can now be found at Duckworks Magazine. You order with a shopping cart set up and pay with credit cards or by Paypal. Then Duckworks sends me an email about the order and then I send the plans right from me to you.
SOME UPCOMING MESSABOUTS...
First up is the 20th annual Lake Monroe Messabout near Bloomington, Indiana, on September 16, 17, and 18. Read the details at https://sites.google.com/site/lakemonroemidwestmessabout/.
Then comes Sail Oklahoma at Lake Eufala on October 7 thru 10. Read about this one at http://groups.yahoo.com/group/SailOklahoma/.
Scarf Joints In Lumber
BACKGROUND...
I thought I had written about this long ago but maybe not. Anyway, when I look at projects it is sometimes evident that some builders aren't taking seriously the joints needed to make a long stick out of shorter sticks. The usual places for this operation are in the spars and in the long sticks sometimes required for wales and chine logs. So, I was reading a report of a wooden jonboat that was being unloaded from the back of a pickup truck and it broke in half! Luckily on land and not in the water, I'd say. Closer inspection showed all the joints of the plywood panels were aligned in a neat row across the middle. And the wales, that sort of form the flanges of an I beam and give the hull its bending strength, were also joined there with simple butt joints in the lumber, and all in perfect line with the plywood joint. So, maybe time to review scarf joints in lumber.
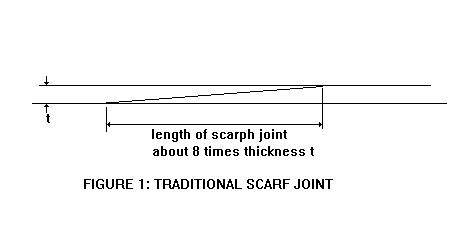
Here is what the scarf joint is supposed to look like:
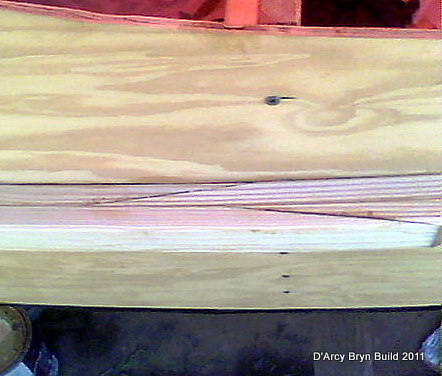
Here is a good one, a pair actually, in real life, in this case on William Moffitt's D'Arcy Bryn build:
THE PROPERTIES OF GLUE...
...well, even on the information super highway, that is hard to find. The numbers I recall were that something like Titebond2 might have a strength of 4000 psi. With epoxy the old note on the tube was something like, "one square inch holds a ton!". A lot of the cheap woods we use on our cheap boats might have a tensile strength of 5000 psi or so. But you can't glue two sticks together with a butt joint and get anywhere near that. The figures you see for glue are almost always in "shear" strength, where one board tries to slide along side each other, and not a butt joint.
So in general you should never use glue in a straight end grain butt joint any more than you would try to get strength from a nail put into end grain.
As an aside I will suggest a read of this website: http://www.jcrocket.com/adhesives.shtml This essay was made for model rocketeers and is really the only epoxy testing I found on the internet. It shows the methods and results although I could not find there the "square inches" of the overlapped area. However, by measuring the photos I thought the results verified the old "one square in holds a ton" that used to appear on the old epoxy tubes. Like the rocketeers, we boaters don't need to know the exact value of the strength since we seldom know the applied load. But the basics of a good joint are needed.
ENTER THE SCARF JOINT....
The scarf joint, if sufficiently long, allows the glue to work in shear, greatly increases the glue area over a simple butt joint, and hopefully leaves you with a long stick that is as strong and as even as the shorter sticks that went into making it. "Sufficiently long" means something like at least a 6 to 1 slant. So if you are joining 3/4" lumber, your scarf would need to be at least 4.5" long.
That is the suggested minimum. Longer would be better although I don't recall the suggestion to be ever more than 12 to 1.
CUTTING THE SCARF JOINT IN LUMBER...
It's easy enough to draw that scarf line on your lumber. Now to cut it to shape. Now, in the olden days when men were men, with big strong muscles and the knowledge to keep their tools sharp, the scarf might have been cut with a plane. Today you might use an electric hand plane. Or maybe a sander, belt or disk. But the scarf must be kept flat to the board so that when the two scarfed boards are fitted together a nice tight joint results. 'Tis true that today's thickened epoxy can make joiners out of all of us but that is not the idea. A slick fit that requires no thick glue is the goal.
They can be cut with a saw. Very carefully with a handsaw for sure. I've cut them with a bandsaw although this saw designed to cut curves can leave you wanting on a joint meant to be dead flat - better reach for that thickened epoxy. I've also cut them with a circular saw by hand - another reach for the thickened epoxy.
It is possible to set up a table saw with a sliding angled fence to cut the scarf joint. But there is a problem there. Normally you are starting with a long stick which must be well supported on it's long angled trip through the saw. That's where the hand circular saw has the advantage - you move the saw instead of the board. But the hand circular saw is not too precise, not in my hand at least. Also, these circular saw methods are limited a bit by the depth of the cut the saw can make. A radial arm saw might be just the ticket if you have the room and money.
ENTER THE ROUTER JIG...
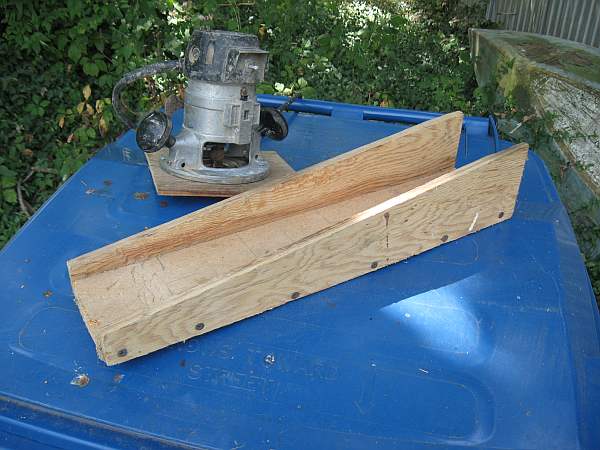
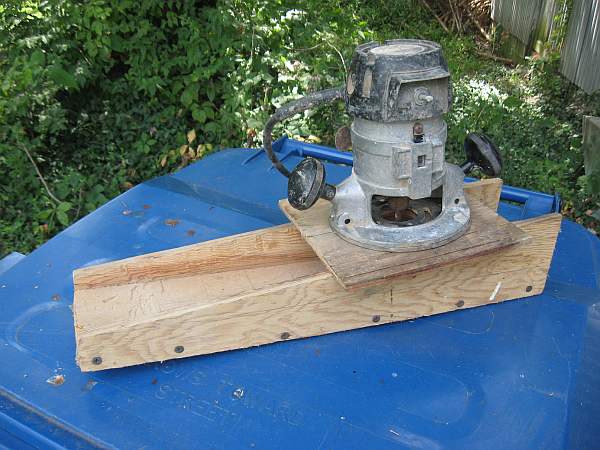
I just got this out of storage but it saw very heavy use when I made my Birdwatcher in 1988. Birdwatcher is 24' long with a 26' mast so a lot of scarfing was required for the long sticks and boards needed in the build. You see the idea, I think, Just a simple tapered jig made of three pieces of wood to start with. This jig is 20" long and 4" wide on the inside and will swallow a 2x4 if required. The sides vary in depth from 3" at one end to 3/4" on the other end so over a 20" span we have a 2.25" taper, or about a 9 to 1 scarf.
So you start by clamping your stick into the jig. Then place the router (with its base widened with a piece of plywood) on the top edges. The router has an end cutting bit adjusted to cut about 1/4" deep with each swipe. Start the router and slide it across the top of the jig so it slices off the first 1/4" of the scarf. Then adjust for another 1/4" cut, and so forth until the scarf is complete. So with a 3/4" board it will take about three passes. Normally I tried to avoid cutting the stick to a knife edge on its end, I would leave maybe 1/32" depth on that end.
That's about it. Maybe I cut a hundred scarfs with this on Birdwatcher including 4" wide boards used in the mast. The real advantages of this thing are that it is made from junk, gives perfect uniform results, and is small enough that you bring the tool to the stick and not wrestle a flimsy 16' stick around the shop and into a table saw. Highly recommended.
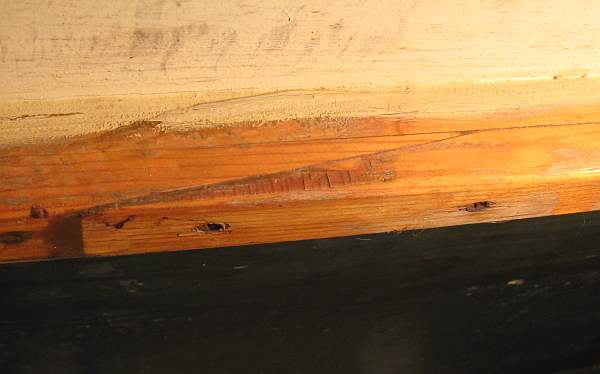
For the most part I never glued up my scarfs ahead of time, say to make a 24' stick from two 12' sticks, then to be assembled to the hull. Instead I would prescarf the stick ends but not join them. Then install one stick, say to the hull side if it were a wale, with glue and nails. Then install the second stick to the hull with glue and nails with the scarfed ends overlapped and flooded with glue. I would apply pressure to the scarf joint as the glue set with screws though all of it, sometimes with a block of wood to allow the clamp screw to pull tight without splitting the thin end of the wood. Here is a photo of the scarfs made this wayl on my AF4 wale showing the assembly screws which I left in place. A belt with suspenders never hurt anybody. And it doesn't hurt to stagger those scarf joints even though they are supposed to be as strong as the stick.
Trilars
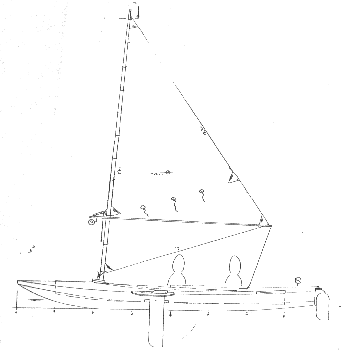
TRILARS, TRIMARAN CONVERSION OF LARSBOAT, 15.5' X 8', 150 POUNDS EMPTY
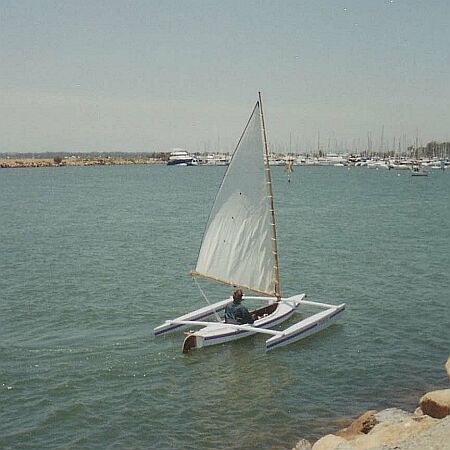
Way back when I drew up a trimaran conversion of my Larsboat kayak and called the conversion Trilars. It is pretty much a clamp on rig except for the small mast step and partner. Down in Texas Charles Nichols built a model of it.
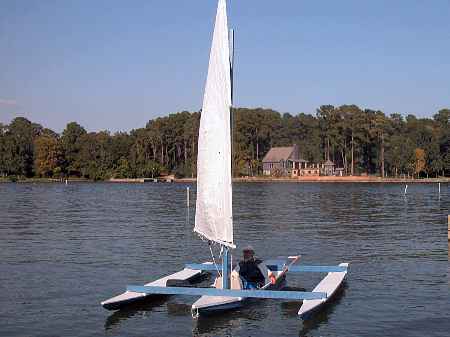
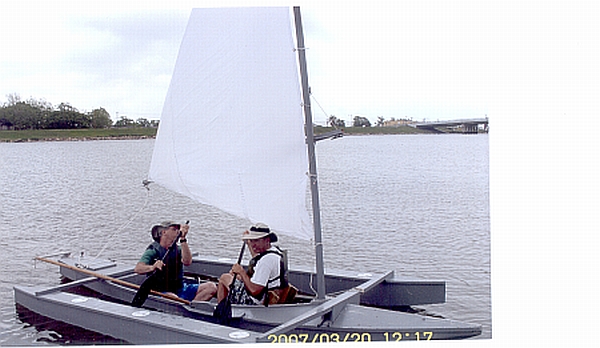
Then he built what they call down there a "Charlars" shown here with me behind the wheel at the Conroe, Texas messabout in 2002:
Charlars was a bit different from the Trilars. The main hull is per the Larsboat blueprint but built without the deck. I thought the rudder and leeboard were just like the Trilars print. The sail is a large balanced lug instead of a sharpie sprit. The floats are triangular in cross section instead of flat bottomed as on the Trilars, and I'm pretty sure the Charlars is wider than the Trilars which I drew narrow enough to trailer without disassembly. There wasn't much wind that day but I got a little sailing in with the Charlars and it seemed fine with the potential of being wicked fast. My only thought was that it was fast and stable enough (it was stable as a dock) that in rough water it might spear a wave and ought to have the fuller deck, something I think the paddling Larsboat can get by without in most cases.
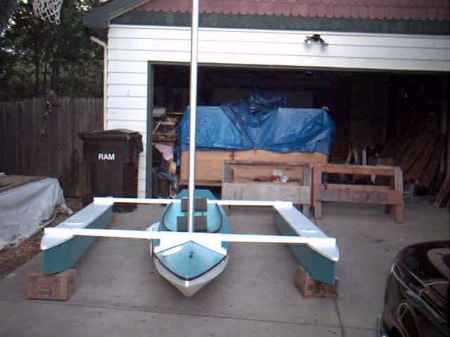
And finally Jeff Blunk built a Trilars in Colorado but I never got a full sailing report on it:
And Errol Smith down in Australia made a Trilars and has sailed it a lot. But it is also not quite a Trilars and in particular has a centerboard instead of the blueprint leeboard (probably makes it a one man boat)..
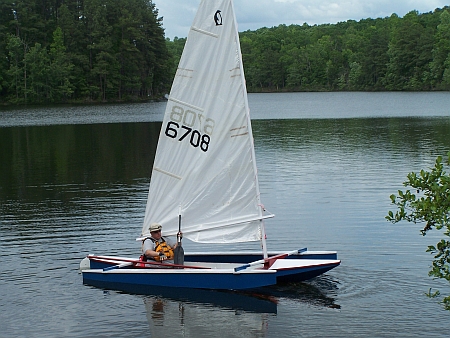
As a lot of time went by I would get more Trilars reports but it wasn't until this year that I got two that seemed to be to the plans to the point where I felt the design was proven. Tom Raidna built this one:
He has used what I think is a Penguin sail which looks like a good swap although he might want to recut to raise the clew and get more head room. He did not make the full deck but I am pretty sure these boats are quite wet in rough water.
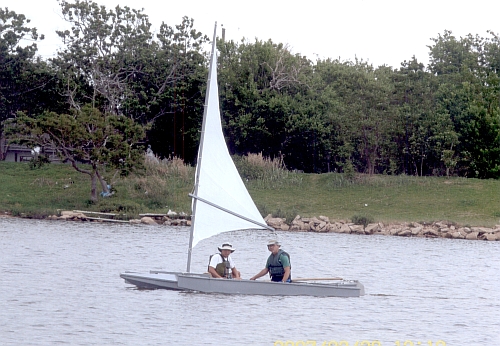
Then came a Trilars from Ken Purdy in Texas.
He took it on the Texas200 pretty much on its first sail. Let's seeeee.....as I recall he got dismasted on the second day. They rebuilt only to have the sail blow totally out the next day. Lots of wind down there!! Ken also had an abreviated deck and said that was a mistake. I felt the basic design was proven by now. Clearly the boat is quite stable and if you intend to go out in a real blow you might make a heavier mast and sail.
Trilars plans are now $20 (but remember you need the Larsboat plans too).
Prototype News
Some of you may know that in addition to the one buck catalog which now contains 20 "done" boats, I offer another catalog of 20 unbuilt prototypes. The buck catalog has on its last page a list and brief description of the boats currently in the Catalog of Prototypes. That catalog also contains some articles that I wrote for Messing About In Boats and Boatbuilder magazines. The Catalog of Prototypes costs $3. The both together amount to 50 pages for $4, an offer you may have seen in Woodenboat ads. Payment must be in US funds. The banks here won't accept anything else. (I've got a little stash of foreign currency that I can admire but not spend.) I'm way too small for credit cards.
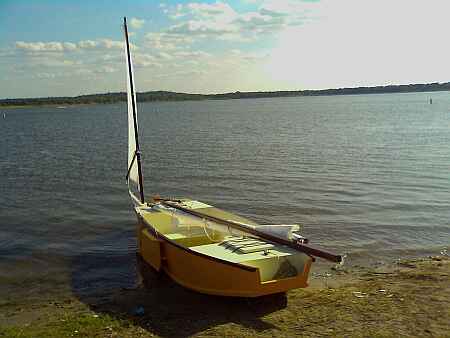
I think David Hahn's Out West Picara is the winner of the Picara race. Shown here on its first sail except there was no wind. Hopefully more later. (Not sure if a polytarp sail is suitable for a boat this heavy.
Here is a Musicbox2 out West.
This is Ted Arkey's Jukebox2 down in Sydney. Shown with the "ketchooner" rig, featuring his own polytarp sails, that is shown on the plans. Should have a sailing report soon.
And the Vole in New York is Garth Battista's of www.breakawaybooks.com, printer of my book and Max's old outboard book and many other fine sports books. Beautiful job! Garth is using a small lug rig for sail, not the sharpie sprit sail shown on the plans, so I will continue to carry the design as a prototype boat. But he has used it extensively on his Bahamas trip towed behind his Cormorant. Sort of like having a compact car towed behind an RV.
And a Deansbox seen in Texas:
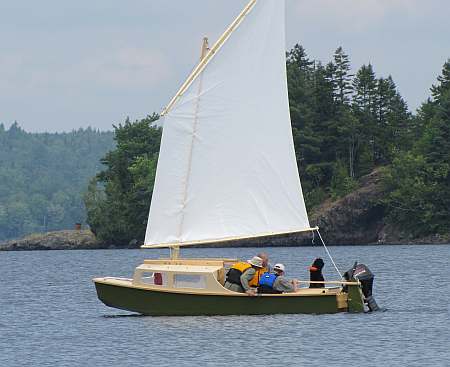
The prototype Twister gets a test sail with three grown men, a big dog and and big motor with its lower unit down. Hmmmmm.....
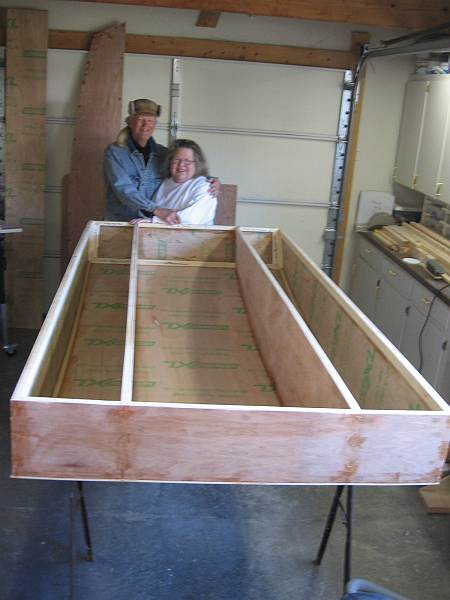
Jackie and Mike Monies of Sail Oklahoma have two Catboxes underway....
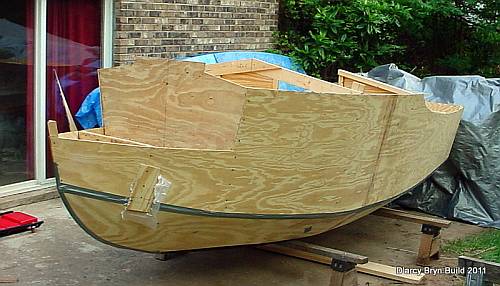
And the first D'arcy Bryn is ready for taping. You can follow the builder's progress at http://moffitt1.wordpress.com/ ....
And the first Brucesboat is in the water for testing. A full report soon.
OK, so he found a major league goof in my plans on fitting the bilge panels. He did some cut and fit and did a great job of salvaging the work, but I have corrected the drawing for the aft end of the bilge panel (I drew it in upside down!!)
AN INDEX OF PAST ISSUES
15sep10,Texas200e, Philsboat
1oct10,Texas200f, Larsboat
15oct10,Sail Area Math, Jonsboat
1nov10,Sail Oklahoma a, Piccup
15nov10,Sail Oklahoma b, Caprice
1dec10,Taped Seams, Trilars
15dec10, Bulkhead Bevels, Raider
1jan11, Mast Tabernacles, OliveOyl
15jan11, Knockdown Recovery, DarcyBryn
1feb11, Knockdown Recovery 2, Caroline
15feb11, Windsurfer Mod, IMB
1mar11, Rowboat Setup, Paddleplank
15mar11, Rigging A Lugsail, Hapscut
1apr11, Displacement, Marksbark
15apr11, Sharpie Sprit Sails, Toon2
1may11, Small Boat Rudders, Blobster
15may11, Sail Sizing1, Mayfly16
1jun11, Sail Sizing2, Ladybug
15jun11, Rend Lake 2011, Toto
1jul11, Trailers, Wooboto
15jul11, Bimini, Mikesboat
1aug11, Cartopping, Family Skiff